Make a DIY drawstring pouch with simple, clear steps. No sewing experience or special tools needed. Gather cotton fabric, matching thread, pins, a safety pin, scissors, and a cord or ribbon. Cut two rectangles about 20 by 25 cm, keep a 1 cm seam allowance, and press the top edge flat.
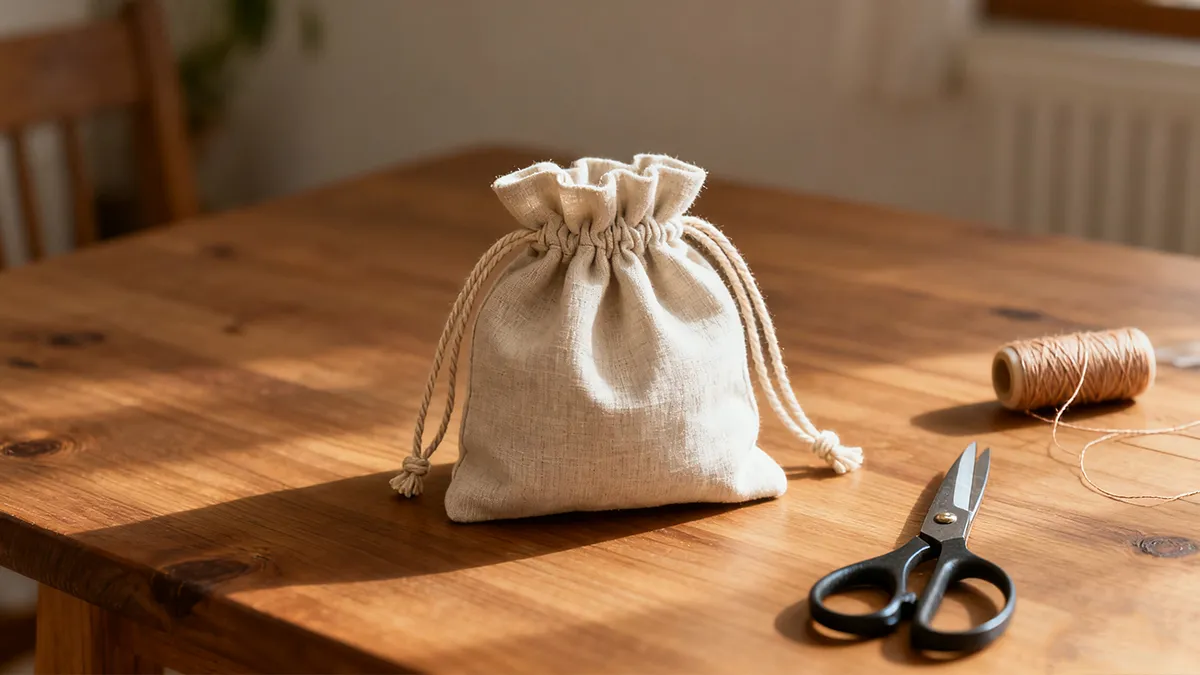
Sew the sides and bottom, fold a 2.5 cm channel at the top, stitch, then use the safety pin to thread the cord. Tie the ends and you are done. The pouch is quick, neat, and easy to resize for coins, makeup, cables, or small gifts. It takes about 20 minutes, works with hand stitches or a basic machine, and is washable and reusable.
Key Takeaways
- You can make a drawstring pouch even if you are new. Just follow easy steps to make something useful and fun.
- Pick the best fabric for your pouch. Cotton is a good choice for beginners because it is soft and easy to use.
- Gather the main sewing tools like scissors, pins, and thread. Having a neat workspace makes sewing much easier.
- Leave a space for the drawstring when you sew. This step is very important for your pouch to work right.
- Use good sewing habits, like sewing straight lines and keeping the seam allowance. This helps your pouch look nice and last longer.
- You can add a lining or decorations to make your pouch special. These extras can make it look better and last longer.
- Fix common problems like crooked seams or edges that fray. Learning to fix mistakes helps you feel more confident.
- Be proud of your progress! Every pouch you make helps you get better and more creative at sewing.
Materials Needed
Fabric Choices
Cotton, Linen, Beginner Options
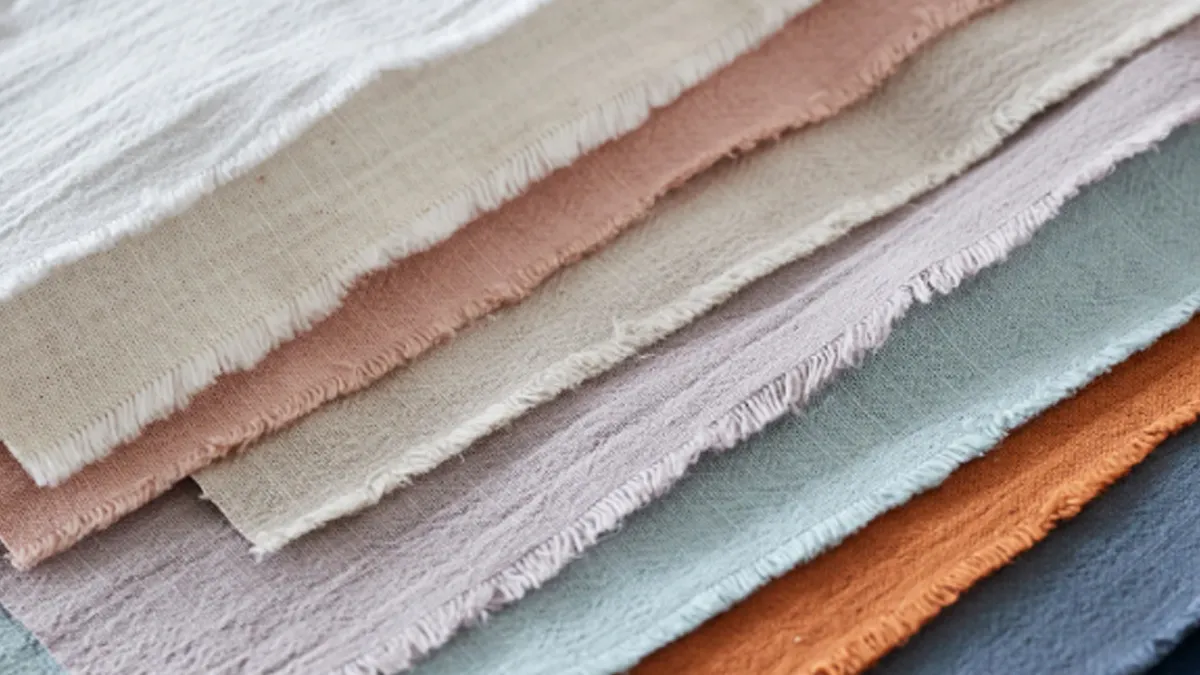
Choosing the right fabric makes your project easier and more fun. If you’re just starting out, you want something that’s easy to handle and forgiving. Cotton is a favorite for beginners because it’s soft, flexible, and machine-washable. You can find it in lots of colors and patterns, so your pouch will look great. Linen is another good choice. It feels a bit fancier and works well for lightweight drawstring bags. If you want something sturdy, canvas is a solid pick. It’s thicker and holds its shape, which is perfect for art projects or heavier items.
Here’s a quick look at popular fabric types for drawstring bags:
| Fabric Type | Characteristics | Best Use |
|---|---|---|
| Cotton | Soft, flexible, machine-washable, eco-friendly, but thin and absorbs water. | Light everyday use (lunch, books) |
| Polyester | Durable, lightweight, colorfast, resistant to fading, but can trap odors. | Sports or gym use |
| Canvas | Thicker, durable, suitable for heavier items, can be painted, but bulkier. | Art projects, DIY projects |
You can mix and match fabrics for the outside and lining. Try a fun print for the exterior and a neutral color for the inside. If you want your pouch to stand out, pick a bold accent fabric for the drawstring channel or the bottom.
Tip: Start with medium-weight cotton. It’s easy to cut and sew, and you won’t struggle with slippery or thick material.
Sewing Tools
Machine, Needles, Thread, Scissors
You don’t need a fancy setup to make drawstring bags. Here’s what you’ll want to have on hand:
- Sewing machine (or you can sew by hand if you’re feeling adventurous)
- Needles (universal needles work well for cotton and linen)
- Thread (choose a color that matches or contrasts with your fabric)
- Fabric scissors (sharp scissors make cutting easier)
- Pins or clips (hold your fabric pieces together while you sew)
- Chalk or fabric marker (mark your cutting lines)
- Seam ripper (fix mistakes quickly)
- Iron and ironing board (press your seams for a neat finish)
If you want to get extra precise, a rotary cutter and cutting mat help you cut straight lines. Safety pins make threading the drawstring a breeze.
Note: Always use sharp scissors for fabric. Dull blades can fray the edges and make sewing harder.
Drawstring Types
Cord, Ribbon, Twine
The drawstring is what makes your pouch easy to open and close. You have lots of choices, and each one gives your bag a different look and feel. Here’s a table to help you pick:
| Material | Durability Characteristics | Use Cases |
|---|---|---|
| Polyester | Durable, water-resistant, vibrant colors | Sports bags, promotional giveaways |
| Nylon | Exceptionally strong, elastic, abrasion-resistant | Outdoor bags, heavy-duty sports |
| Cotton | Natural, breathable, soft, eco-friendly | Retail, daily shoppers |
| Canvas | Heavy-duty, durable, vintage appeal | Heavy-duty shoppers, book bags |
You can use ribbon for a soft, pretty finish, or twine for a rustic look. Cording works well if you want something sturdy and easy to pull. Try grosgrain ribbon for a pop of color, or cotton cord for a classic style.
Tip: Cut your drawstring a little longer than you think you’ll need. You can always trim it later, but it’s hard to add length once it’s threaded through the pouch.
Optional Items
Lining, Decorations
You can make your DIY drawstring pouch extra special by adding a lining or some fun decorations. These optional touches help your pouch look more professional and unique. If you want your pouch to last longer or hold heavier items, a lining is a smart choice. Decorations let you show off your personality and creativity.
Why add a lining?
A lining gives your pouch a neat inside finish. It hides raw edges and makes the bag stronger. You can use a soft cotton for the lining or pick a bright color for a surprise when you open the pouch. If you plan to carry makeup, coins, or small gadgets, a lining helps protect your items.
Tip: Cut your lining fabric the same size as your outer fabric. This makes sewing easier and keeps everything even.
Here’s a quick table to help you choose a lining:
| Lining Fabric | Feel | Best For |
|---|---|---|
| Cotton | Soft, smooth | Everyday use |
| Satin | Silky, shiny | Gifts, special pouches |
| Flannel | Cozy, thick | Jewelry, fragile items |
How do you add a lining?
You sew the lining just like the outer pouch. Place the lining inside the main pouch before you sew the drawstring channel. Make sure the seams match up. You can even use a different color thread for a fun detail.
Now, let’s talk about decorations. You can decorate your pouch in so many ways. Try adding iron-on patches, embroidery, or fabric paint. Sew on buttons, beads, or lace for a fancy look. If you want a simple style, use a printed fabric or a colorful drawstring.
Here are some easy decoration ideas:
- Iron-on patches with your favorite designs
- Embroidery with your initials or a small flower
- Fabric markers for doodles or names
- Sew-on buttons or beads for sparkle
- Ribbon or lace trim around the top
Note: Decorations should be flat and secure. This keeps your pouch easy to use and safe for everyday carrying.
You don’t have to add lining or decorations if you want a quick beginner sewing project. Your pouch will still look great and work well. If you feel creative, try one or two ideas and see what you like best. Making a DIY drawstring pouch is all about having fun and learning new skills. You get to decide how simple or fancy your pouch will be!
Prepare Workspace
Setup Area
Getting your workspace ready makes your project smoother and more enjoyable. You want a spot that feels comfortable and helps you focus. Here’s a simple checklist to help you set up:
- Pick a sturdy table. You need space for your fabric, tools, and sewing machine. A wobbly table can make things tricky.
- Choose a comfy chair. Your back will thank you, especially if you sew for a while.
- Check your lighting. Good lighting helps you see your stitches and avoid mistakes. Natural light is great, but a bright lamp works too.
- Find a power source. Make sure you have enough outlets for your sewing machine and iron.
- Plan for storage. Keep your supplies close by so you don’t have to hunt for things in the middle of your project.
Tip: Adjust your chair and table height so you can sit up straight. Good posture keeps you comfortable and helps you sew better.
Organize Supplies
When your supplies are organized, you spend less time searching and more time creating. You can use bins, baskets, or drawers to keep everything in its place. Clear containers work well for small items like buttons and zippers. You see what you need at a glance.
- Label your bins and baskets so you know what’s inside.
- Group similar items together. Keep all your threads in one drawer and scissors in another.
- Use a pegboard for tools. Hang your scissors, rulers, and seam ripper where you can reach them.
- Try a rolling cart or shelving unit for fabric. You can move it around and keep your workspace tidy.
- Declutter regularly. If you finish a project, put away leftover supplies so your area stays neat.
Here’s a quick table to help you organize:
| Strategy | Description |
|---|---|
| Labeling | Use clear labels to identify containers and save time. |
| Arranging Tools | Keep scissors and pins near your worktable for easy access. |
| Grouping Items | Store threads together, cutting tools in another spot. |
| Pegboard Usage | Hang tools by size or function for quick grabs. |
| Clear Plastic Bins | Store fabric visibly and dust-free, label each bin for easy identification. |
Note: When you organize your supplies, you make your sewing time more fun and less stressful.
Safety Tips
Safety matters, even for simple projects like a drawstring pouch. You want to keep your workspace safe for you and anyone nearby. Here are some easy ways to stay safe:
| Safety Precaution | Description |
|---|---|
| Electrical Safety | Keep cords off the floor to prevent tripping. Check plugs before you start. |
| Personal Safety | Take breaks to avoid strain. Stretch your hands and shoulders. |
| Ergonomics | Adjust your chair and table for good posture. |
| Chemical Storage | Store dyes and glues safely, away from your work area. |
| Clothing & Hair | Wear fitted clothes and tie back long hair to avoid accidents. |
| Tool Handling | Keep fingers clear of needles. Store scissors and pins in safe spots. |
- Always keep needles and pins in a container. You don’t want to step on one!
- Use a thimble if you sew by hand. It protects your fingers.
- Never leave scissors open. Close them and put them away when you finish.
- Check your sewing machine and iron for any problems before you plug them in.
Tip: Safety first! A tidy, well-lit workspace helps you avoid accidents and enjoy your sewing project.
Cut Fabric
Measure Rectangles
Getting your fabric ready is a big step in making your drawstring pouch. You want to make sure your pouch fits everything you plan to carry. A good rule is to make your bag a bit bigger than your largest item. This gives you plenty of space and makes the pouch easy to use.
Here’s a quick guide to help you pick the right size:
- Make your fabric at least 0.5 to 2 inches larger than your biggest item.
- Leave extra room so you can easily open and close the pouch.
- For a standard pouch, cut two rectangles, each measuring 9 x 11.5 inches. This size works well for most small items like makeup, snacks, or small toys.
If you want to try other sizes, here are some common options:
- Small: 8″ x 6″ x 3″
- Medium: 12″ x 6.5″ x 4″
- Large: 15″ x 8″ x 6″
Tip: Always measure your items first. Add a little extra to your measurements so your pouch isn’t too tight.
Cutting Tips
Cutting your fabric with care makes the rest of your project much easier. You want your pieces to be even and neat. Here are some steps to help you get it right:
- Press your fabric before you start. Ironing removes wrinkles and helps you get accurate cuts.
- Use a ruler to measure your rectangles. Don’t just rely on the lines on your cutting mat.
- Mark your lines with chalk or a fabric marker. This helps you see where to cut.
- Straighten the edges of your fabric before you cut. Uneven edges can make your pouch lopsided.
- Use a sharp rotary cutter or fabric scissors. Dull blades can fray the fabric and make sewing harder.
- If you need to cut several pieces, put painter’s tape on your ruler to mark the right spot. This keeps your measurements consistent.
- Always measure twice and cut once. Double-checking saves you from mistakes.
Here’s a table with some common mistakes and how to avoid them:
| Mistake | How to Avoid It |
|---|---|
| Rushing the cutting process | Take your time. Use a rotary cutter and ruler for precision. |
| Forgetting to prewash fabric | Wash and dry cotton before cutting to prevent shrinking. |
| Skipping interfacing | Add interfacing if you want your pouch to hold its shape. |
Note: If you want your pouch to last, consider adding interfacing or stabilizer. This helps your bag keep its shape and makes it more durable.
When you take your time with measuring and cutting, you set yourself up for a smooth sewing experience. You’ll find that your pouch looks neater and feels sturdier. Let’s get those rectangles ready and move on to the fun part—putting your pouch together!
DIY Drawstring Pouch Tutorial
Place Fabric
Ready to start your diy drawstring pouch? Let’s get your fabric pieces set up. This part is simple, but it makes a big difference in how your bag turns out. You’ll work with two rectangles—these will become the front and back of your pouch.
Here’s how you place your fabric:
- Lay both pieces flat on your table, with the right sides (the pretty sides) facing each other.
- Line up the edges so everything matches. If you’re using a lining, stack it on top of the outer fabric, right sides together.
- Pin along the top edge—the widest part. This keeps the pieces from slipping while you sew.
- Sew a straight seam along the pinned edge. You just joined the top of your bag!
- Open up the sewn piece and lay it face up, with the lining half at the top.
- Fold the whole thing over from right to left, so the finished sides are inside.
- Pin along the long left side and the bottom edge.
Tip: Double-check that the right sides are together before you sew. This way, your diy drawstring pouch will look neat when you turn it right side out.
Sew Sides
Now you’re ready to sew the sides of your bag. This step brings your project to life! You don’t need fancy techniques—just a straight stitch and a little patience.
- Start at the top corner and sew down the long side. Keep your stitches straight and even.
- Turn the corner and sew along the bottom edge.
- If you want your bag to hold its shape, you can place a small block inside while sewing. This helps keep everything lined up.
- Use pins or clips to keep the layers together. Remove them as you sew.
- If you have an overstitcher, use it on both sides for extra strength and alignment.
- Check your stitches as you go. If you notice crooked lines, stop and adjust your fabric.
Note: Take your time with this part. Straight seams make your diy drawstring pouch look professional, even if it’s your first sewing project.
Create Channel
The drawstring channel is what lets your bag open and close easily. You’ll make a neat casing at the top for your cord or ribbon.
Follow these steps:
- Fold the top edge down about 1 inch. This creates the channel for your drawstring.
- Press the fold with an iron to keep it flat and even.
- Pin the fold in place so it doesn’t shift while you sew.
- Stitch along the edge, just below your previous seam. This forms the casing.
- Use a hemming guide or ruler to keep your fold and stitches straight.
- Check the width of your channel. Make sure it’s wide enough for your drawstring to slide through.
- Neaten the raw edges with a zigzag stitch or pinking shears to prevent fraying.
Tip: If you want your bag to last, always press your folds and check your seams. A smooth channel makes threading the drawstring much easier.
Common beginner mistakes include uneven seams from rushing or not pressing the fabric, and forgetting to check the channel width. Take a moment to measure and adjust before you sew. Your diy drawstring pouch will work perfectly!
This tutorial makes each step clear and simple, so you can enjoy your sewing project and finish your bag in about ten minutes. You’re doing great—let’s keep going!
Leave Opening
You’re almost done with the main sewing part of your diy drawstring pouch. Now, you need to leave an opening for the drawstring. This step lets you thread the cord or ribbon through the channel you just made. If you skip this, your pouch won’t close properly, so don’t miss it!
Here’s how you do it:
- Stop sewing about 1 inch before you reach the top corners on both sides.
You want to leave a small gap at each end of the channel. These gaps are where your drawstring will go in and out. - Backstitch at the start and end of each opening.
This keeps the stitches strong and stops the seam from coming undone. Just sew forward and backward a few times at the edge of the opening. - Check the size of your opening.
Make sure it’s big enough for your drawstring. Most cords or ribbons fit through a ½-inch gap. If you use a thick cord, you might need a slightly bigger opening. - Trim any loose threads around the opening.
This helps your diy drawstring pouch look neat and makes threading easier.
Tip: If you forget to leave an opening, don’t worry! You can use a seam ripper to carefully open up a small section of the seam. Just be gentle so you don’t tear the fabric.
Here’s a quick table to help you troubleshoot common issues with the opening:
| Problem | Solution |
|---|---|
| Opening too small | Use a seam ripper to widen the gap |
| Fraying edges | Sew a zigzag stitch or use fray check |
| Uneven openings | Measure both sides before sewing |
Leaving the right-sized opening is a small detail, but it makes a big difference. You’ll find threading the drawstring much easier, and your pouch will close smoothly every time. Take a moment to double-check your work before moving on. You’re doing great, and your diy drawstring pouch is almost ready to use!
Step-by-Step Instructions
Turn Right Side Out
You’ve finished sewing the sides and channel, so now it’s time to turn your pouch right side out. This part feels a little magical because you get to see your fabric’s pattern pop and your pouch take shape.
Here’s how you do it:
- Grab a large safety pin and attach it to a piece of twine or string.
- Pin the safety pin to the top edge of your pouch, making sure you only catch one layer of fabric.
- Feed the safety pin through the opening, gently guiding it along the inside of the tube.
- Use your fingers to start turning the edges inward. Pinch the top and pull the fabric through with the safety pin.
- Once the pouch is right side out, use your fingers to press the seams outward. This helps your pouch look crisp and neat.
- Finish by ironing the pouch. Pressing the seams sets them and gives your bag a professional look.
Tip: Take your time when turning the pouch. If you rush, you might stretch the seams or tear the fabric. Smooth out the corners with a blunt pencil or chopstick for a sharp finish.
Thread Drawstring
Now you get to add the drawstring, which brings your pouch to life. This step is easy and fun, and you can use ribbon, cord, or twine—whatever matches your style.
- Cut your drawstring to the right length. For most pouches, measure the top edge and add about 18 inches so you have enough to tie.
- If you’re using ribbon, snip the ends at an angle to keep them from fraying. For cord, tie a knot at each end.
- Attach a safety pin or bodkin to one end of your drawstring. Push the pin through the opening you left in the channel.
- Guide the pin all the way around the channel until it comes out the other side.
- Adjust the ends so they’re even.
Note: Make sure the channel is wide enough for your drawstring to slide easily. If it feels tight, gently wiggle the safety pin through or use a thinner cord.
Tie Ends
You’re almost done! Tying the ends of your drawstring keeps everything secure and gives your pouch a finished look. There are a few ways to do this, so pick the one that feels best for you.
| Technique Description | Example |
|---|---|
| Overhand Knot | Tie a simple knot close to the edge of the pouch. This keeps the drawstring from slipping back into the channel. |
| Neck Formation | Wrap the cord around the top of the pouch and tie a knot. This creates a “neck” and helps seal the bag tightly. |
| String Wrapping | Wind the string around the top inch of the pouch and tie a knot. This adds extra security, but be gentle to avoid wearing out the fabric. |
Tip: Double knot the ends if you want extra hold. If you want a decorative touch, add a bead before tying the knot.
You’ve followed the step-by-step instructions and created a beautiful drawstring pouch. You learned how to turn your pouch right side out, thread the drawstring, and tie the ends securely. These simple sewing techniques help you make a pouch that’s both useful and stylish. If you run into any problems, just check the tips above and keep practicing. You’ll get better with every project!
Sewing Tips
Straight Stitch
Let’s talk about the straight stitch. This is the basic stitch you’ll use for most of your drawstring pouch. You want your stitches to look neat and even. Set your sewing machine to a straight stitch setting. If you sew by hand, try to keep your stitches the same length. Short stitches hold the fabric together better. Long stitches can come loose over time.
Here’s a quick way to check your stitch:
- Look at the line of stitches. It should run straight along the edge.
- Pull gently on the seam. If it feels strong, you did it right.
- If you see gaps or crooked lines, go back and sew over that part again.
Tip: Practice on a scrap piece of fabric before you start your pouch. You’ll get comfortable with your sewing machine and see how the straight stitch looks.
Seam Allowance
Seam allowance is the space between the edge of your fabric and the line of stitches. This space helps your pouch stay strong and last longer. You don’t want your stitches too close to the edge. If you do, the seam might rip when you use the pouch.
Check out this table for common seam allowances used in drawstring pouch tutorials:
| Seam Allowance | Source |
|---|---|
| 2cm | Drawstring Bag Tutorial |
| 5mm | How to Make a Fully Lined Drawstring Bag with Boxed Bottom |
| 5/8″ | How to Sew a Drawstring Bag with French Seams Tutorial |
Most beginners use a seam allowance of about 1/4 inch to 5/8 inch. This gives you enough room to keep the seam strong without wasting fabric. If you want extra durability, try a wider seam allowance, like 2cm. Always measure from the edge before you start sewing.
Note: Use the markings on your sewing machine’s plate to guide your seam allowance. This helps you sew straight and keeps every pouch the same size.
Reinforce Corners
Corners get a lot of wear and tear, especially when you open and close your pouch. You want to make sure these spots stay strong. There are a few easy ways to reinforce corners:
- Use heavy-duty thread and sew extra stitches at each corner.
- Add a protective lining inside your pouch. Canvas or denim works well for this.
- Fortify the eyelets where the drawstring goes in. You can use metal eyelets, sew on patches, or try iron-on patches for a quick fix.
If you want your pouch to last, don’t skip this step. Strong corners mean you can use your pouch every day without worrying about rips.
Tip: When you finish sewing, check the corners and eyelets. If they look thin or weak, add a few more stitches or a small patch.
Sewing a drawstring pouch is simple when you follow these tips. You’ll get neat seams, strong corners, and a bag that lasts. Try these tricks on your next project and see how much better your pouch turns out!
Drawstring Bag Variations

You’ve mastered the basics, so now let’s explore some fun ways to make your drawstring bag unique. These variations help you create bags that fit your style and needs. Whether you want a sturdier bag, a different shape, or a personal touch, you’ll find something here to try on your next project.
Add Lining
Adding a lining to your drawstring bag takes it to the next level. When you sew a lining inside, you make your bag stronger and give it a polished look. You might notice that lined bags feel sturdier and last longer, especially if you use thicker fabrics or add interfacing. The lining hides raw edges, so the inside looks as neat as the outside. If you want your bag to hold heavier items or just look more professional, try adding a lining to your next project.
Tip: Choose a bright or patterned fabric for the lining. Every time you open your bag, you’ll get a little pop of color!
Boxed Corners
Want your drawstring bag to stand up on its own or hold more stuff? Try boxed corners! This simple trick changes the shape and gives your bag extra space. Here’s how it works:
- Cut small squares from the bottom corners of your fabric pieces.
- After sewing the sides and bottom, pinch each corner so the side seam lines up with the bottom seam.
- Stitch across the opening you created. This forms a flat base.
Boxed corners make your bag roomier and help it sit upright. You’ll love this variation for bags that carry snacks, toys, or even laundry. It’s a great way to make your simple drawstring bags more useful.
Personalize
Personalizing your drawstring bags makes every project special. You can pick from lots of materials and decoration methods to match your style or the occasion. Here’s a quick look at some popular materials for customizing your bag:
| Material | Description |
|---|---|
| Cotton | Eco-friendly and high-quality |
| Jute | Durable and great for eco-friendly projects |
| Mesh | Breathable, perfect for outdoor or sports bags |
| Nylon | Flexible and tough, good for everyday use |
| Non-Woven Polypropylene | Affordable, water and tear resistant |
| Microfiber | Sleek, sporty, great for gyms and schools |
| PVC | Waterproof and durable |
| Polyester | Resists scratches, mildew, and shrinking |
| Pongee | Trendy, matte finish |
You can decorate your bag with heat transfer, silk screen, or sublimation printing. These methods let you add names, logos, or fun designs. Many people love making drawstring bags for events like weddings, parties, or school teams. You can even match the bag to your favorite colors or add a patchwork design using fabric squares.
Note: Personalizing your bag makes it a perfect gift or giveaway. Try adding initials, a favorite quote, or a cute patch to make it truly yours.
If you want more ideas, here are some popular drawstring bag styles among beginners:
- Bunny treat bags for holidays or parties
- Drawstring wine bottle bags for gifts
- Fabric baskets with drawstrings for carrying items
- Retro or patchwork bags for a unique look
- Fish-shaped bags for kids or laundry
With these variations, you can turn every drawstring bag project into something new and exciting. Try one or mix a few together—you’ll have a bag that’s both practical and full of personality!
Troubleshooting
Even with careful planning, you might run into a few hiccups while making your drawstring pouch. Don’t worry! You can fix most problems with a little patience and a few simple tricks. Let’s look at some common issues and how you can solve them.
Uneven Seams
Sometimes your seams look wavy or crooked. This happens to everyone, especially when you’re new to sewing. You might notice one side of your pouch looks longer than the other, or the stitches don’t line up.
Here’s what you can do:
- Double-check your fabric before you start sewing. Make sure the edges match up.
- Use pins or clips to hold the layers together. This keeps everything straight.
- Sew slowly and watch the edge of your fabric. Try not to rush.
- If you see a mistake, grab your seam ripper and gently take out the stitches. You can sew that part again.
Tip: Practice on scrap fabric before you sew your pouch. You’ll get better at keeping your seams straight.
| Problem | Quick Fix |
|---|---|
| Crooked seams | Rip out and resew |
| Uneven edges | Trim with sharp scissors |
| Wavy lines | Press with an iron |
Drawstring Issues
Your drawstring might get stuck, twist, or even pull out of the channel. This can feel frustrating, but you can fix it easily.
Try these solutions:
- If the drawstring won’t slide, check the channel. It might be too tight. Use a thinner cord or ribbon.
- If the ends fray, tie a knot or add a dab of clear nail polish.
- If the drawstring pulls out, thread it back through with a safety pin or bodkin.
- For twisted drawstrings, pull them out and re-thread, keeping the cord flat.
Note: You can use a chopstick or pencil to help guide the drawstring through the channel.
| Issue | Solution |
|---|---|
| Stuck drawstring | Use thinner cord or widen gap |
| Fraying ends | Tie knots or use fray check |
| Drawstring pulls out | Re-thread with safety pin |
Fraying Fabric
Fraying edges can make your pouch look messy and wear out faster. You want your sewing project to last, so let’s keep those edges neat.
Here’s how you can stop fraying:
- Trim the edges with pinking shears. The zigzag cut helps prevent fraying.
- Sew a zigzag stitch along the raw edges. This locks the threads in place.
- Use fabric glue or fray check on the edges if you don’t have a sewing machine.
- Always press your seams with an iron. This helps set the stitches and keeps the fabric smooth.
Tip: If you notice fraying after you finish, add a quick zigzag stitch or a dab of glue to the edge.
| Fraying Solution | How It Helps |
|---|---|
| Pinking shears | Stops threads unraveling |
| Zigzag stitch | Secures raw edges |
| Fray check | Seals and protects |
Troubleshooting is part of learning. Each time you fix a problem, you get better at sewing and more confident with your DIY projects. Keep going, and soon you’ll handle any issue with ease!
Success Tips
Practice
You want to get better at sewing, right? The best way is to practice a little every day. You don’t need to spend hours at your machine. Just fifteen minutes can make a big difference. Pick a project that excites you, like a new pouch or a fun bag. Gather all your materials before you start. When you organize your supplies in bins, you save time and keep your workspace tidy.
Set up your sewing machine and tools ahead of time. This way, you jump right into sewing without wasting time on setup. Focus on the basic skills you use most often. These core skills help you feel confident and ready for any future project. If you keep practicing, you’ll notice your stitches get straighter and your bags look more polished.
Tip: Try sewing on scrap fabric before you start your main project. You’ll get comfortable with your machine and see how your stitches look.
Practice Routine for Beginners:
- Choose a project that excites you.
- Gather all materials at once.
- Organize supplies in bins.
- Set up your sewing machine and tools in advance.
- Dedicate at least 15 minutes each day to practice.
Simple Variations
You don’t have to stick to the same style every time. Once you finish your first bag, try changing things up. Use different fabrics, add a lining, or experiment with boxed corners. These small changes make each bag unique and help you learn new techniques. You can switch out the drawstring for ribbon or twine, or decorate your pouch with patches and buttons.
Here’s a quick table with easy variations you can try:
| Variation | What You Change | Why It’s Fun |
|---|---|---|
| Fabric Choice | Use prints or solids | Adds personality |
| Lining | Add a soft inside layer | Makes the bag sturdier |
| Boxed Corners | Sew corners flat | Gives more space |
| Decorations | Add patches or beads | Shows off your style |
Note: Every time you try a new variation, you learn something new. Your sewing skills grow with each project.
Encouragement
You might feel nervous when you start, but you’re doing great. Every stitch you make helps you improve. Mistakes happen, but they’re just part of learning. If your seams aren’t perfect or your drawstring gets stuck, don’t worry. You can fix it and keep going.
Remember, you’re building skills that will help you with every future sewing project. Celebrate each finished bag, no matter how it turns out. You made something with your own hands, and that’s awesome! Keep practicing, try new ideas, and enjoy the process. You’ll get better with every pouch you sew.
Tip: Be proud of your progress. Every bag you finish is a step forward. You’re learning, creating, and having fun!
Conclusion
You just made a diy drawstring pouch from start to finish. That’s a big win! Making your own bag feels great, and you picked up new sewing skills along the way. Take a moment to admire your bag and maybe show it off to friends. Want to keep going? Try another beginner project or experiment with different fabrics. If you ever need more bags or want custom designs, we’re drawstring pouch manufacturers and support OEM/ODM customization.
Celebrate every step. Each project helps you grow and discover your creative side!
FAQ
How do I choose the best fabric for my DIY drawstring pouch?
You want a fabric that’s easy to handle and looks great. Cotton works best for beginner sewing projects because it’s soft, sturdy, and simple to sew. If you want a fancier pouch, linen or canvas adds durability. Pick a print or color that makes you smile!
Can I sew a drawstring pouch without a sewing machine?
Absolutely! You can sew a DIY drawstring pouch by hand using a needle and thread. Just use small, straight stitches to keep the seams strong. Hand sewing takes a bit longer, but you’ll still get a cute pouch. This is a great way to learn basic sewing skills.
What size should I cut my fabric for a beginner drawstring bag?
For most beginner sewing projects, you want two rectangles about 9 x 11.5 inches. This size fits small items like makeup or snacks. If you need a bigger pouch, just add a few inches to each side. Always measure your items first so your pouch fits perfectly.
| Size | Use Case |
|---|---|
| Small | Coins, jewelry |
| Medium | Snacks, makeup |
| Large | Toys, books |
How do I keep my drawstring from fraying or getting stuck?
You can prevent fraying by tying knots at the ends of your cord or ribbon. If you use ribbon, snip the ends at an angle. For stuck drawstrings, make sure your channel is wide enough. Use a safety pin to help thread the drawstring through the pouch easily.
What can I do if my seams look uneven or crooked?
Don’t worry! You can fix uneven seams by using pins or clips to hold your fabric steady. Sew slowly and watch the edge as you go. If you make a mistake, grab a seam ripper and redo that part. Practice makes perfect, and every pouch helps you improve.
Can I personalize my DIY drawstring pouch?
Yes, you can! Add iron-on patches, embroidery, or fabric paint to make your pouch unique. Try sewing on buttons or beads for extra flair. Personalizing your beginner sewing project lets you show off your style and makes your pouch a special gift for friends.
| Decoration | Style Idea |
|---|---|
| Embroidery | Initials, flowers |
| Patches | Fun shapes |
| Beads | Sparkle |
How do I wash and care for my handmade drawstring bag?
You should wash your DIY drawstring pouch in cold water with mild detergent. Air dry it to keep the shape nice. If you use cotton or linen, your pouch will last longer. Avoid bleach or harsh chemicals. Regular care keeps your beginner sewing project looking fresh.
What are some easy variations for beginner drawstring bags?
You can try adding a lining for extra strength, sewing boxed corners for more space, or using different drawstring materials like twine or ribbon. Experiment with fabric prints and decorations. Each variation helps you learn new sewing skills and makes your pouch unique.