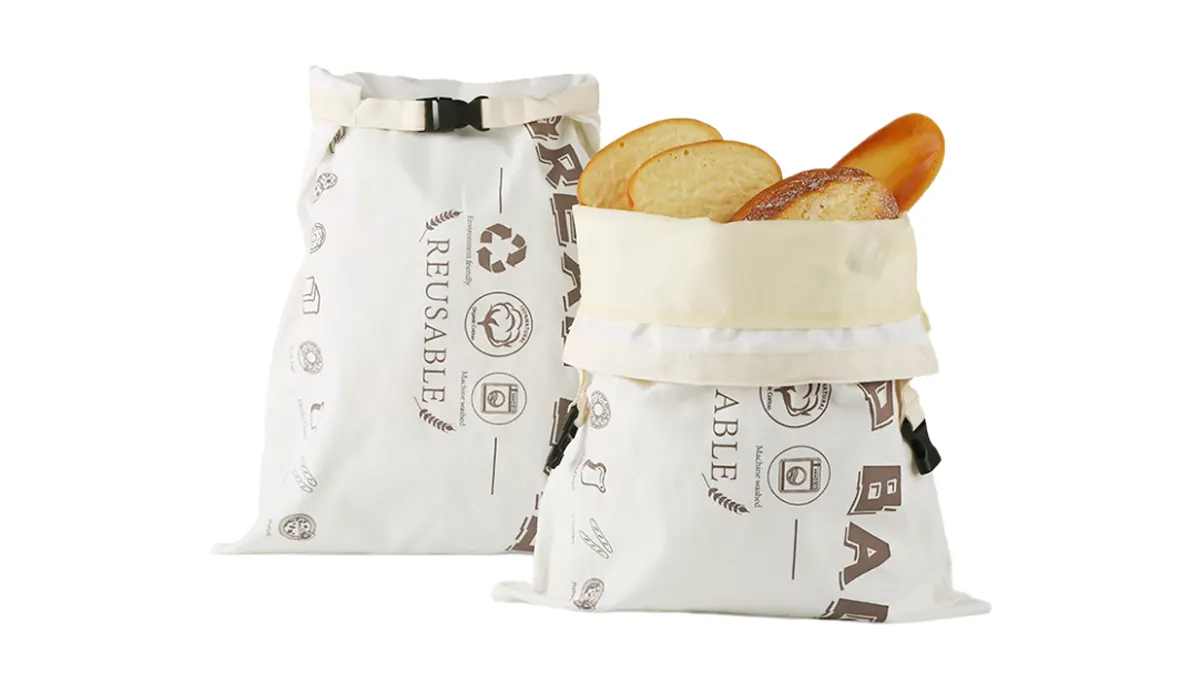
Yes, you can easily make beeswax bread bags at home with just a few simple steps. Beeswax bread bags keep your bread fresh and help you avoid plastic waste. These reusable bags use beeswax, which creates a natural seal and lets your bread breathe. You will love how to make beeswax bread bags because it saves money and helps the planet at the same time. This project works great for beginners and gives you a sense of accomplishment.
Key Takeaways
- Beeswax bread bags help bread stay fresh longer. They do this by keeping the right amount of moisture. They also stop mold from growing.
- Using beeswax bags is good for the environment. They help cut down on plastic trash. Beeswax bags break down naturally.
- You can make beeswax bread bags at home. You only need simple things like cotton fabric and beeswax.
- Pick your fabric carefully. Cotton or linen with a tight weave works best. This makes the bag strong and useful.
- You can make your beeswax bags look special. Add colors, patterns, or decorations you like.
- Take care of your beeswax bag to make it last longer. Clean it gently and add more wax when needed.
- You can sew the bags or use no-sew ways. This means anyone can make them.
- Beeswax bags help you save money. They also help the Earth by using less plastic.
Why Choose Beeswax Bread Bags
Benefits for Bread Freshness
You want your bread to stay fresh for a long time. Beeswax bread bags help keep your bread fresh. The beeswax on the fabric makes a special place for your bread. It keeps the outside crunchy and the inside soft. Your bread will not dry out fast. The bag lets in a little air, so mold does not grow. It also keeps enough moisture inside. This helps your bread taste good and feel soft.
- Keeps the right amount of moisture in
- Stops mold by controlling humidity
- Makes a good place for storing bread
- Keeps the crust crunchy and the inside soft
- Helps bread taste fresh longer
You do not have to worry about chemicals or plastic near your food. Beeswax is natural and fights germs. This keeps your bread safe and tasty.
Eco-Friendly and Cost-Effective
Using beeswax bread bags is good for the Earth and saves you money. You can use each bag many times, so you make less trash. These bags break down on their own when you are done with them. You help stop plastic pollution every time you use one.
Here is a quick look at how beeswax bread bags and plastic bags are different:
| Benefit | Beeswax Bread Bags | Single-Use Plastic Bags |
|---|---|---|
| Reusability | Yes | No |
| Biodegradability | Yes | No |
| Plastic Waste Reduction | Less plastic waste | Makes a lot of waste |
| Natural Antibacterial | Yes | No |
| Environmental Friendliness | Made from natural things, breaks down easily | Made from oil products |
You also save money because you do not need to buy new bags all the time. Making your own bags at home feels fun and smart. You can pick the fabric and size you like. You also keep extra plastic out of your kitchen.
Tip: Beeswax bread bags are good for the planet. They also help you save money and keep your food safe.
Materials and Tools for DIY Beeswax Bread Bag
Essential Materials List
You do not need fancy supplies to make your own bread bag. You can find most of these items at home or at a local store. Here is what you need to get started:
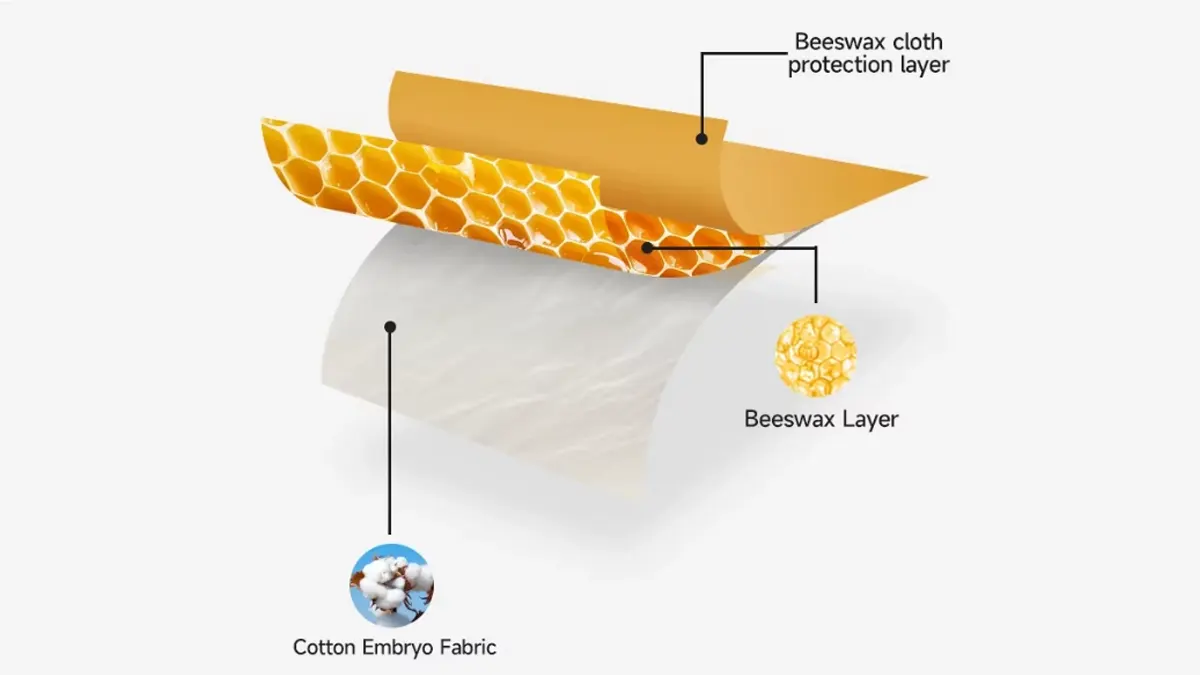
- Cotton or linen fabric (choose a tight weave for best results)
- Beeswax pellets or grated beeswax (this is the magic ingredient)
- Pinking shears (these help stop the fabric from fraying)
- Old or thrifted iron (you do not want to use your best iron for this project)
- Parchment paper (keeps your iron and table clean)
You can pick any color or pattern for your fabric. Old pillowcases or tablecloths work well. Beeswax gives the bag its special power to keep bread fresh.
Tip: If you want to save money, check thrift stores for fabric and tools.
Recommended Tools
The right tools make this project easier and more fun. Here is a list of tools you will want to have on hand:
- Heatproof glass bowl – You will use this to melt the beeswax safely.
- Brush – This helps you spread the melted wax on your fabric.
- Oven – You will need this to remelt the wax and help it stick to the fabric.
- Scraper – Use this to spread the wax evenly and remove any extra.
- Wooden spoons or dowels – These help your bag keep its shape while it cools.
You do not need to buy new tools. You can use what you already have in your kitchen. Just make sure you do not use these tools for food after you use them for wax.
Optional Add-Ons
You can make your bread bag even better with a few extras. Here are some ideas:
- Jojoba oil or coconut oil – These make the bag softer and easier to fold.
- Fabric glue – Use this if you want a no-sew option.
- Decorative ribbon or string – Add a tie to close your bag.
- Stamps or fabric markers – Personalize your bag with your name or a fun design.
- Velcro or snaps – Make your bag easy to open and close.
You can get creative with your bread bag. Try different shapes, sizes, or decorations. Your bag will work well and look great in your kitchen.
Note: Always let your bag cool and dry before using it for bread. This keeps your bread safe and tasty.
How to Make Beeswax Bread Bags: Step-by-Step
Ready to learn how to make beeswax bread bags? This part will guide you through every step. You will find it simple and fun. Let’s get started!
Prepare and Cut Fabric
Before you start, pick the right size for your bread bag. Here’s a quick table to help you choose:
| Bag Size | Dimensions (inches) | Suitable for |
|---|---|---|
| Premium | 13 x 17 | Big sourdough loaves, Dutch oven bakes, bakery bread |
| Large | 15 x 34 | Large round of sourdough |
| Medium | Fits regular loaf | Regular shaped loaves |
Now, follow these step-by-step instructions to prepare your fabric:
- Cut your main fabric to the size you want. Use cotton or linen for best results.
- Make a channel for the drawstring. Cut two strips of fabric, each 2 inches wide and as long as your bag’s width.
- Hem the channel strips. Fold under ¼ inch on all sides and stitch along the short edges.
- Place the channel strips at the top edge of your main fabric.
- Sew the front and back pieces of your bag together along the sides and bottom. Stop sewing just below the channels so you can add the drawstring later.
- Cut two pieces of twill tape. Make them 4 to 6 inches longer than the width of your bag.
- Your fabric is now ready for waxing!
Tip: Use pinking shears to cut your fabric. This helps stop fraying and keeps your bag looking neat.
Apply Beeswax with Iron
You can use an iron to melt beeswax onto your fabric. This method is neat and easy to control. Here’s how to make beeswax bread bags using the ironing method.
Ironing Method Steps
- Lay your fabric flat on a piece of parchment paper.
- Sprinkle beeswax pellets or grated beeswax evenly over the fabric.
- Place another sheet of parchment paper on top.
- Set your iron to a medium-high setting. The metal should reach about 300 degrees Fahrenheit. This temperature melts the beeswax without burning it.
- Press the iron over the parchment paper. Move slowly so the beeswax melts and spreads.
- Use a natural bristle brush to help spread the melted beeswax if needed.
- Check for any dry spots. Add more beeswax and repeat if you see any.
- Let the fabric cool for a few minutes before peeling off the parchment paper.
Tips for Even Coating
- Spread beeswax in a thin, even layer. Too much wax can make your bag stiff.
- Use a scraper or brush to move melted beeswax into corners.
- Always use parchment paper to protect your iron and workspace.
- Let your fabric cool completely before handling.
Note: The ironing method helps you use just the right amount of beeswax. Cleanup is easy, and you won’t waste much wax.
Oven Method (Alternative)
If you want to try another way, you can use your oven. This method works well for larger pieces of fabric. Here’s how to make beeswax bread bags with the oven method.
Oven Steps
- Preheat your oven to 200 degrees Fahrenheit.
- Place your fabric on a parchment-lined cookie sheet.
- Sprinkle beeswax pellets evenly over the fabric.
- Put the tray in the oven for about 20 minutes. Watch as the beeswax melts and soaks into the fabric.
- Take the tray out and use a stiff brush to spread the melted beeswax evenly.
- If you see any dry spots, add a little more beeswax and return the tray to the oven for a few more minutes.
Cooling and Drying
- Let the fabric cool for a few minutes on the tray.
- Hang the fabric up or lay it flat until it is completely dry.
- Once dry, your beeswax bread bag is ready to use!
Here’s a quick look at the pros and cons of each method:
| Method | Pros | Cons |
|---|---|---|
| Oven | Melts beeswax and resin well, good for big pieces | Can get messy, hard to control wax amount, drips easily |
| Ironing | Easy cleanup, less wax wasted | Needs more setup, not zero waste |
Tip: If you want less mess and more control, try the ironing method. If you want to wax a big piece fast, use the oven.
Now you know how to make beeswax bread bags using both the iron and oven methods. Pick the one that fits your style. Both ways help you create a bag that keeps bread fresh and cuts down on plastic waste. You can feel proud every time you use your homemade bag!
DIY Beeswax Bread Bag Assembly
Ready to put your diy beeswax bread bag together? You have two great options: sewing or no-sew. Both ways work well, so pick the one that fits your skills and tools. Let’s walk through each method step by step.
Sewing Method
If you like to sew, this easy sewing tutorial will help you make a strong and reusable bag. You do not need fancy skills. Just follow these steps and you will have a diy bread bag that lasts.
Simple Stitching
You can start by making the drawstring channel. Cut a strip of fabric that matches your bag. Fold and hem the edges to keep them neat. Attach the channel to the inside top edge of your bag. Next, place the front and back pieces together with the right sides facing in. Sew along the sides and bottom, leaving the top open. This creates the main pocket for your bread.
Now, prepare your drawstring. Use a safety pin to help thread it through the channel. Tie knots at the ends so it does not slip out. Your bag is almost ready!
Here’s a quick checklist for the sewing steps:
- Make the drawstring channel with matching fabric.
- Hem the channel and sew it inside the bag.
- Stitch the front and back pieces together.
- Prepare and insert the drawstring.
- Wax the bag using your favorite method.
- Let the bag cool and dry.
- Thread the drawstring with a safety pin.
- Tie the ends to finish.
Tip: This easy sewing tutorial works for any size bag. You can make a small or large diy beeswax bread bag with the same steps.
Adding Closures
Want to keep your bread extra fresh? Add a closure! You can sew on a button, snap, or even a strip of Velcro. Some people like to use a ribbon or string to tie the top closed. Closures help seal in freshness and make your bag look cute. Try different options to see what you like best.
No-Sew Method
No sewing machine? No problem! You can still make a diy beeswax bread bag with this no-sew method. It’s quick and fun.
Folding and Sealing
Lay your waxed fabric flat. Fold it in half so the short sides meet. Press the edges together with your hands. The beeswax helps the fabric stick to itself. You can use clips to hold the sides while you work. Pinch the bottom closed and fold the top over to make a flap. This simple fold keeps your bread safe inside.
Using Fabric Glue
If you want a stronger hold, grab some fabric glue. Run a thin line of glue along the sides and press the edges together. Let it dry for a few hours. Now you have a sturdy diy beeswax bread bag without any sewing. You can add a ribbon or string for a closure if you want.
Note: The no-sew method is perfect for kids or anyone who wants a fast and easy sewing tutorial. You can make a bag in minutes!
Now you know two ways to assemble your diy beeswax bread bag. Pick your favorite and enjoy fresh bread every day!
How to Make a Waxed Bread Bag Last
Using Your Bag
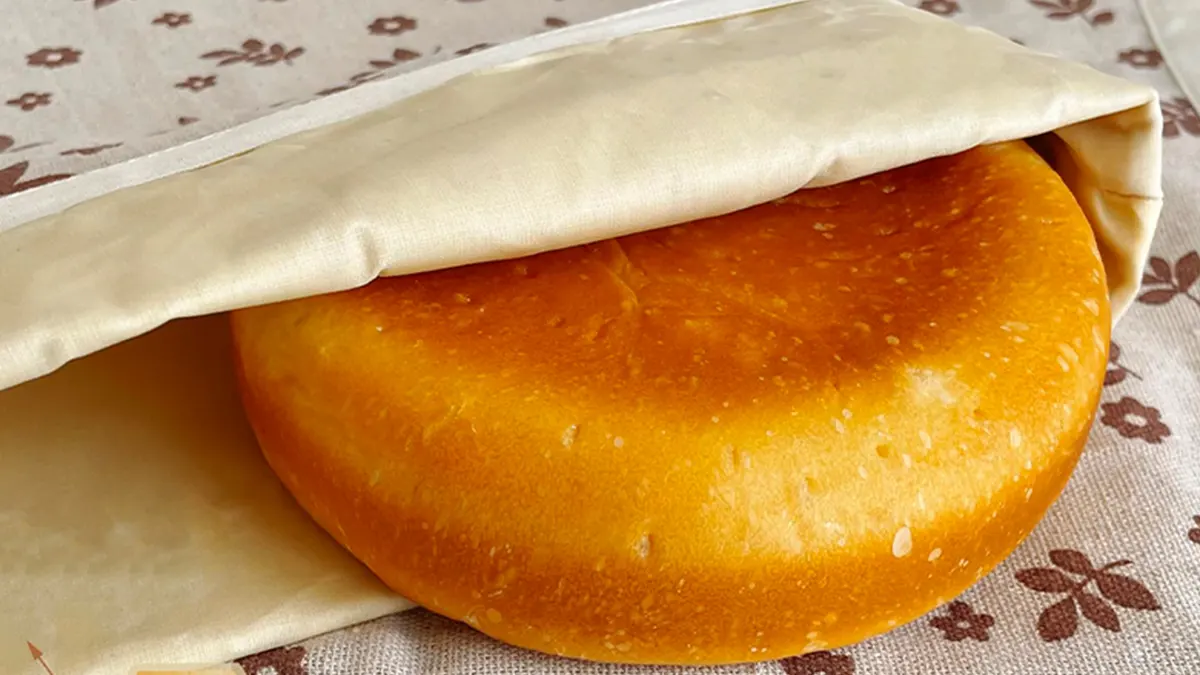
You want your homemade sourdough bread to stay fresh and tasty for days. Learning how to make a waxed bread bag work for you is simple. Start by placing your bread inside the bag with the cut side down. This helps the beeswax touch the bread and keeps it from drying out. Pull the drawstring tight, then roll the opening to seal the bag. This step limits air and keeps your bread soft on the inside and crispy on the outside. Try not to store bread in slices. Whole loaves stay fresh longer in a reusable bread bag. Shape the bag around the crust for the best results.
- Roll the opening after you pull the drawstring tight.
- Put the bread cut side down for more contact with the wax.
- Wrap the bag around the whole loaf, not slices.
- Seal the bag well to keep air out.
You will notice your homemade sourdough bread stays fresh for up to three days. The bag works better than plastic and keeps your kitchen eco-friendly.
Cleaning and Care
Keeping your reusable bread bag clean is easy. You do not need to wash it every time. Just turn the bag inside out and shake out any crumbs. If you see a spot, wipe it with cool water and a little mild soap. Do not use hot water or harsh cleaners. Hot water can melt the wax and ruin the bag. Use natural soap without strong smells or chemicals. After cleaning, keep the bag inside out and let it air dry. You can hang it up or lay it flat.
- Turn the bag inside out to remove crumbs.
- Wipe with cool water and mild soap if needed.
- Let the bag air dry completely before using again.
- Spot clean the outside with a damp cloth.
If you ever see mold, rinse the beeswax lining with cold water. Use a soft brush and mild soap to clean the spot. For tough mold, dab with a little vinegar. Lay the bag in the sun to dry.
Regular care helps your bag last a long time. Air out the bag between uses to keep it fresh for your next loaf of homemade sourdough bread.
Refreshing the Wax
After many uses, you might see the wax start to wear thin. You can refresh your bag and keep it working like new. Here’s how to make a waxed bread bag last even longer:
- Grate a small amount of pure beeswax.
- Sprinkle the wax lightly over the bag.
- Place the bag between two sheets of parchment paper.
- Iron on low heat to melt and spread the wax.
- Let the bag cool, then wipe off any extra wax.
You do not need to refresh the wax often. With good care, your reusable bread bag can last a year or more. When you notice the wax is not sealing well, gently warm the bag to reactivate the wax. This simple step helps you keep your homemade sourdough bread fresh and your bag ready for many more uses.
Tip: Knowing how to make a waxed bread bag last means you always have a safe and eco-friendly way to store your bread.
Customizing Your Bread Bag
Personalization Ideas
You can make your beeswax bread bag unique. Personalizing your bag adds a special touch and makes it easy to spot in your kitchen. Here are some fun ways to show off your style:
- Fabric Choices: Pick a fabric with your favorite color or pattern. You can use old shirts, pillowcases, or even a tablecloth. This gives your bag a story and helps the planet.
- Fabric Markers or Stamps: Draw your name, doodles, or a fun message on the outside. Use fabric markers or stamps for a design that lasts.
- Decorative Stitching: If you like to sew, try adding a colorful border or a zigzag stitch. This makes your bag look neat and cheerful.
- Ribbons and Strings: Swap out the plain drawstring for a bright ribbon or a piece of twine. You can even braid yarn for a chunky, playful look.
- Iron-On Patches or Appliqués: Add a patch with a bread or bee design. Iron it on before you wax the fabric for best results.
- Buttons and Snaps: Sew on a big button or attach a snap for a secure closure. This keeps your bread extra fresh and adds a pop of color.
Tip: Let your creativity shine! Your bread bag can match your kitchen or show off your favorite hobby.
Troubleshooting Tips
Sometimes, you might run into small problems with your homemade beeswax bread bag. Don’t worry! Most issues have easy fixes. Here’s a quick guide to help you solve common problems:
| Problem | What You Can Do |
|---|---|
| Bag smells like bread from last time | Wash the bag with mild soap. Let it dry in fresh air or sunlight for a few hours. |
| Waxy residue on your hands | This happens with new bags. The wax will settle after a few uses. Wash your hands with warm soapy water. |
| Bag feels less effective | Clean the bag well. Make sure your bread is cool before storing. If needed, refresh the wax coating. |
| Creases won’t come out | Let the bag sit at room temperature. The beeswax will soften and smooth out. Never iron the bag directly. |
You might notice your bag smells like bread after a few uses. A deep clean with mild soap and some time in the sun will help. If you get wax on your hands, don’t worry. This is normal at first. The wax settles after a few uses, and you can wash your hands with warm soapy water.
If your bag stops working as well, check if the bread was too warm when you stored it. Always let bread cool first. If the bag still feels weak, sprinkle on a little more beeswax and use the iron method to refresh it.
Creases can look messy, but they usually go away. Leave the bag out at room temperature, and the wax will relax. Never use a hot iron on the bag, or you might ruin the coating.
Note: Most problems have simple solutions. With a little care, your beeswax bread bag will last a long time and keep your bread fresh.
Conclusion
You can see how homemade beeswax wraps make a big difference in your kitchen. They keep bread fresh, help the planet, and let you show off your style. Here’s a quick look at why so many people love using a waxed bread bag:
| Benefit | Description |
|---|---|
| Reusability | You can use homemade beeswax wraps again and again. |
| Eco-friendly | They use natural materials and break down easily. |
| Food preservation | Beeswax keeps your bread safe and fresh. |
| Moisture control | Your waxed bread bag keeps bread just right—not too dry or too soft. |
Homemade beeswax wraps and diy beeswax wraps are reusable and biodegradable. They help you cut down on plastic waste and support a cleaner world. You can compost your waxed bread bag when it wears out. Many people want eco-friendly options, and the demand for waxed bread bag products keeps growing.
If you need custom solutions for retail or business use, we are a professional waxed bread bag manufacturer offering OEM and ODM services for bakeries, shops, and private label brands. Whether for storage, display, or packaging, we can help create the right bread bag for your needs.
FAQ
How long does a beeswax bread bag last?
You can use your beeswax bread bag for about a year. If you take good care of it, it might last even longer. When the wax wears off, just refresh it with more beeswax.
Can I use vegan wax instead of beeswax?
Yes, you can! Try candelilla or soy wax as a plant-based option. These work well for bread bags. Just make sure the wax is food-safe.
Is it safe to store all types of bread in these bags?
You can store most breads in your beeswax bag. Sourdough, sandwich loaves, and baguettes all stay fresh. Avoid using the bag for very moist or oily breads.
How do I stop my bag from sticking together?
If your bag feels sticky, let it air out for a few hours. You can also dust the inside with a little flour. This helps the wax settle and keeps the bag easy to open.
Can I freeze bread in a beeswax bread bag?
You should not freeze bread in a beeswax bag. The wax can crack in the freezer. For freezing, use a different container or wrap.
What should I do if my bag smells odd?
Let your bag air out in sunlight for a few hours. Sunlight helps remove smells. You can also wipe the inside with a little vinegar and water, then let it dry.
Can I use my beeswax bread bag for other foods?
Yes! You can use your bag for rolls, pastries, or even snacks. Just avoid raw meat or very wet foods. The bag works best for dry or baked items.