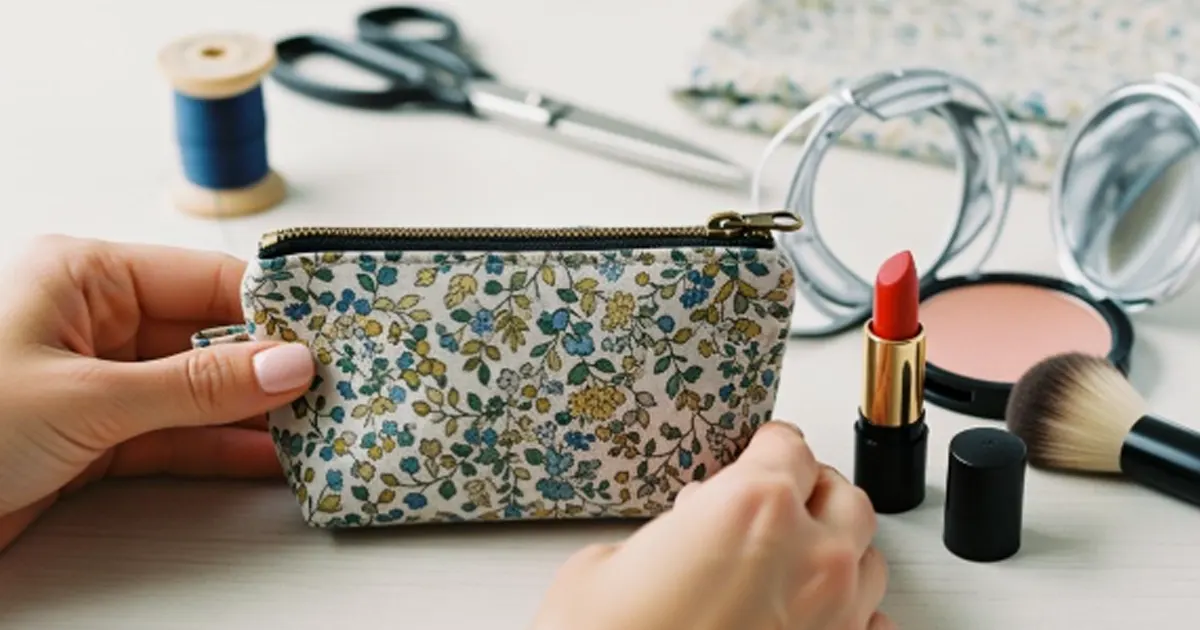
Ready to dive into how to make a small makeup bag? If you want a 20 minute makeup bag that looks cute and keeps your essentials organized, you’re in the right spot. You don’t need to worry if you’re a beginner. Many beginners love this 20 minute makeup bag because it’s quick, fun, and perfect for learning new skills. You’ll see how to make a small makeup bag with easy steps. This 20 minute makeup bag fits right into your purse or backpack. Beginners like you can personalize every 20 minute makeup bag with colors, patterns, or even a zipper charm. Want a practical mini pouch? This how to make a small makeup bag guide gives you a 20 minute makeup bag you’ll use every day. If you’re searching for a full tutorial or a beginner sewing project, this sewing tutorial helps beginners finish a 20 minute makeup bag with confidence.
Key Takeaways
- You can make a cute makeup bag in 20 minutes. It is easy and good for beginners.
- Pick the right fabric for your bag. Quilting cotton is soft and simple to use. Canvas is strong and lasts longer.
- Use nylon coil zippers because they are easy to sew. They come in many colors and are good for beginners.
- Gather tools like fabric scissors, pins, and a sewing machine. These tools help you work faster and better.
- Add your own style with patches, charms, or fun stitching. This makes your bag special and shows your taste.
- Measure and cut the fabric carefully for a neat look. This helps your bag look nice and professional.
- Make boxed corners to give your bag a strong shape. This helps it stand up and hold things well.
- Take care of your bag by cleaning it gently. Store it the right way to keep it looking nice for a long time.
How to Make a Small Makeup Bag: Materials & Tools
Choosing Fabric & Lining
You want your mini makeup bag to look great and last a long time. Picking the right fabric makes a big difference. Most people use quilting cotton because it is soft, easy to sew, and comes in many colors and patterns. Canvas works well if you want something sturdy. Faux suede feels soft and gives your bag a fancy touch. If you need water resistance, nylon or PU leather are smart choices. These fabrics wipe clean and hold up to daily use.
Here’s a quick look at popular fabrics and their advantages:
| Fabric Type | Properties & Advantages | Cost Range |
|---|---|---|
| 600D PU-coated nylon | Water-resistant, tough, wipes clean | $4–$6/yard |
| TPU-laminated canvas | Fully waterproof, soft, durable | $6–$10/yard |
| Silicone | Super durable, non-porous, easy clean | $8–$15/yard |
| Laminated cotton | Soft, organic look, easy to wipe clean | $5–$8/yard |
| DWR-treated polyester | Budget-friendly, water-repellent | $2–$4/yard |
For lining, quilting cotton is a top pick. It is soft and easy to work with. You can match or contrast the lining with your outer fabric. Most mini makeup bags use pieces about 8 x 6 inches or 5 1/2 x 9 1/2 inches for both the outer and lining fabrics.
Selecting the Right Zipper
You need a zipper that fits your bag and works smoothly. Nylon coil zippers are easy to sew and come in many colors. They are perfect for beginners. A 12-14 inch zipper gives you enough length to trim and fit your pouch. Metal zippers look stylish but can be tricky if you are new to sewing. Choose a zipper that matches your fabric or adds a fun pop of color.
Tip: If you want to learn how to sew a zipper, start with nylon. It is flexible and forgiving.
Essential Sewing Tools
You don’t need fancy tools for this tutorial. Here’s what you need to make your mini makeup bag:
- Fabric scissors or rotary cutter for clean cuts
- Quilting ruler for straight lines
- Pins or clips to hold pieces together
- Sewing machine with a zipper foot (or you can hand sew if you prefer)
- Iron and pressing surface to keep your fabric crisp
- All-purpose thread that matches your fabric
- Fusible interfacing or fleece to add structure
Interfacing helps your bag keep its shape. If you want to know how to sew a pouch that feels professional, fuse the interfacing to the wrong side of your main fabric. This step makes your bag sturdy and prevents it from feeling floppy. You will see how to sew a mini makeup bag with these tools and materials, even if you are just starting out.
Optional Embellishments
You can turn your mini makeup bag into something special with a few simple embellishments. These extras help your bag stand out and show off your personality. You don’t need to be an expert to add them. You just need a little creativity and some basic supplies.
Here are some popular embellishments you might want to try:
- Iron-on patches: Pick a patch that matches your style. Place it on the front or back of your bag. Use an iron to stick it on. You can find patches in shapes like hearts, stars, or even cute animals.
- Fabric paint or markers: Draw your own designs. Write your name or add fun doodles. Let the paint dry before you use your bag.
- Decorative stitching: Try zigzag or scallop stitches. Use thread in a bright color. Sew along the edges or across the front for a cool effect.
- Charms and zipper pulls: Clip a charm onto your zipper. Choose a charm that fits your mood. You can use beads, tassels, or tiny keychains.
- Labels and tags: Sew a fabric label inside your bag. Write your name or a short message. This makes your bag feel more professional.
Tip: If you want your embellishments to last, sew them on instead of gluing. Sewing keeps patches and charms secure, even if you use your bag every day.
You can mix and match embellishments. Try combining fabric paint with a zipper charm. Add a patch and some decorative stitching. The possibilities are endless. You decide what looks best.
Here’s a quick table to help you choose the right embellishment for your bag:
| Embellishment | How to Add It | Best For |
|---|---|---|
| Iron-on patch | Iron or sew | Quick style boost |
| Fabric paint | Paint and let dry | Custom artwork |
| Decorative stitch | Sew with colored thread | Fun borders |
| Zipper charm | Clip or sew | Easy personalization |
| Label/tag | Sew inside or outside | Professional touch |
You can follow this tutorial and add any embellishment you like. If you make a mistake, don’t worry. You can always remove or cover it with another patch or paint. Every bag you make will be unique. You get to decide how much flair you want.
If you want your makeup bag to match your backpack or purse, pick similar colors or themes. You can even make a set with matching embellishments. Have fun and let your creativity shine!
DIY Mini Boxy Makeup Bag: Cutting & Preparation
Measuring and Marking
You want your diy mini boxy makeup bag to look neat and professional. Start by measuring your fabric pieces with care. Grab your ruler and mark the dimensions for both the outer fabric and lining. Most people use sizes like 7 x 9 inches or 8 x 6 inches, but you can adjust these to fit your needs. Use a fabric pen or chalk to make clear lines. Double-check your measurements before you cut. If you want to avoid mistakes, measure twice and cut once.
Tip: Lay your fabric flat on a table. This helps you see the lines better and keeps your fabric from slipping.
Cutting Outer, Lining, and Fleece
Cutting your fabric is a big step in this diy project. You want all your pieces to match up perfectly. Here are some tips to help you get precise cuts:
- Cut your lining and outer fabric at the same time. This keeps them even and saves you time later.
- Use pattern weights or pins to hold your fabric in place. This stops the fabric from moving while you cut.
- Always cut on a flat surface. This prevents stretching or slipping.
- Iron your fabric before you cut. Wrinkles and folds can mess up your measurements.
- Stack your cut pieces and trim any extra edges. This gives your bag a clean finish.
You also need to cut fusible fleece or interfacing. This adds structure to your diy mini boxy makeup bag. Cut the fleece to match the size of your outer fabric. If you want a sturdy bag, don’t skip this step.
Fusing Interfacing for Structure
Adding interfacing makes your bag feel strong and keeps its shape. Follow these steps to fuse the interfacing:
- Cut the interfacing so it matches your fabric piece.
- Place the rough, shiny side of the interfacing against the wrong side of your fabric.
- Set your iron to the temperature listed on the interfacing package.
- Press the iron down for a few seconds. Lift and move to the next spot. Don’t slide the iron.
- Let the fabric cool before you touch it.
Note: Always use a pressing cloth between your iron and the interfacing. This protects your fabric and keeps your iron clean.
You finish prepping all your pieces before you start sewing. This step makes the rest of the tutorial easier. If you want your diy bag to look great, take your time with measuring, cutting, and fusing. You can personalize your bag by choosing different fabrics or adding extra fleece for more structure. Every diy project gives you a chance to learn and improve your skills.
Sew a Cosmetics Bag: Zipper Installation
Placing the Zipper
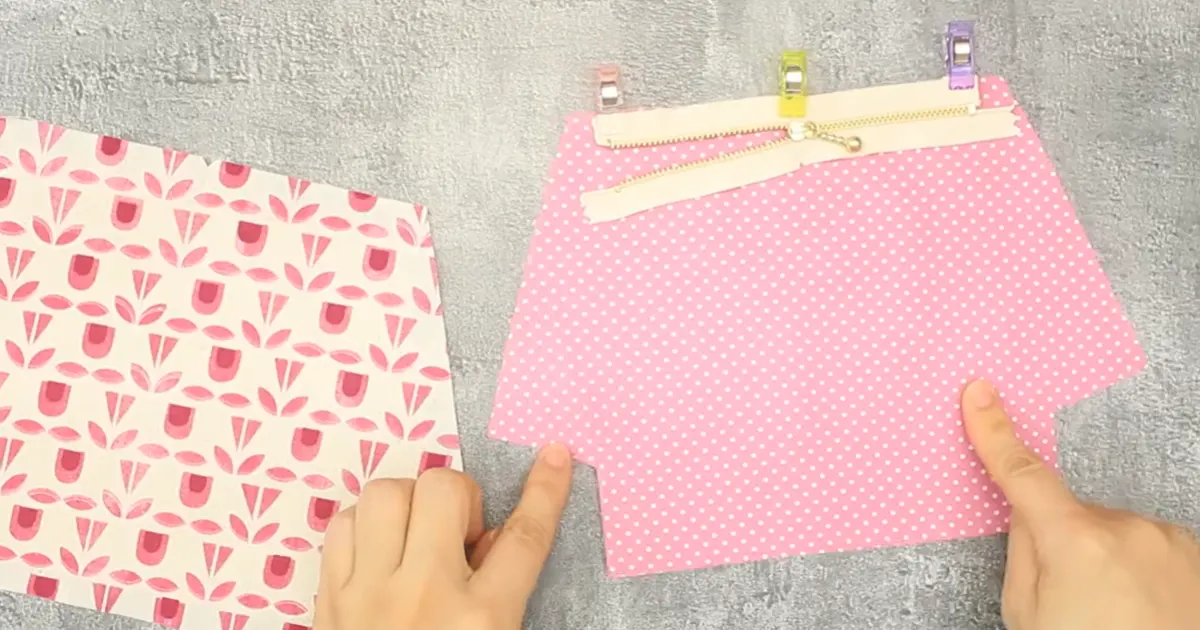
You’re ready to start the zipper part of your mini makeup bag. This step makes your pouch look professional and keeps your items safe. Lay your outer fabric right side up. Place the zipper on top, with the zipper pull facing down. Make sure the top edges line up. Now, grab your lining fabric and lay it right side down on top of the zipper. All the top edges should match. Pin or clip everything together so nothing shifts while you sew.
Tip: Double-check that the zipper teeth point toward the lining. This keeps the zipper in the right spot when you turn the bag later.
If you want a neat finish, leave about ¾ inch unsewn at both ends of the zipper. This gap helps you avoid sewing errors and makes the corners easier to box later.
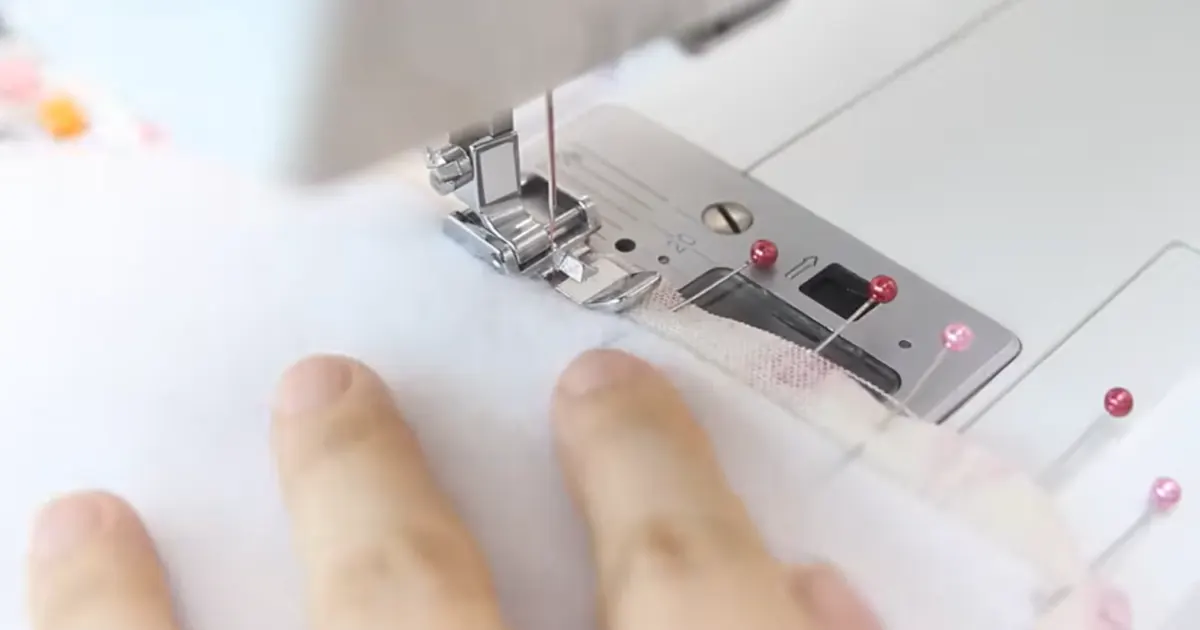
Sewing Zipper to Fabric
Now you can sew a cosmetics bag with confidence. Use your zipper foot on the sewing machine. Sew along the pinned edge, keeping a ¼ inch seam allowance. Stop sewing before you reach the zipper pull. Move the pull out of the way, then finish sewing. This trick helps you avoid wobbly stitches.
Here are some common mistakes and how you can avoid them:
- Make sure the zipper is aligned with all top edges together.
- Keep your seam allowance at ¼ inch for a clean look.
- Leave a ¾ inch gap at both ends so you don’t sew over the zipper stops.
- Fold the zipper tape toward the lining fabric before sewing.
- Sew the edges with the zipper tucked in separately to keep the gap open.
If you want your stitches to look straight, try the zipper sandwich method. Layer the exterior fabric, zipper, and lining, then pin them together before stitching. Press the seams away from the zipper using a pressing cloth. This keeps everything flat and ready for topstitching.
Attaching Lining to Zipper
You’re almost done with the zipper installation. Open up the fabric and zipper so the right sides face out. Grab your second lining piece and repeat the steps on the other side of the zipper. Lay the lining right side down, place the zipper on top, then add the outer fabric right side up. Pin or clip the layers together.
Smooth out any wrinkles before pinning. Align the edges and corners. If you want to add pockets or labels, do it now before stitching. Sew along the edge with your zipper foot, matching the seam allowance from the first side.
Start with the lining right side up, lay the zipper on top, then place your lined outer fabric right side down. Pin at the top and sew.
After sewing, iron the fabric away from the zipper. Topstitch along both sides of the zipper about ⅛ to ¼ inch from the edge. This step gives your bag a polished look and keeps the lining from getting caught in the zipper.
If you follow this tutorial, you’ll get a neat zipper every time. Take your time, check your alignment, and press your seams. Your mini makeup bag will look amazing and work perfectly.
Makeup Bag Sewing Tutorial: Assembly Steps
You’re almost done with your makeup bag sewing tutorial. This part brings your pouch together and gives it that boxy, professional look. Let’s walk through each step so you can finish your project with confidence.
Sewing Sides and Bottom
You have your zipper installed and your fabric pieces prepped. Now, you need to sew the sides and bottom. This step forms the main body of your mini makeup bag.
- Place your bag pieces right sides together. Make sure the lining matches up with the lining and the outer fabric matches up with the outer fabric.
- Pin or clip the sides and bottom edges. This keeps everything lined up and prevents shifting.
- Sew along the sides and bottom with a ¼ inch seam allowance. Leave a small gap (about 2 inches) in the lining for turning the bag later.
- Backstitch at the start and end of each seam for extra strength.
- Iron the seams flat. This helps your bag look crisp and neat.
Tip: Add interlining to your main fabric before cutting. This keeps everything accurate and makes sewing easier.
If you want to know how to sew a makeup bag that looks professional, always press your seams after sewing. This simple step makes a big difference.
Creating Boxed Corners
Boxed corners give your makeup bag structure and help it stand upright. You can follow these steps to create perfect corners:
- Turn your bag on its side and flatten the corner so the side seam lines up with the bottom seam.
- Measure in 1 to 1.5 inches from the corner. Mark a straight line across the corner.
- Stitch across the marked line. This forms the boxed shape.
- Cut off the excess fabric, but don’t cut too close to the seam.
- Repeat for all four corners.
- Optionally, backstitch for added security.
Note: Box out the corners by snipping the seam. This gives your bag a wider opening and helps it sit flat.
After you finish boxing the corners, flip the fabric right side out and push out the corners. Use a blunt tool or your fingers to make the corners sharp.
Turning and Pressing
You’re ready to turn your bag right side out. This step reveals your finished makeup bag sewing tutorial project.
- Reach through the gap in the lining and gently pull the bag right side out.
- Push out all the corners, especially the boxed ones, for a crisp shape.
- Tuck the raw edges of the lining gap inside and sew it closed with a small slip stitch or by machine.
- Press the corners with an iron for extra sharpness.
- Topstitch along the zipper and edges. This adds durability and gives your bag a neat, professional finish.
If you want your bag to look store-bought, iron the sides flat after pinning and topstitch along the zipper and edges.
You can add compartments or pockets if you want more organization. Look for mini makeup bags with built-in dividers or pockets. Some bags have removable sections so you can customize the layout. If you want to try adding a pocket, sew a small rectangle of fabric to the lining before assembling the bag.
Here’s a quick table of optional features you can add:
| Feature | Benefit |
|---|---|
| Built-in dividers | Keeps items separated |
| Lining pockets | Holds small essentials |
| Removable sections | Customizes your layout |
You’ve completed the main steps in this makeup bag sewing tutorial. You learned how to sew a makeup bag with neat seams, boxed corners, and a polished finish. Take your time with each step. Press your seams and corners. Try adding pockets or dividers if you want extra features. Your mini makeup bag is ready for everyday use!
Cosmetics Bag: Finishing Touches & Customization
Topstitching and Details
You’ve finished sewing your cosmetics bag, but you can make it look even better with a few simple touches. Topstitching along the zipper and edges gives your bag a crisp, professional look. Try using thread in a fun color for extra flair. If you want to personalize your bag, decorative stitching, patches, and embroidery are great options. You can sew a border, add a patch, or stitch your initials right onto the fabric.
Here’s a quick table showing popular ways to personalize your cosmetics bag:
| Method | Description |
|---|---|
| Sewn | Hand-sewn designs that reflect your personal style. |
| Patched | Unique patches for a custom look. |
| Embroidered | Personalized embroidery for a unique touch. |
You can mix and match these methods. Maybe you want a patch on the front and some embroidery on the side. It’s your bag, so you get to decide!
Adding Personal Touches
Want your cosmetics bag to stand out? Try adding a label with your name or a charm to the zipper. You can use iron-on patches, sew on a tag, or attach a small keychain. Embroidery lets you add shapes, words, or even a favorite animal. If you make a mistake, don’t worry. You can cover it with another patch or stitch over it.
Here’s another table with quick ideas:
| Method | Description |
|---|---|
| Patches | Customize your bag with unique patches. |
| Embroidery | Add personalized embroidery to your bag. |
Tip: If you want your bag to last, sew embellishments instead of gluing them. Sewing keeps everything secure, even if you use your bag every day.
Final Quality Check
Before you start using your cosmetics bag, check for common mistakes. Look for loose threads, uneven seams, or missed stitches. If you see any problems, fix them now. Make sure the zipper works smoothly and the corners look sharp. Press the bag one last time for a neat finish.
To keep your bag in good shape, follow these care tips:
- Avoid rough or dirty surfaces to prevent wear.
- Protect from sunlight to stop fading.
- Store upright or lightly stuffed to keep its shape.
- Use fabric protection spray for durability.
- Blot excess moisture if your bag gets wet.
- Clean with a soft cloth and spot clean with mild soap and water.
- Store in a cool, dry place and use a dust bag for protection.
Note: Taking care of your bag means it will look great and last longer. If you follow this tutorial and these tips, your cosmetics bag will stay fresh and ready for every adventure.
Beginner Tips for DIY Makeup Bags
Troubleshooting Common Issues
You might run into a few bumps when making your first easy diy makeup bag. Don’t worry! Everyone makes mistakes, and you can fix most of them with simple tricks. Here are some common problems and how you can solve them:
- Skipping pattern prep: Always read the instructions before you start. This helps you know what comes next.
- Choosing the wrong fabric: Pick cotton or canvas for your first bag. These fabrics are easy to sew and hold their shape.
- Using the wrong needle size: Use a 90/14 or 100/16 needle for thick fabrics. This keeps your stitches strong.
- Ignoring seam allowances: Mark and follow the seam allowance. This keeps your bag from looking crooked.
- Rushing the cutting process: Use a rotary cutter and mat for clean, straight cuts.
- Skipping pressing and finishing details: Press your seams and topstitch for a polished look.
Here’s a quick table with more challenges and solutions:
| Challenge | Solution |
|---|---|
| Puckered zipper seam | Remove stitching, re-press, and sew slowly |
| Zipper won’t close smoothly | Check for fabric caught in teeth, trim excess |
| Uneven zipper installation | Use consistent seam allowance and proper foot position |
| Bulky zipper ends | Trim excess zipper tape and fold properly |
| Corners won’t turn out | Clip closer to stitching line and use point turner gently |
| Not opening the zipper before final stitching | Always leave the zipper partly open |
| Uneven seam allowances causing crooked edges | Measure carefully and press seams flat |
| Cutting fabric without double-checking measurements | Measure carefully before cutting |
Tip: If you make a mistake, pause and check your work. You can fix most issues by slowing down and double-checking your steps.
Easy Customization Ideas
You can turn your easy diy makeup bag into something special with simple changes. Try different fabrics, colors, or add fun details. You don’t need advanced skills to make your bag unique. Here are some ideas:
- Use bright cotton for the exterior and a patterned liner.
- Add a zipper pull or charm for extra flair.
- Sew a patch or label on the front.
- Try decorative stitching along the edges.
- Make a small tab from fabric and attach it to the side.
If you want to follow a step-by-step tutorial, start by fusing interfacing to the wrong side of your main fabric. Sew the zipper to the main fabric and liner. Assemble the bag by sewing the sides and bottom, leaving an opening for turning. Topstitch around the top for a finished look.
Experiment with colors and designs. Every bag you make will be different. You can even match your makeup bag to your backpack or purse.
Care Instructions
You want your handmade makeup bag to last. Keeping it clean and fresh is easy if you follow a few simple steps:
- Use a soft, lint-free cloth to wipe away dust and fingerprints.
- Avoid abrasive cleaners. Stick to mild soapy water.
- Test any cleaner on a hidden spot first.
- Rotate your bags so each one gets a break.
- Store your bag with tissue paper inside to keep its shape.
- Use a dust bag for storage to protect from dirt.
- Keep your hands clean before handling your bag.
Note: Taking care of your bag means it will look great for a long time. If you follow these tips, your easy diy makeup bag will stay ready for every adventure.
You might not get everything perfect the first time. That’s okay! Practice helps you improve. Try new fabrics, designs, and techniques. Each bag you make teaches you something new. Have fun and enjoy the process.
Conclusion
You can use this tutorial to start sewing and make a small makeup bag that matches your style. This project teaches you skills like putting in a zipper and using lining fabric. You will feel more confident as you put each part together and see how much you learn. Every bag you sew is different, so have fun and show your finished bags to your friends.
If you want more ideas, look at other sewing tutorials. You can find many types of bags and new designs to try. Our company also makes makeup bags for brands with OEM and ODM services. Many brands ask us to make special bags like these:
| Makeup Bag Type | Description |
|---|---|
| Slim Rectangular Makeup Pouches | Great for daily essentials and giveaways. |
| Travel Makeup Bags & Kits | Multiple compartments and waterproof linings for travel brands. |
| Hanging Toiletry Bags | Fold-out designs for outdoor and travel retailers. |
| PU Leather & Structured Cases | Premium padded cases for luxury beauty brands. |
| Clear PVC & TPU Makeup Bags | Transparent bags for TSA kits and e-commerce brands. |
| Quilted & Puffer Makeup Bags | Trendy shapes for Gen Z brands. |
| Cotton & Canvas Cosmetic Bags | Eco-friendly options for sustainable brands. |
| Branded Cosmetic Pouch Sets | Coordinated sets for retail gifts and subscription boxes. |
You can pick OEM or ODM services depending on what you need:
- You can add your logo, choose colors, and pick hardware.
- OEM lets you make private label bags and helps from design to big orders.
- ODM gives you ready-made bags with some changes allowed.
Try making your own bag and see how creative you can be!
FAQ
How long does it take to make a mini makeup bag?
You can finish your mini makeup bag in about 20 to 30 minutes. If you’re new to sewing, you might need a little more time. Take it slow and enjoy the process!
Can I sew this bag by hand?
Yes, you can sew this bag by hand. Use small, tight stitches for strong seams. A sewing machine makes it faster, but hand sewing works well for beginners.
What fabric works best for beginners?
Cotton fabric is the easiest for beginners. It’s soft, easy to cut, and doesn’t slip. You can also try canvas if you want a sturdier bag.
How do I fix a wavy zipper?
If your zipper looks wavy, press it flat with an iron. Sew slowly and use pins or clips to keep everything in place. Practice helps you get better results.
Can I wash my finished makeup bag?
Most makeup bags are washable. Use cold water and mild soap. Air dry your bag to keep its shape. Always check your fabric’s care instructions first.
What size should I cut my fabric?
For a small pouch, cut two pieces of outer fabric and two pieces of lining, each about 7 x 9 inches. You can adjust the size to fit your needs.
Where can I find more ideas for customizing my bag?
You can look for inspiration on craft blogs, YouTube, or Pinterest. Try adding patches, charms, or embroidery. This tutorial gives you a great base to start from!