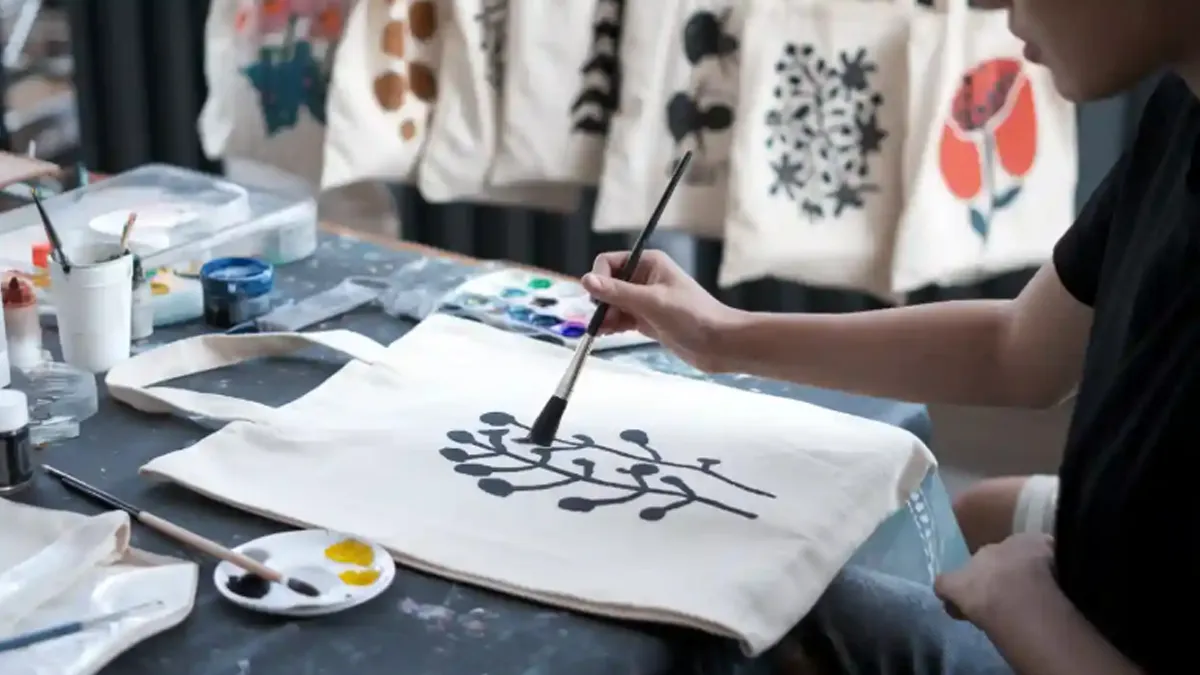
Painting on canvas tote bags feels easy and fun, especially when you know a few tricks. You get to play with colors and create something unique. Many beginners run into small issues, like forgetting to place a barrier inside the bag or touching the canvas before the paint dries. Sometimes, paint seeps through or colors look uneven if you don’t mix them well. Don’t worry—when you learn how to paint on canvas tote bags, you can avoid these mistakes and enjoy the process. Anyone can do this, no art degree required!
Key Takeaways
- Gather all your materials before starting. This includes fabric paints, brushes, and a clean canvas tote bag.
- Prepare your canvas by washing and ironing it. A clean, smooth surface helps the paint stick better.
- Use gesso for a brighter finish. It creates a smooth base and helps colors pop.
- Plan your design carefully. Think about the purpose of the bag and choose colors that match your style.
- Apply paint in thin layers. This prevents bleeding and allows for better color mixing.
- Let each layer dry completely before adding more. This keeps your design sharp and clean.
- Heat set your painted design to make it washable. Use an iron to lock in the colors and prevent fading.
- Take care of your tote bag by washing it gently and storing it properly. This keeps your artwork looking fresh.
Materials Needed to Paint Canvas Tote Bag

You need to get your supplies before you start painting. Having everything ready helps you work faster and keeps you calm. Let’s look at what you need for painting a canvas tote bag so you can set up your space and feel sure about it.
Fabric Paints and Brushes
Picking the right paint for your bag matters a lot. You want colors that stay bright and don’t wash out. Here is a table showing different paints and brushes you might use:
| Type of Paint | Characteristics | Recommendations |
|---|---|---|
| Acrylic | Covers well, sticks easily, dries quickly, easy to use, not see-through | Good for thick or thin designs, no need to seal |
| Oil | Stays colorful, good for details, takes longer to dry | Nice for ombré looks, but can hurt fabric over time |
| Watercolor | Makes cool abstract looks, fades after a while | Not good if you want your design to last |
| Fabric Paint | Works well, quality changes results | Pick high-quality fabric paint for best look |
| Fabric Markers | Great for small details | Use good markers for better lines |
| Brushes | Thick for big areas, thin for small details | Synthetic for acrylic, natural for watercolor and oil |
You should have different brush sizes. Big brushes cover more space fast. Small brushes help you draw details and lines. Fabric markers are good for writing or drawing thin lines.
Other Essential Supplies
You need more than just paint and brushes to get started. Here is a list of other things you should have:
- Canvas tote bag (make sure it’s clean and dry)
- Palette or plate for mixing colors
- Cup of water for cleaning brushes
- Paper towels or rags for wiping brushes and spills
- Pencil or chalk for drawing your design
- Cardboard or something similar to put inside the bag so paint does not go through
Tip: Try your paint on a scrap piece of fabric first. This lets you see the color and how the paint works with the canvas.
Optional Tools
Some tools are not needed, but they can help you and make your art last longer.
- Gesso: Putting gesso on the canvas helps your painting last longer and keeps colors bright.
- Stencils: These help you make shapes and patterns if you don’t want to draw by hand.
- Masking tape: Use this to block off spots you don’t want to paint or to make straight lines.
- Apron or old shirt: Wear this to keep your clothes safe from paint.
- Hair dryer: This helps your paint dry faster between layers.
Getting all your supplies ready before you start helps you focus on your art. You won’t have to stop and look for things while you work. With the right stuff, painting your canvas tote bag will be more fun.
Preparing the Canvas Tote Bag
Cleaning and Ironing
Before you start painting canvas tote bags, you want your surface to be as perfect as possible. A clean, smooth, and wrinkle-free bag helps your paint stick better and keeps your design looking sharp. If your tote has dust or creases, the paint might not go on evenly. You could end up with patchy colors or lines that look wobbly.
Here’s a simple way to get your bag ready:
- Wash the tote bag
Use mild soap and cold water. This removes any dirt or oils that might stop the paint from sticking. - Dry it completely
Hang the bag up or lay it flat. Make sure it’s totally dry before you move on. - Iron out wrinkles
Set your iron to medium heat. Smooth out any creases, especially where you plan to paint. If you skip this step, your design could look bumpy.
Tip: If you’re worried about the iron sticking, place a thin cloth between the iron and the tote. This keeps the canvas safe.
Workspace Setup
Setting up your workspace makes painting canvas tote bags much easier. You don’t want to hunt for brushes or spill paint everywhere. A good setup helps you stay focused and keeps your area neat.
Here’s how you can organize your space:
- Keep all your tools—brushes, paints, water, and towels—within arm’s reach. You won’t have to stop and search for things.
- Sort your materials by type and size. Put brushes together, group paint tubes, and keep your palette close.
- Dedicate spots for each item. Maybe one corner for paints, another for clean brushes, and a spot for your water cup.
- Clear away anything you don’t need. A tidy space helps you work faster and makes painting more fun.
Note: Place a piece of cardboard inside your tote bag before you start. This stops paint from bleeding through to the other side.
Using Gesso
Gesso is a special primer that helps your paint stick to the canvas. If you want your design to last longer and look brighter, you should consider using it. Gesso creates a smooth base and keeps colors from soaking into the fabric.
Here’s how you use gesso:
- Lay your tote bag flat.
- Use a wide brush to spread a thin layer of gesso over the area you want to paint.
- Let it dry completely. This usually takes about 30 minutes.
You don’t have to use gesso, but it can make a big difference. Your paint will glide on smoothly, and your finished design will pop.
Pro Tip: Try painting a small patch with and without gesso. You’ll see how much brighter and smoother your artwork looks with it.
Now your canvas tote bag is ready for the next step. With a clean, smooth surface and a well-organized workspace, you’re set up for success. Let’s move on to planning your design!
Planning Your Design
You’re ready to get creative! This is where you decide what your canvas tote bag will look like. Good design and planning help you avoid mistakes and make your artwork pop. You don’t have to be a professional artist. You just need a clear idea and a few simple tools.
Before you start, think about these things:
- Purpose of the tote bag (Is it for groceries, books, or gifts?)
- Material selection (Some canvas is thicker than others)
- Size and shape (Big bags need bigger designs)
- Color scheme (Pick colors that match your style)
- Budget (Some methods cost more than others)
Let’s look at some popular ways people plan their designs and how each one can change the final look:
| Method | Description | Influence on Outcome |
|---|---|---|
| Appliqué | Fabric shapes or designs sewn or glued onto the bag. | Adds contrasting textures and colors. |
| Stamping | Repeating patterns using fabric ink and stamps. | Creates custom backgrounds or border designs. |
| Heat Press Vinyl | Professional design application using heat. | Ideal for logos and intricate designs. |
| Beading and Sequins | Incorporating beads or sequins for decoration. | Adds sparkle and dimension to designs. |
| Fabric Markers | Drawing directly onto the bag for detailed designs. | Allows for sharp lines and intricate detailing. |
| Decoupage | Adhering paper cutouts to the bag for a unique design. | Utilizes printed designs or photos for decoration. |
| Patches | Iron-on or sew-on patches for personalization. | Reflects personal style and interests. |
Tip: Heat transfer printing works great for detailed, colorful designs. Embroidery gives your bag a fancy, long-lasting look.
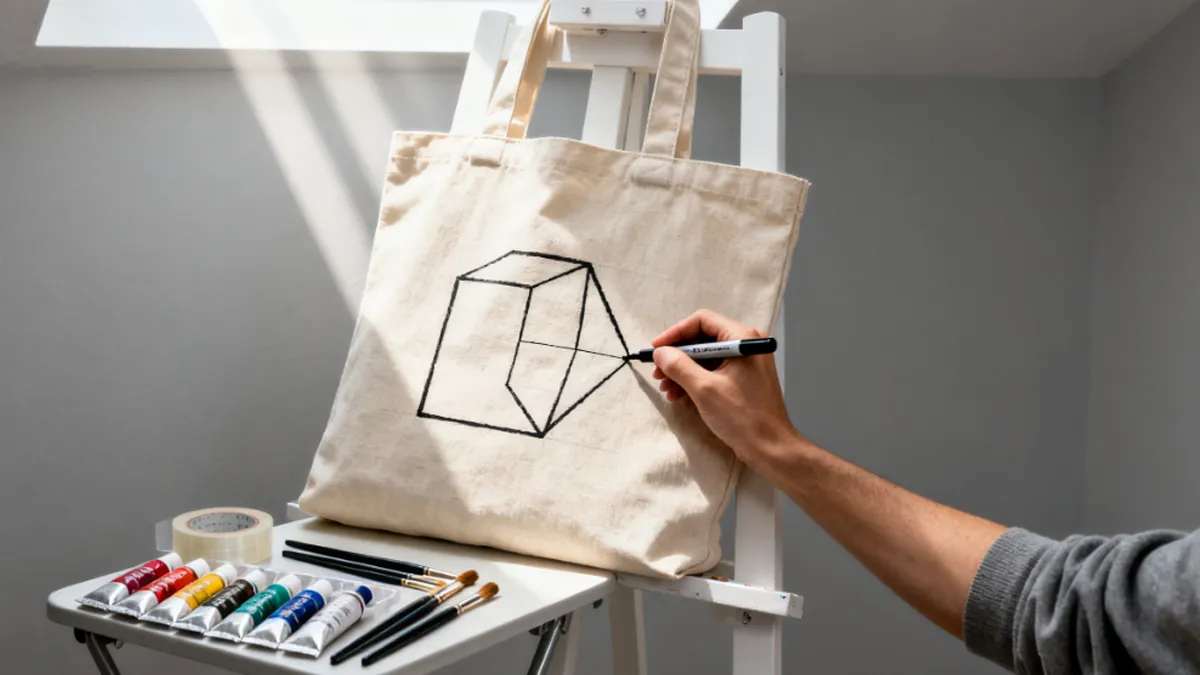
Freehand Sketching
If you love drawing, freehand sketching is a fun way to start. Grab a pencil or some chalk and lightly sketch your design right onto the canvas. You can erase or adjust lines until you’re happy. This method lets you create anything you imagine—flowers, animals, or cool patterns.
- Use light strokes so you can paint over them easily.
- Try sketching on paper first if you feel nervous.
- Don’t worry about mistakes. You can always paint over them!
Note: Freehand sketching gives your tote bag a personal touch. Your style shines through every line.
Stencils and Templates
Want perfect shapes or repeating patterns? Stencils and templates make it easy. You can buy them or make your own from cardboard or plastic. Place the stencil on your bag, then dab paint over it with a sponge or brush.
- Stencils help you create neat letters, stars, or geometric shapes.
- Templates work well for larger designs, like animals or logos.
- Masking tape can help you make straight lines or block off areas.
Using stencils saves time and helps you get a clean, professional look. You don’t have to worry about shaky hands or uneven lines.
Image Transfer
If you want to use a photo or a printed design, image transfer is the way to go. You can print your image on special transfer paper, then iron it onto the canvas. This method works well for detailed pictures or logos.
- Choose high-quality images for best results.
- Follow the instructions on your transfer paper.
- Let the design cool before you start painting around it.
Image transfer lets you add photos, quotes, or even your favorite cartoon characters. Your tote bag will stand out and look unique.
Pro Tip: Try combining methods! Sketch a border, use a stencil for the center, and add an image transfer for extra flair.
Now you know how to plan your design. Pick the method that fits your style and purpose. Have fun and let your creativity lead the way!
How to Paint on Canvas Tote Bags
Ready to start painting? This is where your canvas tote bag comes to life! You’ve got your design planned, your workspace set up, and your supplies ready. Now, let’s walk through how to paint on canvas tote bags step by step. I’ll share some painting techniques and tips so you can get vibrant colors and a smooth finish.
Prepping for Paint
Before you dip your brush into paint, take a moment to prep your canvas tote bag. This step makes a big difference in how your colors look and how long your design lasts.
- Place cardboard inside the bag. This keeps paint from bleeding through to the other side.
- Lay your bag flat. Smooth out any wrinkles so your brush glides easily.
- Choose your brushes. Thick brushes work best for big areas. Thin brushes help with details and lines.
- Pour a small amount of paint onto your palette. You don’t need much to start. You can always add more.
- Wet your brush slightly. Dip it in water, then dab off the excess on a paper towel. This helps the paint spread smoothly.
Tip: Test your paint on a scrap piece of canvas before you start. You’ll see how the colors look and how they react with the fabric.
Applying Paint
Now comes the fun part—adding colors to your canvas tote bag! If you want to know how to paint canvas bags with bold, lasting colors, start with fabric paint. It sticks well and stays bright after washing. Acrylic paints also work great for canvas bag painting because they dry fast and let you layer colors easily.
Preventing Bleeding
Nobody likes messy edges. You want your lines crisp and your colors sharp. Here’s how you can keep paint from bleeding:
- Don’t overload your brush. Dip just the tip into paint. Wipe off extra paint before you touch the canvas.
- Paint in thin layers. Thick globs of paint can seep through the fabric.
- Use masking tape. Block off areas you don’t want to paint. Peel the tape off slowly once the paint dries.
- Let each color dry before adding another next to it. This keeps colors from mixing where you don’t want them to.
Note: If you see paint starting to bleed, blot it gently with a dry paper towel. Don’t rub—just dab.
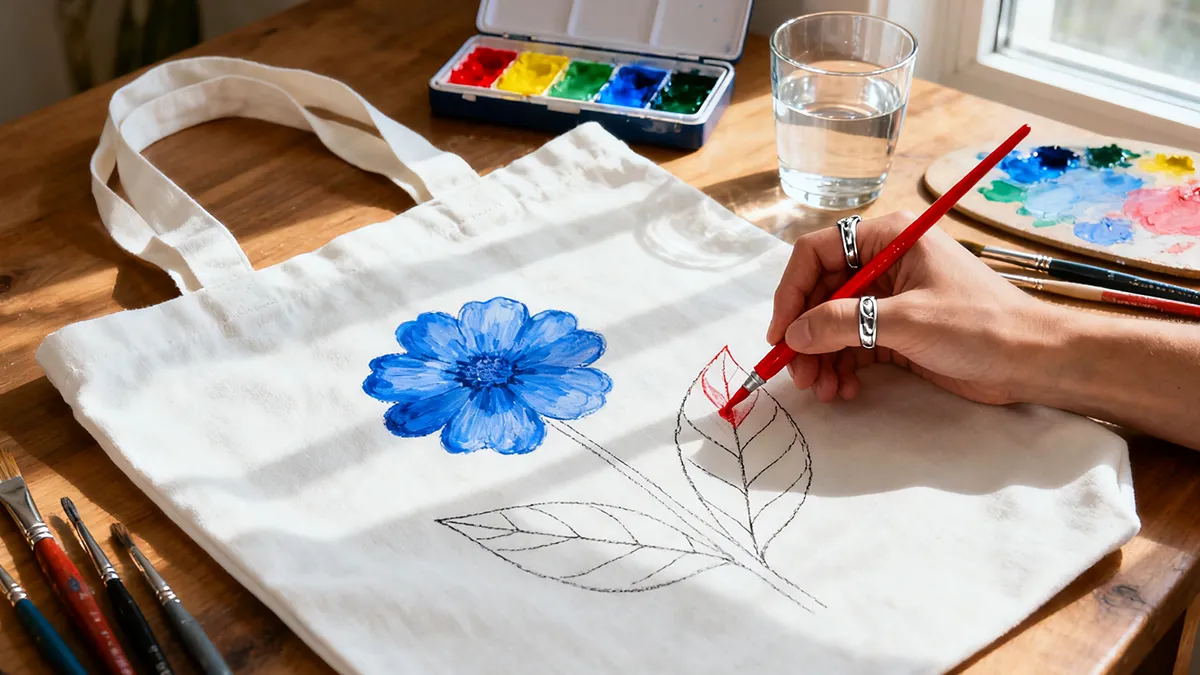
Layering Colors
Layering colors is the secret to making your canvas tote bags pop. You can create depth, shadows, and highlights with this painting technique. Here’s how to paint a canvas bag with vibrant layers:
- Start with lighter colors as your base. Let them dry before adding darker shades.
- Use acrylic paints for easy layering. They dry quickly and let you fix mistakes fast.
- Try fabric markers for sharp lines and details after your base colors dry.
- Build up colors slowly. Add thin coats and let each one dry before adding the next.
- Mix colors on your palette to get new shades. Test them on a scrap before using them on your canvas tote bag.
| Paint Type | Layering Ability | Drying Time | Best Use |
|---|---|---|---|
| Acrylic | Excellent | Fast | Multiple layers, easy fixes |
| Oil | Good | Slow | Detailed designs, ombré looks |
| Watercolor | Fair | Fast | Abstract effects, fades easily |
| Fabric Paint | Excellent | Medium | Bright, lasting colors |
| Fabric Markers | Good | Fast | Details, outlines |
Pro Tip: Use thick brushes for your background colors and thin brushes for details. This helps you control where the paint goes and keeps your design neat.
Drying Between Coats
Drying is super important in canvas bag painting. If you rush, your colors can smudge or bleed. Here’s how to paint on canvas tote bags and get crisp, clean results:
- Let each layer of paint dry before adding another. Most fabric paints and acrylics dry in about 20–30 minutes.
- If you’re in a hurry, use a hair dryer on a cool setting. Hold it a few inches away from the canvas tote bag.
- Check the paint with your finger. If it feels tacky, wait a bit longer.
- Don’t stack wet bags or fold them. Lay them flat until they’re completely dry.
- Once you finish painting a canvas bag, let it dry overnight before you use it or add any finishing touches.
Tip: Patience pays off! Drying between coats keeps your colors bright and your design sharp.
Painting a canvas bag is all about enjoying the process. You get to play with colors, try new painting techniques, and make hand painted tote bags that show off your style. If you ever wonder how to paint a canvas bag that lasts, remember to use good fabric paint, layer your colors, and let everything dry well. Your canvas tote bags will look amazing, and you’ll feel proud every time you carry them.
Finishing and Heat Setting
You’ve painted your canvas tote bag and watched your design come to life. Now, let’s make sure your artwork stays bright and beautiful for a long time. This part is all about finishing touches, heat setting, and making your painted tote bag durable enough for everyday use.
Final Touches
Before you move on to heat setting, take a moment to check your design. Look for any spots that need a little extra color or sharper lines. You can add highlights, shadows, or even a touch of sparkle with beading or sequins. Some people like to use fabric markers for crisp outlines or add a layer of decoupage for a unique look. If you want a professional finish, try heat press vinyl or stamping for bold patterns.
Here are some popular finishing techniques you can try:
- Add extra details with fabric markers.
- Sew or glue on appliqué shapes for texture.
- Use stamps for repeating patterns.
- Attach beads or sequins for sparkle.
- Try decoupage for a layered effect.
Tip: Let your creativity guide you. Small changes can make your tote bag stand out.
Heat Setting the Paint
Heat setting is the secret to making your painted canvas tote bag washable and long-lasting. If you skip this step, your design might fade or wash out after a few uses. You want your colors to stay bright, so don’t rush the drying and curing process.
First, let your paint dry completely. Most fabric paints need at least 30 minutes, but for the best results, let your bag air cure in a warm, dry spot for up to two weeks. This extra time helps with curing and makes sure your design is ready for heat setting.
When you’re ready, follow these steps:
| Technique | Description |
|---|---|
| Heat Setting | Place a clean cloth or teflon sheet over the design and iron on medium-high heat for 3–5 minutes, moving constantly. |
| Testing for Cure | Rub the back of the design with a damp white cloth. If no paint comes off, the piece is fully cured and wash-ready. |
- Place a pressing cloth or teflon sheet over your design.
- Set your iron to medium-high heat.
- Move the iron slowly over the area for 3–5 minutes.
- Keep the iron moving so you don’t scorch the fabric.
- Test for curing by rubbing a damp white cloth on the back. If no paint comes off, your design is ready for washing.
Note: You can also tumble dry your tote bag on low heat to help with curing. Always check the paint instructions for the best results.
Ensuring Durability
You want your painted tote bag to last through shopping trips, school days, and laundry cycles. Heat setting helps lock in the paint, but a few extra steps will boost durability.
- Always let your paint finish drying and curing before you use or wash the bag.
- Avoid harsh detergents when you clean your tote. Gentle washing keeps colors bright.
- Store your bag in a cool, dry place to prevent fading.
- If you see any cracks or fading, touch up the design with fabric paint and repeat the curing process.
Product testing shows that heat setting with an iron and a protective cloth makes your design more wash-resistant. Curing helps the paint stick to the canvas, so your artwork won’t peel or fade. Take care of your tote, and it will stay vibrant for years.
Pro Tip: Patience pays off. The longer you let your bag dry and cure, the better your results.
You’ve finished your canvas tote bag! With proper drying and curing, heat setting, and a few smart care tips, your hand-painted design will stay beautiful and strong.
Customizing and Inspiring Ideas
Now that you know how to paint canvas tote bags, you can make your bag unique. This is your chance to show your style and be creative. You can use customization to make your bag special. If you want your bag to match your personality or need new ideas, this part will help you get started.
Personalization
Making your tote bag personal makes it feel extra special. There are many ways to add your own style. Here are some popular ways people decorate their canvas bags:
- Begin with a plain canvas tote bag. It is strong and easy to decorate.
- Use acrylic or fabric paint for bright, lasting designs.
- Pick up paintbrushes for small details.
- Try stencils or stamps for neat patterns.
- Add iron-on transfers or patches for a finished look.
- Use embroidery thread and a needle to add texture.
- Draw with fabric markers or pens for fine details.
- Use fabric glue to stick on beads or trims.
You can use more than one method at a time. Painting and fabric markers help you make colorful, special designs. Heat transfer vinyl gives you sharp images with little work. Embroidery makes your bag look fancy and textured. Screen printing and digital printing are good for lots of bags or detailed pictures. Sewing on patches or trims adds style and makes your bag stronger.
When you decorate your bag, you feel proud of it. You get to show your style, and your tote is one-of-a-kind.
Tip: Mix painting with embroidery or add a patch to make your bag even cooler.
Patterns and Themes
Choosing a pattern or theme helps your design look good. You can pick something simple or something bold. Here is a table with some popular patterns and themes for canvas tote bags:
| Trend/Theme | Description |
|---|---|
| Minimalist Logos | Simple, clean designs that look modern and stylish. |
| Full-Color Art | Bright, multi-colored artwork that grabs attention. |
| Personalization | Unique, customized options that reflect your personality. |
| Eco-Friendliness | Designs that use sustainable materials or promote green living. |
| Limited-Edition Releases | Exclusive designs for special occasions or limited-time offers. |
You can paint a simple logo for a modern look. Or you can use lots of colors for a bold design. Eco-friendly themes are great if you care about the planet. Limited-edition designs make your bag feel rare and special.
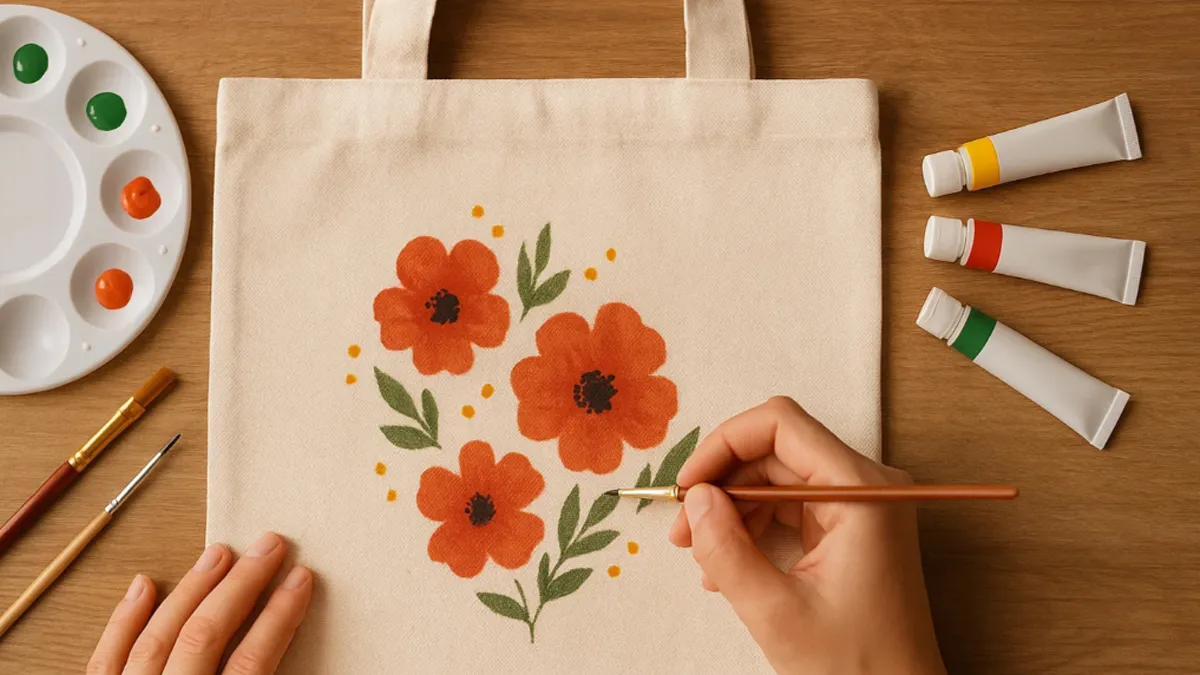
Note: Patterns like flowers, shapes, or food are always popular. You can also add quotes or funny sayings to make people smile.
Creative Inspiration
If you don’t know what to paint, that’s okay. Many people look for ideas in everyday life. Here are some ways to get inspired:
- Paint flowers you see in your yard.
- Add your name, initials, or a date that matters to you.
- Use quotes that show what you believe or make you laugh.
- Try memes or jokes for a fun look.
- Make tie dye effects for a bright, old-school style.
- Paint your favorite snack or dessert.
- Use flower patterns in happy colors.
You can find ideas anywhere. Look at nature, think about your hobbies, or remember something funny. Your bag can tell a story or just make you happy every time you use it.
Try new things and have fun. The best ideas come from trying and enjoying yourself.
Caring for Painted Canvas Bags
Taking care of your painted canvas tote bags keeps them looking fresh and colorful for a long time. You put effort into your design, so let’s make sure it stays vibrant and doesn’t fade or crack. Here’s how you can wash, store, and touch up your tote so it always looks its best.
Washing Tips
You don’t want your beautiful artwork to fade or peel after the first wash. Washing painted canvas tote bags takes a gentle touch. Here’s a step-by-step way to clean your bag without damaging your design:
- Fill a basin with cold or lukewarm water. Make sure your bag fits inside.
- Add a small amount of mild, bleach-free laundry detergent.
- Empty your tote bag completely before you start.
- Pre-treat any stains with a gentle detergent or a natural stain remover.
- Submerge your bag and scrub gently, especially on spots that get dirty often.
- For tough stains, mix baking soda and water, then scrub softly.
- Rinse your bag in clean water until all the soap is gone.
- Don’t wring or twist the bag. Press it gently with a towel to remove extra water.
- Air-dry your bag away from direct sunlight.
Tip: Direct sunlight can fade your painted design. Always let your bag dry in the shade.
Storage and Maintenance
Storing your canvas tote bags the right way helps prevent fading and keeps the material strong. You want your colors to stay bright and your canvas to last.
- Put your tote in a cool, dry place when you’re not using it.
- Keep it away from direct sunlight. UV rays can bleach colors and weaken the canvas.
- Make sure your bag is clean and dry before you store it.
- Fold your tote gently or hang it up to avoid creases.
Note: If you store your bag in a damp spot, mold can grow and ruin your artwork. Always choose a dry area.
Touch-Ups
Sometimes your design might get scratched or faded. Don’t worry—you can fix small mistakes and keep your tote looking new.
- Use fabric paint or markers to touch up faded spots or chipped areas.
- Let the paint dry completely before you use the bag again.
- If you see cracks, add a thin layer of paint and heat set it just like you did before.
- For stubborn stains that won’t come out, paint a new design over the area or add a patch.
| Problem | Quick Fix |
|---|---|
| Faded colors | Touch up with fabric paint |
| Small cracks | Add a thin layer of paint |
| Stubborn stains | Cover with a patch or new design |
Keeping your canvas tote bags clean and well-maintained means you get to enjoy your artwork every day. If you ever make a mistake, just grab your paint and fix it. Your tote can always look fresh and fun!
Conclusion
You’ve learned how to paint on canvas tote bags from start to finish. Here’s a quick recap to help you remember each step:
- Prepare your workspace and protect your bag with cardboard.
- Sketch your design lightly with a pencil.
- Apply base colors, then layer and add details.
- Let the paint dry fully.
- Heat set your design with an iron.
Try different techniques like stenciling, sponge painting, or fabric markers for unique results. Practice and patience always pay off. Share your finished tote bags or experiment with new ideas. If you want to create your own custom bags, we’re a canvas bags manufacturer and support custom OEM/ODM orders. Let your creativity shine—your next masterpiece is just a brushstroke away!
FAQ
How do I stop paint from bleeding through my canvas tote bag?
You can slide a piece of cardboard or thick paper inside your tote before you start painting. This barrier keeps paint from soaking through to the other side. It also gives you a flat, sturdy surface to work on.
What kind of paint works best for canvas tote bags?
Fabric paint is your best choice for painting canvas tote bags. It sticks well and stays bright after washing. Acrylic paint also works if you heat set it. Always check the label for washability.
Can I wash my painted canvas tote bag?
Yes, you can! Just wait until the paint cures and you heat set it. Wash your bag by hand in cold water with mild soap. Air-dry it in the shade to keep your design looking fresh.
How do I fix mistakes while painting my tote bag?
If you make a mistake, let the paint dry. Then, paint over it with a matching background color or add a new design. Fabric markers help with small touch-ups. Don’t worry—mistakes often lead to creative ideas!
Do I need to use gesso before painting on canvas tote bags?
You don’t have to use gesso, but it helps your paint go on smoother and look brighter. Gesso also makes your design last longer. Try painting a small area with and without gesso to see the difference.
How long should I let my painted tote bag dry before using it?
Let your painted canvas tote bag dry for at least 24 hours. For best results, wait up to two weeks before washing. This gives the paint time to cure and stick to the fabric.
Can I use stencils or stamps for my design?
Absolutely! Stencils and stamps make it easy to create neat shapes and patterns. They’re perfect if you want crisp lines or repeating designs. Just hold them steady and dab paint gently for the best results.
What should I do if my design starts to fade?
You can touch up faded spots with fabric paint or markers. Let the new paint dry, then heat set it again. Regular touch-ups keep your painted canvas tote bags looking bright and new.