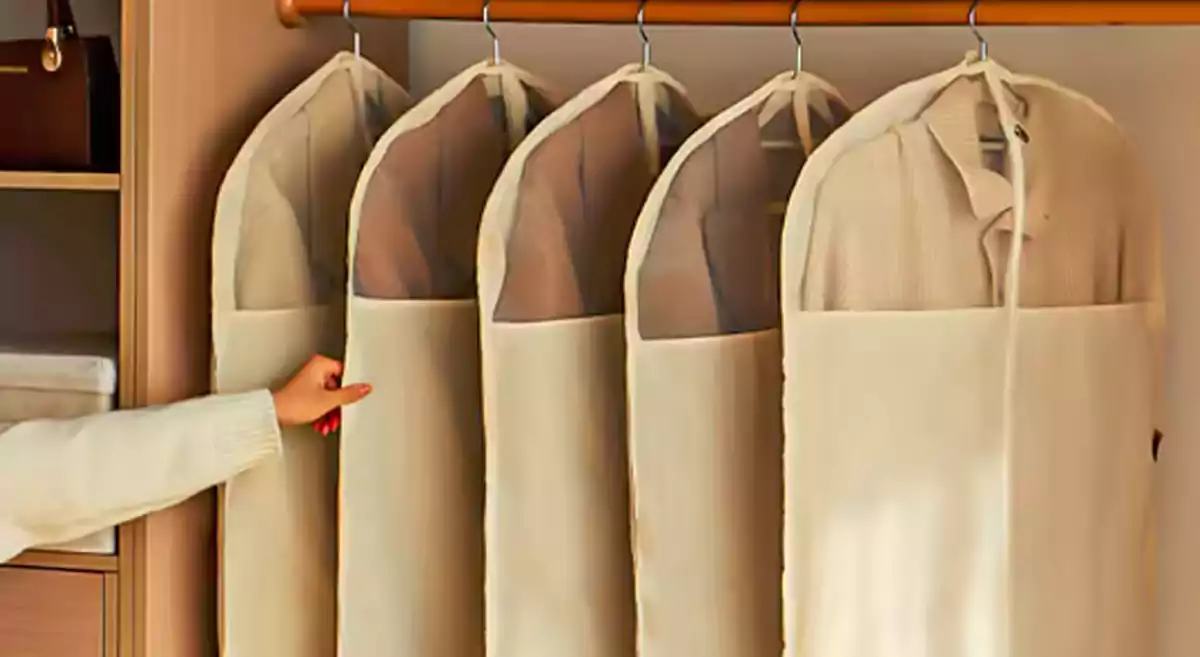
You want to learn how to make a garment bag with a zipper? This guide shows you easy steps for a diy garment bag that works for you. Get your workspace ready and collect your materials before starting. Many people pick a diy garment bag for garment protection, saving money, and better storage. You can also make it your own style or brand. Look at the table below to see why people like this diy project.
| Reason | Description |
|---|---|
| Garment Protection | Keeps clothes safe from dust and water. |
| Cost-Effectiveness | Saves money and lowers shipping costs. |
| Brand Enhancement | Lets you add logos or your brand. |
| Reusable Options | Helps you be more eco-friendly. |
| Storage Solutions | Makes it easier to organize and save space. |
Key Takeaways
- A DIY garment bag keeps your clothes safe from dust and water. It also helps you save money.
- Pick strong fabrics like polyester or nylon. These are easy to sew and last a long time.
- Use a full-length zipper so packing is simple. Make sure the zipper is at least 36 inches long.
- Get important tools like a sewing machine, scissors, and fabric clips before you start.
- You can add extra things like batting or lining. These make the bag work better and look nicer.
- Measure and mark your fabric carefully. This helps the bag fit well and stops mistakes when you cut.
- Make stress points stronger, like where the handles go. This helps your bag last longer.
- Check your finished bag for loose threads. Try the zipper to make sure it works smoothly.
Materials and Tools
Fabric Selection
Choosing the right fabric makes your garment bag strong and easy to sew. You want something that protects your clothes and lasts a long time. Synthetic fabrics like nylon and polyester stand out for their strength and durability. They work well for travel and everyday use. Natural fibers such as cotton feel soft and eco-friendly, so you can pick them if you care about the environment. Canvas gives you a sturdy option for long-term storage. If you want a luxury look, leather is a premium choice, but it costs more and feels heavier.
Here’s a quick table to help you compare fabrics:
| Material | Pros | Cons | Common Use |
|---|---|---|---|
| Polyester | Affordable, lightweight, water-resistant | Less breathable | Travel & retail bags |
| Nylon | Strong, durable, tear-resistant | Can be more costly | Premium travel bags |
| Canvas | Eco-friendly, sturdy, customizable | Heavier | Long-term storage |
| Leather | Luxurious, long-lasting, premium | Expensive, heavy | Luxury & branded bags |
| PEVA/Plastic | Low cost, dust-proof | Poor durability | Dry cleaning, retail |
Tip: If you’re new to sewing, polyester and nylon are easier to handle. They don’t fray much and you can sew them with a basic machine.
Zipper Choice
A good zipper keeps your garment bag closed and your clothes safe. You should look for a full-length zipper because it lets you open the bag wide and makes packing simple. Nylon zippers are popular since they glide smoothly and last a long time. Metal zippers feel strong but can be harder to sew. Make sure your zipper is at least 36 inches long so it fits the bag from top to bottom.
Note: If you want to add pockets or extra features, buy extra zippers in different sizes.
Essential Tools
You need a few basic tools to start your diy garment bag project. Here’s a list to help you get ready:
- Sewing machine
- Iron
- Scissors
- Frixion pen (for marking)
- Fabric clips
You also need fabric, a zipper, and pieces for the back, front, and gusset. Most diy sewing pattern guides suggest using 1-3/4 yards of fabric and a zipper that’s at least 36 inches long. You can find Kraft-tex for extra structure. If you want to customize your bag, grab some batting or lining.
| Item | Quantity |
|---|---|
| Fabric | 1-3/4 yards |
| Zipper | 1 (36″ long) |
| Back piece | 1 (21″ x 44″) |
| Front pieces | 2 (11″ x 44″) |
| Gusset pieces | 3 (5″ x 44″) |
| Sewing machine | 1 |
| Iron | 1 |
| Scissors | 1 |
| Frixion pen | 1 |
| Fabric clips | Several |
If you want your diy project to go smoothly, set up your workspace with all these tools before you start.
Optional Supplies
You want your garment bag to stand out or work better for your needs? You can grab some optional supplies to make your project more fun and useful. These extras help you add style, strength, or special features. You don’t have to use them, but they can make your bag look more professional or fit your personal taste.
Here’s a list of popular optional supplies:
- Batting: Adds padding and structure. Your bag feels thicker and protects clothes from bumps.
- Lining Fabric: Makes the inside smooth. You can use cotton, satin, or polyester. Lining keeps your clothes from snagging and gives your bag a finished look.
- Bias Tape: Covers raw edges. You get a neat finish and extra strength at seams.
- Interfacing: Stiffens parts of the bag. Handles and pockets stay firm and don’t flop.
- Webbing or Straps: You can add handles or a shoulder strap. Webbing is strong and easy to sew.
- Velcro or Snaps: Closes pockets or adds extra security. You can use them for quick access.
- Clear Vinyl: Makes see-through pockets. You can spot your items fast.
- Decorative Elements: Try embroidery, patches, or iron-on logos. You can show off your brand or style.
- Extra Zippers: Add more pockets or compartments. You can organize shoes, ties, or accessories.
Tip: If you want to make your bag unique, pick a few extras that match your needs. You don’t need all of them. Choose what fits your style or the way you plan to use the bag.
Let’s look at a quick table to help you decide:
| Optional Supply | Why Use It? | Best For |
|---|---|---|
| Batting | Extra padding and structure | Travel, fragile items |
| Lining Fabric | Smooth, finished interior | Everyday use, luxury |
| Bias Tape | Neat edges, strong seams | DIY beginners |
| Interfacing | Stiff handles, pockets | Custom designs |
| Webbing/Straps | Handles, shoulder straps | Heavy bags, easy carry |
| Velcro/Snaps | Secure pockets | Quick access |
| Clear Vinyl | See-through pockets | Accessories, ID cards |
| Decorative Items | Personal style, branding | Gifts, business |
| Extra Zippers | More compartments | Organization |
You can mix and match these supplies. If you want a simple bag, you can skip most extras. If you want a bag that feels special, you can add lining, handles, or pockets. You can even use leftover fabric for pockets or decorations.
Some people like to use batting for extra protection. Others want lining to make the bag feel soft inside. If you travel a lot, you might want webbing for strong handles. If you want to show your brand, you can add patches or embroidery.
Note: You can find most of these supplies at fabric stores or online. If you’re not sure how to use something, you can ask staff or check tutorials.
You can start with basic materials. If you feel confident, you can try optional supplies next time. You can always upgrade your bag later. You get to decide what works best for you!
How to Make a Garment Bag: Cutting and Preparation
Measuring and Marking
You want your garment bag to look neat and fit your clothes perfectly. Start with careful measuring and marking. This step sets the foundation for the whole project. Here’s a simple way to get it right:
- Lay your fabric flat with the right sides facing out.
- Place your paper pattern on top and smooth out any wrinkles. You can iron the fabric if needed.
- Pin the pattern to the fabric. Make sure you pin through important points like corners and notches.
- Fold back the top layer of fabric at each corner and mark the spot with a fabric pen.
- For the sides, fold back the top layer until you see the pin, then mark that spot.
- If you need to mark inside points, expose the pinned spot and mark both layers.
- Remove all pins when you finish. You’ll see clear marks on the wrong side of the fabric.
Tip: Always double-check your measurements before you cut. Incomplete measurements or unclear marks can lead to mistakes later.
You want to avoid common errors. Many people forget to measure all sides or skip marking the center for the zipper. Take your time with this step. It saves you trouble later in the process.
Cutting Main Panels
Now you’re ready to cut the main panels for your garment bag. Use sharp scissors for clean edges. Follow these steps for the best results:
- Check your marked lines before you cut. Make sure everything matches your garment bag pattern.
- Cut slowly and keep your hand steady. Try not to lift the fabric too much.
- If your pattern has notches or holes, cut them out. These help you line up pieces later.
- Keep all your cut pieces together so you don’t lose any parts.
Note: Missing tolerances or unclear material specs can cause problems. Always follow your pattern and check your fabric type.
You might want to cut extra pieces for practice if this is your first time. It’s better to have a spare than to run out of fabric.
Garment Bag Pattern
Choosing the right garment bag pattern makes your project easier. Patterns come in different sizes for different clothes. Here’s a quick table to help you pick the right size:
| Garment Type | Recommended Bag Length | Use Case |
|---|---|---|
| Men’s Suits | 40–45 inches | Business Travel, Carry-On |
| Evening Gowns | 55–60 inches | Weddings, Formal Events |
| Overcoats/Winter Wear | 50–55 inches | Seasonal Storage, Travel |
| Children’s Clothing | 30–35 inches | School Events, Recitals |
If you want to fit more than one outfit, choose a longer bag. For a single suit or dress, a 40-inch or 47-inch bag works well. Always match your pattern to the clothes you plan to store.
Pro Tip: Mark the center of your main panel for the zipper. Draw a straight line down the middle and make a 1.5-inch mark where the zipper will go. Pin the two pieces together, right sides facing, and stitch to the ends you marked. Baste the opening closed before installing your zipper. Press the seam allowance open for a neat finish.
You can find many free patterns online or use the measurements above to make your own. This tutorial helps you understand each step, so you can adjust the size if you need to.
Remember, skipping steps or ignoring real usage conditions can lead to problems. Always check your pattern, measure twice, and cut once. This way, your garment bag will look great and last a long time.
Cutting Zipper and Pocket Pieces
Now that you have your main panels ready, it’s time to cut the pieces for your zipper and pockets. This step helps you add function and style to your garment bag. You want your zipper to fit perfectly and your pockets to hold everything you need.
Cutting the Zipper Opening
You need a straight, even opening for your zipper. Here’s how you do it:
- Find the center line you marked earlier on your main panel.
- Measure the length of your zipper. Most people use a 36-inch zipper, but you can use a longer one if your bag is bigger.
- Mark the start and end points for the zipper on your fabric. Use a fabric pen for clear lines.
- Draw a straight line between these points. This line shows where you will cut.
- Double-check your measurements before you cut. You want the zipper to fit snugly.
Tip: If you feel nervous about cutting, practice on a scrap piece of fabric first. This helps you get comfortable with the process.
Cutting Pocket Pieces
Pockets make your garment bag more useful. You can add one or more pockets for shoes, ties, or small accessories. Here’s a simple way to cut pocket pieces:
- Decide how many pockets you want. Most people add one large pocket or two smaller ones.
- Measure the size you need. A good size for a shoe pocket is 10 inches by 14 inches. For smaller pockets, try 6 inches by 8 inches.
- Mark the pocket shapes on your leftover fabric. Use a ruler for straight edges.
- Cut out the pocket pieces with sharp scissors. Keep the edges neat.
| Pocket Type | Suggested Size | Best Use |
|---|---|---|
| Large Pocket | 10″ x 14″ | Shoes, folded shirts |
| Small Pocket | 6″ x 8″ | Ties, socks, accessories |
| Clear Vinyl Pocket | 5″ x 7″ | ID cards, tickets |
Note: If you want see-through pockets, use clear vinyl. Cut it the same way as fabric, but go slow because vinyl can slip.
Marking for Placement
You want your pockets and zipper to line up just right. Here’s how you mark for placement:
- Lay your main panel flat.
- Place the pocket pieces where you want them. Try different spots until you like the look.
- Mark the corners of each pocket with a fabric pen.
- For the zipper, check that your opening matches the zipper length.
Pro Tip: Leave at least 2 inches between the edge of the bag and the pocket. This gives you room to sew seams later.
Common Mistakes to Avoid
- Don’t cut the zipper opening too wide. The zipper might not cover the gap.
- Don’t forget to add seam allowance to your pocket pieces. Add 1/2 inch on each side.
- Don’t place pockets too close to the edge. You need space for seams.
If you follow these steps, you’ll have all your zipper and pocket pieces ready. You can move on to sewing and see your garment bag come together!
Sewing the Zipper
Layering Fabrics
You’re ready to add a zipper to your garment bag. Start by layering your fabrics the right way. Place the main panels with the right sides facing each other. Make sure the edges line up neatly. If you’re using a lining, sandwich it between the outer fabric layers. This step helps you get a clean finish when you turn the bag right side out.
Before you begin sewing, check that your fabric and zipper match in weight and type. Use sharp needles and high-quality thread for a strong hold. Lay the zipper face down along the center seam where you marked the opening. Pin or clip it in place so it doesn’t shift. This setup keeps everything stable and makes the next steps easier.
Tip: Use a zipper foot on your sewing machine. It lets you stitch close to the zipper teeth without hitting them.
Topstitching Zipper
Now, you’ll secure the zipper with topstitching. Set your machine to a stitch length between 3.5mm and 4mm. This length gives you a neat look and holds the zipper firmly. You can use a straight stitch for a classic finish or try a zig-zag stitch for a decorative touch. Avoid heavy thread in the bobbin to keep the stitches smooth.
Start at the top of the zipper and sew down one side. Keep the stitches straight and even. When you reach the bottom, pivot the fabric and sew across the end of the zipper. Then, sew up the other side. This method keeps the zipper secure and helps it last longer.
If you want your garment bag to look professional, press the seam open before you topstitch. This step creates a crisp edge and makes it easier to sew close to the zipper teeth.
Aligning and Attaching Zipper
Getting the zipper straight is key. Pin both sides of the zipper tape in place, then close the zipper to check the alignment. Mark the seam line with chalk or a washable marker. This guide helps you keep a consistent distance from the teeth.
As you sew, stop every few inches to check that you haven’t stitched too close to or over the teeth. If you notice any misalignment, remove the stitches and adjust before continuing. For best results, stop sewing about two inches before the bottom of the zipper. Close the zipper and mark where it stops on both sides. Open the zipper and sew up to those marks. Finish the seam below the zipper from the right side, starting just before where the zipper stitching ended.
Note: If you run into issues like puckering or stiffness, try using interfacing along the seam allowance or basting tape for extra stability.
With these steps, you’ll add a zipper that looks neat and works smoothly. Take your time, and your garment bag will turn out great!
Troubleshooting Zipper Issues
Zippers can be tricky, but you don’t have to stress. If you run into problems, you can fix most of them with a few simple tricks. Let’s look at some common zipper issues and how you can solve them.
1. Zipper Won’t Glide Smoothly
Sometimes, the zipper feels stuck or hard to move. This happens if the fabric gets caught or the zipper teeth don’t line up.
- Check for fabric in the teeth. Gently pull the fabric away from the zipper. Try zipping again.
- Rub a little soap or candle wax on the zipper teeth. This helps the slider move smoothly.
- Make sure the zipper is straight. If it’s crooked, unpick the stitches and realign it.
Tip: Always test the zipper before you sew the final seams. It’s easier to fix problems now than later.
2. Zipper Puckers or Waves
If you see bumps or waves along the zipper, don’t worry. This usually means the fabric stretched while you sewed.
- Use fabric clips instead of pins. Clips hold the fabric flat and stop it from shifting.
- Sew slowly and don’t pull the fabric. Let the machine feed the fabric at its own pace.
- Press the zipper area with an iron. This can flatten small puckers.
3. Zipper Pull Comes Off
If the zipper pull slides off, you can fix it.
- Line up the zipper teeth. Gently slide the pull back onto both sides.
- If the pull is broken, you can buy a replacement at most craft stores.
4. Zipper Doesn’t Close All the Way
If the zipper won’t close, check the teeth.
- Look for bent or missing teeth. You may need to replace the zipper if it’s damaged.
- Try zipping from the other end. Sometimes, the slider works better in one direction.
Quick Reference Table
| Problem | Quick Fix |
|---|---|
| Stuck zipper | Soap or wax on teeth |
| Fabric caught | Gently pull fabric free |
| Puckering | Press with iron, sew slowly |
| Misaligned zipper | Unpick and realign |
| Broken pull | Replace with new pull |
Note: Don’t get discouraged if your zipper gives you trouble. Every sewist faces zipper issues at some point. You’ll get better with practice!
If you keep these tips in mind, you’ll handle zipper problems like a pro. Take your time, check your work, and enjoy the process. Your garment bag will look great!
Assembling the Bag
Sewing Seams
You’re almost there! Now, it’s time to join your garment bag pieces together. Start by matching up the edges of your main panels. Use fabric clips or pins to keep everything in place. When you begin sewing, choose a plain seam and press it open for a neat finish. This method works well for most fabrics and gives your bag a smooth look.
Here’s what you need to remember for strong seams:
- Use a lockstitch (Type 301) for durability.
- Set your machine to about 8-10 stitches per inch. This keeps the seam strong but not too stiff.
- Keep a seam allowance of 1/2 inch from the edge. This gives you enough room for trimming or finishing.
- Pick a thread color that matches your fabric. Polyester thread works for most projects.
- Double-check the placement of hems and pockets before you sew.
If you want extra strength, try a 5-thread safety stitch or overlock the edges. This helps prevent fraying, especially if you use canvas or nylon.
Tip: Press your seams open with an iron after sewing. This step makes your bag look crisp and helps the lining fit better.
Adding Lining
A good lining protects your clothes and makes your garment bag last longer. You can pick from several materials, depending on how you plan to use your bag. Check out this table to see which lining works best for you:
| Material | Advantages | Best Use Case |
|---|---|---|
| Nonwoven Fabric | Lightweight, cost-effective, flexible | Short-term travel or storage |
| Polyester | Durable, water-resistant, keeps color | Long-term storage, daily use |
| Nylon | Strong, abrasion-resistant | Frequent travel, active use |
| Canvas | Very durable, abrasion-resistant | Heavy-duty, long-term storage |
To add the lining, cut it to match your main panels. Place the lining with the wrong side facing the inside of your bag. Sew around the edges, leaving a small opening to turn the bag right side out. Once you finish, close the opening with a few hand stitches.
- Nonwoven fabric works well for dust protection.
- Polyester lining gives you water resistance.
- Nylon stands up to lots of use.
- Canvas is best for heavy-duty bags.
Reinforcing Points
Some parts of your garment bag need extra support. These spots get the most stress, like where you attach handles or where the hanger hook sits. You can use these methods to make your bag stronger:
| Method | Description |
|---|---|
| Double-layer fabric panels | Add extra fabric at the hanger zone or bottom corners. |
| Bartack stitching | Use tight, short stitches at stress points for more durability. |
| Internal webbing reinforcement | Sew webbing inside the bag at the hanger or handle area. |
Don’t forget to reinforce these areas:
- Handle attachment points
- Zipper corners
- Hanger hook area
- Fold hinges
Note: Reinforcing these spots keeps your bag from tearing, even if you pack it full or carry heavy clothes.
Take your time with these steps. Good sewing and strong reinforcements make your garment bag last for years.
Handles and Straps
Handle Styles
You have a lot of choices when it comes to handles for your garment bag. Some people like short handles that you can grab quickly. Others prefer longer handles that fit over your shoulder. You can even mix and match styles to fit your needs.
Here’s a quick look at popular handle styles:
| Handle Style | Description | Best For |
|---|---|---|
| Short Fabric Loop | Simple, easy to sew, fits in your hand | Quick grab-and-go |
| Long Fabric Strap | Worn over the shoulder, more comfortable | Carrying heavier loads |
| Webbing Handle | Very strong, lasts a long time | Travel and daily use |
| Leather Handle | Looks fancy, feels soft | Gifts or luxury bags |
| Padded Handle | Extra comfort, less strain on your hand | Long trips |
You can pick a style that matches your fabric and how you plan to use your bag. If you want something strong, try webbing. If you want a soft feel, padded handles work well.
Tip: Test the handle length before you sew. Hold it up and see if it feels right for you.
Attaching Handles
You want your handles to stay put, even when your bag is full. There are several ways to attach handles, and each one has its own benefits. Here’s how you can do it:
- Sewing: Use strong thread and a heavy-duty needle. This method works best for fabric straps. Sew back and forth a few times to make it extra strong.
- Grommets: Add metal grommets to your bag. Slide the handle through and secure it. This gives your bag a modern look.
- Rivets: Use rivets for heavy straps. They add durability and keep the handle from tearing away.
- Clips and Rings: Attach handles with clips or rings. This lets you adjust the length or remove the handle if you want.
- Best Practices: Always reinforce the area where you attach the handle. Use extra fabric or interfacing so the handle doesn’t rip out.
Note: If you carry heavy clothes, double-check your handle attachment. Reinforcing the area helps your bag last longer.
Optional Shoulder Strap
A shoulder strap can make your garment bag much easier to carry. You can keep your hands free for other things, like holding your phone or a cup of coffee. Many people love this feature, especially when traveling.
Here’s why you might want to add a shoulder strap:
- Convenience: Carry your bag hands-free and move around easily.
- Ease of Transport: The bag stays lightweight and you can attach it to rolling luggage.
- Organization: Some bags have special features like hanger clamps and big pockets. These help keep your clothes neat and give you space for accessories.
You can make a shoulder strap from webbing or fabric. Add clips so you can take it off when you don’t need it. Adjust the length to fit your height. If you want extra comfort, add a padded section.
Tip: Try your bag on with the strap before you finish sewing. Make sure it feels good and doesn’t slip off your shoulder.
With the right handles and straps, your garment bag will be easy to carry and look great. Pick the options that fit your style and needs!
Finishing Touches
Adding Pockets
You can make your garment bag even more useful by adding pockets. Pockets help you organize shoes, ties, or small accessories. You have several options when it comes to pocket styles. Here are the most common types you might want to try:
- Patch Pocket – You sew this pocket right on top of the fabric. It’s simple and works for almost anything.
- Welt Pocket – This pocket has a narrow opening with a neat strip of fabric. You see it a lot in formal wear.
- Flap Pocket – This one has a flap that covers the opening. It’s popular in jackets and keeps things secure.
- Zipper Pocket – You add a zipper for extra safety. It’s great for travel and keeps items from falling out.
- Cargo Pocket – This pocket is large and expandable. It’s perfect if you need to carry more.
You can choose one or mix a few types. If you want to keep things simple, start with a patch pocket. For more security, try a zipper pocket. When you sew pockets, remember to reinforce the corners. This step keeps them strong and helps your bag last longer.
Tip: Place your pockets before you finish sewing the bag. This way, you can reach all the spots easily and make sure everything lines up.
Trimming Threads
After you finish sewing, you’ll see little threads sticking out. These loose threads can make your bag look messy. You want your garment bag to look neat and professional, so take a few minutes to trim them.
- Use small, sharp scissors for the best results.
- Snip threads close to the fabric, but don’t cut into your stitches.
- Check all seams, pockets, and around the zipper.
- Turn the bag inside out and look for hidden threads.
If you see any knots or tangles, trim those too. Clean edges show you care about your work. This step only takes a few minutes, but it makes a big difference.
Final Pressing
Pressing your garment bag gives it a crisp, finished look. You want your bag to look its best, so follow these steps:
- Slide the open end of your finished bag onto your ironing board. Press as much as you can reach.
- Work around the open end. Press the top edge and the spots where you attached the handles.
- For the bottom, reach inside the bag and flatten the corners. Press the seams first.
- Use steam to help set the shape. Steam helps the fabric “remember” the fold along the bottom edge.
- Tuck the front lining corners into the cover corners. Press again to create a nice, sharp fold.
Note: Always check your iron’s heat setting. Some fabrics need a lower temperature. Test on a scrap piece if you’re not sure.
Pressing is the last step before you use your new garment bag. It smooths out wrinkles and sets the shape. You’ll see your sewing work come together and look professional.
Inspecting Bag
You’ve finished sewing, pressing, and adding all the details to your garment bag. Now it’s time to give your project a good inspection. This step helps you catch any small mistakes and make sure your bag is ready for real use. Think of it as your final quality check—just like a pro!
Start by laying your garment bag flat on a clean surface. Look at the outside first. Do you see any loose threads or uneven seams? If you spot anything, grab your scissors and trim those threads. Smooth out the fabric with your hands and check for wrinkles or puckers. Your bag should look neat and tidy.
Next, open the zipper all the way. Test it a few times. Does it glide smoothly from top to bottom? If it sticks, try rubbing a little soap or wax on the teeth. Make sure the zipper lines up at both ends. A straight zipper keeps your clothes safe inside.
Now, check the handles and straps. Give them a gentle tug. They should feel secure and strong. If you notice any wobbly stitches or weak spots, reinforce them with a few extra stitches. You want your handles to hold up, even when your bag is full.
Move on to the pockets. Open and close each one. Do the zippers, snaps, or Velcro work well? Slide your hand inside to check for rough edges or loose threads. Pockets should feel smooth and roomy. If you used clear vinyl, make sure it’s not wrinkled or cloudy.
Here’s a quick checklist to help you inspect your bag:
- Check all seams for strength and neatness.
- Test the zipper several times.
- Tug on handles and straps.
- Inspect pockets for function and finish.
- Look for loose threads or missed stitches.
- Check the lining for smoothness and fit.
- Make sure the bag folds easily if it’s a folding style.
Tip: Try packing a suit or dress inside your bag. Zip it up and carry it around the room. This test shows you if the bag works well in real life.
If you find any problems, don’t worry. Small fixes are easy at this stage. A few extra stitches or a quick press with the iron can make a big difference. When everything looks and feels right, you can feel proud of your work. Your custom garment bag is ready to use or give as a gift!
Troubleshooting Tips
Common Mistakes
You might run into a few bumps while making your garment bag. Don’t worry—everyone makes mistakes, especially when learning something new. Here are some of the most common problems people face:
- Misaligned seams can make your bag look uneven.
- Poorly finished edges might fray or come apart.
- Sewing pieces in the wrong order can cause confusion.
- Zipper or closure issues can keep your bag from closing right.
- Puckering happens when fabric bunches up along seams.
- Seam slippage means the stitches pull apart.
- Open seams leave gaps in your bag.
- Roping hems twist instead of lying flat.
Tip: Take your time with each step. Double-check your pattern and marks before you sew. If you’re not sure, look back at this tutorial for guidance.
When you add pockets, think about where you want them. Place pockets 3 to 6 inches below the natural waist for comfort. Measure a favorite garment to find the best spot. Make sure pocket bags don’t hang below the hem, especially if you’re making a shorter bag.
Adjusting Size
You may want your garment bag to fit different types of clothing. Here’s how you can adjust the size:
- Measure the longest item you want to pack, like a suit jacket or dress.
- Add a few inches to your measurement for extra space.
- Check the depth of your bag. A gusset of four inches can hold two or three items.
- For bigger trips, use a gusset of ten inches or more.
- Pick hangers that match the shape of your clothes.
- Don’t overstuff your bag. This keeps your outfits wrinkle-free.
If you want to add more pockets, make sure they fit inside the bag without crowding your clothes. Always check your measurements before you cut.
Care and Maintenance
You want your garment bag to last a long time and keep your clothes safe. Here are some easy ways to care for it:
- Use breathable materials for your bag. This helps prevent moisture buildup.
- Stay away from plastics like PVC and PEVA. These can break down and release harmful stuff over time.
- Store your bag in a dark place, away from sunlight. This keeps your clothes from fading.
- Cotton or muslin bags work well. They let air flow and protect your clothes from dust and light.
- Wash your garment bag regularly to keep it clean and fresh.
- Don’t use dry-cleaning bags for storage. They often contain plastics that aren’t good for your clothes.
- Choose bags that are made to last and protect your clothes well.
Note: A little care goes a long way. Clean your bag, store it right, and it will serve you for years.
If you follow these tips, you’ll avoid most problems and enjoy a garment bag that works for every trip or closet.
Conclusion
You’ve learned every step in this tutorial, from picking fabric to sewing the zipper. You can make a garment bag that fits your style and protects your clothes. Custom patterns let you show off your brand, keep garments safe, and even spark conversations. As a garment bag manufacturer, we offer OEM and ODM custom services for any project. If you have questions about materials, design, or branding, just reach out. We’re here to help you create the perfect bag!
FAQ
How long does it take to make a garment bag?
You can finish a basic garment bag in about 2 to 3 hours. If you add pockets or lining, you might need more time. Take breaks if you need them.
Can I wash my DIY garment bag?
Most fabric garment bags are machine washable. Use cold water and gentle detergent. Air dry for best results. Always check your fabric label before washing.
What’s the best fabric for beginners?
Polyester or nylon works great for beginners. These fabrics are easy to sew and don’t fray much. You can also try cotton if you want a softer feel.
Do I need a special sewing machine?
No, you can use a regular home sewing machine. Just make sure you have a zipper foot. If you use thick fabric, try a heavy-duty needle.
How do I add more pockets?
You can sew extra pockets inside or outside your bag. Try patch pockets for an easy option. Place them before you sew the main panels together.
Where can I find a pattern for this project?
You can find free patterns online or create your own using the measurements in this tutorial. Adjust the size to fit your clothes or travel needs.