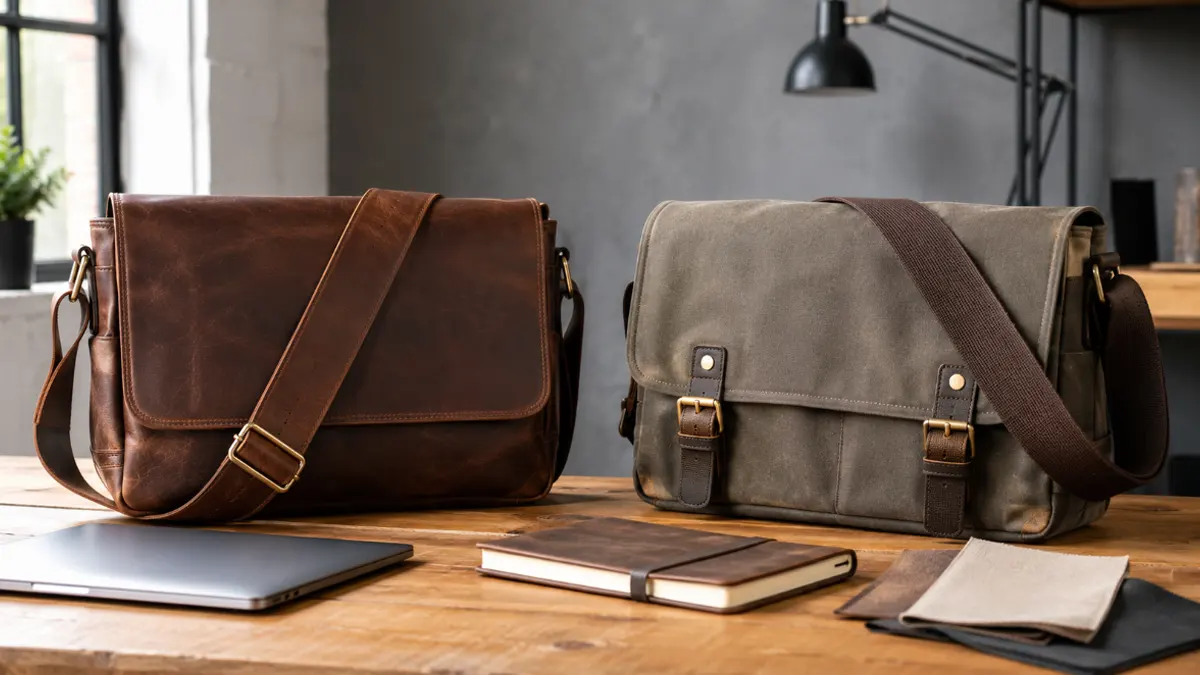
You can knit your own crossbody bag, even if you just picked up your first pair of needles. Making something by hand feels special. You get to choose your yarn, your colors, and your style. If you ever wondered how to knit a bag, this guide will help you start with confidence. Imagine showing off a bag you created yourself. You might surprise yourself with how easy and fun the process can be!

Key Takeaways
- You can knit a bag even as a beginner. Choose your yarn, colors, and style to make it unique.
- Select medium-weight yarn for easy handling. Cotton yarn is great for bags because it holds its shape.
- Use size US 7 to US 9 needles for most beginner projects. Metal needles help stitches slide easily.
- Gather essential tools like scissors, stitch markers, and a tape measure to make your knitting smoother.
- Start with the knit stitch, then learn the purl stitch. These are the building blocks for your bag’s fabric.
- Read patterns carefully. Abbreviations like ‘k’ for knit and ‘p’ for purl help guide your project.
- Knit the base flat, then pick up stitches to create the sides. This gives your bag structure.
- Add personal touches with embellishments like buttons, beads, or embroidery to make your bag truly yours.
Materials and Tools
Yarn Choices
You get to pick the yarn that matches your style and the look you want for your bag. Most beginners like to start with medium-weight yarn, also called worsted weight. This yarn feels easy to handle and works up quickly. Cotton yarn is a great choice for bags because it holds its shape and feels sturdy. Acrylic yarn is another option if you want something soft and budget-friendly. Wool can work too, but it may stretch more over time. Try to choose a yarn that is smooth and not too fuzzy. This makes it easier to see your stitches and fix mistakes if you need to.
Tip: Many simple bag patterns only need one skein of yarn. This keeps your project affordable and less overwhelming.
You can find yarn in almost any color. Go bold with bright shades or keep it classic with neutrals. If you want a unique look, try a variegated yarn that changes color as you knit. The choice is yours!
Needle Selection
Knitting needles come in many sizes and materials. For most beginner bag projects, you will use size US 7 to US 9 (4.5mm to 5.5mm) needles. Check your pattern for the exact size. Straight needles work for flat pieces, like the base of your bag. Circular needles help you knit in the round, which is perfect for the body of the bag. Circular needles also hold more stitches and feel lighter in your hands.
You can choose needles made of metal, wood, or plastic. Metal needles let your stitches slide easily. Wooden needles grip the yarn a bit more, which helps if your stitches slip off too often. Plastic needles feel light and cost less, so they are good for beginners.
Other Supplies
Besides yarn and needles, you need a few more tools to make your knitting smooth and fun. Here are some essentials:
- Small scissors for cutting yarn
- Tape measure to check your progress
- Stitch markers to keep track of your rounds or pattern repeats
- Needle point protectors to stop stitches from slipping off when you take a break
- Stitch holders for saving stitches you will use later
- Embroidery needles for weaving in ends and sewing pieces together
- A small crochet hook to pick up dropped stitches
- Project bag to keep everything organized
You might also want a needle gauge to check your needle size, cable needles for special patterns, and blocking mats to shape your finished bag. Some knitters use Eucalan, a gentle wash, to clean their projects.
Note: Having these supplies ready before you start helps you avoid frustration and keeps your project on track.
With the right materials and tools, you set yourself up for a fun and successful knitting experience. Now you are ready to learn the basic skills and start your bag!
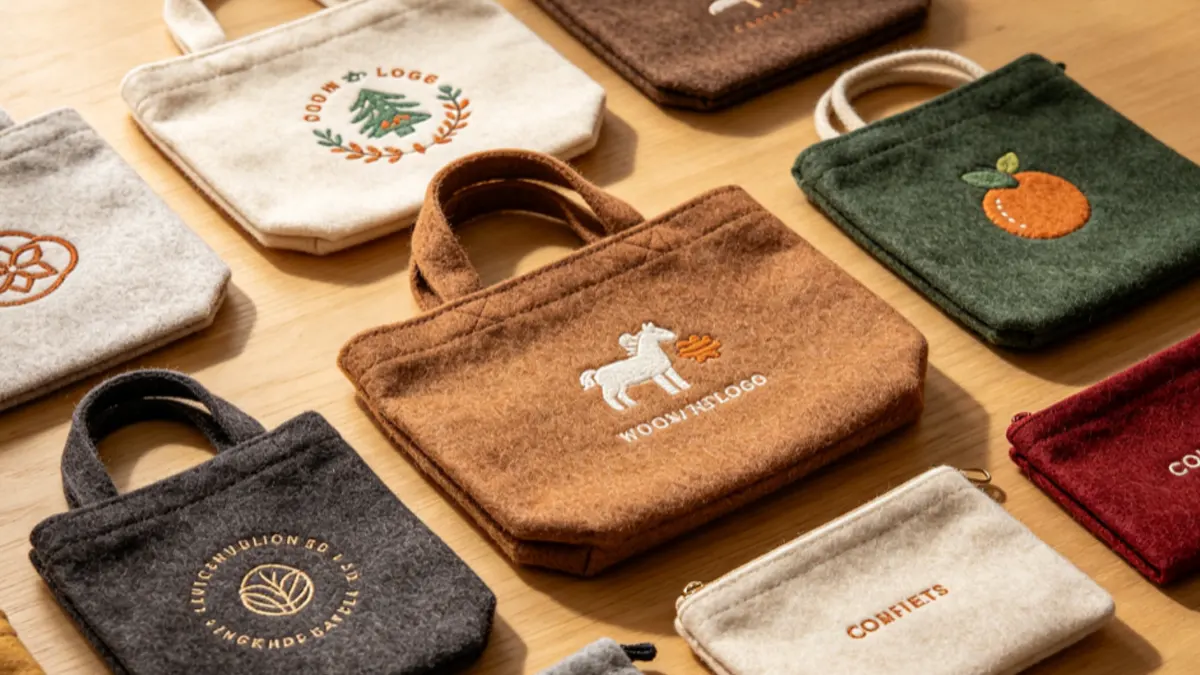
Optional Embellishments
You can make your knitted bag stand out with a few fun extras. Embellishments add personality and style. You get to decide how simple or bold you want your bag to look. Here are some popular options you might want to try:
- Buttons: You can sew a big button on the front for a classic closure. Pick a wooden button for a natural look or a colorful one for a pop of fun.
- Beads: Slide beads onto your yarn before you start knitting. You can add them to the strap or the body of the bag. Beads catch the light and make your bag sparkle.
- Patches: Iron-on or sew-on patches give your bag a playful touch. You can find patches with flowers, animals, or even your favorite words.
- Tassels and Pom-Poms: Make your own tassels or pom-poms with leftover yarn. Hang them from the sides or the zipper pull. They add movement and a bit of whimsy.
- Embroidery: Use a needle and some colorful thread to stitch simple designs on your bag. Try hearts, stars, or your initials.
- Appliqué: Knit or crochet small shapes like flowers or leaves. Sew them onto your bag for a 3D effect.
- Charms: Clip a cute charm or keychain to the strap. This is an easy way to change up the look whenever you want.
Tip: Start with one or two embellishments. You can always add more later if you want a bolder look.
You do not need to buy expensive supplies. You can use buttons from old shirts, leftover yarn, or beads from a craft kit. Get creative and see what you have at home.
Here is a quick table to help you match embellishments with the style you want:
| Embellishment | Style Vibe | How to Attach |
|---|---|---|
| Button | Classic, Simple | Sew on with needle |
| Beads | Sparkly, Fun | String onto yarn |
| Patch | Playful, Trendy | Iron or sew on |
| Tassel/Pom-Pom | Whimsical, Cute | Tie or sew on |
| Embroidery | Artistic, Unique | Stitch with needle |
| Appliqué | 3D, Handmade | Sew on |
| Charm | Personal, Easy | Clip to strap |
You can mix and match these ideas. Try a pom-pom with a patch, or beads with a button. There are no rules. Your bag should show off your style.
If you want to keep your bag simple, that is okay too. Sometimes less is more. The most important thing is that you enjoy the process and feel proud of your finished bag.
Basic Knitting Skills
Holding Needles and Yarn
When you start knitting, holding the needles and yarn can feel awkward. You might think your hands are too clumsy or the yarn keeps slipping. Guess what? Almost every beginner feels this way. You are not alone! Many new knitters struggle with this part, so do not worry if it takes a little practice.
- Most beginners feel clumsy when learning to hold the yarn and needles.
- This is a common challenge, so you can expect it to get easier with time.
- Picking the right needles helps a lot. If your needles are too slippery or too big, your hands may not feel comfortable.
- Try different needle sizes and materials until you find what feels best.
Hold one needle in each hand. Let your fingers rest on the needles, not grip them too tightly. Wrap the yarn around your fingers in a way that feels natural. Some people like to loop the yarn over their index finger. Others prefer to hold it between their thumb and forefinger. There is no single right way. Find a style that lets you move the yarn easily.
Tip: Relax your hands and shoulders. If you feel tense, take a break and shake out your fingers. Knitting should feel comfortable.
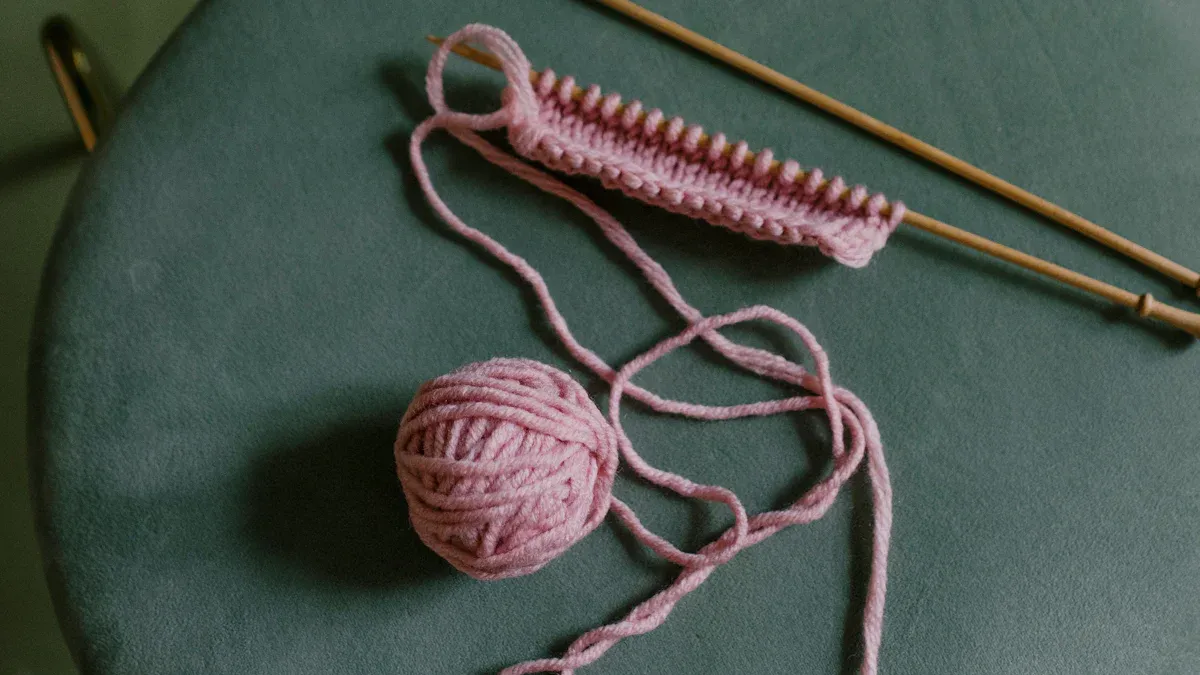
Knit Stitch
The knit stitch is the first stitch you will learn. It forms the basic fabric of most bags. If you want to know how to knit a bag, you need to master this stitch. Here is a simple way to do it:
- Hold the yarn in your left hand. Wrap it so it feels natural.
- Insert the right needle through the first loop on the left needle.
- Wrap the yarn around the right needle, moving counter-clockwise.
- Pull the yarn back through the loop, keeping it on the needle.
- Slip the old loop off the left needle. The new loop stays on the right needle.
Repeat these steps for each stitch across the row. You will see a row of neat V-shaped stitches. Practice this until your hands remember the motion.
Note: If you drop a stitch, use a crochet hook to pick it up. Mistakes happen, and you can fix them!
Purl Stitch
The purl stitch is the knit stitch’s best friend. You use it to make patterns and textures. The purl stitch looks like a little bump on the fabric. Here is how you do it:
- Hold the yarn in front of your work.
- Insert the right needle into the first loop from right to left.
- Wrap the yarn around the right needle.
- Pull the yarn through the loop.
- Slip the old loop off the left needle.
You can mix knit and purl stitches to create ribbing, stripes, or other designs. Try practicing both stitches until you feel comfortable switching between them.
Tip: If you get confused, watch a video or ask a friend to show you. Sometimes seeing the motion helps more than reading about it.
With these basic skills, you are ready to start your bag. Take your time and enjoy each step. Every row brings you closer to your finished project!
Reading Patterns
You might look at a knitting pattern and feel a little lost at first. All those abbreviations and symbols can seem confusing. Don’t worry! You can learn to read patterns with a few simple tricks. Once you get the hang of it, you’ll find that patterns make your knitting projects much easier.
Patterns use abbreviations to save space and keep instructions clear. You’ll see things like “k” for knit, “p” for purl, and “st” for stitch. Some patterns use special symbols or charts. You can spot abbreviations quickly if you highlight them or keep a list nearby. A knitting glossary helps you check what each abbreviation means. You can find glossaries online or in knitting books.
Tip: Write out each row of the pattern in your own words. This helps you understand what you need to do next. If you get stuck, break the instructions into smaller steps.
Many bag patterns use simple charts. Charts show you what your knitting should look like row by row. Start with easy charts to build your confidence. You can practice reading charts with small projects before you try a full bag.
Here’s a quick table to help you with common pattern abbreviations:
| Abbreviation | Meaning | What You Do |
|---|---|---|
| k | Knit | Make a knit stitch |
| p | Purl | Make a purl stitch |
| st | Stitch | One loop on needle |
| rep | Repeat | Do it again |
| rnd | Round | Work in a circle |
| CO | Cast On | Start your stitches |
| BO | Bind Off | Finish your stitches |
You can find free eBooks with nine different knitted bag patterns. These resources give you step-by-step instructions for each style. You can try casual bags or more formal ones. Each pattern helps you practice the skills you learn from reading patterns. If you want to explore more styles, look for free knitting patterns for bags online. Many websites offer patterns for beginners.
Note: Keep your pattern, yarn, and tools together in a project bag. This way, you won’t lose your place or forget what you need.
If you want to know how to knit a bag, reading patterns is a big part of the process. Patterns guide you through each step, so you don’t have to guess what comes next. You’ll feel proud when you finish a project by following a pattern. With practice, you’ll read patterns faster and make fewer mistakes.
You can always ask for help if you get confused. Knitting groups, online forums, and video tutorials can answer your questions. The more you read patterns, the easier it gets. Soon, you’ll pick up a new pattern and start knitting with confidence.
How to Knit a Bag: Step-by-Step
Knit the Base Flat
You start your bag by knitting the base. This part gives your bag a strong foundation and sets the size. Most patterns ask you to cast on a certain number of stitches. You use straight needles for this step. If you want a rectangle, cast on more stitches for width and knit more rows for length. For a square base, keep the stitch and row count close to equal.
Here’s a simple way to knit the base:
- Cast on the number of stitches your pattern suggests.
- Knit every row using the knit stitch. This creates a smooth, sturdy fabric.
- Keep knitting until the base reaches the size you want. Use a tape measure to check your progress.
- Bind off all stitches when you finish the last row.
You might notice your edges look a little loose. Don’t worry. You can fix this when you pick up stitches for the next step. If you want a thicker base, use double yarn or knit two pieces and sew them together.
Tip: Count your rows as you knit. Write down each row on a piece of paper or use a row counter. This helps you keep track and makes your bag look even.
Pick Up Stitches Around Base
Now you move on to picking up stitches around the base. This step lets you build the sides of your bag. You use a circular needle for this part. Picking up stitches means you insert your needle into the edge of the base and pull a loop of yarn through. You do this all the way around.
Many beginners find this step tricky. You might run into a few common problems:
- Loose stitches at the beginning and end of rows can make picking up stitches harder.
- You may struggle to keep the number of stitches even, which can cause uneven tension.
- Sometimes you see gaping holes where you picked up stitches, even if you watched tutorials.
- If your stitches look too loose, try using a smaller needle to tighten them up.
To pick up stitches smoothly, start at one corner. Insert your needle into the edge stitch, wrap your yarn, and pull a loop through. Move to the next stitch and repeat. Keep your tension even. If you see a gap, pick up an extra stitch to close it. Work your way around all four sides of the base.
Note: Don’t rush. Take your time and check your work as you go. If you make a mistake, pull out a few stitches and try again.
Knit the Bag Body in the Round
You’re ready to knit the body of your bag. This part is fun because you see your bag take shape. You use circular needles and work in the round, which means you knit in a continuous loop. This makes the sides seamless and strong.
Here’s how you get started:
- Cast on the number of stitches your pattern calls for.
- Move the stitches to the center of the cable and find the middle point between equal numbers of stitches. Gently bend your cable to pull a loop between the center stitches.
- Slide each half of the cast-on stitches along each side of the cord until they rest on the needles, not the cable.
- Turn the needles so they are horizontal to the table or floor. Make sure the first cast-on stitch is on the needle closest to you.
- Hang the yarn tail down and lay the working yarn over the back needle.
- Pull the back needle out so the back stitches sit on the cable. Keep the loop between the two halves of stitches.
- Knit across all the stitches on the front needle.
- After you finish the first half, turn your needles so the unworked stitches are closest to you. Pull the back needle so the just-knit stitches rest on the cable, then slide the unworked stitches onto the front needle.
- Bring the back needle around and get ready to knit the first stitch on the front needle.
You keep knitting in the round until your bag reaches the height you want. You can use stitch markers to mark the beginning of each round. If you want to add stripes or patterns, switch yarn colors at the start of a new round.
Tip: If you’re learning how to knit a bag, working in the round helps you avoid seams and makes your bag look neat. Practice this technique with a small project first if you feel unsure.
You now have the base and body of your bag. You’re halfway to finishing your handmade accessory. Keep going and enjoy watching your bag grow with each round!
Shape and Bind Off
You have finished knitting the body of your bag. Now, you need to shape the top and bind off your stitches. This step gives your bag a clean edge and helps it keep its shape. You can also add a flap if you want a closure.
Here are some tips to help you shape and bind off your bag:
- If you want a bigger bag, cast on more stitches at the start. For example, try 85 stitches instead of 38. This makes your bag wider and roomier.
- Knit more rows if you want a taller bag. You can go up to 55 inches before binding off. This gives you extra space for books, snacks, or anything you want to carry.
- Leave extra length for a flap. If you want a closure, knit about 10 inches for the flap. This helps your bag stay closed and keeps your things safe.
- Use a simple bind-off. Knit two stitches, then lift the first stitch over the second and off the needle. Keep going until you finish all the stitches. This creates a neat edge.
- Try steam blocking your bag. Lay your bag flat and use steam from an iron (without touching the fabric) to help it relax and look smooth. This step helps your bag lie flat and look professional.
Tip: Take your time when you bind off. If you pull too tight, the edge will pucker. If you keep it loose, the top will stretch out nicely.
You can shape your bag to fit your style. Some people like a straight top, while others add a flap or curve. You get to decide what looks best. This is one of the fun parts of learning how to knit a bag.
Weave in Ends
You have finished knitting and binding off. Now, you need to take care of the yarn tails. Weaving in ends makes your bag look neat and keeps it from unraveling. There are a few ways to do this, and you can pick the one you like best.
- Weave as you go. When you start a new ball of yarn or change colors, wrap the yarn tail around the working yarn for a few stitches. This hides the ends as you knit.
- Hide ends in the seams. If your bag has seams, use a yarn needle to weave the tails through the inside of the seam. This keeps them out of sight and adds strength.
- Try the duplicate stitch technique. Thread the yarn tail onto a needle and follow the path of the original stitches. This makes the end blend in with the fabric.
- Use a felting needle. If you use wool yarn, poke the tail into the fabric with a felting needle. The fibers lock together, and the end disappears.
Note: Always weave in at least 2-3 inches of yarn. Short ends can slip out, but longer ends stay put.
Take a few minutes to check your work. Run your fingers over the inside of the bag. If you feel any loose ends, weave them in again. A well-finished bag lasts longer and looks better.
You are almost done! The next steps will show you how to assemble your bag and add straps or closures. You are so close to carrying your own handmade accessory.
Assemble the Bag
Seam Sides (if needed)
You might need to seam the sides of your bag if you knit it flat. Seaming brings your bag together and gives it a finished look. Here’s a simple way to get neat seams every time:
- Block your pieces first. This means you lay them flat and let them dry in shape. Blocking helps your fabric look even and tidy.
- Grab a blunt-ended, large-eyed needle. Pick a yarn that matches your bag in both weight and color. This keeps your seam almost invisible.
- Place the right sides of your fabric together. You want the pretty sides facing each other.
- Start seaming by picking up the horizontal bar between the edge stitch and its neighbor. Go back and forth, switching sides each time. This makes a strong seam.
- Don’t slip the first stitch of each row. This keeps your edges easy to sew.
- Leave a yarn tail about three inches long. You’ll weave this in when you finish.
Tip: Take your time with seaming. A slow and steady hand gives you a cleaner look.
Add Lining (Optional)
A lining can make your bag stronger and help it hold its shape. You don’t have to add one, but it’s a nice touch if you want your bag to last longer or carry small items.
Lightweight cotton or cotton blends work best for linings. These fabrics feel soft but stay strong. They won’t make your bag heavy. You can pick a fun print or a solid color to match your style.
To add a lining, cut the fabric a little smaller than your bag. Sew the sides of the lining together, then slip it inside your bag. Use a needle and thread to attach the lining to the top edge. Make small, neat stitches so they don’t show on the outside.
Note: If you want pockets inside your bag, sew them onto the lining before you put it in.
Reinforce Structure
You want your bag to keep its shape, especially if you plan to carry heavier things. There are a few easy ways to reinforce your bag:
- Add a structured lining or insert. This gives your bag support but keeps the knitted look.
- Slip a flat, stiff bottom insert into your bag. You can use plastic or cardboard. This stops the bottom from sagging.
- Try a handbag organizer insert. This adds structure and gives you extra pockets for your things.
You can mix these ideas for extra strength. Your bag will look great and stay sturdy, ready for everyday use.
Tip: Test your bag with a few items before you finish. If it sags, add more support until you like how it feels.
Add Strap and Closure
Knit the Strap
You get to decide how long and wide you want your bag strap. Most knitters choose a strap that fits across the body or over the shoulder. You can knit a simple strap using the same yarn as your bag. Try using a garter stitch for extra strength. Cast on about 6 to 10 stitches, depending on how wide you want the strap. Knit every row until the strap reaches your desired length. Measure as you go. If you want a thicker strap, double up your yarn or knit two pieces and sew them together.
Tip: If you worry about the strap stretching, sew a piece of canvas strapping to the back side. This keeps your strap sturdy and helps it last longer.
You can also add color stripes or a textured pattern. Mix and match styles to make your bag unique. If you want a shorter handle, knit fewer rows. For a crossbody style, make the strap longer.
Attach Strap
Attaching the strap is an important step. You want your bag to feel secure and comfortable. Here’s a simple way to attach your strap so it stays strong:
- Prepare your knitted strap. Make sure it matches the length you want.
- Thread about 2–3 inches of the strap through one side of a tri-glide buckle. This helps you adjust the length later.
- Attach the strap to the left side buckle on your bag. Keep the right side of the strap facing you. Sew it in place using a strong hand stitch or a sewing machine.
- Thread the other end of the strap through the right side buckle. Let it hang loose for now.
- Loop the strap through the middle of the tri-glide buckle. Bring it up to the top from the back bar and thread it through.
- Sew the final end securely. Use sturdy stitches so the strap does not come loose.
Note: Always check your stitches before you use the bag. Tug gently to make sure the strap holds tight.
You can use metal rings or D-rings if you want a removable strap. Some knitters like to crochet the ends for extra strength. Test the strap by carrying a few items in your bag.
Add Button or Flap
You can finish your bag with a button or a flap. Both options help keep your things safe inside. If you want a simple closure, sew a large button to the front of your bag. Knit a small loop at the top edge to hook over the button. Choose a button that matches your style—wooden, colorful, or shiny.
If you prefer a flap, knit an extra piece at the top of your bag. Make it about 4 to 6 inches long. Fold it over the opening and sew a button or snap underneath. You can add a magnetic clasp for easy opening. Some knitters like to decorate the flap with embroidery or patches.
| Closure Type | How to Add | Style Vibe |
|---|---|---|
| Button | Sew on, add loop | Classic, simple |
| Flap | Knit extra rows | Cozy, secure |
| Snap | Sew inside flap | Modern, easy |
Tip: Try your closure a few times before finishing. Make sure it opens and closes smoothly.
You now have a bag with a sturdy strap and a secure closure. Your handmade accessory is almost ready to use!
Finishing Touches
Decorative Elements
You have finished knitting your bag. Now, you can make it stand out with some fun decorative elements. These little extras can turn a simple bag into something special. You do not need to be an expert to add decorations. You just need a bit of creativity and a few supplies.
Here are some easy ideas to try:
- Add tassels or pom-poms: Use leftover yarn to make colorful tassels or pom-poms. Attach them to the corners or the zipper pull. They add movement and a playful touch.
- Sew on patches: Pick patches that show your favorite things. You can find patches with animals, flowers, or even funny sayings. Sew them on with a needle and thread.
- Try embroidery: Use a needle and some bright thread. Stitch simple shapes like hearts, stars, or your initials. You can draw your design first with a pencil.
- Attach beads or sequins: String beads onto your yarn before you knit, or sew them on after. Sequins catch the light and make your bag sparkle.
- Use fabric paint: Draw patterns or write your name with fabric paint. Let it dry before you use your bag.
Tip: Start with one or two decorations. You can always add more later if you want a bolder look.
You can mix and match these ideas. Try a pom-pom with a patch, or add beads to your embroidery. There are no rules. Your bag should show off your style.
Personalization
Personalizing your bag makes it truly yours. You can add details that show your personality or match your favorite outfits. Think about what makes you happy or what you want your bag to say about you.
Here are some ways to personalize your knitted bag:
| Personalization Idea | How to Do It | Why Try It? |
|---|---|---|
| Monogram | Embroider your initials | Makes it unique |
| Favorite Colors | Use yarn in your top shades | Matches your style |
| Themed Charms | Clip on keychains or charms | Shows your interests |
| Custom Lining | Pick a fun fabric for inside | Adds a surprise touch |
You can also add a small pocket inside for your phone or keys. If you love nature, try leaf or flower designs. If you want a sporty look, use bold stripes or team colors.
Note: Personal touches make your bag one of a kind. You will feel proud every time you use it.
Take your time with these finishing touches. Enjoy the process. When you finish, you will have a bag that is not just handmade, but also full of your own style and creativity.
Troubleshooting
Knitting a bag feels exciting, but sometimes things don’t go as planned. You might spot a mistake or notice your stitches look uneven. Don’t worry! Every knitter faces these challenges. You can fix most problems with a little patience and the right tricks.
Fixing Mistakes
Mistakes happen, especially when you’re learning. You might drop a stitch, add an extra one, or twist a loop. The good news? You can fix almost anything if you catch it early. Let’s look at some common problems and how you can solve them.
Here’s a handy table to help you spot and fix frequent knitting mistakes:
| Mistake | How to Prevent It | How to Fix It |
|---|---|---|
| Dropped Stitch | Check your fabric for gaps or nubs. Count stitches. Stop at row ends. | Use your left needle to pick up the last visible stitch. Work up the ladder rungs. |
| Extra Stitches | Watch for holes or odd patterns. Count stitches often. | If recent, pull extra stitches off the needle. For older mistakes, “tink” or rip back. |
| Twisted Stitches | Inspect your knitting often. | “Tink” back or rip out stitches above the twist to fix. |
| Tension Issues | Relax your grip. Try larger needles. | Make sure each stitch sits fully on the thick part of the needle. |
If you drop a stitch, don’t panic. Look for a loose loop or a gap. Use your left needle to pick up the stitch and work it back up. For extra stitches, check your count at the end of each row. If you find one right away, just slip it off. If you notice it later, you might need to “tink”—that means unknitting stitch by stitch—or pull out a few rows.
Twisted stitches can sneak up on you. They look different from the rest. If you spot one, go back to where it started and fix it. You can use a crochet hook for tricky spots. Remember, slow and steady wins the race.
Tip: Mistakes teach you new skills. Each time you fix a problem, you become a better knitter!
Adjusting Tension
Tension means how tight or loose your stitches feel. If your bag looks wavy or uneven, you might need to adjust your tension. You want your stitches to look even and smooth.
Try these steps to get better tension:
- Hold your yarn gently. Don’t squeeze too hard.
- Use larger needles if your stitches feel tight.
- Make sure each stitch sits on the thick part of the needle before you knit the next one.
- Take breaks if your hands feel tired. Relax your shoulders and fingers.
If your stitches look loose, check that you’re not letting the yarn slip too much. If they look tight, loosen your grip and let the yarn flow. Practice helps you find the right balance.
Note: Consistent tension makes your bag look neat and helps it last longer.
You might need to experiment with different yarns or needles. That’s okay! Every project teaches you something new. Soon, you’ll knit with confidence and fix mistakes like a pro.
Care and Maintenance
Taking care of your knitted bag helps it last longer and look great every time you use it. You put a lot of effort into making your bag, so you want to keep it in good shape. Let’s talk about how you can wash and store your bag the right way.
Washing Tips
You don’t need to wash your knitted bag often. When you do, gentle care works best. Here’s a simple way to clean your bag without causing damage:
- Hand wash in cool water. Fill a sink or basin with cool or lukewarm water. Add a small amount of mild detergent. Swish the bag gently in the water. Don’t scrub or wring the fabric. This keeps the stitches from stretching or getting fuzzy.
- Rinse carefully. Drain the soapy water and refill the sink with clean, cool water. Move the bag around to rinse out the soap. Don’t twist or wring the bag. Just press it gently to remove extra water.
- Dry with care. Lay your bag flat on a clean towel. Roll up the towel with the bag inside to soak up more water. Unroll and reshape your bag. Let it air dry flat, away from direct sunlight or heat. Sunlight can fade colors and heat can shrink the yarn.
Tip: Never put your knitted bag in the washing machine or dryer. Machines can stretch, shrink, or tangle your bag.
If you spill something on your bag, spot clean with a damp cloth and a little soap. Always test on a small area first to make sure the color doesn’t bleed.
Storage
Storing your bag the right way keeps it looking fresh and helps it keep its shape. Here are some easy tips for storage:
- Pick a cool, dry spot away from sunlight. Sunlight can fade your bag and make the yarn weak.
- Stuff your bag lightly with acid-free tissue paper or a soft cloth. This helps your bag hold its shape without stretching.
- Store your bag flat or upright on a shelf. Hanging can make the bag sag or stretch out.
- Cover your bag with a cotton or linen fabric bag. These covers keep dust away but let your bag breathe. Plastic bags can trap moisture and cause mildew.
- Move your bag to a new spot every few months. This keeps it fresh and stops pressure marks or creases from forming.
Note: If you use your bag every day, give it a break sometimes. Letting it rest helps the yarn bounce back and keeps your bag looking new.
Taking a few minutes to wash and store your bag with care means you can enjoy your handmade accessory for years. You’ll feel proud every time you carry it, knowing it still looks as good as the day you finished knitting.
Customization Ideas
You have finished your basic bag, but maybe you want to make it stand out. Customizing your knitted bag is where the real fun begins! You can play with colors or try new patterns. These changes help you create a bag that feels truly yours.
Color Changes
Changing colors is one of the easiest ways to make your bag pop. You do not need to be an expert to add stripes or blocks of color. Here are some beginner-friendly ways to switch up your colors:
- Stripe Color Change: Start a new color at the beginning of a row. Drop the old yarn and pick up the new one. This method works great for bold stripes or big color blocks. You get a clean line and a fresh look.
- Carrying Yarn Up the Side: If you want to use two colors often, carry the unused yarn up the side of your work. This trick keeps your edges neat and saves you from weaving in lots of ends. It works best for bags with frequent color changes.
Tip: Try using your favorite colors or mix bright shades for a playful vibe. You can even use leftover yarn to make a rainbow effect!
You do not have to follow any rules. Pick colors that make you happy. If you want a classic look, use two colors. For something bold, add three or more. Stripes, blocks, or even random color changes all work.
Pattern Variations
You can also change the look of your bag by trying different patterns. Some patterns are simple and perfect for beginners. Others let you get creative with shapes and textures. Here is a table with some easy pattern ideas you can try:
| Bag Pattern Name | Description |
|---|---|
| Easy Knitting & Crochet Bag Patterns | Simple designs for any occasion or style. |
| Mohave Slouchy Knit Tote | Cool shaping with a photo tutorial to guide you. |
| Palmetto Tote Crochet Pattern | Light yarn for summer, but you can use any worsted weight yarn you like. |
| Eco String Market Bag | Quick to knit and great for using up leftover yarn. |
| Camel Bucket Bag Crochet Pattern | Tight stitches mean you do not need a lining. |
| Farmers Market Tote | Uses super bulky yarn for a fast and easy project. |
| Bobbles Circle Tote Crochet Pattern | Fun design with bobbles—just count your stitches as you go. |
| Summer Circle Bag Crochet Pattern | Unique fibers give this bag a summery, eye-catching look. |
You can pick a pattern that matches your style or the season. Try a slouchy tote for a relaxed look or a market bag for shopping trips. If you want a challenge, add bobbles or try a circle shape.
Note: Start with a simple pattern. Once you feel confident, try mixing patterns or adding your own twist.
Customizing your bag makes it special. You get to show off your creativity and make something you will love to use every day.
Conclusion
You did it! Take a moment to admire your new bag—every stitch reflects your creativity and effort. If your first bag isn’t perfect, that’s completely fine. You’ll improve each time you practice. Try new yarns, bold colors, or fun patterns as you keep learning and enjoying the craft.
And if you ever want a custom, eco-friendly bag made with professional quality, we’re a dedicated bag manufacturer specializing in sustainable materials and full customization. Whether you need a unique design, OEM/ODM support, or bulk production, we can bring your ideas to life. Your next favorite accessory could be handmade by you—or expertly produced by us.
FAQ
How long does it take to knit a bag?
Most beginners finish a simple bag in one or two weekends. If you knit a little each day, you can finish even faster. Your speed will improve as you practice.
Can I use any yarn to knit a bag?
You can use many types of yarn, but cotton or sturdy acrylic works best. Soft or stretchy yarn may not hold the bag’s shape. Try to pick yarn that feels strong and smooth.
What if I make a mistake while knitting?
Don’t worry! Everyone makes mistakes. You can fix most errors by “tinking” (unknitting) or using a crochet hook to pick up dropped stitches. Take your time and check your work often.
Do I need to line my knitted bag?
You don’t have to add a lining, but it helps your bag last longer and keeps small items from poking through. If you want a stronger bag, try adding a simple fabric lining.
How do I stop my bag from stretching out?
Use a tight stitch and sturdy yarn. You can also sew a fabric lining or add a canvas strap for extra support. Test your bag with a few items before using it every day.
Can I wash my knitted bag in the washing machine?
It’s best to hand wash your bag in cool water. Machines can stretch or damage the yarn. Lay your bag flat to dry. This keeps it looking new and helps it last longer.