

Are you searching for new tote bag embroidery ideas? You can get ideas from many places. Pinterest has lots of colorful stitches. There are also free patterns online. Here are some good places for easy designs:
- DIY hand embroidered tote bag for Halloween, with a free PDF pattern
- Simple sewing patterns and how-to guides on Etsy
- Blank canvas tote bags you can buy on Amazon
You do not need special skills to begin. Pick a theme for the season. You can stitch your pet’s picture. You can also add a pop culture symbol. Get a plain tote and make it your own.
Key Takeaways
- Look at websites like Pinterest and Etsy for free embroidery patterns and ideas. You can find lots of inspiration online.
- Pick a strong canvas tote bag for your project. It holds stitches well and lasts a long time.
- Begin with easy themes like nature, animals, or pop culture. These ideas help you make your tote bag special.
- Use simple stitches like backstitch, satin stitch, and French knots. These stitches help you make pretty designs.
- Try adding things like beads and sequins for more shine and texture.
- Mix different stitches and thread types to make your embroidery stand out. This shows your creativity.
- Change your designs with the seasons to keep your tote bag new and fun. You can make it fit any occasion.
- Take care of your embroidered tote by washing it gently. Store it the right way to keep it looking nice.
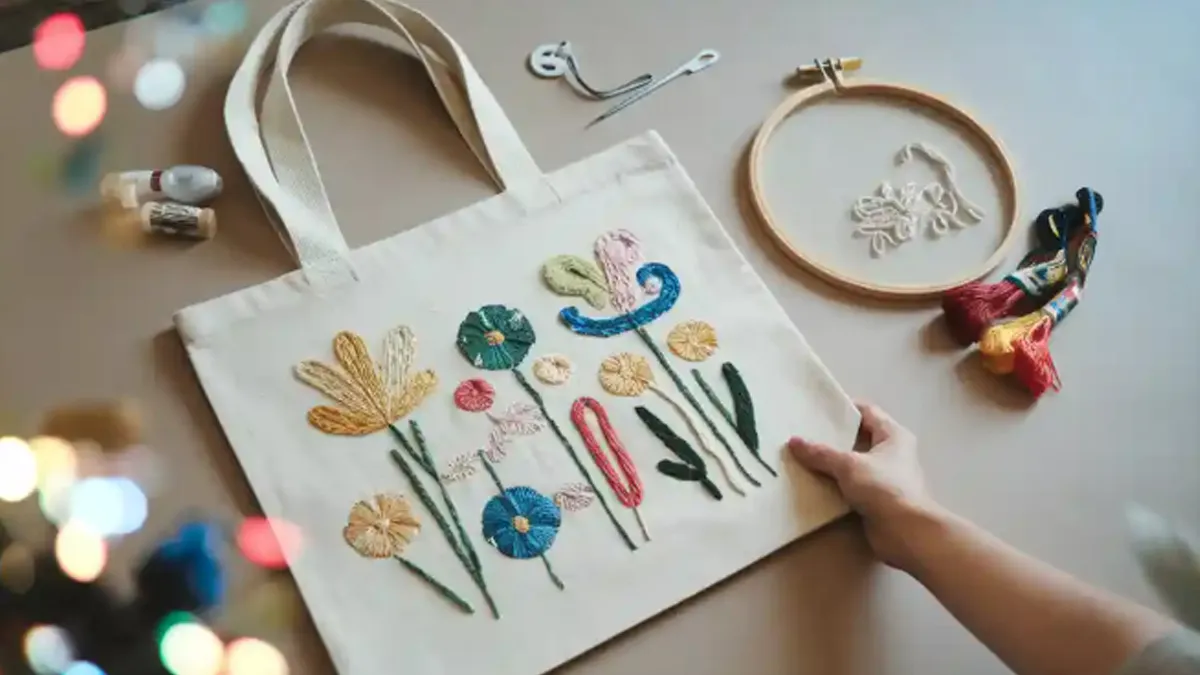
Tote Bag Embroidery Ideas
Do you want to make your tote bag special? There are many fun ways to decorate it with embroidery. You can try these ideas even if you are new. Nature, abstract art, and monograms can inspire you. Pick your favorite thread colors and get ready to start!
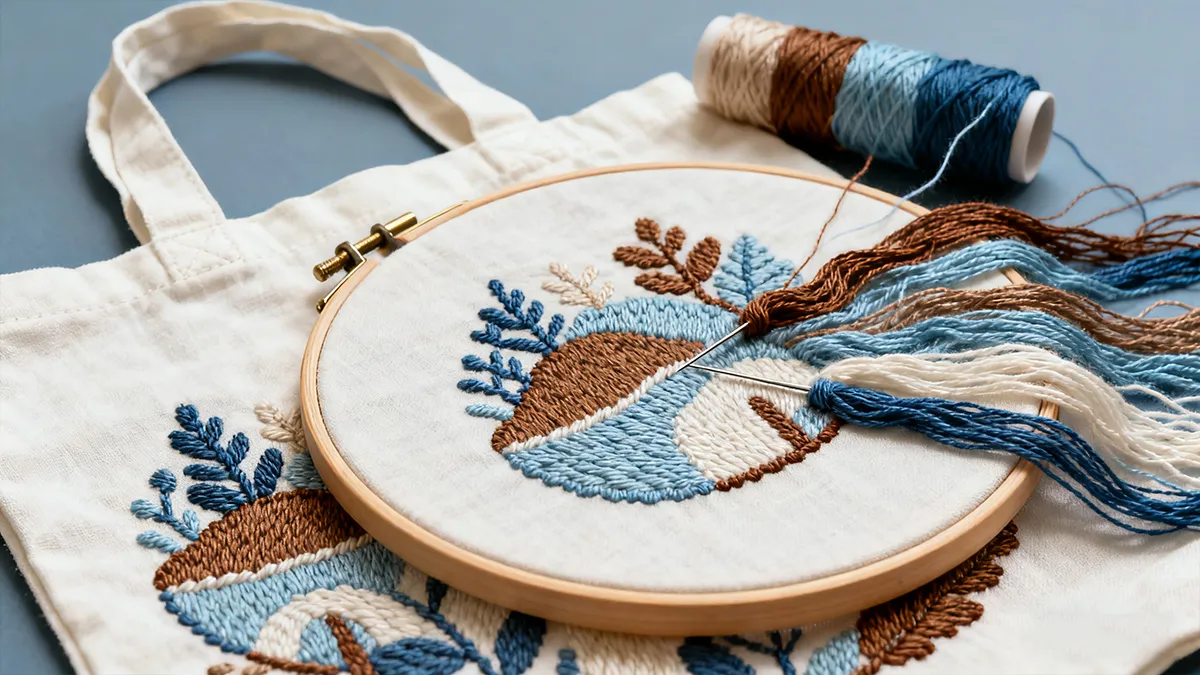
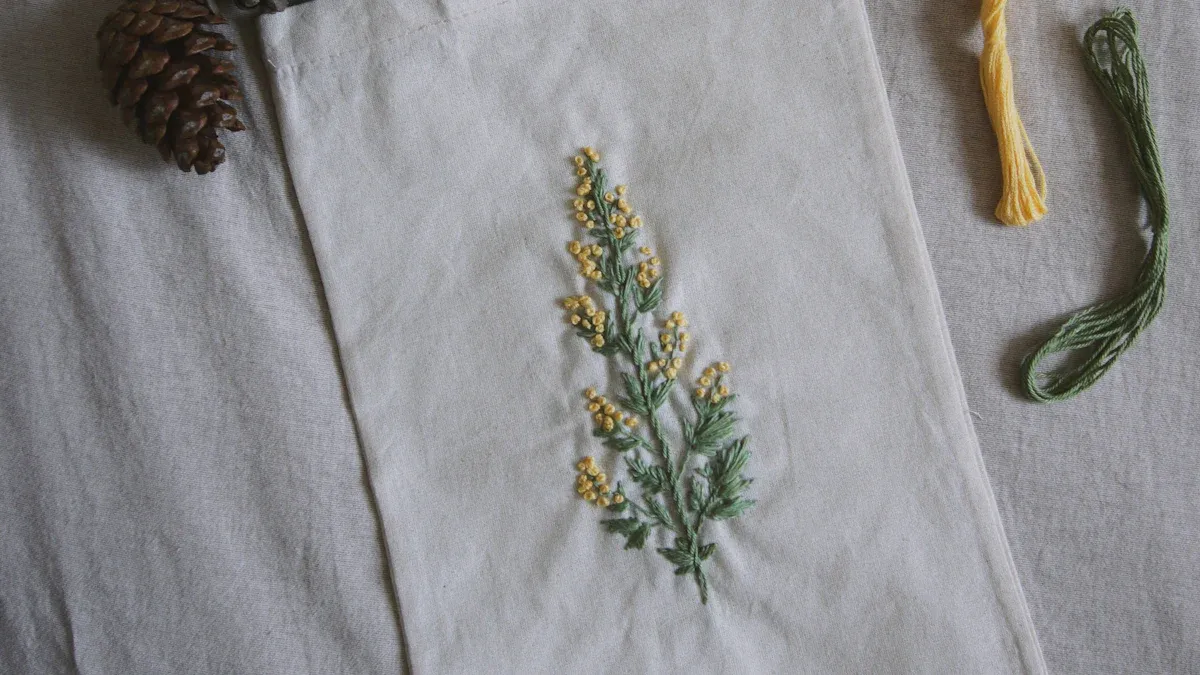
Nature Motifs
Florals
Flowers always look nice on tote bags. You can sew one rose, a bunch of wildflowers, or a whole garden. Florals make your bag look bright and happy. Use bright colors for petals and green for leaves. If you want something simple, try making daisies with lazy daisy stitches. For more detail, use satin stitch and French knots to add texture.
Tip: You can find free floral patterns online. Pinterest has lots of easy guides for beginners and experts.
Animals
Animal designs make your tote bag cute and fun. You can pick your pet or choose animals from craft websites. Here are some popular ideas:
- Woodland Wonders: Baby animals like foxes, rabbits, and deer look adorable.
- Avian Artistry: Birds like cockatoos and barn owls add color and style.
- Aquatic Inspirations: Fish, like flying coral fish, make your tote look fancy.
If you love animals, try sewing a pet portrait or a playful fox. There are many free patterns online to help you.
Abstract Patterns
Geometric
Geometric patterns give your tote a modern look. They are easy for beginners. Here is how you can try them:
- Start with simple shapes like rectangles and stars.
- Find free templates online and trace them on your tote.
- Use basic stitches like backstitch, running stitch, and satin stitch.
- Practice with small designs, like a border or a star.
Geometric designs look neat and stylish. You can use different colors and shapes to match your taste.
Freeform
Freeform embroidery lets you be creative and make something special. You do not need to follow a pattern. Just use your imagination! Some fun freeform ideas are:
- Wreaths with leaves, branches, and flowers
- Abstract art that shows your style
- Creative geometric shapes for your tote
Try satin stitch for big areas, French knots for texture, and lazy daisy for flowers. Freeform embroidery is about trying new things and having fun.
Monograms
Initials
Monogrammed tote bags are very popular, especially as gifts. You can sew your initials or a friend’s. Pick a font that fits your style—classic, modern, or fun. Monograms make your tote feel special and unique.
Here are some cool styles:
- Personalized Large Yacht Tote: Good for sunny days
- Trolley Sleeve Tote: Looks fancy and is great for travel
- Geoprint Tote Bag: Modern with geometric shapes
- Buffalo Plaid Tote Bag: Rustic and useful
Custom Lettering
Custom lettering makes your tote even more personal. You can add your name, a word, or a short phrase. This makes your tote bag one-of-a-kind. Here are some creative ways people decorate their bags:
| Tote Bag Description | Sale Price | Original Price |
|---|---|---|
| Black Poodle Dog Graphic with Custom Text | $26.86 | $31.60 |
| R.P.N.-Personalize Name with Monogram | $24.70 | $29.05 |
| Personalized Floral Wreath Monogram | $33.88 | $39.85 |
| Custom Embroidered Tote Bag | $23.89 | $28.10 |
| Simple Pink Font, Personalized Tote Bag | $22.57 | $26.55 |

You can see how pet portraits, custom words, and flower designs make each tote bag special. These embroidery ideas are great for gifts or to show your own style.
Pop Culture
Do you want your tote bag to show off your favorite TV shows or movies? Pop culture embroidery is a fun way to make your bag stand out. You can stitch characters or symbols that mean something to you. This style lets you share your interests with everyone you meet.
Characters
You can bring your favorite cartoon or movie characters to life on your tote. Many people love adding playful faces and bright colors. Here are some popular choices you might see online or on Pinterest:
- Characters from The Simpsons
- Characters from Bob’s Burgers
- Characters from SpongeBob SquarePants
- Max Goof from A Goofy Movie
You can find free patterns for these characters. If you want to try something new, sketch your own design and use simple stitches like backstitch or satin stitch. You do not need to be an expert. Just pick a character you love and start stitching.
Tip: Use bold thread colors to make your pop culture designs pop. You can mix and match shades for extra fun.
Symbols
Symbols from pop culture work great for tote bag embroidery ideas. You can stitch a logo, a catchphrase, or a small icon. These designs are quick and easy. You might choose a donut from The Simpsons, a burger from Bob’s Burgers, or a pineapple from SpongeBob SquarePants. You can also add music notes, superhero emblems, or gaming icons.
Try using metallic thread for symbols. This adds a shiny effect and makes your tote bag look cool. You can place symbols in the corner or center of your bag. If you want to make your bag unique, combine a character with a symbol for a custom look.
Seasonal Themes
Seasonal embroidery brings fresh style to your tote bag all year. You can change your designs for each holiday or special event. This keeps your bag looking new and exciting.
Holidays
Holidays inspire many tote bag embroidery ideas. You can celebrate special days with creative stitches. Here are some holidays that people love to use for embroidery:
- Mother’s Day
- Graduations
- Weddings
Popular motifs for these holidays include floral designs, initials, and meaningful quotes. For Mother’s Day, you might stitch a bouquet or a sweet message. Graduation bags look great with the graduate’s initials or a short quote. Wedding totes often feature elegant flowers or the couple’s names.
Note: You can find free holiday patterns online. Many websites offer step-by-step guides for beginners.
Festive Colors
Festive colors make your tote bag feel cheerful and bright. You can use red and green for winter holidays, pastels for spring, or gold and silver for special events. Try mixing thread colors to match the season. You can add beads or sequins for extra sparkle.
If you want your bag to stand out, use bold color blocks or rainbow stripes. You can also stitch small motifs like stars, hearts, or snowflakes. Festive colors and simple designs help you create a tote bag that fits any occasion.
Creative Techniques
Stitch Mixing
You can make your tote bag look cool by using different stitches. This helps your designs stand out and feel interesting. Try using a machine for the main design. Then add hand stitches like French knots or satin stitch for more detail.
Here are some ways to mix stitches for special effects:
- Use machine outlines and add French knots by hand.
- Paint your tote first, then sew on top for a mixed look.
- Sew fabric strips on your tote, then embroider over them for more color.
- Use shiny metallic threads to make some parts sparkle.
- Stitch words or quotes onto fabric strips for a personal touch.
- Add rhinestones or other decorations to finish your design.
Tip: Mixing stitches lets you play with colors and textures. You can make a tote bag that shows your own style.
Basic Stitches
If you are new to embroidery, start with easy stitches. These are simple and work for most designs:
- Backstitch is good for outlines and letters.
- Running stitch is quick and works for borders.
- Satin stitch fills shapes with solid color.
- French knot makes small dots and adds texture.
You can use these stitches alone or together for cool results. Practice each stitch on scrap fabric before you work on your tote.
Advanced Stitches
When you get better, try harder stitches for more detail. Some favorites are:
- Chain stitch makes bold lines and curves.
- Feather stitch looks nice for leaves and branches.
- Bullion knot adds raised, bumpy parts.
- Couching lets you sew thick threads or yarn for a big effect.
Mixing easy and hard stitches makes your tote look professional. You can follow a pattern or make up your own style.
Colorful Threads
Picking the right thread can make your tote bag look amazing. You can choose cotton, metallic, or variegated threads.
Metallic
Metallic threads are shiny and catch the light. Use them for holiday designs or to highlight special spots. They work well for stars, symbols, and festive patterns. Metallic threads last a long time and stay bright.
Variegated
Variegated threads change color as you sew. These threads make smooth color changes and look natural, especially for flowers or backgrounds. Use tone-on-tone threads for soft shading. Use contrasting threads for bold, bright patches.
Here’s a simple chart to help you pick the best thread:
| Project Type | Recommended Thread | Why It Works |
|---|---|---|
| Gradient bags/patchwork | Variegated (tone-on-tone) | Smooth color changes, natural look |
| Statement patches | Variegated (contrasting) | Bright, bold color changes |
| Festive decorations | Metallic | Shiny and special for holidays |
Appliqué
Appliqué is a fun way to add fabric shapes to your tote bag. You sew pieces of fabric onto the bag and then decorate them with embroidery. This makes bold designs and keeps your tote light.
Here’s why you should try appliqué:
- You get bright, bold designs.
- The bag stays light and easy to carry.
- It saves money for big designs.
- Appliqué adds fun textures and looks cool.
- Your tote will last longer and look neat.
- You can try new ideas and projects.
Fabric Shapes
Cut shapes from colorful fabric and sew them onto your tote. You can make flowers, animals, or cool patterns. Use running stitch or blanket stitch to attach the shapes.
Decorative Stitches
After you sew on the shapes, decorate them with embroidery. Try satin stitch, French knots, or metallic thread for extra style. You can outline the shapes or fill them with patterns.
Note: Appliqué works with both hand and machine embroidery. You can find machine embroidery designs for tote bags at different prices. Look at the chart below to compare prices:

Mixing stitches, using colorful threads, and trying appliqué gives you lots of ways to decorate your tote bag. You can follow a pattern or make your own design. Try these ideas and see how creative you can be!
Beads & Sequins
Adding beads and sequins to your tote bag can turn a simple embroidery pattern into something dazzling. You get sparkle, texture, and a touch of glam. If you want your bag to stand out, this is a great way to do it.
Placement
Where you put beads and sequins matters. You can sprinkle them across the whole design or just highlight certain areas. Try these ideas:
- Outline a flower or animal with tiny beads for extra shine.
- Fill the center of a floral motif with sequins.
- Add a row of beads along the edge of your tote for a fun border.
- Mix beads and sequins with thread to create a 3D effect.
Tip: Before you start, lay out your beads and sequins on the tote to see how they look. Move them around until you find a style you love.
Attachment
You want your embellishments to stay put, so use strong thread when you sew beads and sequins. Double up your thread for extra security. For sequins, you can add a dab of fabric glue to the back before stitching. This helps them stay in place, even if you use your tote every day.
When you finish, take care of your bag so the decorations last. Here are some care tips:
- Hand wash gently in cold water with mild detergent.
- Avoid wringing or twisting the bag.
- Lay the tote flat to dry.
- Use a mesh bag if you need to wash it in a machine.
- Always follow any special care instructions from the maker.
Proper care keeps your tote looking beautiful and helps the beads and sequins stay secure. Gentle cleaning and skipping harsh chemicals will protect both the fabric and the embroidery.
Felt Lining
Felt lining is a smart trick for anyone who wants their tote bag to last longer and look neat. You get extra structure and protection for your embroidery.
Structure
Adding felt to the inside of your tote gives it shape. The bag stands up better and feels sturdy. If you use a hoop while stitching, felt helps keep the fabric smooth and prevents puckering. You can cut felt to fit the size of your design and attach it before you start embroidering.
- Use felt for large or heavy embroidery patterns.
- Iron the tote before adding felt for a crisp finish.
- Place felt between the tote and the hoop for extra support.
Protection
Felt acts like a cushion for your stitches. It protects the back of your embroidery from rubbing and wear. If you carry books or groceries, felt helps prevent snags and keeps your design safe.
- Choose soft, high-quality felt for best results.
- Secure the felt with small stitches so it stays in place.
- If you use beads or sequins, felt adds another layer of protection.
You can use felt with both hand and machine embroidery. It works for any style, from simple initials to bold, colorful designs. Try felt lining on your next tote bag project and see how much it improves the look and feel.
How to Embroider a Tote Bag
Ready to start your own embroidered tote? Let’s walk through each step together. You’ll see how easy it is to turn a plain canvas tote bag into something you’ll love to carry.
Choosing Materials
Canvas Tote Bag
First, pick your tote. Most people choose a canvas tote bag because it’s tough and holds stitches well. Canvas is heavyweight and durable, so your designs won’t stretch or get distorted. You can also use cotton or blended fabrics, but make sure the weave is smooth. Rough textures can snag your thread and make your embroidery look messy. If you want to use lighter cotton, add a stabilizer to keep your stitches neat.
Tip: Always check the weave of your tote before you start. Tightly woven fabric gives you a crisp, clean finish.
Supplies
You don’t need fancy tools to get started. Here’s a quick list of what you’ll need:
- Embroidery hoop (helps keep your fabric tight)
- Embroidery needles (choose sharp ones for canvas)
- Embroidery floss or thread (pick colors you love)
- Scissors (small and sharp work best)
- Water-soluble stabilizer or tracing paper (for transferring designs)
- Pencil or washable marker (for sketching)
- Iron (for prepping your tote)
- Felt (optional, for extra structure and protection)
Before you begin, iron your canvas tote bag using a dry iron on the cotton setting. This smooths out wrinkles and gives you a flat surface for stitching.
Transferring Designs
Transfer Methods
Getting your embroidery pattern onto the tote is easy. You have a few options:
- Tracing Paper: Place tracing paper over your design, then trace it onto your tote with a pencil or washable marker.
- Water-Soluble Paper: Print or draw your design on water-soluble paper. Stick it to your tote, stitch over it, then soak the bag in warm water to dissolve the paper.
- Printed Templates: Print your design, cut it out, and use it to visualize placement before you start stitching.
Here’s a simple step-by-step guide:
- Outline your design with tracing paper.
- Transfer the outline to water-soluble embroidery paper for stability.
- Secure the design on your tote before you start sewing.
- After stitching, soak your tote in warm water to remove the paper and reveal your design.
| Transfer Method | Pros | Cons |
|---|---|---|
| Tracing Paper | Simple, cheap, reusable | May smudge, less stable |
| Water-Soluble Paper | Clean finish, easy removal | Costs more, needs soaking |
| Printed Templates | Good for placement | Needs tracing or marking |
Tip: Test your transfer method on scrap fabric first. This helps you avoid mistakes on your actual tote.
Freehand Drawing
Feeling creative? You can draw your design straight onto the tote. Use a pencil or washable marker. Freehand drawing works best for simple shapes or abstract patterns. If you make a mistake, just dab the area with a damp cloth and redraw.
Basic Stitches
Let’s talk about the stitches you’ll use most often. These are easy to learn and work for almost any design.
Backstitch
Backstitch is perfect for outlines and lettering. You make a straight line by bringing your needle up and down along the design. It’s strong and looks neat.
- Use backstitch for borders, words, and simple shapes.
- Try it on your first project to get comfortable with embroidery.
Satin Stitch
Satin stitch fills in shapes with solid color. You bring your needle up and down close together, covering the area smoothly. This stitch works great for petals, leaves, or bold letters.
- Use satin stitch for flowers, initials, or any part you want to stand out.
- Practice on scrap fabric to get even coverage.
French Knot
French knots add texture and tiny dots. You wrap the thread around your needle, then pull it through the fabric. These knots look great in the center of flowers or as accents.
- Use French knots for eyes, flower centers, or decorative dots.
- Make sure your thread is tight so the knot stays in place.
Tip: Mix these stitches for a more interesting design. You can outline with backstitch, fill with satin stitch, and add French knots for detail.
Now you know how to embroider a tote bag from start to finish. With the right materials, a clear embroidery pattern, and a few basic stitches, you’ll create a bag that’s truly your own.
Finishing
Securing Threads
You’ve finished your last stitch—now it’s time to make sure your hard work stays put. Securing your threads is super important if you want your embroidered tote bag to last. If you skip this step, your beautiful design might start to unravel after just a few uses.
Here’s what you can do to lock in your stitches:
- Tie Off Carefully: When you finish a section, flip your tote inside out. Thread your needle under a few stitches on the back, then tie a small knot. This keeps the thread from slipping out.
- Weave the Ends: After tying the knot, weave the tail of your thread through a few more stitches. This adds extra security and hides the loose ends.
- Trim Neatly: Use sharp scissors to snip off any extra thread. Don’t cut too close to the knot, or you might undo your work.
- Add Felt Backing: For even more protection, sew a piece of felt over the back of your embroidery. This keeps the stitches safe from rubbing and helps your tote keep its shape.
Tip: If you use beads or sequins, double up your thread and secure each one with a tiny knot. This way, even if one comes loose, the rest will stay put.
Taking a few extra minutes to secure your threads means your tote bag will look great for a long time. You won’t have to worry about loose threads or unraveling designs.
Cleaning
Now that your tote bag looks amazing, you’ll want to keep it fresh and bright. Embroidered tote bags need a little extra care, but it’s easy once you know how.
Start by checking if your threads are colorfast. Dab a damp white cloth on a hidden spot to see if any color comes off. If the colors stay put, you’re good to go!
When it’s time to wash your tote, always turn it inside out. This protects the embroidery from friction. Use cold water and a mild detergent. Hot water can make colors bleed or shrink the fabric. Hand washing is best, but if you must use a machine, place your tote in a mesh laundry bag.
After washing, gently reshape your tote and lay it flat to dry. Skip the dryer—heat can damage both the fabric and your stitches. Air-drying keeps everything looking crisp and helps your bag keep its shape.
Here’s a quick checklist for caring for your embroidered tote bag:
- Test for colorfastness before washing.
- Turn the bag inside out to protect the design.
- Use cold water and mild soap.
- Lay flat to air-dry—never use a dryer.
- Store your tote in a cool, dry place. Stuff it with tissue paper to help it keep its shape.
- Spot-clean stains as soon as you see them.
Note: Clean your tote bag about once a month if you use it often. Quick spot cleaning helps prevent stains from setting in.
With these simple steps, your embroidered tote bag will stay beautiful and strong. You’ll enjoy your handmade creation for years, and your stitches will look just as fresh as the day you finished them!
Tips & Inspiration
Sourcing Ideas
Online Resources
You can find lots of embroidery ideas online. Pinterest has many creative tote bag designs. Instagram and YouTube show step-by-step videos and real project photos. If you want to learn new skills or see what’s popular, join embroidery groups on Facebook or Reddit. These groups share free patterns and help beginners with advice.
Here’s a simple way to use online resources: Plan your project and get your supplies. Try dyeing your tote bag with indigo or natural dyes for a cool look. Transfer your favorite embroidery pattern onto the bag and start stitching. Iron your tote bag first to make it smooth. Use stabilizer paper to help transfer patterns, then rinse it out when you finish.
You will find many free guides and patterns online, so you always have new ideas!
Everyday Life
Great inspiration can come from things you see every day. Look around for cool logos, your pet’s funny pose, or patterns on your notebook. Changes in the seasons, like flowers blooming or holiday decorations, give you new ideas too. Take pictures or make quick sketches when you see something interesting. You can turn these moments into special tote bag embroidery projects.
Avoiding Mistakes
Embroidery is fun, but you might make mistakes sometimes. Here are ways to avoid common problems and keep your tote bag looking nice.
Puckering
Puckering means your fabric bunches up around the stitches. You can stop this by using a hoop to keep your tote bag tight. Always iron your tote before you start and use a stabilizer that matches your fabric. If you see puckering, loosen your stitches and smooth the area before you keep going.
Thread Tension
Thread tension is important for your design. If your stitches are too tight, the fabric will pucker. If they’re too loose, the design looks messy. Practice keeping your thread even as you stitch. Test your tension on scrap fabric first to see what works.
Here are other beginner mistakes to watch for: Measure and mark the center of your bag before stitching. Pick thread colors that stand out against your tote. Make sure your design fits the space you have. Use the right stabilizer for your fabric. Match your stitching style to the material.
Tip: Take your time when planning and setting up. A little prep helps a lot!
Showcasing Work
When you finish your embroidered tote bag, show it off! Sharing your work can inspire others and help you start a small business.
Social Media
Instagram and Pinterest are great for showing your tote bag embroidery. Post clear photos and use hashtags like #embroideredtotebag or #handmadetote. Join embroidery challenges to meet other crafters. You can get feedback and build a group of followers. Share your process with stories or short videos to reach more people.
Gifting & Selling
Handmade tote bags make great gifts for friends and family. If you want to sell your bags, try these ideas:
| Strategy Type | Description |
|---|---|
| Email Marketing | Send emails with new designs and special deals. |
| Content Marketing & SEO | Write blog posts about tote bag trends and tips. |
| Social Media | Share your designs on Instagram and Pinterest to find buyers. |
| Search Engine Marketing (SEM) | Use paid ads to help people find your online store. |
| Customer-Centric Approach | Listen to feedback and give good service to keep customers. |
| Sustainable Options | Offer eco-friendly tote bags for shoppers who care about the environment. |
Order samples to check the quality before you sell. Look at competitor prices to set a fair price. Work with influencers or bloggers to promote your bags. You can turn your hobby into a side job or even a full-time business!
Note: Whether you share, gift, or sell, your embroidered tote bags show your creativity and style. Have fun and be proud of your work!
Conclusion
You have seen lots of cool embroidery ideas for tote bags. You can use different stitches and colors. You can also try new patterns. Experts say canvas is strong and lasts a long time. Cotton is soft and good for beginners. Always measure your design and put it in the center. This makes your tote look neat.
- Pick canvas or cotton for your tote bag
- Use a stabilizer so your fabric does not bunch up
- Try flat panel designs because they are easy to hoop
- Add felt backing to keep your stitches safe
Want to make your own special embroidered tote bag? We offer tote bag customization with many creative embroidery choices. Let’s make something cool together!
FAQ
How do you choose the best tote bag for embroidery?
You want a sturdy canvas tote with a tight weave. This makes stitching easier and helps your design look crisp. Cotton totes work well, too. Always check the fabric thickness before you start your personalized tote bag embroidery project.
What embroidery stitches are easiest for beginners?
You can start with backstitch, running stitch, and satin stitch. These basic stitches work for most embroidery ideas for beginners. Practice on scrap fabric first. You’ll get comfortable and see how each stitch looks on your tote.
Can you embroider a tote bag without a hoop?
Yes, you can! A hoop helps keep your fabric tight, but you can stitch without one if your tote is thick. Just make sure you keep your stitches even and don’t pull the thread too tight. You’ll avoid puckering and get a smooth finish.
How do you transfer embroidery designs onto a tote bag?
You can use tracing paper, water-soluble stabilizer, or draw freehand with a washable marker. Each method works for different embroidery patterns. Try a small test first. You’ll see which transfer method fits your style and project best.
What’s the best way to care for an embroidered tote bag?
Turn your tote inside out before washing. Use cold water and mild soap. Lay it flat to dry. Spot-clean stains quickly. These steps help your embroidered tote bag stay bright and last longer. You’ll keep your stitches looking fresh.
Can you use beads and sequins on your tote bag embroidery?
Absolutely! Beads and sequins add sparkle and texture. Sew them on with strong thread and secure each one with a knot. You’ll create a dazzling, personalized tote bag embroidery design that stands out in any crowd.
How do you fix mistakes in your embroidery?
If you make a mistake, gently snip the thread and pull it out. Use a needle to lift stitches. Redraw your design if needed. You’ll get a second chance to make your embroidered tote bag look just how you want.
Where can you find free embroidery patterns for tote bags?
You’ll find free patterns on Pinterest, Etsy, and embroidery blogs. Many sites offer step-by-step guides for how to embroider a tote bag. Join online groups for more inspiration and tips. You’ll never run out of creative ideas!


