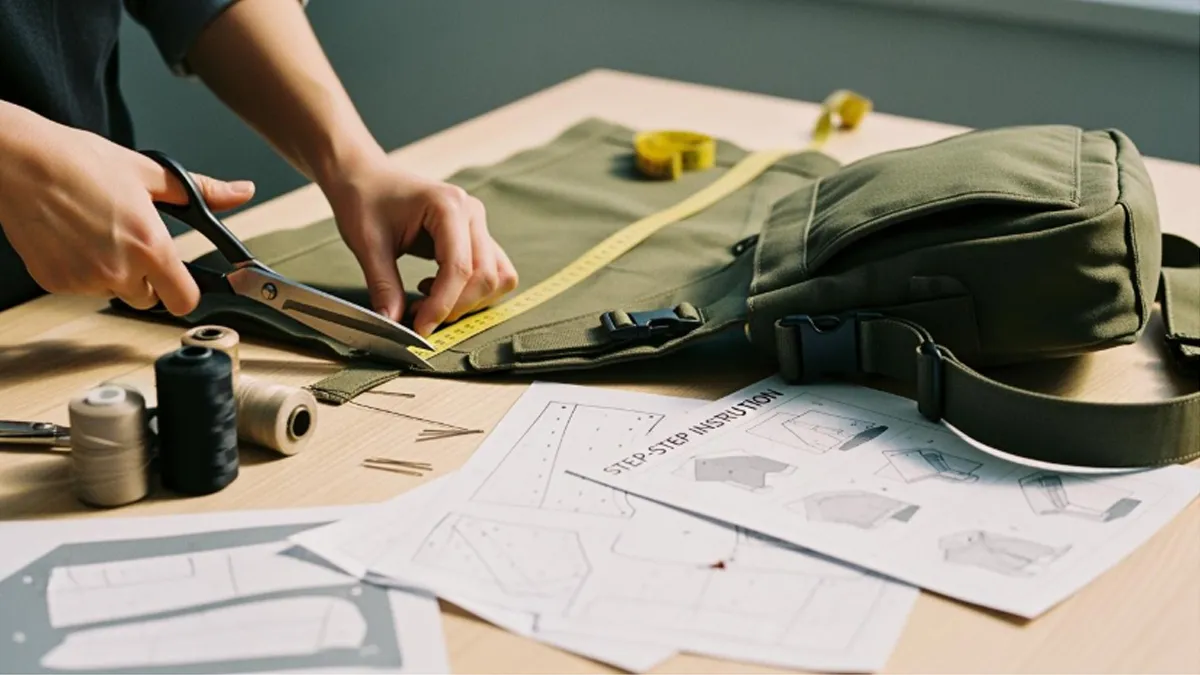
Are you ready to learn how to make sling bag projects at home? This sewing tutorial gives you easy steps to follow. You can make a simple sling bag, even if you have never made a reversible sling bag before. You only need a few basic materials and a good place to work. Pick your favorite fabric, follow each step, and have fun making your own bag with this helpful guide.
Key Takeaways
- Get all your materials before you start. You will need fabric, interfacing, hardware, and tools. Having everything ready makes sewing easier.
- Pick a strong fabric so your bag lasts longer. Ripstop nylon and CORDURA® are tough choices. Polyester is cheaper if you want to save money.
- Cut the fabric pieces with care. Follow the standard sizes as a guide. Check your measurements twice so you do not waste fabric.
- Decide where pockets should go before cutting. Think about what you will carry in the bag. Make sure you can reach the pockets easily.
- Choose a strap material that feels good. Leather looks nice, and webbing is strong. Change the strap length so it fits you well.
- Use interfacing to help your bag keep its shape. Fusible interfacing gives a clean look and helps the bag stay firm.
- Sew with strong stitches and finish the edges well. Topstitching and zig-zag stitching stop the fabric from fraying. These stitches also make the bag last longer.
- Make your sling bag special with decorations. Add extra pockets or use different fabrics. You can also try decoupage to make your bag unique.
Materials for How to Make Sling Bag
You need to get all your materials before you start. This guide will help you choose the best things for your sling bag. Having everything ready makes sewing easier. Let’s see what you need for this project.
Fabric and Interfacing
Picking the right fabric is important for your bag. You want fabric that is strong and easy to sew. Here is a table that shows some popular fabrics and how tough they are:
| Fabric Type | Durability Rating Description |
|---|---|
| Ripstop Nylon | High strength-to-weight ratio, prevents rips from spreading, lightweight but strong. |
| Polyester | Heavier, cheaper, suitable for short-term use, some durable options available when blended. |
| CORDURA® Fabrics | High abrasion resistance and strength-to-weight ratio, quality assurance from CORDURA®-approved mills. |
| Canvas | Heavier, more susceptible to abrasions, weatherproofing can be re-proofed for durability. |
| Leather | Heavy, sensitive to elements, requires maintenance, not ideal for travel. |
| Denier Ratings | Higher denier means more durability, but weight increases; 500D is usually enough for sling bags. |
Ripstop nylon and CORDURA® are good if you want a strong bag. Canvas is a classic choice. Polyester is good if you want to save money. Leather looks nice but needs special care.
Interfacing helps your bag keep its shape. Beginners like fusible fleece or fusible interfacing. These are easy to use and make your bag look neat.
Tip: Fusible interfacing sticks to fabric when you use an iron. Fusible fleece makes your bag soft and gives it shape. Both are good for a reversible sling bag.
Hardware and Notions
Hardware helps your bag work well and last longer. You need a few important pieces for this project. Here is a table to show what you need:
| Component | Description |
|---|---|
| Zippers | YKK zippers keep your items safe and secure. |
| Coated Zippers | Help keep moisture out, perfect for rainy days. |
| Reinforced Stitching | Adds strength at stress points. |
| Quick-dry Lining | Handles spills and keeps your bag fresh. |
| Water-resistant Fabric | Protects your things from unexpected weather. |
You also need thread, snaps, and sometimes D-rings or sliders. These help with adjustable straps. Good stitching and strong materials help your bag last longer.
Tools Needed
You do not need fancy tools, but some basics help a lot. Here is what you should have for this project:
- Sewing machine (helps you sew faster and neater)
- Sharp scissors or rotary cutter (for cutting fabric)
- Quilting ruler (helps you measure and cut straight lines)
- Clips or pins (hold pieces together while you sew)
- Strong thread (keeps seams from breaking)
- Bulky seam aid (helps sew over thick seams)
- Rivet hole punch and placement template (for adding rivets)
- Hand press and rivet dies (set rivets and snaps)
- Turning tool (pushes out corners for a clean finish)
If you want to use leather, you need leather machine needles and strong thread. Ultrasuede is good for lining because it is water-resistant and easy to clean. Decovil Heavy interfacing gives your bag extra shape.
Now you are ready to start making your sling bag. With these materials and tools, you can follow the steps and sew a bag that looks great and lasts. Get your supplies, set up your workspace, and get ready for the next part of your sewing project!
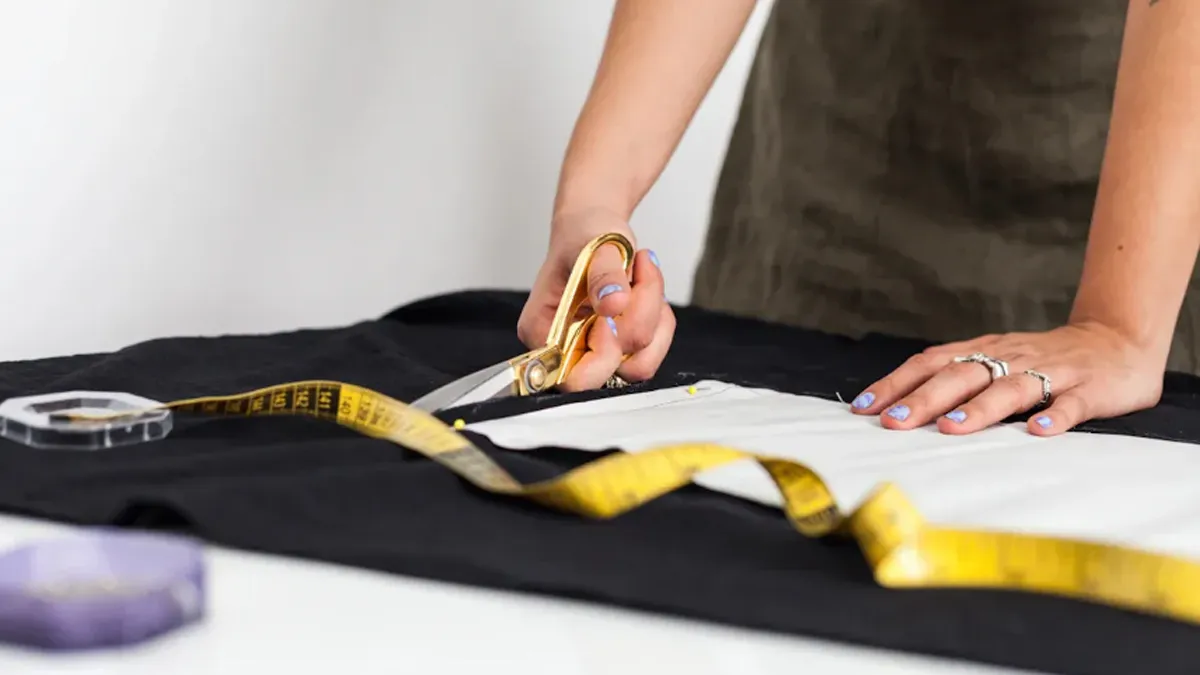
Cut Fabric Pieces
Main Body
Let’s start with the main body of your sling bag. This part gives your bag its shape and strength. You want to cut your fabric pieces with care so everything fits together later. For a medium-sized sling bag, you can follow these standard dimensions:
| Piece Type | Quantity | Dimensions (inches) | Dimensions (cm) |
|---|---|---|---|
| SIDE & BOTTOM PIECE | 1 | 13.25” x 4” | 33.65cm x 10.16cm |
| ZIPPER PIECE | 2 | 22” x 2.5” | 55.88cm x 6.35cm |
| RECRESSED ZIPPER PIECE | 2 | 7” x 8” | 17cm x 20cm |
| FRONT PIECE | 1 | N/A | N/A |
| BACK PIECE | 1 | N/A | N/A |
You can use these measurements as a guide. If you want a bigger or smaller bag, adjust the sizes. Always use a ruler and mark your fabric before cutting. Sharp scissors or a rotary cutter will help you get clean edges. Remember to cut one piece for each part unless the table says you need two.
Tip: Double-check your measurements before you cut. It saves you time and fabric!
Lining
The lining makes your bag look neat inside and adds strength. You want a lining that feels smooth and lasts a long time. Many people use synthetic fabrics for this part because they are tough and resist water. Here are some popular choices:
| Fabric Type | Features |
|---|---|
| Silicone-coated polyester | Strong, seam-tapeable, low priced |
| PU-coated nylon | Durable, water-resistant |
| Dyneema composite fabric | Extremely strong, lightweight |
| Nylon | Durable, commonly used in bags |
| Polyester | Durable, often used for outdoor gear |
You can pick nylon or polyester if you want something easy to sew and clean. Cut your lining pieces to match the main body pieces. If your bag has extra pockets inside, cut those from the same lining fabric.
Note: Synthetic linings like nylon and polyester help your bag last longer and keep your things dry.
Pockets
Pockets make your sling bag super useful. You can add as many as you like. Think about what you want to carry. Do you need a spot for your phone, keys, or a water bottle? Here are some ideas for pocket sizes and placements:
- Add a small pocket inside for keys or coins.
- Sew a medium pocket on the outside for your phone.
- Make a tall pocket for a water bottle or umbrella.
- Use multiple compartments to keep things organized.
- Try a padded section for electronics or documents.
Cut pocket pieces a little bigger than the items you want to store. This way, you have room for seams and the pocket will not feel too tight. Place pockets where you can reach them easily. You can even add a zipper or snap for extra security.
Tip: Plan your pocket layout before you cut. Lay out your items on the fabric to see what works best!
Strap
The strap is what makes your sling bag easy to carry. You want it to feel comfortable on your shoulder and strong enough to hold your things. Let’s talk about how to pick the right material, measure, and cut your strap so your bag feels just right.
First, think about what you want from your strap. Do you want it to look stylish, feel soft, or last a long time? Here’s a table to help you compare some popular strap materials:
| Material | Benefits |
|---|---|
| Leather | Sophisticated look, very strong |
| Embroidered cotton | Flexible, adds a unique style |
| Reinforced webbing | Breathable, soft backing, very durable |
If you want a classic look, leather works well. For a fun and colorful bag, try embroidered cotton. If you want something tough and easy to clean, reinforced webbing is a great choice. Many people like heavy-duty nylon webbing because it is stronger than polypropylene and holds up well over time.
Tip: Reinforced webbing with a soft backing feels good on your shoulder, even when your bag is heavy.
Some straps have special features that make them even better. Look for straps with an internal control-stretch system. This helps spread out the weight and makes the bag feel lighter. Shock absorption in the strap can also make carrying your bag more comfortable, especially if you plan to use it every day.
When you cut your strap, think about how you want to wear your bag. Most sling bags use a strap that is 40 to 55 inches (about 100 to 140 cm) long. If you want an adjustable strap, cut it a little longer. You can always trim it later. The width of the strap matters too. A strap that is 1 to 1.5 inches (2.5 to 4 cm) wide feels sturdy and does not dig into your shoulder.
Here’s a simple way to get your strap ready:
- Choose your material and measure the length you want.
- Use a ruler to mark the length and width on your strap material.
- Cut the strap with sharp scissors for a clean edge.
- If you want an adjustable strap, cut two pieces and use all-metal swivel hooks or sliders. These make it easy to change the length and add durability.
Note: All-metal swivel hooks last longer than plastic ones and make your bag look more professional.
If you want to add style, sew on a strip of embroidered cotton or use a bright color. For extra strength, fold the ends of the strap over and sew them down before attaching hardware. This keeps the strap from fraying and makes it last longer.
You now have a strap that fits your style and feels great to wear. Take your time with this step. A good strap makes your sling bag comfortable and easy to use every day.
Easy Sling Bag Preparation
Getting ready before you sew makes your project go smoothly. This part of the tutorial will help you prepare all the pieces for your easy sling bag. You will learn how to apply interfacing, get your zippers ready, and organize everything for assembly. These steps make the sewing process much easier, especially if you are new to making a reversible sling bag.
Apply Interfacing
Interfacing gives your bag structure and helps it hold its shape. You want your reversible sling bag to look neat and last a long time. Here’s how you can apply interfacing like a pro:
- Cut your fabric a little bigger than you need.
- Iron the interfacing onto the whole piece before you cut out your pattern shapes. This is called block fusing and saves time.
- Use fusible interfacing such as Vilene F220 or Pellon SF-101 Shape Flex for most bag parts. These make your fabric sturdy, especially around zippers and pockets.
- For a professional look, try 520 Deco-Fuse on the main body.
- If you want a soft, padded feel, use Vilene H640 fusible fleece for small bags or Vilene Style-Vil foam stabilizer for medium and large bags.
- For big bags, heavy craft weight sew-in interfacing like Vilene S80/240 works well.
Tip: Always follow the instructions on your interfacing. Use a pressing cloth and set your iron to the right temperature. This keeps your fabric safe and helps the interfacing stick well.
Prep Zippers
Zippers are important for your reversible sling bag. They keep your things safe and make your bag easy to use. You have a few zipper choices:
- Coil zippers bend easily and work great for curved openings.
- Molded plastic zippers are strong and resist weather, perfect for outdoor bags.
- Metal zippers look classic and last a long time.
- Invisible zippers hide in the seam for a clean look.
To prep your zippers, measure the opening and cut the zipper a little longer than you need. If you use a free sewing pattern, check the zipper size in the instructions. Sew zipper tabs on each end to make sewing easier and give your bag a neat finish.
Note: Always test your zipper before sewing it into your easy sling bag. Make sure it slides smoothly and does not catch on the fabric.
Organize Pieces
Before you start sewing, lay out all your pieces. This step helps you see if you have everything you need for your reversible sling bag. Group your main body, lining, pockets, and strap pieces. Keep your zippers and hardware close by.
Here’s a simple checklist to keep you organized:
- Main body pieces (with interfacing)
- Lining pieces (with interfacing if needed)
- Pocket pieces
- Strap pieces
- Zippers and hardware
Put each group in a separate pile or use small trays. This makes it easy to grab what you need during each step of the tutorial. Staying organized helps you sew faster and makes the whole process more fun.
Tip: Take a photo of your layout before you start sewing. If you get mixed up, you can check the photo and get back on track.
Now you are ready to sew your reversible sling bag! Careful preparation makes the rest of the tutorial much easier. You will feel more confident as you follow each step on how to make sling bag projects at home.
Sew Bag Body
You’re ready to dive into the heart of this tutorial. This part covers the sewing steps for the main body of your sling bag. You’ll follow clear instructions for joining the lining, sewing the exterior panels, and adding pockets. Take your time with each step. Good sewing makes your bag look professional and last longer.
Join Lining Pieces
Start with the lining. The lining gives your sling bag a neat inside and helps it hold its shape. You want strong seams that don’t come apart. Here’s a table to help you pick the best stitch type and seam allowance for joining lining pieces:
| Stitch Type | Seam Allowance |
|---|---|
| Flat Seam | 0.5″ (12 mm) |
| French Seam | 0.25″ (6 mm) |
| Flat Fell Seam | 3/4″ (19 mm) |
| Ladder Stitch | N/A |
Flat seams work well for most linings. French seams look tidy and hide raw edges. Flat fell seams add extra strength. If you want a hidden stitch for closing small openings, use a ladder stitch.
Follow these instructions for sewing the lining:
- Pin the lining pieces together with the right sides facing each other.
- Choose your stitch type. Use a flat seam for easy sewing or a French seam for a clean finish.
- Sew along the edges, keeping your seam allowance even.
- Press the seams open with an iron. This helps the lining lay flat.
- Check for any loose threads and trim them.
Tip: If you’re making a reversible sling bag, French seams make the inside look just as good as the outside.
Sew Exterior Panels
Now you’ll sew the exterior panels. This step gives your sling bag its shape and style. You want neat edges and strong seams. Follow these tutorial instructions for a professional finish:
- Topstitch along all edges, about ¼” from the seams. This makes your bag durable and gives it a polished look.
- Seal the edges with heat-set tape if you’re using nylon or canvas. This stops fraying and keeps your bag looking new.
- Keep your stitching straight. Use the edge of your zipper foot as a guide. Check your thread tension before you sew the final seams.
Here’s a quick checklist for sewing the exterior panels:
- Pin the panels together, right sides facing.
- Sew along the edges, following your seam allowance.
- Topstitch for extra strength and style.
- Seal raw edges if needed.
Note: Consistent stitching helps your sling bag last longer and look great.
Add Pockets
Pockets make your sling bag super useful. You can add inside or outside pockets for keys, phones, or other small items. Good sewing and strong hardware keep your pockets secure.
Here are some best practices for attaching pockets:
- Use durable materials for pocket pieces. Water-resistant fabric keeps valuables safe.
- Sew pockets with strong stitches. Double-stitch the edges for extra hold.
- Attach zippers from YKK for security. These zippers prevent items from falling out.
- Use tough hardware like metal snaps or rivets for everyday use.
Follow these instructions to add pockets:
- Pin the pocket pieces where you want them on the bag.
- Sew around the edges, leaving the top open or adding a zipper.
- Reinforce the corners with extra stitches.
- Attach hardware if needed.
Tip: Plan your pocket layout before you sew. This tutorial helps you keep everything organized and easy to reach.
You’ve finished the main sewing steps for your sling bag. Careful sewing and following these instructions make your bag strong and stylish. You’re almost done with the assembly instructions. Keep going with the tutorial and enjoy seeing your reversible sling bag come together!
Attach Strap and Finish
You are almost done with your sling bag! This part of the tutorial will help you sew the strap, attach it to your bag, and finish the edges for a strong, neat look. Follow these instructions to make sure your bag feels comfortable and lasts a long time.
Sew Strap
Let’s start with the strap. You want a strap that feels good on your shoulder and holds up to daily use. This tutorial shows you how to sew a strong strap, whether you use webbing, cotton, or leather.
- Fold the strap material in half lengthwise, with the right sides facing out.
- If you use fabric, press the fold with an iron to keep it flat.
- Topstitch along both long edges. This step makes the strap sturdy and gives it a clean look.
- If you want extra strength, sew a second row of stitches close to the first one.
- For adjustable straps, thread the ends through your slider or D-ring hardware before sewing them down.
Tip: Use heavy-duty thread for this step. It helps your strap last longer and keeps it from breaking when you carry heavy things.
You can add padding inside the strap for more comfort. Some people like to sew a strip of soft fabric or foam inside. This makes the strap feel better on your shoulder, especially if you plan to use your sling bag every day.
Attach Strap
Now you will attach the strap to your bag. This part of the tutorial is important for both comfort and safety. You want the strap to stay in place, even when your bag is full.
Follow these instructions to attach the strap:
- Place the ends of the strap at the side seams or on the back panel, depending on your bag style.
- Tuck the raw ends of the strap inside the seam allowance.
- Pin or clip the strap in place so it does not move while you sew.
- Sew a box with an X through it at each end of the strap. This is called a box stitch. It makes the connection extra strong.
- If you use hardware like swivel hooks, sew the strap ends around the hardware and reinforce with extra stitches.
Note: Double-check that your strap is not twisted before you sew it down. A twisted strap can feel uncomfortable and look messy.
If you want to make your sling bag reversible, attach the strap with snaps or clips. This way, you can remove the strap and switch the bag inside out. It is a fun way to get two looks from one bag!
Finish Edges
Finishing the edges is the last step in this tutorial. Clean edges make your bag look professional and stop the fabric from fraying. There are several ways to finish the edges, and you can pick the one that works best for your sewing skills.
Here is a table with some popular stitching techniques for finishing bag edges:
| Stitching Technique | Description |
|---|---|
| Flat Felled Seams | Encloses raw edges for a strong, neat finish. |
| Zig-Zag Stitch | Easy for beginners, keeps seams tidy and prevents fraying. |
| Binding with Grosgrain | Covers raw edges and adds a polished look. |
| Heavy Thread | Makes seams stronger and helps stop fraying. |
| Seam Sealer | Seals the inside of seams for extra protection against fraying. |
You can use these methods to finish your sling bag:
- Try flat felled seams to hide raw edges and make your bag stronger.
- Use a zig-zag stitch if you want a quick and easy finish.
- Bind the seams with grosgrain or bias tape for a tidy look.
- Sew with heavy thread to add durability.
- Apply seam sealer inside the seams for extra fray protection.
Tip: If you use nylon or canvas, sealing the edges with a lighter or seam sealer keeps them from unraveling. Always be careful with heat!
Take your time with this part of the tutorial. Good edge finishing makes your bag last longer and look great. You have now learned how to sew, attach, and finish the strap, and how to make your bag edges neat and strong. Your reversible sling bag is almost ready to use!
Final Assembly Steps
Combine Interior and Exterior
You’re almost at the finish line of this tutorial. Now, you need to combine the interior and exterior parts of your sling bag. This step brings everything together and makes your bag look complete. Start by turning the exterior piece inside out. Slip the lining inside, making sure the right sides face each other. Line up the edges and pin them in place.
Here’s a table showing some methods you can use to join these parts:
| Method | Description |
|---|---|
| Pockets | Add a second pocket inside for easy access to important items. |
| Attachment | Use sewing, heat welding, or adhesive bonding to join materials securely. |
You can add pockets in different shapes and sizes to make your bag more useful. Place them where you can reach them easily. This way, you get more storage without making your bag bulky. When you follow these instructions, you make sure your reversible sling bag stays strong and organized.
- Try to maximize space but keep the bag sturdy.
- Make sure pockets are easy to reach.
- Use a variety of pocket styles for different needs.
Topstitch and Reinforce
This part of the tutorial helps you make your sling bag tough and stylish. Topstitching gives your bag a neat look and adds strength. Sew along the top edge where the lining and exterior meet. Keep your stitches straight for a professional finish.
You want your bag to last, so use these reinforcement techniques:
- Double-stitch at anchor zones for extra hold.
- Add internal patches between the outer layer and lining.
- Use rivets at the start and end of straps.
- Try bar tacking, which is a zigzag stitch that stops ripping.
- Sew a subtle V-shape into the straps to spread out weight.
Follow these instructions to reinforce your sling bag. Each method helps your bag handle daily use. If you use leather or heavy fabric, rivets and bar tacking work best. For lighter bags, double-stitching and internal patches add plenty of strength.
Tip: Always check your stitches before you finish. Strong seams mean your bag will last longer.
Trim Excess
You’re almost done with this tutorial. Now, you need to trim any extra threads or fabric. Use sharp scissors to cut away loose ends. This step makes your sling bag look clean and professional.
- Check all seams for stray threads.
- Trim fabric close to the stitching, but don’t cut the seam.
- Remove any extra interfacing or lining that sticks out.
If you want your reversible sling bag to look perfect, take your time with this step. Neat edges show you followed the instructions carefully. Your bag is now ready to use or give as a gift.
Note: Clean finishing makes your sewing project stand out. You did a great job following this tutorial!
Customize and Troubleshoot
Personalize Your Bag
You can make your sling bag stand out with a few creative touches. This tutorial gives you lots of ways to add your own style. Try adding extra pockets inside or outside for more storage. You can sew on a zipper pocket for your phone or a small pouch for coins. If you want to make your bag unique, use different fabrics for the lining or the strap. Mix bright colors or fun patterns to match your personality.
Many people love to decorate their bags with special techniques. Here are some popular ideas you can try:
- Decoupage: Cut out paper shapes and glue them onto your bag. Cover with a clear finish to protect your design.
- Resin Art: Pour resin over a small area to create a shiny, custom look. You can add glitter or tiny charms inside the resin.
- Paper Crafting: Make paper flowers or shapes and attach them to your bag for a playful touch.
You can also sew on patches, buttons, or embroidery. Try adding a keychain or a tassel to the zipper. If you want your reversible sling bag to look different on each side, use two fabrics with bold prints. This tutorial encourages you to get creative and make your bag one of a kind.
Tip: Lay out your decorations before you attach them. This helps you see what looks best and keeps your design balanced.
Fix Common Mistakes
Even if you follow every step in this tutorial, you might run into a few problems. Don’t worry! You can fix most issues with simple solutions. Here are some common sewing problems and how to solve them:
- Fabric issues: If your fabric starts to fray, use a fray stopper or sew a zig-zag stitch along the edge. For stretching or tearing, pick a tighter weave or test your fabric strength before you start.
- Sewing machine malfunctions: If your machine skips stitches or the thread breaks, check if your needle is sharp. Adjust the tension and make sure the bobbin is in place. Clean your machine often to keep it running well.
- Interfacing problems: If the interfacing peels or bubbles, use a hot iron and smooth it out as you press. Pick the right weight of interfacing for your fabric so your bag feels just right.
If you make a mistake, don’t panic. This tutorial is here to help you learn. You can always rip out a seam and sew it again. Follow the instructions step by step, and you will get better with practice.
Note: Keep extra fabric and thread nearby. If you need to fix something, you will have everything ready.
This tutorial wants you to enjoy the process. Every time you sew, you learn something new. Soon, you will make sling bags with confidence and style!
Conclusion
You finished this tutorial about making sling bag projects. You used easy steps and learned new sewing skills. Practice helped you get better and more creative. Everyone who tried this felt happy with their DIY sling bag. You can make your bag special with extra pockets, bright colors, or cool decorations. If you want to buy custom sling bags for your brand or event, here are some good things:
| Benefit | Description |
|---|---|
| Brand Differentiation | Special designs help you stand out. |
| Cost Efficiency | You save money when you buy more bags. |
| Quality Assurance | You get strong bags that meet standards. |
| Speed to Market | You can sell your product faster. |
Lots of customers like the different styles and great service. You can post your finished bag on Instagram, follow other creators, and meet other makers. Try this tutorial, follow the steps, and have fun sewing your own sling bag. Show off your project or ask for custom help!
Want to turn your idea into a custom bag? We offer full style/size/material customization, low MOQs, fast samples, eco fabrics, and branding—send your specs and get a free mockup & quote today.
FAQ
How long does it take to make a sling bag?
You can finish a simple sling bag in about 2 to 4 hours. If you add extra pockets or decorations, you might need more time. Take breaks and enjoy the process!
Can I sew a sling bag by hand?
Yes, you can sew a sling bag by hand. Use a strong needle and thick thread. Hand stitching takes longer, but you get more control over each seam.
What fabric works best for beginners?
Cotton canvas or polyester works great for beginners. These fabrics are easy to cut and sew. They also hold their shape well and come in many colors and patterns.
How do I make my sling bag waterproof?
You can use water-resistant fabric like ripstop nylon or add a waterproof lining. You can also spray your finished bag with a fabric protector for extra water resistance.
My seams look messy. What should I do?
Try pressing your seams with an iron. Use a straight stitch and keep your fabric flat. If you make a mistake, you can use a seam ripper and sew again. Practice helps!
Can I wash my homemade sling bag?
Most fabric sling bags are machine washable. Use cold water and a gentle cycle. Air dry your bag to keep it in good shape. If you use leather, spot clean only.
How do I adjust the strap length?
If you want an adjustable strap, use a slider or D-ring. Thread the strap through the hardware and sew the ends down. You can make the strap longer or shorter as needed.
What if I don’t have a sewing machine?
You can sew your sling bag by hand. Use small, tight stitches for strength. It takes more time, but you can still make a sturdy and stylish bag.