
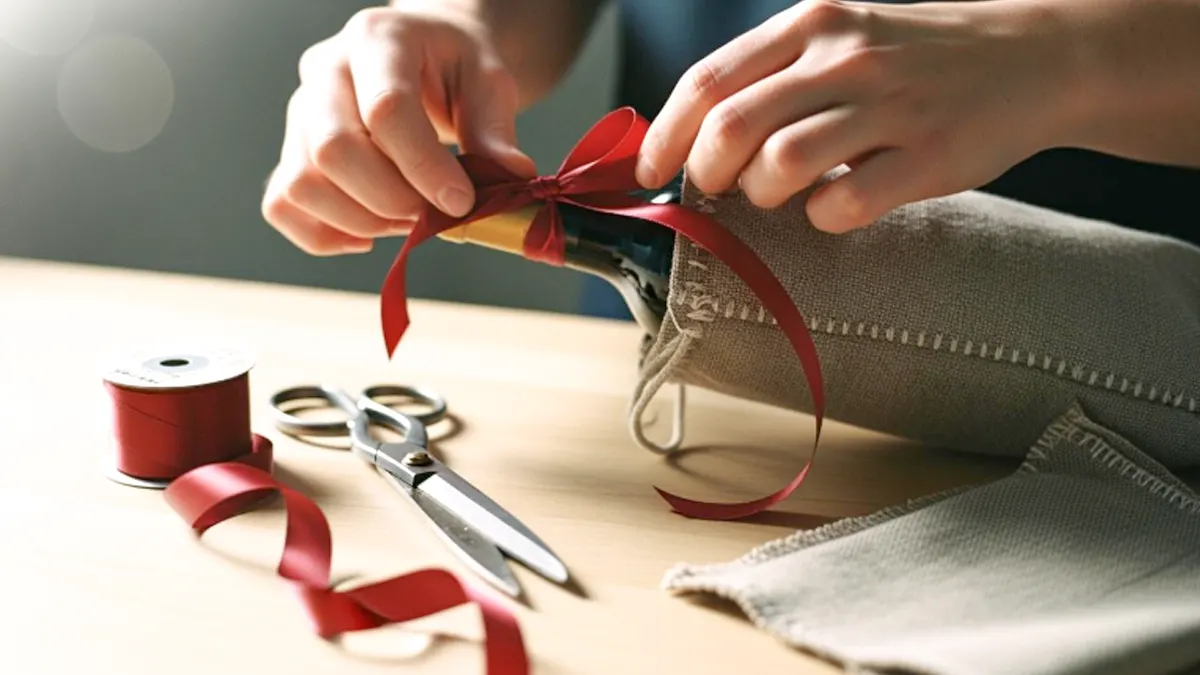
Ever wondered how to make a wine bottle gift bag that feels personal and fun? You can jump into this diy project with just a few supplies and a little creativity. Even if you have never sewn before, you will find this diy wine bottle gift bag easy to create. Grab some fabric, try upcycling old materials, and add your own touches. This project lets you give a gift that stands out and shows you care.
Key Takeaways
- Get your supplies ready before you begin.
- Pick fabrics such as cotton, jute, or velvet.
- These make the bag look nice and last longer.
- You can reuse old things like sweater sleeves.
- This helps you make a special and earth-friendly gift bag.
- A sewing machine is fast to use.
- Hand sewing is good for beginners.
- It lets you control your stitches better.
- Cut your fabric to 33 inches by 8 inches.
- This size fits most wine bottles well.
- Fix the edges of your fabric so they do not fray.
- Try zigzag stitching or use tape for this step.
- Make your gift stand out with decorations.
- Add bows, buttons, or custom labels.
- You can also try no-sew ways.
- Use fabric glue or ties for a fast and simple bag.
- Take care of your bag by washing it gently.
- Store it the right way so it lasts for many uses.
Materials for a Wine Bottle Gift Bag
Get your supplies before you start sewing. The right materials help your wine bottle gift bag look nice and last longer. You can pick many kinds of fabric, use old things, and add cool extras to make your bag special.
Fabric Options
Cotton, Linen, and More
There are lots of fabric choices. Some are stronger and look better than others. Here are some popular options:
| Material | Key Features |
|---|---|
| Jute | Natural fiber texture, rustic look, eco-friendly |
| Cotton / Canvas | Soft, durable, versatile for customization |
| Velvet | Luxurious feel, rich colors, upscale presentation |
| Tyvek | Lightweight, water-resistant, tear-resistant |
| Washable Kraft Paper | Water-resistant, suitable for sustainable reuse |
| Laminated Non-Woven | Sturdy, water-resistant, ideal for high customization |
| Non-Woven | Lightweight, cost-effective, easy to shape |
| Paper | Lightweight, colorful designs, mostly disposable |
Cotton and canvas are simple to sew and decorate. Velvet makes your bag look fancy. Jute and washable kraft paper are good if you want something eco-friendly.
Upcycled Materials (Sweater Sleeve)
You do not need to buy new fabric. Old sweater sleeves work great for wine bottle gift bags. Using upcycled materials like sweater sleeves helps cut down on waste. Many sweaters get thrown away for small problems, but you can reuse them. Wool and knit fabrics are tough and bend easily, so your bag will last. Upcycling lets you be creative and care about the planet.
Tools and Supplies
Sewing Machine or Needle
A sewing machine helps you finish faster. If you do not have one, you can use a needle and thread. Hand sewing is good for beginners and gives you more control.
Scissors, Pins, Measuring Tape
Here is a table to help you choose your tools and other options:
| Item Description | Alternatives |
|---|---|
| Decorative fabric (33 x 8 inches) | Any fabric type for different occasions |
| Coordinating fabric for bow | Ribbon instead of fabric for the bow |
| Tex 70 UV Bonded Polyester Thread | Any strong thread for sewing |
| Rotary Cutter | Scissors |
| Cutting Mat | Any flat cutting surface |
| Acrylic Ruler | Any straight edge for measuring |
| Sewing Pins | Clips or other fastening methods |
| Sewing Machine | Hand sewing with needle and thread |
Thread, Ribbon, Iron
Pick thread that matches your fabric. Polyester thread works for most projects. You need ribbon or extra fabric for the bow or to close the bag. An iron helps you press seams and keeps your bag neat.
Tip: If you want to decorate your bag, use buttons, appliqué patches, or custom labels. You can also add a drawstring or use ribbon to close your bag easily.
With these materials and tools, you can start your wine bottle gift bag. Mix and match fabrics, try upcycling, and add your own style. Next, measure and cut your fabric, so keep your supplies nearby!
How to Make a Wine Bottle Gift Bag: Step-by-Step
Ready to learn how to make a wine bottle gift bag? You’re about to see just how simple and fun this project can be. Let’s break down each step so you can follow along and create a beautiful bag for your next gift.
Measure and Cut Fabric
Standard Size (33″x8″)
Start by measuring your fabric. The standard size for a wine bottle gift bag is 33 inches tall and 8 inches wide. This size fits most wine bottles perfectly. You want the bag to look neat and snug, not loose or floppy. Here’s why this size works best:
- The tall shape matches the height of a wine bottle.
- The width gives enough room for the bottle but keeps the bag looking tidy.
- Your finished bag will look professional and presentable.
Check out this table to see which bottles fit inside:
| Bottle Size | Type | Dimensions (inches) |
|---|---|---|
| 750ml | Standard Bottle | 3-3.2 (diameter) x 12 (height) |
| Champagne | Champagne Bottle | Slightly larger than standard |
| Magnum | Magnum Bottle | Larger than standard, varies |
If you want to make a bag for a larger bottle, just add a few inches to your measurements.
Using a Free Pattern
You can use a free sewing pattern to make things even easier. Patterns give you exact measurements and step-by-step instructions. Here’s how a pattern helps:
- You get clear directions for each step.
- You cut your fabric with confidence, knowing it will fit.
- You follow a guide that makes sewing simple, even if you’re new.
Using a pattern means you don’t have to guess. You just follow along and watch your project come together. Many patterns include pictures or diagrams, which help you see what to do next.
Tip: If you’re nervous about cutting your fabric, print out a pattern and trace it onto your material. This keeps your lines straight and your bag looking sharp.
Prepare Edges
Fold and Hem Short Sides
Now, let’s get your edges ready. You want to stop your fabric from fraying and make your bag last longer. Here are some easy ways to prepare the edges:
- Tape: Place masking or painter’s tape along the edge before you sew. Trim off any extra fabric after stitching.
- Zigzag Stitch: Use your sewing machine’s zigzag setting to lock the threads in place.
- Hand Stitching: Try a whipstitch around the edge for a handmade look.
- Fray Check: Dab a little seam sealant on the edges to keep them from unraveling.
- Serger: If you have a serger, use it for a clean, professional finish.
For smaller pieces, you can fold the edge over and sew a simple hem. This keeps everything neat and stops threads from coming loose.
Beginner Tip: Use tape on your sewing surface to guide your stitches. This helps you sew straight lines and gives your bag a polished look.
Sew the Bag
Fold Right Sides Together
Take your fabric and fold it in half lengthwise, with the right sides facing each other. The “right side” is the part of the fabric you want to show on the outside of your bag. Line up the edges carefully.
Sew Long Edge and Bottom
Pin the long edge and the bottom closed. Now, sew along these edges using a straight stitch. If you’re using a sewing machine, remove the flatbed section so you can rotate the bag easily. If you’re sewing by hand, keep your stitches close together for strength.
- Mark a line about 1.5 inches from the top edge for your hem.
- Sew slowly and check your lines as you go.
- Remove pins as you sew to avoid bumps.
This project is quick! You can finish your wine bottle gift bag in about 10 minutes. It’s a great way to practice straight stitches and make something useful.
You’ve just learned how to make a wine bottle gift bag with simple steps. Next, you’ll turn your bag right side out and add the finishing touches!
Turn and Finish
You’re almost done with your wine bottle gift bag. This part is where your project really comes together. Let’s make sure your bag looks neat and professional.
Turn Bag Right Side Out
Grab the sewn bag and reach inside. Gently pull the fabric through the opening so the right side faces out. You’ll see the pretty side of your fabric now. Use your fingers to poke out the corners at the bottom. This helps the bag stand up straight and gives it a crisp shape.
Tip: If the corners look a little flat, use a pencil or chopstick to push them out. Be gentle so you don’t poke through the fabric.
Check the seams as you turn the bag. Make sure there are no gaps or loose threads. If you spot any, you can fix them with a few quick stitches.
Press and Trim Threads
Lay your bag flat on an ironing board. Press the seams with a warm iron. This step makes your bag look smooth and helps the edges stay sharp. If you don’t have an iron, you can smooth the seams with your hands.
Look for any stray threads sticking out. Use scissors to trim them close to the fabric. Clean edges make your bag look finished and tidy.
Here’s a quick checklist to help you finish strong:
- Turn the bag right side out.
- Push out the corners.
- Check for loose threads or gaps.
- Press the seams.
- Trim any extra threads.
Mistakes can happen, but you can avoid the most common ones. Take a look at this table so you know what to watch for:
| Common Mistakes | Description |
|---|---|
| Sizing Errors | Measure carefully and consistently, considering seam allowances. |
| Weak Stitching | Use tight, reinforced stitching particularly at stress points. |
| Fabric Selection | Select durable, appropriately weighted fabrics to ensure reliability. |
You’ve finished the main steps. Your wine bottle gift bag is ready for the final touches. You can add a ribbon, a bow, or any decoration you like. Enjoy giving your handmade gift!
Alternative DIY Wine Bottle Gift Bag Methods
You don’t have to stick with just one way to make a diy wine bottle gift bag. There are plenty of creative methods you can try, especially if you want to use upcycled materials or skip sewing altogether. Let’s look at some fun alternatives that let you personalize your gift and help the planet.
Reversible Bag
Want a bag that looks great inside and out? Try making a reversible wine bottle gift bag. You get two looks in one, and it’s perfect if you like to switch things up for different occasions.
Sewing Two Fabrics Together
Pick two fabrics you love. Place them right sides together and sew along the edges, leaving a small opening. Turn the bag right side out, then sew up the opening. You now have a bag with two stylish sides. You can use cotton for one side and velvet for the other. This method gives you a sturdy bag and lets you show off your favorite patterns.
Tip: Use contrasting colors or prints for a bold effect. You can match the bag to holidays or special events.
Upcycled Sweater Sleeve Bag
If you want a diy project that’s eco-friendly, try making a bag from an old sweater sleeve. Upcycling helps reduce waste and saves resources. You don’t need to buy new fabric, and you keep old clothes out of landfills.
Measuring and Sewing the Sleeve
Here’s how you can make a wine bottle bag from a sweater sleeve:
- Gather supplies: old sweater, fabric scissors, pins, sewing needle, thread, and ribbon.
- Slide the wine bottle into the sleeve to measure the height you want.
- Cut the sleeve to size. Pin and sew the bottom seam. For extra stability, pinch the corners and sew across them to make “grocery bag” corners.
- Turn the sleeve right side out. Add a ribbon or cord at the top for decoration.
You can use jackets or other thick fabrics too. This method is quick and gives your bag a cozy look.
Note: Upcycling is better for the environment. It uses less energy and keeps waste out of landfills, while new materials can cause pollution.
No-Sew and Quick Methods
Don’t have a sewing machine? No problem! You can still make a wine bottle gift bag with no sewing at all.
Using Fabric Glue or Ties
Try these easy ideas:
- Use fabric glue to seal the edges of your fabric. Let it dry, then wrap the bottle and tie a ribbon at the top.
- Cut a piece of fabric, wrap it around the bottle, and secure it with a decorative tie or bow.
- Use a large sock or scarf as a quick bag. Just slip the bottle inside and tie the end.
These methods work well if you’re short on time or want a simple diy solution. You can decorate with stickers, buttons, or tags to make your bag unique.
Tip: No-sew bags are perfect for kids or anyone new to crafting. You can finish them in minutes and still get a great result.
Closures and Finishing Touches
You’ve made your diy fabric gift bag, and now it’s time to add those special touches that make your gift stand out. Closures and decorations not only keep your wine bottle secure but also show off your creativity.
Adding a Drawstring or Ribbon
A drawstring or ribbon is a simple way to close your wine bottle gift bag. It keeps the bottle safe and adds a stylish finish.
Creating a Casing
To make a drawstring closure, you need a casing at the top of your bag. Fold the top edge down about an inch and sew along the edge, leaving a small gap. This gap lets you thread your drawstring or ribbon through. You can use a safety pin to help guide the string.
Tip: A durable fabric with a drawstring closure holds the wine bottle in place and prevents spills when you carry it.
Inserting the Closure
Pick a material for your drawstring or ribbon that matches your bag’s style. Here’s a quick guide to help you choose:
| Material | Features & Recommended Use Cases |
|---|---|
| Jute | Strong texture, great for rustic or eco-friendly events. |
| Cotton / Canvas | Durable, perfect for everyday gifting or retail. |
| Velvet | Soft and fancy, ideal for holidays or executive gifts. |
| Tyvek | Lightweight and water-resistant, modern look. |
| Linen-Like Fabric | Natural and soft, good for vintage style. |
| Cotton-Linen Blend | Soft and structured, gives a natural feel. |
| Satin Ribbons | Smooth and shiny, perfect for weddings or matching wine labels. |
Thread your chosen material through the casing and tie a bow or knot. You can use twisted string or decorative ties for a trendy look.
Decorative Ideas
Personalizing your diy wine bottle gift bag makes your gift memorable. You can add embellishments and custom labels for any occasion.
Bows, Buttons, Appliqué
Try these popular embellishments to make your bag unique:
| Embellishments | Closures |
|---|---|
| Faux fur | Twisted string |
| Large Christmas bells | Decorative ties |
| Decorative strings |
You can sew on bows, attach buttons, or add appliqué patches. Large bells or faux fur give your bag a festive touch. Decorative strings work well for holiday gifts or themed parties.
You can use these ideas for weddings, anniversaries, corporate events, dinner parties, or big celebrations.
Custom Labels or Tags
Custom labels or tags add a personal touch and make your gift unforgettable. You can write names, special dates, or create designs that match the event.
| Customization Aspect | Description |
|---|---|
| Names | Add personalized names for a unique touch. |
| Dates | Include important dates for special memories. |
| Custom Designs | Create designs that fit the event’s theme. |
Personalized wine labels turn a simple gift into a keepsake. They increase the value of your gift and help with brand recognition if you’re giving gifts for a business.
Here’s how you can add a custom label:
- Decide what message you want to share.
- Design your label with simple fonts and colors.
- Use a design tool to create your label.
- Print and attach the label to your bag.
Adding a custom tag or label makes your diy gift bag perfect for any occasion and helps your gift stand out.
Tips for Your DIY Wine Bottle Gift Bag
Troubleshooting
Common Sewing Issues
You might run into a few bumps while making your diy wine bottle gift bag. Don’t worry—everyone faces challenges, even experienced crafters. Sometimes you break a needle or need to redo a seam. These moments can feel frustrating, but you can fix most problems with a little patience.
Here are some common issues and ways to solve them:
- Skipping the pattern can lead to sizing mistakes. Always read the instructions before you start.
- Using the wrong fabric or needle size can make sewing tough. Choose fabric that’s easy to handle and match your needle to the material.
- Forgetting interfacing or ignoring seam allowances can cause your bag to look uneven.
- A dull needle or rushing the cutting process can leave rough edges.
- Skipping basting or not testing stitch length might make your seams weak.
- Neglecting finishing touches can make your bag look unfinished.
Take your time with each step. Slow down your stitching speed, increase stitch length if needed, and loosen the tension. Guide the fabric gently and pin or clip seams to keep everything in place.
Care and Reuse
Washing and Storage
You want your diy wine bottle gift bag to last for many celebrations. Regular cleaning keeps your bag looking fresh and helps prevent shrinkage, fading, or fabric wear. Sort your bags by color before washing to avoid dye transfer. Handwashing or steaming works best for most fabrics and helps maintain their shape.
- Store your bags in a cool, dry place. This prevents mold and mildew.
- Use breathable storage options, like cotton bags or open bins, to keep airflow moving.
- Avoid stuffing bags tightly together. Give them space so they don’t wrinkle or lose their shape.
A little care goes a long way. Clean and store your bags properly, and you’ll reuse them for years.
Creative Variations
Themed Fabrics and Occasions
You can make your diy wine bottle gift bag special for any event. Try themed fabrics or decorations to match the occasion. Here are some ideas:
| Occasion | Description |
|---|---|
| Weddings | Monogrammed and embroidered designs for bridal and groom gifts. |
| Anniversaries | A stylish upgrade to traditional wrapping for liquor bottles. |
| Holiday Gifting | Seasonal motifs make festive bottles extra special with Christmas wine bags. |
| Host and Hostess | Show appreciation with elegance and practicality. |
You can also find printed paper wine bottle bags with designs like snowy Christmas scenes, glitter snowflakes, Christmas trees, candy canes, or nutcrackers. For New Year’s, look for bags with cheerful messages. Add stripes, greetings, or custom labels for a personal touch.
- Use bright colors for birthdays.
- Try elegant fabrics for weddings.
- Pick fun prints for holidays.
Let your creativity shine. Every diy project is a chance to make something unique. Your wine bottle gift bag can match any celebration or style you love.
Conclusion
You can make your own wine bottle gift bag with just a few steps:
- Cut your fabric to 33″ x 8″.
- Fold and pin a 1/2″ hem on each short side.
- Sew straight stitches down the hems.
- Fold the fabric in half with right sides facing.
- Sew the sides with a 1/2″ seam.
With practice, you’ll create bags for any occasion. If you need custom designs or bulk orders, check out our options below:
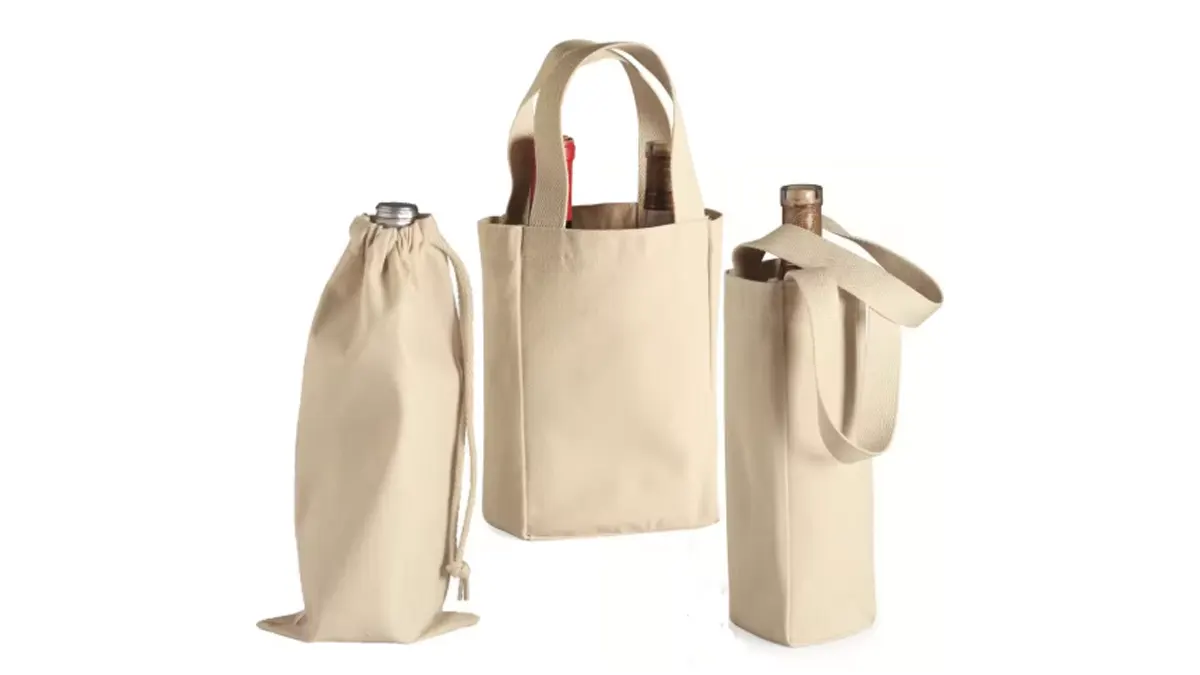
| Type of Bag | Benefits |
|---|---|
| Custom Canvas Wine Bags | Durable, great for branding |
| Bulk Custom Wine Bags | Cost-effective for events |
| Eco-Friendly Bags | Reusable, sustainable choice |
Want more info? Reach out and let’s make your next gift stand out!
FAQ
How long does it take to make a wine bottle gift bag?
You can finish a basic bag in about 15 minutes. If you add decorations or try a reversible style, you might need a little more time.
Can I make a wine bottle gift bag without a sewing machine?
Yes! You can sew by hand or use fabric glue. You can also wrap a bottle with a scarf or sweater sleeve for a no-sew option.
What size fabric should I use for one bag?
You need a piece of fabric that measures 33 inches by 8 inches. This size fits most wine bottles and gives you enough room for seams.
Which fabrics work best for wine bottle gift bags?
Cotton, canvas, and linen are easy to sew and look nice. Velvet and jute add a fancy touch. You can also upcycle old clothes for a unique style.
How do I keep the bag from fraying?
Fold and sew the edges, use a zigzag stitch, or apply fray check. These methods help your bag last longer and look neat.
Can I wash my wine bottle gift bag?
Most fabric bags are washable. Hand wash with mild soap and let them air dry. Avoid washing bags with glued decorations or delicate trims.
What can I use to close the top of the bag?
You can use ribbon, string, or a drawstring. Just thread it through a casing at the top or tie it around the neck of the bottle.
How can I personalize my wine bottle gift bag?
Add bows, buttons, or custom labels. You can use themed fabrics for holidays or special events. Get creative and make each bag unique!


