You want to know how to make a wine bag, but you feel unsure where to start. This wine bag tutorial shows you simple steps and lists all the materials you need. You can finish a 10 minute wine bag even if you are a beginner. You will love how quick and easy this project feels. Your wine bag makes a perfect choice for gifting, and you can add your own creative touch.
Tip: Try different fabrics or add decorations to make your wine bag unique!
Key Takeaways
- Making a wine bag is easy. You can finish it in 15 to 20 minutes. Beginners can do it too.
- Pick fabrics like cotton. These are simple to cut and sew.
- Follow each step in order. First, cut the fabric. Next, sew the edges. Then, add a flat base. This helps the bag stand up.
- Make your wine bag special. Add decorations like embroidery, paint, or appliqué.
- A sewing machine works fast. You can also sew by hand if you want.
- Keep your workspace neat. Organize your tools. This makes sewing easier and safer.
- Try different sizes and styles. Make wine bags for many events.
- Mistakes are okay. Each project teaches you more. You will get better at sewing.
Wine Bag Process Overview
Project Steps Summary
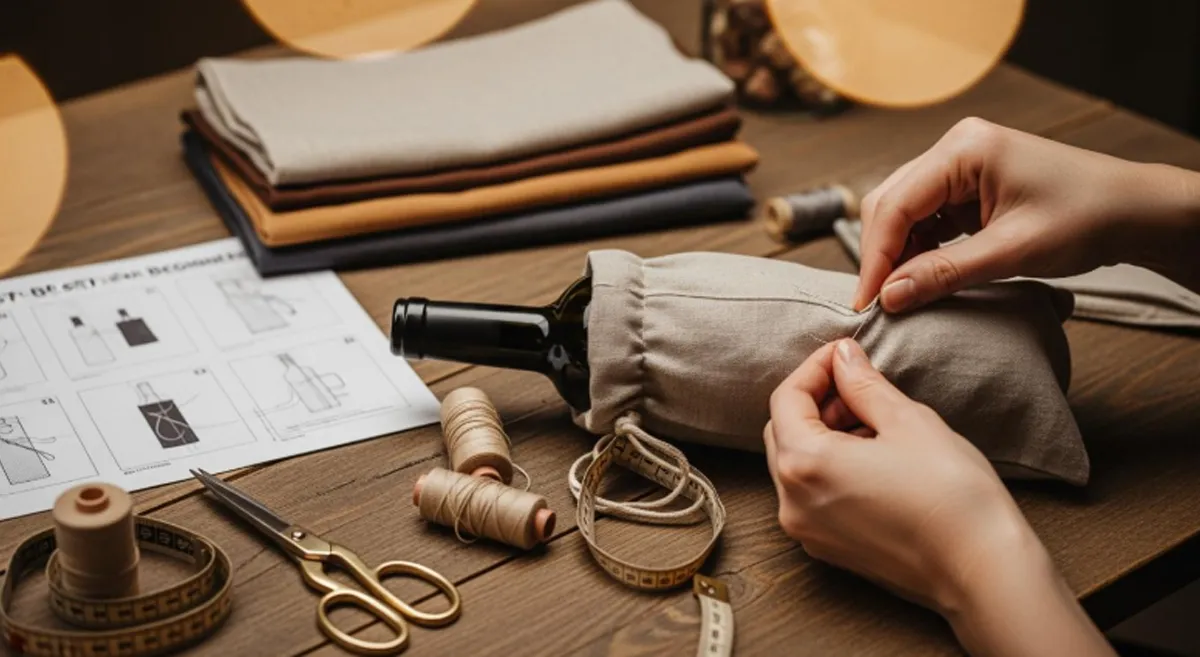
You might wonder what steps you need to follow to make a wine bag. This tutorial breaks down the process so you can see how easy it is. You start by picking your favorite fabric. Cotton, linen, or velvet all work well. Next, you cut the fabric to the right size. Most wine bags use a piece about 6 x 16 inches. You fold the fabric in half, right sides together, and sew down the long edge and the bottom edge. If you want your bag to stand up nicely, pinch the bottom corners and sew across them. This gives your wine bag a flat base.
After sewing, you turn the bag right side out. Some people like to add a lining for extra strength or a pop of color. You can insert the lining now if you want. To finish the top edge, you fold over a hem and sew a straight stitch. This keeps the edge neat and helps the bag last longer. If you want a drawstring, sew a casing at the top and thread a ribbon or cord through. You can also make simple straps by cutting strips of fabric and sewing them to the sides.
Now comes the fun part—decorating! You can personalize your wine bag with paint, fabric markers, or embroidery. Let any paint dry completely before you use the bag. Some people like to add cork embellishments or tie twine around the neck for a rustic look. When you finish, just slip a wine bottle inside and admire your work.
Tip: Lay your bag flat on a clean surface before decorating. This makes it easier to add details and keeps your workspace tidy.
Skill Level & Time Estimate
You do not need to be an expert to follow this tutorial. The steps are simple, and you can finish your wine bag in about 15 to 20 minutes. If you have never sewn before, you will find this project a great way to learn basic skills. You only need to sew straight lines and make a few folds. Most beginners complete their first wine bag quickly and feel proud of the result.
If you want to make several wine bags for gifts or parties, you can set up a little assembly line. Cut all your fabric pieces first, then sew them one after another. You will save time and get a stack of beautiful wine bags ready for any occasion.
Note: You can always customize your wine bag with different fabrics, colors, or decorations. This tutorial gives you the basics, but your creativity makes each bag special.
DIY Wine Bag Materials & Tools
Before you start sewing, you need to gather your supplies. Picking the right materials makes your diy wine bag project much easier and more fun. Here’s a simple guide to help you choose what you need for your wine bag pattern.
Fabric Choices
You have lots of options when it comes to fabric. Some fabrics work better for beginners because they are easy to cut and sew. Here are a few good choices:
Fat Quarters, Cotton, Linen, Velvet
- Fat Quarters: These are small pieces of fabric, usually 18 x 22 inches. They are perfect for a single wine bag pattern and come in many colors and prints.
- Cotton: Cotton is soft, easy to sew, and holds its shape well. You can find cotton in almost any color or pattern you like.
- Linen: Linen gives your wine bag a natural, textured look. It feels a bit stiffer than cotton, which helps the bag stand up.
- Velvet: Velvet adds a touch of luxury. It’s soft and looks fancy, but it can be slippery, so take your time if you use it.
Tip: If you’re new to sewing, start with cotton. It’s the easiest to handle and works well with any wine bag pattern.
Essential Tools
You don’t need a lot of fancy equipment to make a wine bag. Most of these tools might already be in your home.
Sewing Machine, Needles, Scissors, Pins, Tape
- Sewing Machine: Speeds up the process and gives neat seams. You can also sew by hand if you don’t have a machine.
- Needles: Use sharp needles for hand sewing or machine needles for your sewing machine.
- Scissors: Fabric scissors cut clean edges. Don’t use paper scissors, as they can dull quickly.
- Pins: Hold your fabric pieces together while you sew. Clips work too.
- Measuring Tape or Ruler: Helps you measure your fabric for the right wine bag pattern size.
Note: Keep your tools organized on your workspace. This helps you follow your pattern without losing anything.
Optional Supplies
You can make your wine bag unique with a few extra touches. These supplies add style and function to your wine bag pattern.
Decorative Elements, Lining, Drawstring
- Decorative Elements: Try paper or fabric scraps for inserts, or add natural touches like dried flowers or greenery. Custom tags and handwritten notes make your bag feel special.
- Lining: Add a lining for extra strength or a pop of color. You can use cotton, jute for a rustic look, or even vacuum-sealed polyester for protection and UV blocking.
- Drawstring: Use ribbon, cord, or even a strip of fabric. A drawstring keeps the bottle secure and adds a nice finish.
- Other Options:
- Neoprene for insulation, great for picnics or outdoor events.
- Canvas for durability and structure. Some canvas bags have dividers to keep bottles from clinking.
- Personalized touches like internal pockets for wine openers or branding for gifts.
Tip: Mix and match fabrics and decorations to create a wine bag pattern that matches your style or the occasion.
A simple table can help you see what you need:
| Item | Purpose | Beginner Friendly? |
|---|---|---|
| Cotton Fabric | Main body of bag | Yes |
| Sewing Machine | Fast, neat stitching | Yes |
| Scissors | Cutting fabric | Yes |
| Pins/Clips | Hold fabric in place | Yes |
| Ribbon/Drawstring | Closure | Yes |
| Lining (optional) | Extra strength/color | Yes |
| Decorative Items | Personal touch | Yes |
With these materials and tools, you’re ready to follow any wine bag pattern and make a bag that’s both useful and beautiful.
Prepare Fabric & Workspace
Getting your fabric and workspace ready is the first step to making a wine bag that looks neat and fits your bottle perfectly. You want to make sure you measure and cut your fabric with care, and set up your sewing area so you can work safely and efficiently.
Measure & Cut Fabric
Choosing the right size for your wine bag helps your bottle fit snugly. Most wine bags use a standard size, but you can adjust the dimensions if you have a larger or smaller bottle. Here’s a quick guide to help you:
Standard Dimensions (6 x 16 inches)
You can start with a simple rectangle of fabric. For most wine bottles, a piece that measures 6 x 16 inches works well. If you want to add a cuff, bottom, or handle, you might need extra pieces. Check out this table for some common fabric cuts:
| Fabric Piece | Dimensions |
|---|---|
| Main Body | 6 x 16 inches |
| Cuff Fabric | 5 x 16 1/2 inches |
| Bag Bottom | 4 1/2 x 4 1/2 inches |
| Handle | 1 1/2 x 14 inches |
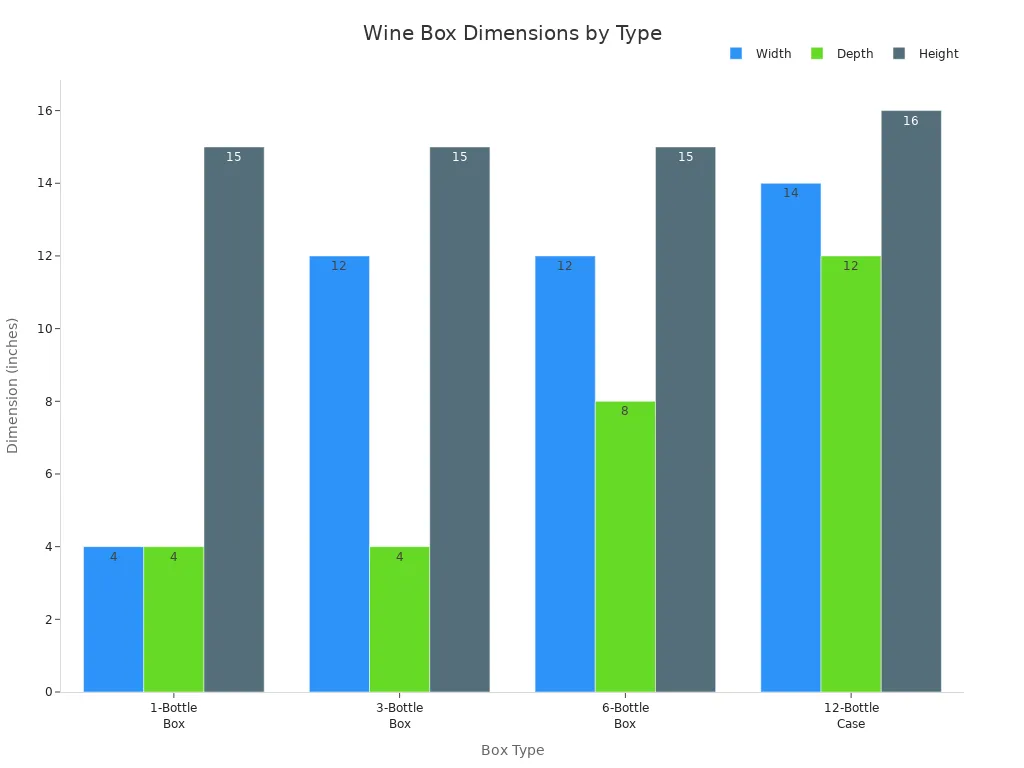
If you want to make a bag for a gift set or a larger bottle, you can use these box sizes as a reference:
| Box Type | Dimensions (inches) | Description |
|---|---|---|
| 1-Bottle Box | 4 x 4 x 15 | Fits most standard wine bottles |
| 3-Bottle Box | 12 x 4 x 15 | Great for trio gift sets |
| 6-Bottle Box | 12 x 8 x 15 | Popular for travel or parties |
| 12-Bottle Case | 14 x 12 x 16 | Holds a full case, best for bulk gifting |
Cutting Bottom Corners for Structure
If you want your wine bag to stand up on its own, try cutting small squares from the bottom corners before sewing. This lets you pinch and sew across the corners, creating a flat base. Use a ruler and fabric chalk to mark your lines. A rotary cutter and cutting mat help you get straight edges.
Tip: Always double-check your measurements before you cut. It saves fabric and helps your bag look professional.
Organize Sewing Area
A tidy workspace makes sewing easier and safer. You don’t need a fancy studio—just a clean table and good lighting.
Tool Placement
Keep your scissors, pins, and measuring tape within reach. Place your sewing machine on a stable surface. Lay out your fabric pieces in the order you’ll use them. This helps you move smoothly from one step to the next.
- Put sharp tools like rotary cutters away when you finish using them.
- Store pins in a small dish or magnetic holder.
- Keep your fabric scraps in a basket for easy cleanup.
Safety Tips
Sewing is fun, but you want to stay safe. Here are some simple rules to follow:
- Make sure your workspace has enough light so you can see what you’re doing.
- Close blades on cutters and scissors after each use.
- Keep your area free of clutter to avoid tripping or losing tools.
- Stay focused—save the wine tasting for after you finish sewing!
Note: If you’re sewing with kids or friends, remind everyone to handle tools carefully. Safety first means more fun for everyone!
Now you’re ready to start sewing your wine bag. With your fabric measured and your workspace organized, you’ll find the process smooth and enjoyable.
How to Make a Wine Bag: Step-by-Step
Ready to dive into the main part of this tutorial? You’re about to learn how to make a wine bag from start to finish. I’ll walk you through each step, so you can follow along and create a wine bag that looks great and lasts. This tutorial covers everything, from sewing the main body to adding straps or a drawstring, and finishing with neat seams.
Sew Main Body
Fold & Sew Long Edge
Let’s start with the main body. Here’s how to make a wine bag that holds up well and looks professional:
- Lay out your fabric pieces. You need two for the outside and two for the lining.
- Place one outside piece and one lining piece together at the short edge, right sides facing each other. Sew a 1/2-inch seam.
- Press the seam open with your iron. This helps the bag keep its shape.
- Fold the fabric in half, right sides together. Sew along the long edge, about 1/4 inch from the edge. Use pins to keep the fabric in place.
- Backstitch at the start and end for extra strength.
- If you want a reversible bag, use two different fabrics for the outside and lining. Sew them together just like above.
- For extra structure, pin the ties with raw edges sticking out and sew, leaving a 4-inch opening if you plan to add a drawstring later.
Tip: Pressing seams open after sewing makes your wine bag look crisp and helps with the next steps.
Sew Bottom Seam
Now, let’s close up the bottom:
- Flatten the bag and sew across the bottom edge, making sure the ties or straps aren’t caught in the seam.
- To prevent fraying, finish the cut edges with a zigzag stitch or use a serger if you have one.
- Make small cuts into the seam allowance at the corners. This lets the fabric lie flat when you turn the bag right side out.
- If you want a flat base, draw lines 1 inch away from each bottom corner and sew diagonally across. Trim off the excess fabric.
Note: These steps help your wine bag stand up and keep its shape, especially if you want to make a wine bag for gifting.
Make Straps or Drawstring
You can choose between straps or a drawstring for your wine bag. This tutorial shows you both options.
Cut & Fold Straps (1.25-inch strips)
If you want to add straps:
- Cut two strips of fabric, each about 1.25 inches wide and 14 inches long.
- Fold each strip in half lengthwise, right sides together. Sew along the long edge, then turn right side out.
- Press the straps flat with your iron.
- Pin the straps to the top edges of the bag, making sure they’re even on both sides.
- Sew the straps in place with a straight stitch.
Here’s a quick table for strap and drawstring materials:
| Material Type | Dimensions/Quantity |
|---|---|
| Fabric (Fat quarters) | 3 pieces (18″x21″) |
| Twill tape/Paracord | 1 1/2 yards |
| Fabric for ties | (2) 26″x2″ strips |
| Twill for ties | (2) 26″ pieces |
| Coordinating thread | 1 spool |
| Acrylic ruler | 1 |
| Large safety pin | 1 |
| Marking pen | 1 |
Sew Casing for Drawstring
If you prefer a drawstring closure, follow these steps:
- Fold the top edge of the bag down by about an inch. Press with your iron.
- Sew around the folded edge to create a casing for the drawstring.
- Locate the holes left in the sides of the bag. Push any extra fabric into the hole and press for a smooth edge.
- Pin above and below the holes to set your sewing gauge.
- Sew two parallel lines across the bag, one above and one below the pins. Backstitch for durability.
- Attach a paper clip or safety pin to one end of your ribbon or cord. Push it through one side hole into the casing, wiggle it through, and pull it out the other side.
- Repeat with a second ribbon from the opposite side.
- Tie the ribbon ends into knots and trim as needed.
Tip: Using a safety pin makes threading the drawstring much easier.
Finish & Press
You’re almost done! The last steps in this tutorial help your wine bag look polished and last longer.
Trim Threads
- Check all seams and trim any loose threads with sharp scissors.
- Make sure the inside looks tidy, especially if you want to make a wine bag as a gift.
Press Seams
- Press all seam allowances to the inside with your iron.
- Turn the bag right side out and give it a good press for a crisp finish.
- Line up the edges of any openings, pin carefully, and stitch across the opening about 1/8 inch from the edge.
- If you used a lining, close up the opening in the lining by hand or machine with a small slip stitch.
Note: Pressing your wine bag at each step helps it look neat and professional.
Now you know how to make a wine bag from start to finish! This tutorial gives you all the steps, so you can create a wine bag that fits your style. Try making a reversible bag or adding structure for a sturdy base. You’ll find that each wine bag you make gets easier and looks better. Enjoy your new skill and have fun with every tutorial you try!
Customize Your Wine Bag
You have finished sewing your wine bag. Now comes the fun part—making it your own! Personalizing your wine bag turns a simple project into a special gift or keepsake. You can use different techniques and decorations to match any style or occasion.
Decoration Ideas
Embroidery, Appliqué, Paint
You can add a personal touch to your wine bag with a few creative ideas. Here are some popular ways to decorate:
- Embroidery: Stitch a name, a short message, or a simple design on the front. You can use bright thread for a pop of color or stick with classic white for a clean look.
- Appliqué: Cut out shapes from fabric and sew them onto your bag. Try hearts, stars, or even a wine glass shape. This adds texture and makes your bag stand out.
- Paint: Use fabric paint or markers to draw patterns, write messages, or create fun doodles. Let the paint dry before using the bag.
- Hanky Wine Bags: Wrap your wine bottle in a pretty handkerchief before placing it in the bag. This gives your gift a unique and vintage feel.
- Charms and Tags: Tie a small charm or a monogrammed gift tag around the neck of the bag. This adds flair and makes your gift feel extra thoughtful.
- Pom Poms: Attach handmade pom poms to the drawstring or handles for a playful touch.
- Canvas Bags: Start with a plain canvas bag and decorate it from scratch. You can invite friends to a craft party and let everyone design their own bag to take home.
Tip: Try mixing two or three decoration ideas for a one-of-a-kind look. You can use leftover fabric, buttons, or even dried flowers.
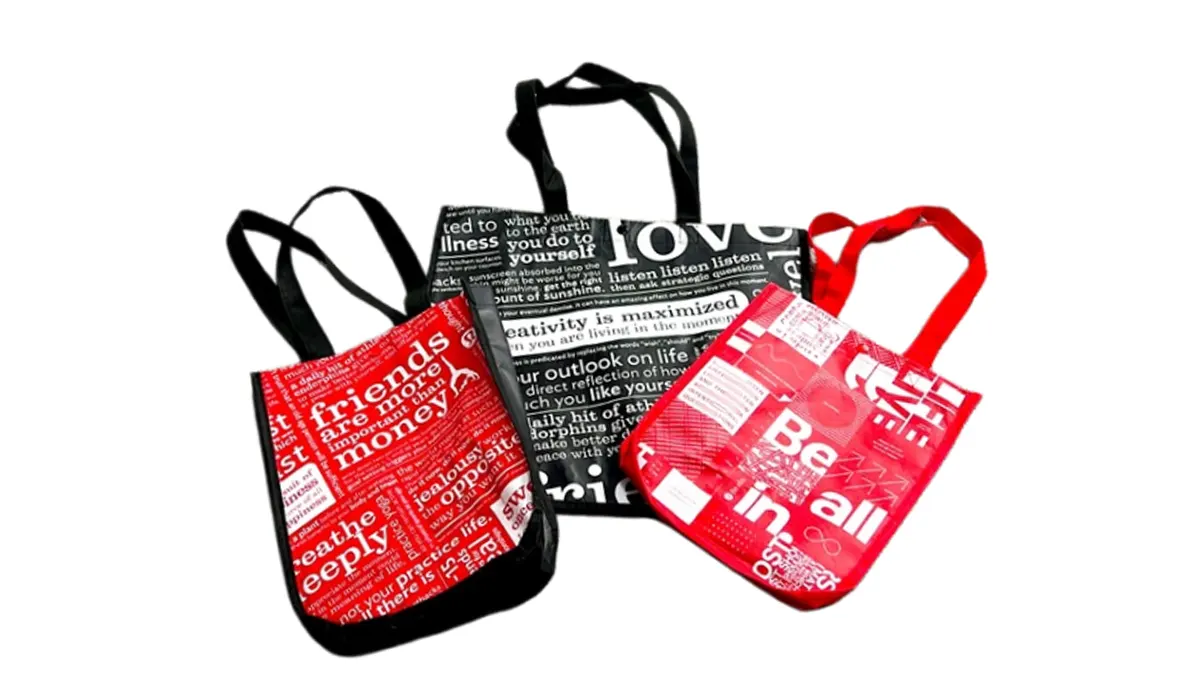
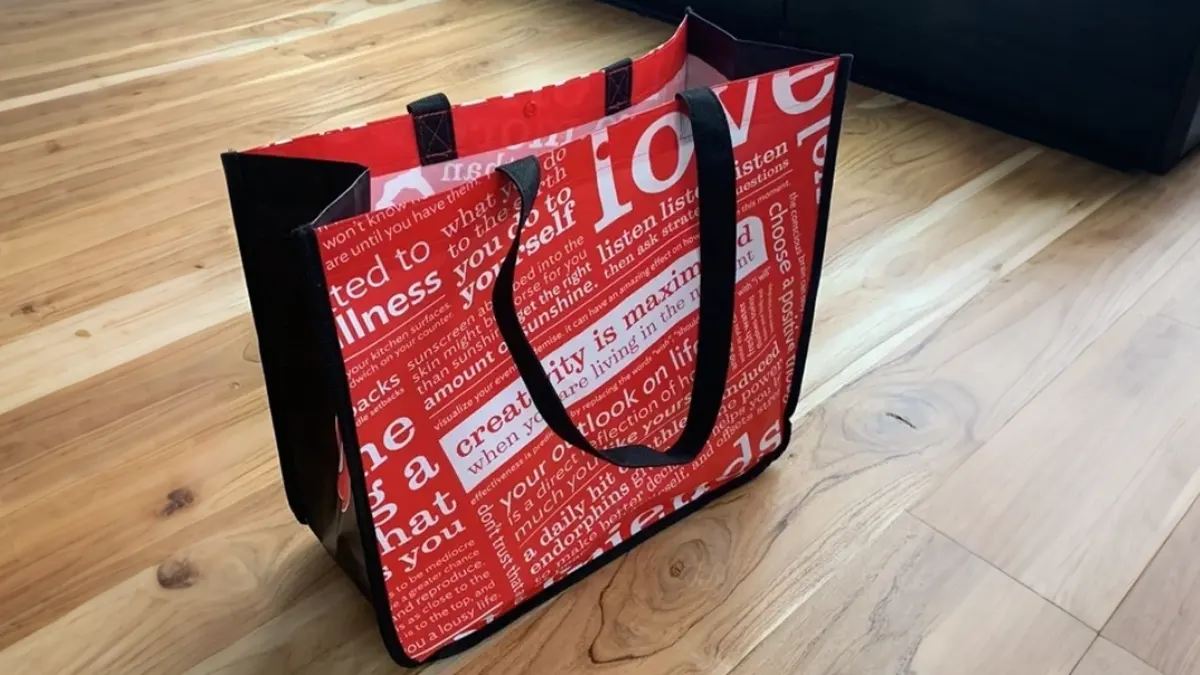
Seasonal & Themed Designs
You can match your wine bag to any season or event. Choose colors and patterns that fit the occasion. Here’s a quick guide to popular seasonal and themed designs:
| Seasonal Theme | Common Colors | Specific Designs |
|---|---|---|
| Winter | Red, White, Green, Grey, Yellow, Black, Blue, Brown, Multi-Colored | Snowy Christmas, Glitter Snow Flakes, Christmas Tree, Holiday Cheer, Candy Cane, Festive Holidays |
| Fall | Red, Green, Multi-Colored | Red Holly & Poinsettia, Green Holly & Poinsettia |
| Special | Various | Sale, New Products |
| Themes | Various | Wine Sayings |
You can use red and green for Christmas, or try gold and white for a winter wedding. For fall, pick warm colors and add leaf or holly appliqué. If you want a bag for a birthday or a special event, use bright colors and add a fun saying like “Cheers!” or “Sip Sip Hooray!”
Don’t be afraid to play with patterns and colors. You can use polka dots, stripes, or even fabric with wine bottles printed on it. Your wine bag can be as bold or as simple as you like.
You have so many ways to make your wine bag unique. Try new ideas, mix different materials, and have fun with the process. Every bag you make will show your creativity and care!
Troubleshooting & Tips
Common Mistakes
Uneven Seams, Fabric Slipping
You might run into a few bumps when making your wine bag. Don’t worry—everyone makes mistakes, especially when starting out. Here are some of the most common issues beginners face:
- You skip reading the pattern and jump straight into sewing.
- You pick fabric that’s too thick or slippery for your machine.
- You use the wrong needle size, which can cause skipped stitches.
- You forget to add interfacing or stabilizer, so your bag feels flimsy.
- You ignore seam allowances, which leads to seams that don’t line up.
- You use a dull needle, which damages your fabric.
- You rush the cutting process, ending up with uneven edges.
- You skip basting or clipping, so your pieces don’t match up.
- You don’t test your stitch length, which affects how strong your seams are.
- You skip finishing touches like pressing or topstitching, so your bag looks unfinished.
Tip: Take your time with each step. Double-check your pattern and measurements before you start sewing. This helps you avoid uneven seams and fabric slipping.
Quick Fixes & Shortcuts
Pre-cut Kits, Fast Assembly
You want your wine bag to look neat, even if you make a mistake. Here are some quick fixes and shortcuts to help you out:
- Use pre-cut kits. These save time and make sure your pieces are the right size.
- Slow down your stitching speed. This helps prevent ripples and puckering.
- Increase your stitch length for easier fabric handling.
- Loosen your tension if you notice rippling.
- Guide your fabric gently. Don’t pull or push while sewing.
- Align side seams before you sew. This keeps everything straight.
- Pin or clip the midpoints and endpoints when sewing gussets. This helps your bag keep its shape.
| Shortcut | What It Fixes |
|---|---|
| Pre-cut Kits | Uneven edges |
| Slow Stitching | Fabric ripples |
| Longer Stitches | Easier handling |
| Looser Tension | Puckering |
| Careful Guiding | Slipping fabric |
| Pinning/Clipping | Misaligned seams |
Note: If you make a mistake, don’t stress. Most problems have a simple fix. You can always trim uneven edges or resew a seam.
Beginner Encouragement
You might feel nervous about sewing your first wine bag. That’s normal! You’re learning a new skill, and every project helps you get better. This guide gives you clear instructions, so you know exactly what to do. If you can use a sewing machine, you can make a wine bag.
- You don’t need fancy tools or years of experience.
- You can finish your bag in under 20 minutes.
- Every mistake teaches you something new.
Remember, sewing is about having fun and being creative. Your wine bag doesn’t have to be perfect. The best part is making something with your own hands. Keep going—you’ve got this!
Make a Wine Bag in Bulk with INITI
INITI Brand & Services
If you want to make wine bags in bulk, you should know about INITI. This company stands out as a key player in the wine bag manufacturing industry. Many customers trust INITI because they deliver quality and keep up with strong competition. You can see how INITI compares to others in the market:
| Company Name | Market Position | Competition Level |
|---|---|---|
| INITI | Key Player | Intense |
You get more than just a wine bottle bag when you work with INITI. They offer reliable service and help you create bags that fit your needs. You can order for parties, events, or even your business. INITI makes sure every bag looks professional and feels sturdy.
You can count on INITI for large orders and special requests. They have experience with bulk production and pay attention to every detail.
OEM/ODM Customization
Do you want your wine bottle bag to stand out? INITI gives you many options for customization. You can choose the size, shape, color, and even add special features. This makes your bags unique and perfect for any occasion. Here’s what you can customize:
| Customization Aspect | Details |
|---|---|
| Size | Any size of the bag |
| Shape | Any shape, including flat-bottom or irregular |
| Color | Any color and finish |
| Additional Features | Ribbons, woven threads, embossments, glitter, matte finish |
You can ask for ribbons, glitter, or a matte finish. You can pick a flat-bottom bag or something with a special shape. INITI helps you design bags that match your brand or event theme. You get to choose every detail, so your wine bags look just the way you want.
If you have a creative idea, INITI can make it happen. Their team works with you to turn your vision into real products.
Contact for Bulk Orders
Ready to order your custom wine bags? INITI makes the process simple. You just need to share a few details so they can help you quickly. Here’s what you should prepare:
| Required Information | Description |
|---|---|
| Name | Your full name |
| Your email address | |
| Country | Your country of residence |
| Tel | Your telephone number |
| Company Name | The name of your company |
| Message | Your inquiry message |
You can send your information through their website or by email. Tell INITI what you need, how many bags you want, and any special requests. Their team will reply and guide you through the next steps.
Don’t wait if you need wine bags for your business or event. INITI’s experts are ready to help you with bulk orders and custom designs.
Conclusion
You just learned how to make a wine bag from start to finish. Here are the main steps to remember:
- Lay your bag flat on a clean surface.
- Personalize it with paint or fabric markers.
- Let your design dry.
- Make a cork embellishment.
- Tie twine or ribbon around the bag.
Practice leads to better designs — and fresh ideas often start with the right partner. If you’re looking for custom or bulk wine bags, INITI, a trusted OEM/ODM manufacturer in China, is here to help.
Here’s how INITI supports your business success:
| Benefit | Description | Impact on Business |
|---|---|---|
| Custom Printing & Branding | Add your logo, design, or message to each bag. | Strengthens brand visibility and recognition. |
| Durable & Reusable Materials | Made to last with premium fabrics and strong stitching. | Promotes sustainability and long-term brand use. |
| Practical & Stylish Design | Easy to carry and perfect for retail or events. | Enhances customer experience and brand appeal. |
Whether for promotions, retail packaging, or corporate gifting, INITI offers full customization, low MOQ, and reliable production to match your goals. turn your creative wine bag ideas into quality products that make your brand stand out.
FAQ
How long does it take to make a wine bag?
You can finish your first wine bag in about 15 to 20 minutes. If you use a sewing machine, you might work even faster. Hand sewing takes a little longer.
What fabric works best for beginners?
Cotton is the easiest fabric for you to cut and sew. It holds its shape and comes in many colors. You can also try linen or canvas if you want a sturdier bag.
Can I sew a wine bag without a sewing machine?
Yes! You can sew a wine bag by hand. Use a sharp needle and strong thread. Sew straight lines and take your time. Your bag will look great.
How do I make my wine bag stand up?
Cut small squares from the bottom corners before sewing. Pinch and sew across those corners. This gives your wine bag a flat base and helps it stand up.
What size should I cut my fabric?
For most wine bottles, cut your fabric to 6 x 16 inches. If you want a bigger bag, add a few inches to the length or width.
Can I wash my wine bag?
You can wash your wine bag if you use washable fabric like cotton or linen. Wash in cold water and let it air dry. Avoid washing bags with glued decorations.
How do I add a drawstring or straps?
Sew a casing at the top for a drawstring. Thread ribbon or cord through the casing. For straps, cut fabric strips, sew them, and attach to the top edges.
What decorations can I use?
Try embroidery, fabric paint, or appliqué. You can also add charms, tags, or pom poms. Mix and match decorations to create a wine bag that fits your style.