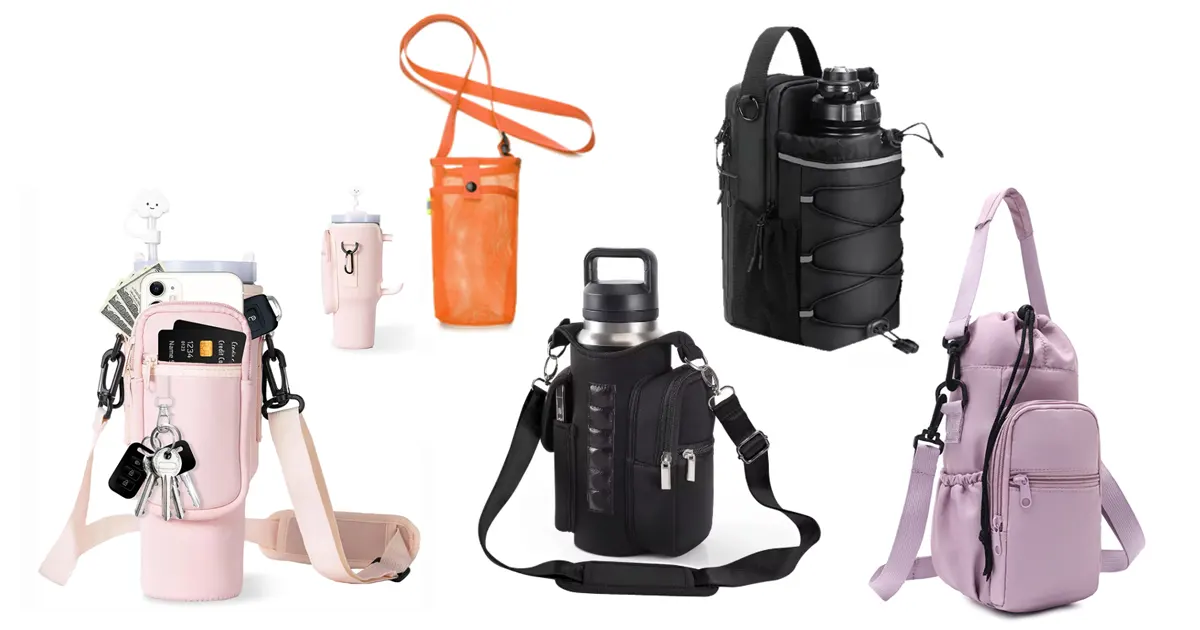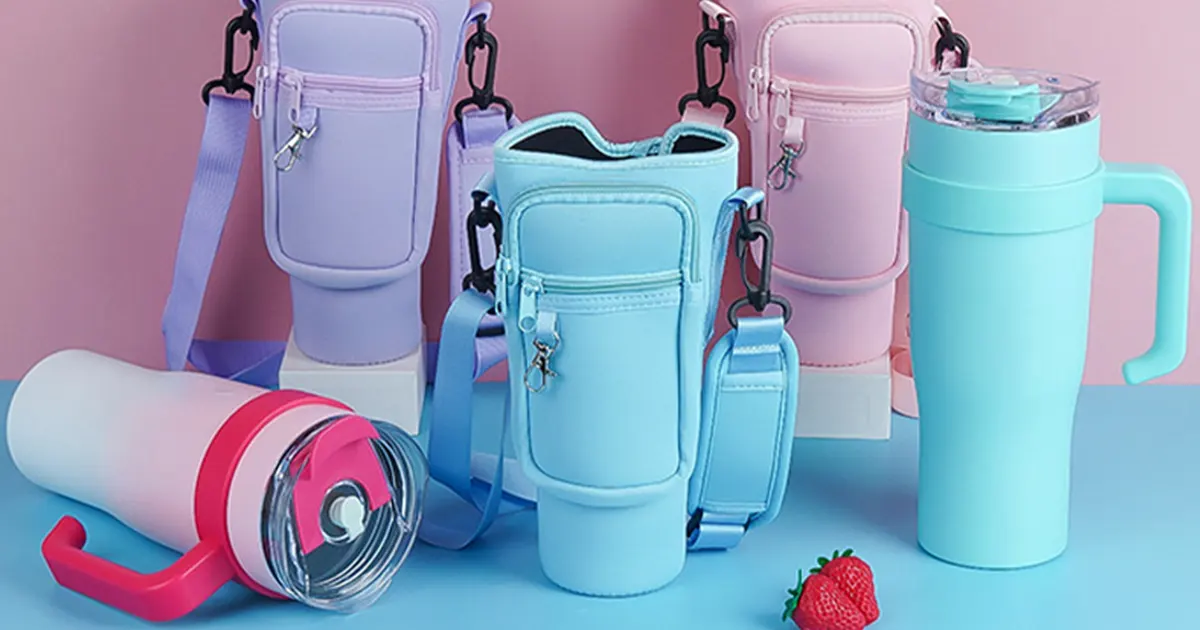
Making a water bottle bag is easier than you might think. If you have ever wondered how to make a water bottle bag, you are in the right place. This diy project lets you create something useful and fun. You can follow this easy step by step guide and dive into the written tutorial. You get to pick your favorite colors, patterns, and add your own twist, so your bag stands out every time you use it.
Key Takeaways
- Collect important items like fabric, interfacing, and sewing tools before you begin.
- Pick strong fabrics like canvas or nylon for your water bottle bag.
- Measure your water bottle well so your bag fits tightly.
- Add interfacing to make your water bottle holder strong and keep its shape.
- Make your bag special with pockets or decorations for more use and style.
- Use a step-by-step sewing guide to put your bag together the right way.
- Wash your water bottle holder by hand and be gentle to keep it looking nice.
- Try different colors and patterns to make a water bottle bag that shows who you are.
Materials & Tools for DIY Water Bottle Holder
Before you start sewing, you need to gather your supplies. Picking the right materials makes your water bottle bag strong and stylish. You can keep it simple or add fun extras. Here’s what you’ll need:
Essential Supplies
Fabric & Interfacing
Choosing the right fabric is important. You want your bag to last and look good. Here are some top choices for durability:
- Static mesh
- Mixed Robic and stretch mesh
- Dyneema stretch mesh
- Challenge UltraGrid
You can use cotton, canvas, or denim if you want something easy to sew. For extra strength, add interfacing. Interfacing helps your bag keep its shape and stand up to daily use. You only need small scraps of fusible interfacing for this project.
Tip: If you plan to carry your bag outdoors, pick a water-resistant fabric. This keeps your bottle dry and your bag looking new.
Thread, Needles, & Pins
You need basic sewing tools for this project. Here’s a quick list:
- Sewing machine (or hand sewing needle)
- All-purpose thread
- Straight pins or clips
- Fabric scissors
You can also use pinking shears to trim seams and stop fraying. A bodkin helps pull cords through fabric, but a safety pin works too.
Straps & Hardware
A sturdy strap makes your bag easy to carry. You can use fabric, webbing, or even an old belt. For a crossbody style, cut your strap about 2 yards long. You’ll also need:
- 1-inch wide strap webbing (2 yards)
- 1-inch buckle slide
- 1-inch rectangle ring, O ring, or D ring
If you want a drawstring closure, grab:
- Drawstring cord (at least 18 inches)
- Cord lock toggle
- 4 inches of 1/4-inch wide elastic
Optional Add-Ons
Decorative Elements
You can make your bag unique with a few extras. Try adding:
- Mini bungee cords
- Zip ties (8 inch)
- Duct tape (fun colors or patterns)
- Recyclable materials like cork, pool noodle pieces, or sponges
These add-ons give your bag personality and extra function.
Extra Pockets
Want to carry your phone or keys? Add a pocket! You can sew a small patch pocket on the outside or inside. This makes your bag even more useful.
Note: A phone pocket is a great way to keep your hands free and your essentials close.
You now have a complete list of materials and tools. Pick sturdy fabric for a bag that lasts. Add a pocket or some fun details to make it your own. Once you have your supplies, you’re ready to start cutting and sewing!
How to Make a Water Bottle Bag: Step-by-Step
Ready to start your project? This tutorial breaks down each step so you can follow along easily. You’ll learn how to make a water bottle bag that fits your bottle perfectly and holds up to daily use. Let’s jump right in!
Measure & Cut Fabric
Getting the right fit is important. You want your bag to hold your bottle snugly but not too tight. Here’s how you measure for your water bottle bag:
Bottle Sizing
- Height: Measure from the bottom of your bottle to the top edge.
- Width: Measure across the front of your bottle.
- Depth (Gusset): Decide if you want extra space at the sides or bottom.
- Handle/Strap Length: Measure from your hip, over your shoulder, and back to your hip. Add 6 inches for comfort.
Write down these numbers. You’ll use them to cut your fabric. If you want a crossbody bag, make sure your strap is long enough.
Seam Allowance
When you cut your fabric, add a seam allowance. This gives you room to sew without making the bag too small. Use a 1/4-inch seam allowance for most seams. Fold your fabric with the right sides together before cutting. This makes sewing easier and keeps the outside looking neat.
Tip: Pin your fabric before you cut. This keeps everything lined up and helps you follow the tutorial without mistakes.
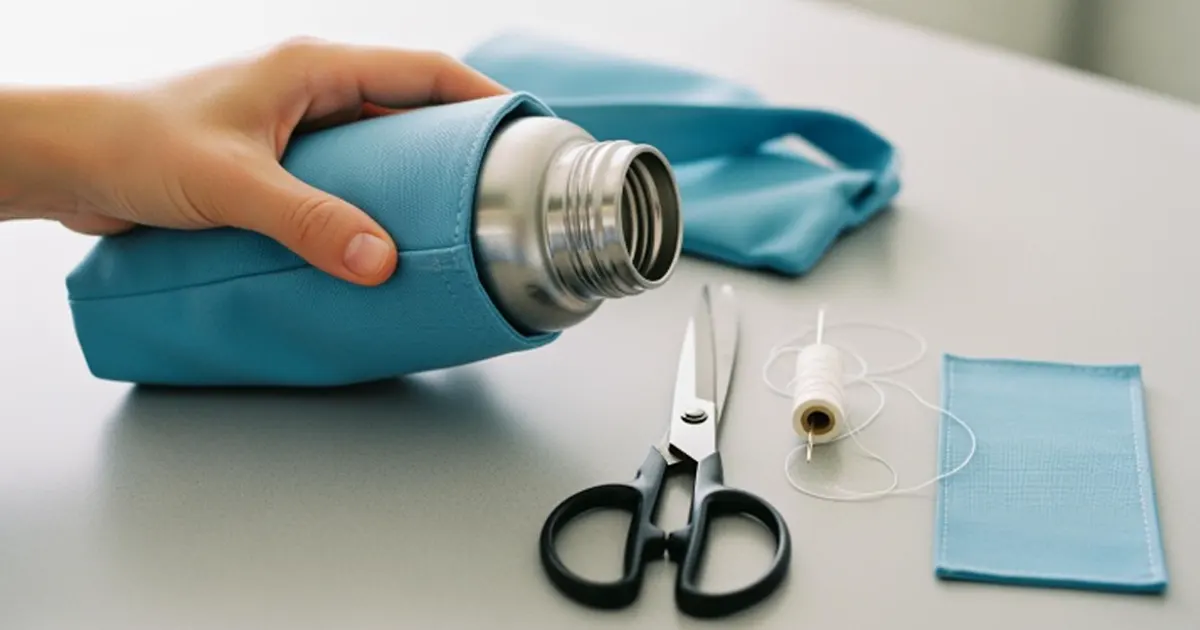
Add Interfacing
You want your bag to be sturdy. Interfacing gives your water bottle bag extra strength and helps it keep its shape.
Stability Tips
Pick the right interfacing for your project:
- By Annie’s Soft and Stable works well for sturdiness.
- Heavyweight options like Peltex and Pellon 520 add structure.
- Lightweight interfacing helps your bag keep its shape.
- Interfacing supports the weight of a full bottle.
Cut your interfacing to match your fabric pieces. Iron it onto the wrong side of your fabric before you sew. This step makes your bag last longer and look professional.
Note: If you skip interfacing, your bag might sag or lose its shape. Follow these instructions for a strong finish.
Prepare Straps
Straps make your bag easy to carry. You can use fabric or webbing, depending on what you like.
Fabric or Webbing
- Webbing (nylon or polyester) gives you strength, abrasion resistance, and water resistance.
- Nylon webbing feels comfortable and flexible.
- Polyester webbing stands up to UV rays and water, so it’s great for outdoor use.
- Cotton fabric straps feel soft but may not last as long.
Pick the material that fits your needs. If you want a heavy-duty bag, go with webbing. For a softer feel, try cotton.
Crossbody Option
To prepare the strap, measure from your hip, over your opposite shoulder, and back down to your hip. Add 6 inches to this length. Fold the strap in half with the wrong side facing out. Stitch along the edge, then turn it right side out. Press the strap flat with an iron. Arrange the strap along the bottom edge of the pouch, allowing for overlap. Secure it with a diagonal stitch. Finally, stitch along the top edge of the pouch to hold the straps in place.
Pin your straps before sewing. This keeps them straight and makes the instructions easy to follow. If you want a crossbody bag, make sure your strap is long enough to fit comfortably.
You now know how to make a water bottle bag with the right measurements, sturdy interfacing, and strong straps. Follow this tutorial step by step, and you’ll have a bag that’s ready for any adventure!
How to Sew a Water Bottle Holder
You’re ready to sew a water bottle holder! This part of the tutorial walks you through each step. You’ll learn how to assemble the water bottle holder, sew the body and base, attach straps, and add a closure. Let’s get started.
Sew Body & Base
You need to sew the main part of your bag first. Follow these steps to make sure your water bottle holder is strong and neat.
Side Seams
- Fuse fleece down the middle of the wrong side of one strap. Attach interfacing to the backs of the circles.
- Fold your side pieces with the right sides together. Line up the ends.
- Place your strap pieces right sides together.
- Sew down the side and strap pieces using a 1/2″ seam allowance. This keeps your seams strong and your bag looking tidy.
- Turn the strap right side out. Press it flat.
- Sew a few straight lines down the strap. This keeps the fleece from shifting.
Pin your fabric before you sew. This helps you keep everything lined up and makes the tutorial easier to follow.
Attach Base
Now you need to sew the base to your bag. This step gives your water bottle holder a sturdy bottom.
- Pin your circles to the bottom of the tubes you made from the side pieces.
- Sew around the circle to attach the base. Make sure you sew slowly so you don’t miss any spots.
- Clip around the seam to the stitching line every 1/2 inch. This helps the base fit smoothly.
- Turn one of the tubes right side out. On both tubes, turn the raw edge of fabric 1/2″ to the wrong side and press.
If you want extra strength, try using zip ties, electrical tape, or Voile straps to secure the base. These methods work well for rough terrain or heavy bottles.
Place one tube inside the other, wrong sides together. Match up the seams. Sandwich the strap between the two tubes. Sew around the top to secure the strap and enclose all raw edges.
Attach Straps
Straps make your water bottle holder easy to carry. You need to sew them on securely.
Reinforce Ends
- Weave two hairbands together and slide them through a shoulder loop to secure the top of your bottle.
- Use a koozie and a zip tie. Cut a small hole in the koozie, zip tie it through the hole, and attach it to your shoulder strap.
- Make a paracord jug knot to secure your bottle onto your belt or shoulder strap.
- Try an Aqua Clip designed to hold your bottle in place.
Always reinforce the ends of your straps. Sew back and forth several times at the attachment points. This keeps your water bottle holder from breaking when you carry heavy bottles.
If you use webbing, sew a box with an X in the middle at each end. This gives extra strength. For fabric straps, sew a diagonal stitch and then topstitch for durability.
Add Cinch-Cord or Closure
You want your water bottle holder to keep your bottle safe. Adding a closure helps with security and style. Here are two popular methods.
Drawstring Method
- Cut a drawstring cord at least 18 inches long.
- Fold the top edge of your bag over 1/2 inch to the wrong side. Sew a channel for the cord.
- Use a bodkin or safety pin to thread the cord through the channel.
- Add a cord lock toggle to keep the cord tight.
- Pull the cord to cinch the top closed.
A drawstring closure is easy to sew and keeps your bottle from falling out. You can use elastic for extra stretch.
Velcro/Snap Option
You can also sew Velcro or snaps for a quick closure. Here’s how:
- Sew a strip of Velcro to the inside of the top edge.
- Sew the matching strip to the opposite side.
- Press the Velcro together to close your bag.
Or, use snaps:
- Sew a snap to one side of the top edge.
- Sew the matching snap to the other side.
- Press to close.
Here’s a table showing common closure types for water bottle holders:
| Closure Type | Description | Common Applications |
|---|---|---|
| Drawstring | Cord pulls tight for easy opening and closing | Water bottle holders, gym bags |
| Velcro | Hook-and-loop strips for quick closure | Water bottle holders, lunch bags |
| Snaps | Metal or plastic snaps for secure closure | Water bottle holders, purses |
Pick the closure that fits your style and needs. Drawstrings work well for outdoor use. Velcro and snaps are fast and easy.
You now know how to sew a water bottle holder from start to finish. This tutorial gives you all the steps to sew, assemble, and secure your bag. Reinforce your straps, sew your base tightly, and add a closure for safety. Try different methods and make your water bottle holder unique!
Easiest Way to Sew a Water Bottle Holder
You want the easiest way to sew a water bottle holder? Let’s break it down so you can finish your project with confidence and a smile. You don’t need fancy skills or tools. Just follow these simple steps and tips.
Simple Construction Tips
Pinning & Turning
Pinning and turning fabric can trip up beginners, but you can avoid mistakes with a few tricks. Here’s a step-by-step list to help you sew your water bottle holder smoothly:
- Decide the size for your water bottle holder.
- Gather all your supplies before you start.
- Cut the box bottoms carefully so you don’t make errors.
- Clip or pin the fabrics together to keep them secure.
- Sew the main pieces together, making sure everything lines up.
- Sew the strap pieces and add fleece for structure.
- Assemble the holder and add the clasp.
- Sew everything together, then turn it right side out.
- Close the turning opening and topstitch to finish.
The boxed bottom can confuse beginners. Match the seams and sides of the cut-out carefully when you sew. This keeps your bag neat and strong.
When pinning, always check the alignment. If you sew pockets, make sure you don’t sew them upside down. Leave an opening in the lining so you can turn the bag right side out. Zig-zag stitch over raw edges to stop unraveling, especially if you use lighter fabric.
Topstitching
Topstitching gives your water bottle holder a polished look. After you sew the main pieces and turn the bag, sew along the top edge. This step secures the seams and makes your bag look professional. Use a straight stitch for a clean finish. If you add a closure, topstitch around the channel for extra strength.
Troubleshooting
Fixing Seams
Sometimes seams don’t look perfect. You can fix them easily. Press fusible fleece firmly with an iron. Don’t move the iron while pressing. If edges lift, re-press them. Clip notches into circular pieces to help align seams. Use sewing clips instead of pins to avoid misalignment and poking your fingers. Sew with the right seam allowance to manage bulk. Trim seam allowances to 1/4 inch. If you see raw edges, sew binding strips over them to cover and secure seams.
Adjusting Fit
You might need to adjust the fit as you sew. Try using a piece of closed cell foam for stiffness and shape. Sew straps and pockets in a sequence that makes fitting sections into your sewing machine easier. Removable Velcro-type fasteners with vertical straps and multiple hook points let you adjust the fit. If you notice puckering, reconstruct and resew the lining. Careful measurement helps you avoid this problem.
Always check your work as you sew. If something feels off, stop and fix it before moving on. You’ll end up with a water bottle holder that fits perfectly and lasts.
Here’s a quick table for troubleshooting common issues:
| Problem | Quick Fix |
|---|---|
| Seams puckering | Remeasure, resew lining |
| Raw edges showing | Sew binding strips over edges |
| Misaligned straps | Use clips, check alignment |
| Loose closure | Topstitch channel, add cord lock |
You now know the easiest way to sew a water bottle holder. Pin, sew, turn, and topstitch for a sturdy, stylish bag. If you run into trouble, use these tips to fix seams and adjust the fit. Sewing gets easier every time you try!
Customize & Personalize Your DIY Water Bottle Holder
You can make your diy water bottle sling stand out with a few creative touches. Customizing your bag is fun and lets you show off your style. Here are some easy ways to add personality and function to your water bottle holder.
Add a Phone Pocket
Do you want to keep your phone close while you walk or hike? You can add a phone pocket to your sling. Cut a small rectangle of fabric that fits your phone. Fold the edges under and sew the pocket onto the outside or inside of your bag. Pin it in place before you sew to keep it straight. You can also add a snap or Velcro to keep your phone secure. This pocket is handy for keys, cards, or snacks too.
Tip: Use a sturdy fabric for the pocket so it holds up to daily use.
Embellishments
Decorating your water bottle holder is easy. You can use embroidery or appliqué to make your bag unique.
Embroidery
Embroidery adds color and texture. You can sew your initials, a favorite shape, or a fun design. Machine embroidery works well if you want a strong and neat look. It also lasts a long time. Nylon fabric is a great choice because it resists water and mildew. If you want your bag to keep drinks cool, try adding Insul-Bright batting inside.
| Technique/Material | Description |
|---|---|
| Nylon Fabric | Water and mildew resistant, easy to wash, ideal for durability. |
| Machine Embroidery | Decorative and durable, keeps your design looking sharp. |
| Insul-Bright Batting | Adds insulation, helps keep drinks cold or hot, boosts durability. |
Appliqué
Appliqué lets you sew shapes or letters onto your bag. Cut out a heart, star, or animal from fabric. Pin it to your bag and sew around the edges. You can use a zig-zag stitch for a fun border. Mix and match colors for a bold look.
Try using scraps from old clothes for your appliqué. This saves money and helps the planet.
Color & Pattern Choices
Choosing the right color and pattern makes your sling pop. Bright colors stand out, while darker shades hide dirt. You can pick a pattern that matches your style or mood. Here’s a quick look at some popular fabric types:
| Fabric Type | Characteristics |
|---|---|
| Canvas | Durable, non-stretch, easy to clean |
| Leather | Strong, stylish, and long-lasting |
| Gabardine | Medium to heavy, holds shape well |
| Fusible Fleece | Adds structure and extra durability |
You can mix fabrics for a cool effect. Try a canvas body with a leather strap. Add a patterned pocket for a splash of color. If you want your diy water bottle sling to match your backpack or shoes, use the same fabric or color family.
Don’t be afraid to experiment. Your water bottle sling should show off your personality!
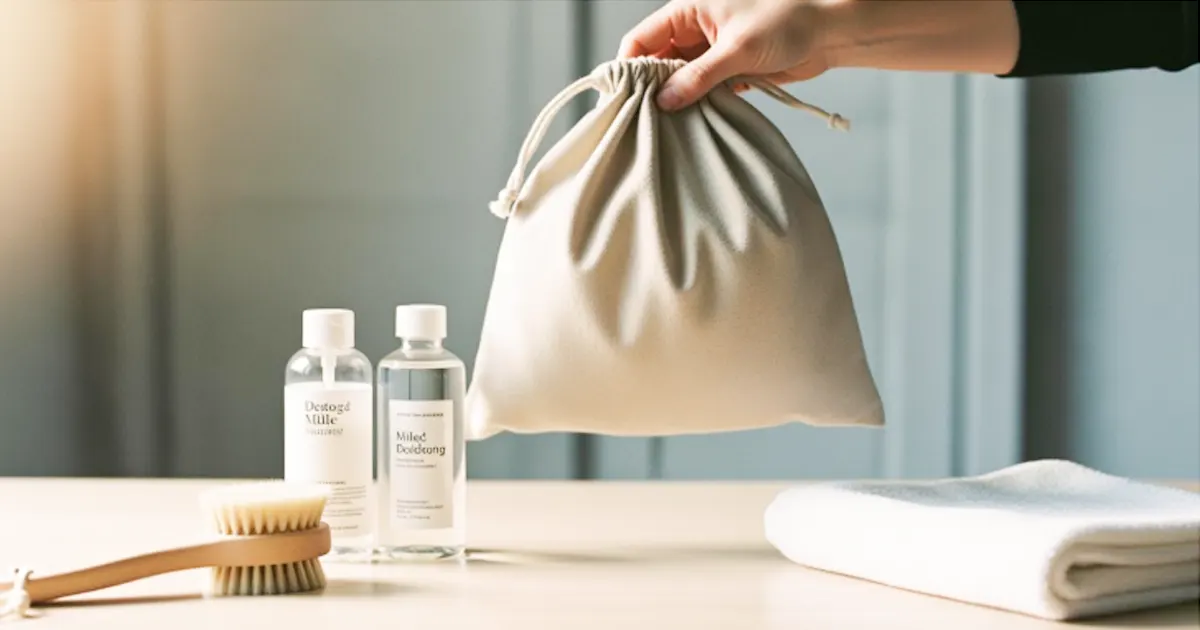
Care & Use Tips for Water Bottle Holder
Taking care of your water bottle holder helps it last longer and keeps it looking fresh. You put in the effort to sew your own, so let’s make sure you get the most out of it every day.
Cleaning
Keeping your water bottle holder clean is simple if you follow a few easy steps. You don’t need fancy products or a washing machine. In fact, gentle care works best.
- Hand-wash your holder in cool water with a pH-neutral, enzyme-based detergent.
- Skip the bleach, vinegar, and fabric softeners. These can damage the fabric and any reflective trim.
- Rinse your holder well so no soap stays behind.
- Lay it flat to air-dry. Keep it out of direct sunlight and away from heaters.
- When you store it, roll it up loosely. This helps the trim and fabric keep their shape.
Tip: Machine washing might seem faster, but it can wear out your holder and make it lose its shape.
Everyday Use
You’ll find that a water bottle holder makes daily life easier. It’s more than just a place to stash your drink.
- Enjoy hands-free convenience. You can use your phone, carry groceries, or walk your dog without juggling your bottle.
- Adjust the strap for comfort. A good fit means you won’t feel uneven weight on your shoulder.
- The design keeps your bottle secure. It won’t slip or wobble, even if you run or hike.
- Use your holder for many activities. Take it to the gym, run errands, or explore new places. It fits right in with your routine.
If you sew your own holder, you can pick the strap length and style that works best for you.
Outdoor & Travel Tips
Your water bottle holder shines when you head outdoors or travel. You want easy access to your drink, especially on long walks or hikes.
- Choose a holder that lets you grab your bottle quickly, even when you wear a backpack.
- Smooth bottles slide in and out faster, so you don’t have to struggle.
- Adjust your hip belt if you use a backpack. This helps you reach your bottle without taking off your pack.
- Some backpacks, like the REI Flash 55 or ULA packs, have great side pockets for holders. Try different setups to see what works best for you.
When you sew your own holder, you can add features like extra loops or clips for outdoor adventures.
Taking care of your water bottle holder is easy. Clean it gently, use it every day, and try new ways to carry it outdoors. You’ll enjoy your handmade project for a long time!
Conclusion
Making your own water bottle bag is a great way to save money, show your creativity, and create something useful for daily use. You can experiment with different fabrics, colors, and features to make a design that truly fits your needs. If small sewing problems come up, simple adjustments like reinforcing seams, trimming threads, or tightening the closure can help improve the final result.
If you need custom water bottle bags for your brand, event, or business, partnering with a professional manufacturer is the better long-term solution. As a bag manufacturer, we offer flexible customization in materials, sizes, colors, and printing, along with full OEM and ODM services. We help clients develop practical, attractive, and high-quality bag products tailored to different markets and applications.
FAQ
How long does it take to make a water bottle bag?
You can finish your water bottle bag in about one to two hours. If you watch a video, you might work even faster. A video tutorial helps you see each step clearly.
Do I need a sewing machine for this project?
You can sew by hand or use a sewing machine. A machine makes things quicker. If you watch a video, you can follow along with either method.
Can I wash my water bottle bag in the washing machine?
You should hand-wash your bag for best results. Some fabrics can handle a gentle machine wash. Check a video for cleaning tips if you want to see the process.
What size bottle fits in this bag?
Most standard water bottles fit. You can adjust the pattern for larger or smaller bottles. Many video guides show how to measure and cut fabric for different sizes.
Where can I find a good video to help me?
You can search YouTube or craft blogs for a helpful video. Many creators post step-by-step videos. Look for a video with clear instructions and close-up shots.
Can I add extra pockets or decorations?
Yes! You can add pockets, patches, or embroidery. Watching a video gives you ideas for customizing your bag. Some videos even show how to sew on extra features.
What if I make a mistake while sewing?
Don’t worry. You can use a seam ripper to fix errors. Many video creators show how to correct common mistakes. Pause the video and try again until you get it right.
Is there a video tutorial for beginners?
Yes, you can find a video tutorial made just for beginners. These videos break down each step and use simple language. Watching a video makes learning much easier.