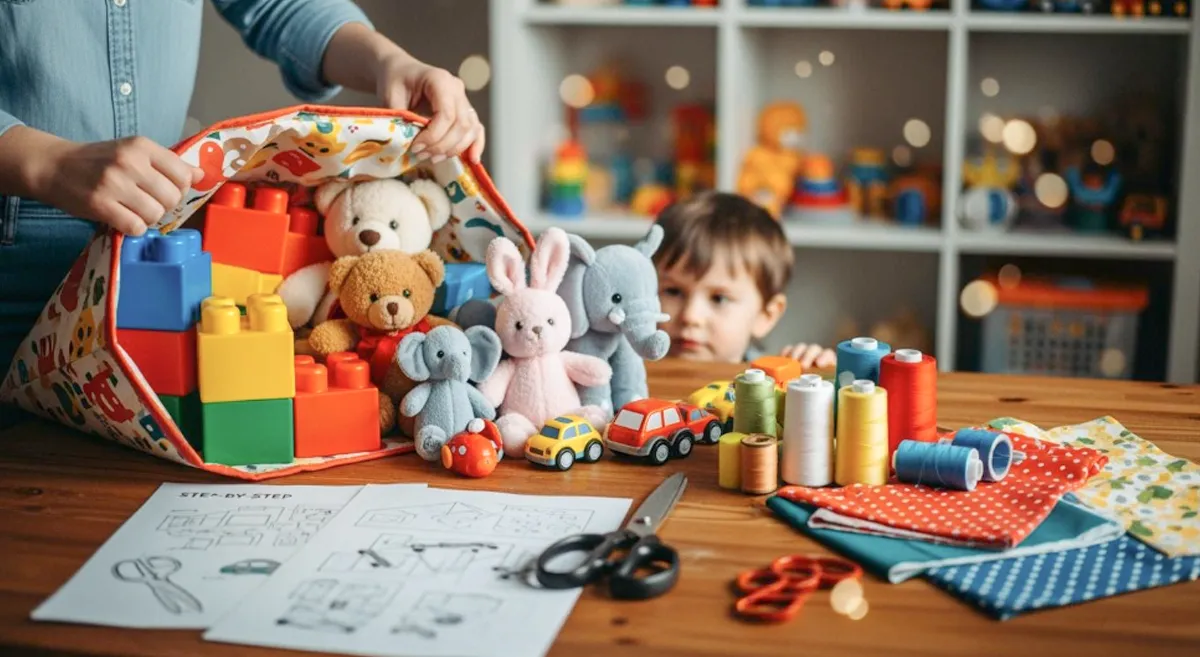
Ever wondered how to make a toy storage bag that fits your space and style? You can create something practical and fun right at home, even if you’re new to sewing. Toy storage bags stand out for their portability and convenience, which makes them a rising favorite among families who want easy ways to keep toys organized, especially when traveling. You might love how these bags double as play mats or show off creative patchwork designs. Ready to dive in and start your own project? Let’s get started!
Key Takeaways
- Get all the things you need like strong fabric, cord, and tools before you start making your toy storage bag.
- Pick tough fabrics like cotton canvas or old materials so your bag will last longer and help the planet.
- Measure and cut your fabric with care so it fits what you want to store, no matter if you want a round or rectangle shape.
- Try patchwork to make your bag look cool by mixing colors and patterns for a fun style.
- Follow easy sewing steps to put your bag together, making sure the seams are strong and the edges look neat for a nice finish.
- Put in a drawstring so you can open and close the bag easily, which makes it simple for kids to use their new toy storage bag.
- Make your bag special by adding names or labels so your child feels proud and wants to keep things tidy.
- Take care of your bag by cleaning it the right way and keeping it in a dry spot so it stays fresh and safe for play.
How to Make a Toy Storage Bag: Materials
Before you start sewing, you need to gather the right materials. Picking the best supplies makes your project easier and helps your toy storage bag last longer. Let’s break down what you’ll need and why each item matters.
Fabric Selection
Cotton, Canvas, Upcycled
Choosing fabric is the first step in how to make a toy storage bag. You want something sturdy and easy to clean. Cotton canvas stands out because it’s tough and holds up well to daily use. Many people prefer 100% GOTS-certified organic cotton canvas for its durability and safety. If you want to save money or help the planet, try upcycled fabrics. Old curtains, sheets, or laundry mesh bags work great. Upcycling teaches kids about sustainability and sparks creativity. You can even turn recycled materials into stylish home decor, which reduces waste and saves money.
| Feature | Details |
|---|---|
| Fabric | 100% GOTS-certified organic cotton canvas |
| Cord | Thick natural organic cotton cord |
| Reinforcement | Interior reinforced with cotton binding |
| Size | 22″ wide x 6″ soft edge piece |
| Care Instructions | Spot clean or use a cool dryer |
Water-Resistant Backing
If you want your bag to double as a play mat, consider adding a water-resistant backing. Waterproof materials keep toys dry and clean, even on wet ground. Some outdoor storage bags use waterproof fabric and include features like adjustable straps and sand escape holes. These extras make your bag perfect for trips to the park or beach.
Tools Needed
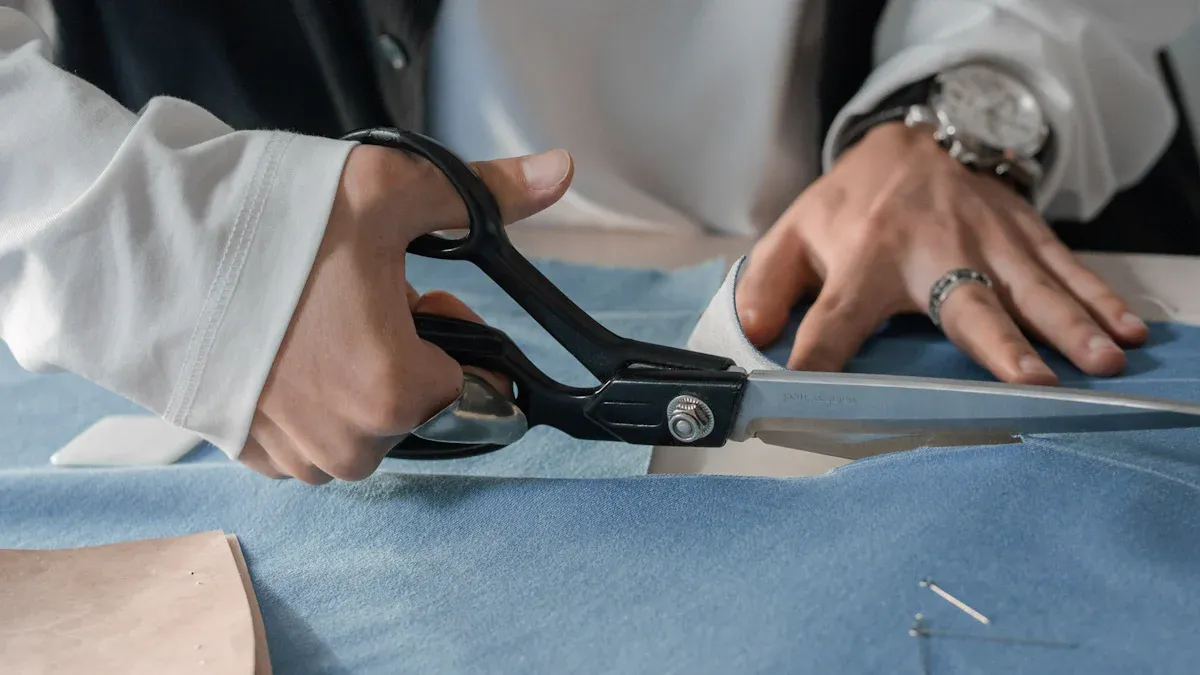
Scissors, Pins, Tape
You need a few basic tools to get started. Good cutting tools like shears or a rotary cutter help you make clean cuts. Pins and sewing clips hold your fabric in place while you work. Measuring tape and marking pens help you keep everything straight and neat.
- Shears
- Thread snips
- Rotary cutter and mat
- Large cutting mat
- Tape measure
- Seam gauge
- Marking pens
- Seam turning tool
- Iron
- Pins and pincushion
- Seam ripper
- Sewing clips
Using these tools helps you sew with precision. Clean cuts and accurate measurements make your bag look professional. Pressing seams with an iron gives your project crisp edges.
Sewing Machine or Needle
You can sew your toy storage bag by hand or with a sewing machine. A machine speeds up the process and gives strong seams. If you sew by hand, use a sturdy needle and strong thread. Either way, take your time and check your stitches for strength.
Drawstring and Extras
Cord or Ribbon
A drawstring lets you open and close your bag easily. Thick cotton cord works best, but you can also use ribbon. Make sure the cord is strong enough to handle daily use.
Safety Pins, Markers
Safety pins help you thread the drawstring through the casing. Fabric markers let you add names or designs to personalize your bag.
Tip: Pick bright colors and fun patterns for your fabric. Kids love bags that stand out, and colorful materials make it easier to spot the bag in a busy room.
Now you know how to make a toy storage bag with the right materials. Durable fabrics and quality tools make your project easier and safer for kids. Upcycled and waterproof options add extra value and teach important lessons about caring for the environment.
Cutting and Preparing Fabric
Getting your fabric ready is the first hands-on step in making your toy storage bag. You want to make sure your bag fits your space and holds all the toys you need. Let’s break down how you can measure, cut, and prep your fabric for a smooth sewing experience.
Measuring and Cutting
Round or Rectangular Shape
You get to choose the shape of your toy storage bag. Most people go for a round bag because it doubles as a play mat. Rectangular bags work well for shelves or bins. Grab your measuring tape and decide which shape fits your space best.
- Round Bag: Use a large bowl or a string and pencil to draw a circle on your fabric. Most round bags measure between 40 and 60 inches across. This size gives kids plenty of room to spread out toys.
- Rectangular Bag: Measure out your length and width. A good starting point is 22 inches by 30 inches, but you can adjust based on your storage needs.
Tip: Lay out your toys on the floor first. This helps you see how much space you need for your bag.
Sizing for Storage Needs
You want your bag to fit your toy collection. Check out this table for some handy size ideas based on common toy types:
| Storage Unit Size | Best For | Example Toys |
|---|---|---|
| 5×5 | Small toy storage bins and boxes | Stuffed animals, dolls, LEGO sets |
| 5×10 | Medium toy collections | Toy box, ride-on toys, play kitchens, collectibles |
| 10×10 | Garage toy storage | Bikes, Power Wheels, outdoor games, sports gear |
| 10×15+ | Full playroom or outdoor storage | Playhouses, inflatables, trampolines, furniture |
Pick a size that matches your needs. If you have lots of small toys, a 5×5 or 5×10 bag works great. For bigger items, go for a larger size.
Patchwork Preparation
Arranging Fabric Pieces
Want to add some personality to your bag? Patchwork is a fun way to use up scraps and show off cool patterns. Cut your fabric pieces into squares, rectangles, or triangles. Lay them out on a table or the floor. Try different arrangements until you find a look you love.
- Mix colors and prints for a playful vibe.
- Use solid colors for a clean, modern style.
- Alternate light and dark pieces for contrast.
Note: Take a quick photo of your layout before you start sewing. This helps you remember your design.
Securing with Pins
Once you’re happy with your patchwork layout, start pinning the pieces together. Place pins along the edges to keep everything in place. Make sure the corners line up so your seams look neat.
- Use straight pins or sewing clips.
- Pin every few inches for extra security.
- Double-check your arrangement before moving to the sewing machine.
If you’re working with kids, let them help with pinning. It’s a safe and easy way to get them involved in the project.
Now your fabric is measured, cut, and ready for sewing. You’ve set the stage for a toy storage bag that fits your space and shows off your style!
Sewing Tutorial: Assembling the Bag
Ready to sew? This sewing tutorial will guide you through each step so you can assemble your toy storage bag with confidence. You’ll learn how to align and pin your fabric, stitch the sides, and add a lining for extra durability. Let’s get started!
Stitching Sides
Aligning and Pinning
Start by laying out your fabric pieces with the right sides facing each other. If you chose patchwork, make sure all your sections are in the correct order. Use pins or sewing clips to hold the edges together. Pin every few inches so nothing shifts while you sew. Double-check that the corners and seams line up. This step helps your bag look neat and professional.
Tip: Take a quick look at your pinned fabric before sewing. If anything looks uneven, adjust the pins now. It’s easier to fix before you start stitching!
Leaving Top Open
When you sew the sides, leave the top edge open. This opening is where you’ll add the drawstring casing later. Use a sewing machine or a sturdy hand needle. Follow these instructions for strong seams:
- Sew along the pinned edges, using a ¼” or ⅜” seam allowance.
- Backstitch at the beginning and end of each seam. This keeps your stitches from unraveling.
- For extra strength, reinforce stress points like corners. You can sew a few extra stitches here.
- If you want to prevent fraying, use a whip stitch or zigzag stitch along the raw edges.
Here’s a quick look at common mistakes beginners make and how you can avoid them:
| Mistake | How to Avoid It |
|---|---|
| Using the Wrong Needle Size | Use a 90/14 or 100/16 needle for thick fabrics. Smaller needles can break or struggle. |
| Skipping Interfacing and Stabilizer | Add interfacing or stabilizer to keep your bag sturdy. Check your pattern for the right type. |
| Ignoring Seam Allowances | Stick to the pattern’s seam allowance. Use a seam guide for accuracy. |
| Not Testing Stitch Length | Try stitching on a scrap first. Use longer stitches for thick fabrics, shorter for light ones. |
| Neglecting Finishing Details | Press seams, topstitch edges, and finish raw edges for a polished look. |
Note: If you’re new to sewing, don’t rush. Take your time with each step. Mistakes happen, but you can fix most of them with a seam ripper.
Adding Lining (Optional)
A lining adds strength and protects toys from moisture. You can use materials like PEVA or aluminum foil for insulation and durability. If you want your bag to last longer or keep toys dry, lining is a smart choice.
Attaching Lining
Cut your lining fabric to match the size and shape of your main bag. Place the lining inside the bag, with the wrong sides facing each other. Pin the lining to the main fabric along the edges. Sew around the sides, leaving the top open just like before.
- Use a 2.5mm stitch length for durability.
- Backstitch at the start and end of each seam.
- Reinforce stress points, especially if your bag will hold heavy toys.
Turning Right Side Out
Once you’ve sewn the lining and sides, reach inside and turn the bag right side out. Push out the corners and edges so everything looks smooth. If you added patchwork, check that all the seams are secure. Press the bag with an iron for crisp edges.
Tip: Create a double-fold hem at the top edge before adding the drawstring casing. This encloses raw edges and makes the cord slide smoothly.
Here are some techniques to make your toy storage bag extra strong:
- Reinforce stress points to prevent early wear.
- Use backstitching at the start and end of seams.
- Try a whip stitch to finish edges and stop fraying.
This sewing tutorial gives you clear instructions for assembling your bag. You learned how to make a toy storage bag that’s sturdy and looks great. If you follow these steps, your bag will last through lots of playtime and storage.
Drawstring Tutorial for Toy Storage Bag
Adding a drawstring is the final step in your bag-making journey. You get a secure closure and a fun way for kids to open and close their new bag. This tutorial will walk you through making the casing and inserting the drawstring, so your drawstring toy storage bag looks neat and works perfectly.
Making the Casing
Folding and Stitching Edge
You want your casing to look tidy and hold the cord well. Here’s how you do it:
- Fold the top edge of your bag down about 1 inch. This creates the space for your drawstring.
- Press the fold with an iron. The crease helps you stitch straight and keeps the fabric in place.
- Pin the fold all the way around the edge. Use sewing pins or clips to make sure it doesn’t shift.
- Stitch along the edge, just below the previous stitching line. Try to keep your stitches even. A hemming guide or seam gauge helps you stay on track.
- Check your seams with a tape measure or cutting mat. Even seams make your bag look professional.
- Neaten the raw edges inside the casing. You can use pinking shears or an overlock stitch if you want extra durability.
Tip: If you want a colorful casing, use a contrasting thread or add a decorative stitch. Kids love bright details!
Creating Openings
You need an opening for the drawstring to slide through. Here’s a simple way:
- Before you sew the casing shut, mark two spots on opposite sides of the bag. These will be your openings.
- Use a seam ripper or small scissors to carefully open a few stitches at each spot. Make sure the holes are big enough for your cord or ribbon.
- Reinforce the edges of each opening with a few extra stitches. This keeps the fabric from fraying.
Inserting the Drawstring
Threading Cord
Now you’re ready to add the cord or ribbon. Follow these steps:
- Cut your cord or ribbon. Make it more than double the width of your bag, so you have plenty to tie a bow or knot.
- Attach a safety pin to one end of the cord. Push the safety pin through one opening and thread it all the way around the casing.
- Pull the cord out through the second opening. Your drawstring toy bag is almost done!
Note: If the cord gets stuck, gently wiggle the safety pin. Take your time and avoid pulling too hard.
Securing Ends
Finish your bag by securing the drawstring ends:
- Tie knots at both ends of the cord to keep it from slipping back into the casing.
- If you want extra flair, add beads or tassels to the ends.
- Test the drawstring by pulling it closed and opening it again. Make sure it slides smoothly.
Here’s a quick table to help you choose the best cord or ribbon:
| Material | Best For | Pros | Cons |
|---|---|---|---|
| Cotton Cord | Everyday use | Durable, washable | May fray |
| Satin Ribbon | Decorative bags | Soft, colorful | Less sturdy |
| Nylon Cord | Outdoor play mats | Water-resistant | Can be slippery |
You’ve finished the drawstring tutorial! Your drawstring toy storage bag is ready for action. Kids can open and close it with ease, and you get a neat, organized space for toys.
How to Make a Patchwork Drawstring Toy Bag
Creating a patchwork drawstring bag lets you mix colors, patterns, and textures for a playful look. You get to design something unique that matches your style and storage needs. Let’s walk through how to make a patchwork drawstring toy bag step by step.
Patchwork Layout
Choosing Patterns
Picking patterns is the fun part. You can use bright colors, cartoon prints, or even upcycled fabric from old clothes. Before you start cutting, think about these key points:
- Choose fabric types that are tough and look good. Cotton and canvas work well.
- Decide how big you want your bag. Will you use it for blocks, dolls, or cars?
- Plan your construction. You’ll make a patchwork front panel, then sew it into a bag that opens and closes easily.
Tip: Lay out your fabric pieces on a table before you sew. This helps you see how the colors and patterns work together.
Arranging Pieces
Arrange your fabric squares or rectangles in rows or a fun random pattern. Try mixing light and dark colors for contrast. You can use a simple grid or get creative with triangles and strips. Snap a quick photo of your layout so you remember the order.
- Place larger pieces in the center for strength.
- Use smaller pieces around the edges for a playful border.
- Make sure the seams line up for a neat finish.
Sewing Patchwork
Joining Sections
Start sewing your patchwork pieces together. Place two pieces with the right sides facing each other and stitch along one edge. Keep adding pieces until you finish a row, then join the rows together.
Pressing seams open can create a flatter appearance, contributing to a more seamless look. This method also helps maintain the desired size of quilt blocks by preventing fabric loss due to the turn of fabric. To achieve this, lay the right side of the block against the ironing board and use the tip of the iron to separate the seam allowance before pressing down.
Keep going, even if your stitches aren’t perfect. You’ll notice the bag looks better after you finish and wash it. The fabric and stitches blend together, giving your bag a cozy, homemade feel.
- Machine quilting can be tricky with a small sewing machine.
- Don’t worry if the lines aren’t straight. The bag will still look great.
- Washing the finished bag helps soften the seams and makes the patchwork pop.
Attaching to Main Bag
Once you finish your patchwork panel, attach it to the rest of your bag. Pin the patchwork front to the backing fabric, then sew around the edges. Leave the top open for the drawstring casing. Make sure you reinforce the corners and stress points so your bag lasts longer.
You now have a colorful patchwork drawstring bag that’s perfect for storing toys. Kids love the bright patterns, and you get a sturdy bag that stands out in any room.
Finishing and Customization Tutorial
Final Touches
Trimming Threads
You’re almost done with your toy storage bag. Before you show it off, check for loose threads. Grab your scissors and snip any stray ends. This step keeps your bag looking neat and prevents unraveling. You want every seam to look clean and tidy.
Reinforcing Points
Some spots on your bag get more wear, like the drawstring openings and corners. You can make these areas stronger by sewing a few extra stitches. Press the seams flat with a hot iron for a polished look. If your bag has a round shape, clip the curves before turning it right side out. This trick helps the edge stay smooth. You can sew a final edge around the circle to close the opening neatly. Try using tabs instead of grommets for a cleaner finish. Pin the tabs to the fabric with offset ends to reduce bulk when sewing. Sew around the perimeter to secure everything.
Customization Ideas
Adding Names or Labels
Personalizing your toy storage bag makes it special for your child. You can use custom labeling stickers or iron-on patches. Try adding your child’s name with fabric markers or embroidery. Use vibrant colors and clear fonts so your child can spot their bag easily. Let your child help pick the design. When kids choose their own labels, they feel proud and want to use the bag more.
According to HighScope, “Well-labeled materials stored in consistent locations support children’s independence, reduce conflicts, and help children plan and review their play.”
Here are some creative ways to label your bag:
- Photo labels: Attach a picture of the toys inside.
- Word labels: Write the toy names to help with reading.
- 3D object labels: Glue a small toy piece to the bag for tactile recognition.
- Shape-matching labels: Cut out shapes for kids to match with their toys.
- Child-made labels: Let your child draw their own label.
Decorative Elements
You can decorate your bag with patches, themed prints, or fun artwork. Canvas bins work well for DIY projects and portability. Many families love modular and collapsible designs. Eco-friendly materials like recycled plastics and bamboo are popular choices. You can add zippers, pockets, or straps for extra features.
| Customization Aspect | Description |
|---|---|
| Material Selection | Choose from eco-friendly and high-quality materials. |
| Color Variants | Pick from a wide spectrum of colors. |
| Size and Shape Customization | Tailor the size and shape to your needs. |
| Prints and Patterns | Add custom prints, patterns, or artwork. |
| Branding | Include logos, names, or taglines. |
| Additional Features | Add zippers, pockets, straps, and more. |
Care and Cleaning Tips
You want your toy storage bag to last. Spot clean with a damp cloth for small messes. For deeper cleaning, use a gentle cycle in the washing machine and air dry. Avoid harsh chemicals to keep colors bright and fabric strong. Store your bag in a dry place to prevent mold or mildew.
This tutorial helps you finish your bag with style and durability. Personal touches make your bag unique, and proper care keeps it looking new for years.
Tips for Use and Care
Keeping your toy storage bag clean and safe helps it last longer and keeps your child’s play area healthy. You can follow these easy tips for cleaning, storing, and choosing safe materials.
Cleaning Guide
Washing Instructions
You want your toy storage bag to look fresh and stay strong. Different fabrics need different care. Here’s a quick guide to help you clean your bag the right way:
| Fabric Type | Spot Cleaning Method | Machine Washing Method |
|---|---|---|
| Faux Fur | Dab stains with a damp cloth and mild detergent. | Use a pillowcase or mesh bag, gentle cycle, cold water, mild detergent. Air dry or use no-heat dryer. |
| Cotton Fabric | Treat stains with mild detergent or stain remover. | Wash in cold water, gentle cycle, mild detergent. Air dry or use low heat. |
| Velvet | Dab stains with water and mild detergent. | Gentle cycle, cold water, mild detergent. Air dry. |
| Felt | Dab stains with damp cloth and mild detergent. | Hand wash in cold water, mild detergent. Pat dry. |
| Polyester Fiberfill | Wipe with damp cloth and mild soap. | Mesh bag, gentle cycle, cold water, mild detergent. Air dry. |
| Wool Stuffing | Wipe with damp cloth. | Avoid submersion; spot clean only. |
| Microbeads | Wipe with damp cloth. | Avoid submersion; spot clean only. |
Tip: Always check the care label before washing. Air drying helps prevent shrinking and keeps the bag’s shape.
Storing the Bag
Storing your toy storage bag the right way keeps it fresh and free from mold or odors. You can follow these steps for best results:
- Clean and dry the bag thoroughly before putting it away.
- Spot clean stains as soon as you see them.
- Air dry the bag completely. Sunlight or low-heat drying works best.
- Use antibacterial sprays that are safe for fabric to reduce germs.
- Store the bag in a breathable cotton bag to allow airflow.
- Choose clear plastic bins with ventilation holes if you need extra protection.
- Avoid thin plastic bags or sealed containers without ventilation. These trap moisture and cause mold.
Note: Letting your bag breathe keeps it smelling fresh and helps prevent mildew.
Safety Tips
Child-Safe Materials
You want your toy storage bag to be safe for your child. Look for materials that meet safety standards. Here’s a table showing what to check:
| Safety Aspect | Description |
|---|---|
| Mechanical & Physical Safety | Strong structure prevents dangerous breakage. |
| Chemical Safety | Controls exposure to harmful substances like heavy metals and phthalates. |
| Flammability | Materials resist ignition and burn slowly to protect against burns. |
| Electrical Safety | Prevents shocks and overheating in bags with electronic parts. |
| Biological & Hygiene Safety | Non-toxic and easy-to-clean materials keep your child healthy. |
Tip: Choose certified organic cotton or canvas for peace of mind. These fabrics are gentle on skin and easy to clean.
Avoiding Small Parts
Small parts can be a choking hazard for young children. You can keep your bag safe by following these tips:
- Avoid using beads, buttons, or decorations that can come loose.
- Check the drawstring ends and secure them with knots instead of small objects.
- Inspect the bag regularly for loose threads or broken pieces.
- If you add labels or patches, make sure they are firmly attached.
Safety first! A well-made bag keeps playtime fun and worry-free.
You now know how to care for your toy storage bag and keep it safe for your child. Clean it often, store it properly, and choose safe materials. Your bag will stay bright, fresh, and ready for play.
Conclusion
You can make a toy storage bag at home. This helps keep your play area clean and safe. You can try patchwork or add a play mat for more fun. Families say these bags have many benefits:
| Benefit | Description |
|---|---|
| Enhanced Organization | Toys stay neat and there is less mess. |
| Improved Safety | Fewer accidents happen with toys put away. |
| Promotion of Imaginative Play | Kids use their imagination more during play. |
| Encouragement of Positive Behaviors | Kids learn to keep their things organized. |
Follow care tips to help your bag last longer. If you want a special bag, we can help design and make one for you. Many families like custom bags for these reasons:
| Reason | Description |
|---|---|
| Organization | It is easier to find toys when they are sorted. |
| Safety | Small parts stay safe and do not get lost. |
| Space Optimization | The bag fits under beds or inside closets. |
| Convenience | Handles and wheels make cleaning up quick for kids. |
FAQ
How long does it take to make a toy storage bag?
You can finish a simple bag in about 1–2 hours. If you add patchwork or a lining, you might need more time. Take breaks and enjoy the process!
Can I make a toy storage bag without a sewing machine?
Yes! You can sew by hand with a strong needle and thread. It takes longer, but you get the same results. Just use small, tight stitches for strength.
What size should I make my toy storage bag?
Pick a size that fits your toys and space. Here’s a quick guide:
| Bag Size | Best For |
|---|---|
| Small | Blocks, cars |
| Medium | Dolls, plushies |
| Large | Play sets, balls |
What fabric works best for kids?
Cotton canvas is a great choice. It’s strong and easy to clean. Upcycled fabric works well, too. Kids love bright colors and fun prints.
How do I keep the drawstring from slipping inside the casing?
Tie a big knot at each end of the cord. You can also add beads or tassels for extra flair. This keeps the drawstring from getting lost.
Can I wash my toy storage bag in the washing machine?
Most bags made from cotton or canvas are machine washable. Use cold water and a gentle cycle. Air dry to keep the bag in good shape.
Is it safe for toddlers?
Yes, if you use child-safe materials and avoid small parts. Always check for loose threads or decorations. Safety comes first!