Yes, you can make a swimming bag at home—even if you’re new to sewing. You just need to pick your favorite waterproof fabric, cut it to size, and sew it together. Want to keep things dry? Try PVC coated cotton, oilcloth, or even Polyurethane Laminate (PUL). Check out some popular options:
| Fabric Type | Description |
|---|---|
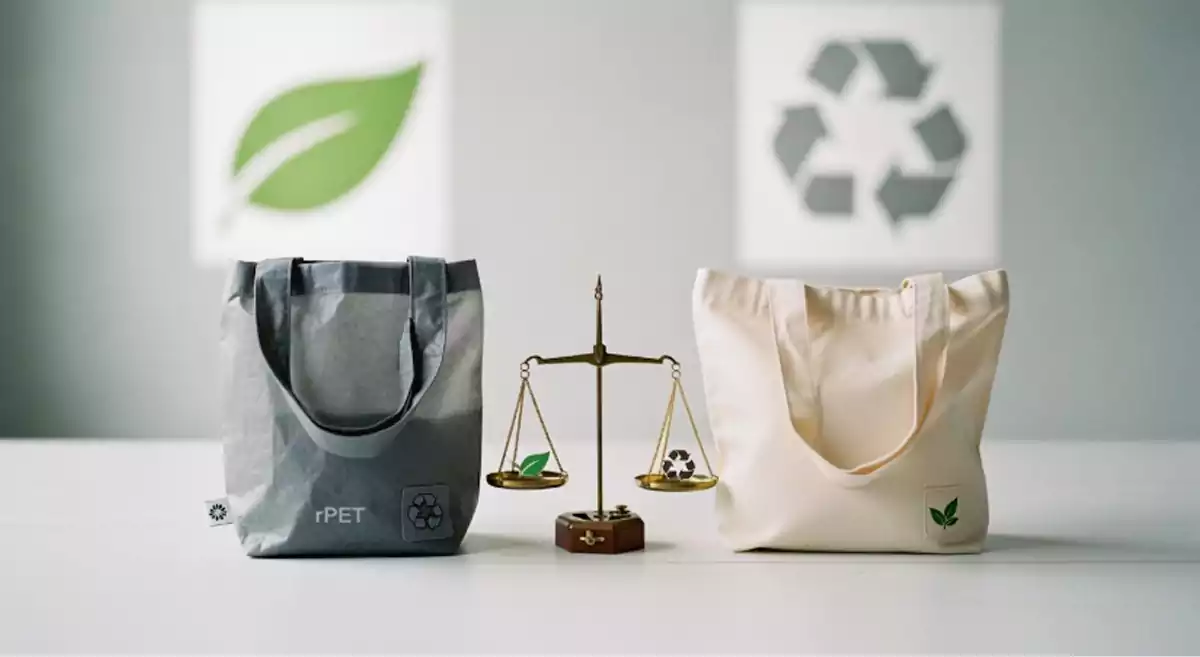
| Polyurethane Laminate (PUL) | A polyester fabric with a plastic backing that is thin, flexible, breathable, and washable. Eco-friendly options made from recycled plastics are available. |
Add closures like zippers or drawstrings, and customize your bag however you like. If you want to know how to make a swimming bag that stands out, you’re in the right place.
Key Takeaways
You can make a swimming bag at home. Use waterproof fabrics like PVC-coated cotton or oilcloth.
- Gather tools like a sewing machine, scissors, and measuring tape. These tools help you sew smoothly.
- Pick the right closure for your bag. Zippers keep things safe. Drawstrings let you open the bag fast.
- Cut the fabric pieces carefully. This helps your bag look neat and fit well.
- Make corners and handles stronger. This stops them from wearing out.
- Clean your swimming bag often. Dry it well to keep it fresh and last longer.
- Add pockets, colors, and patterns to your bag. This shows your personal style.
- Fix leaks or stuck zippers with easy repairs. This keeps your bag working well.
How to Make a Swimming Bag: Materials & Tools
Before you start sewing, you need to gather the right materials and tools. Picking the right supplies makes your swimming bag strong, waterproof, and easy to use. Let’s break down what you’ll need and why each item matters.
Waterproof Fabrics
You want your swimming bag to keep wet swimsuits and towels from leaking everywhere. That means you need a waterproof storage solution. Here are some top choices:
PVC Coated Cotton
PVC coated cotton feels soft but blocks water very well. It’s flexible, so you can fold or shape your bag easily. This fabric also wipes clean with a damp cloth, which is perfect for busy pool days.
Oilcloth
Oilcloth is another great pick. It’s tough, waterproof, and super easy to clean. If you spill something, just wipe it off. Oilcloth also comes in lots of fun colors and patterns, so you can make your bag unique.
| Material | Advantages | Cleaning Method |
|---|---|---|
| Oilcloth | Waterproof, durable, easy to clean | Wipe to clean |
| PVC-coated polyester | Tough, very waterproof, good for heavy rain | Wipe to clean |
Nylon & Polyester
Nylon and polyester are lightweight and strong. Many sports bags use these fabrics because they dry quickly and resist tearing. If you want a bag that’s easy to carry and lasts a long time, nylon or polyester works well.
Tip: Choose a fabric that matches your style and needs. If you want a bag for outdoor swimming, go for something extra tough like PVC-coated polyester.
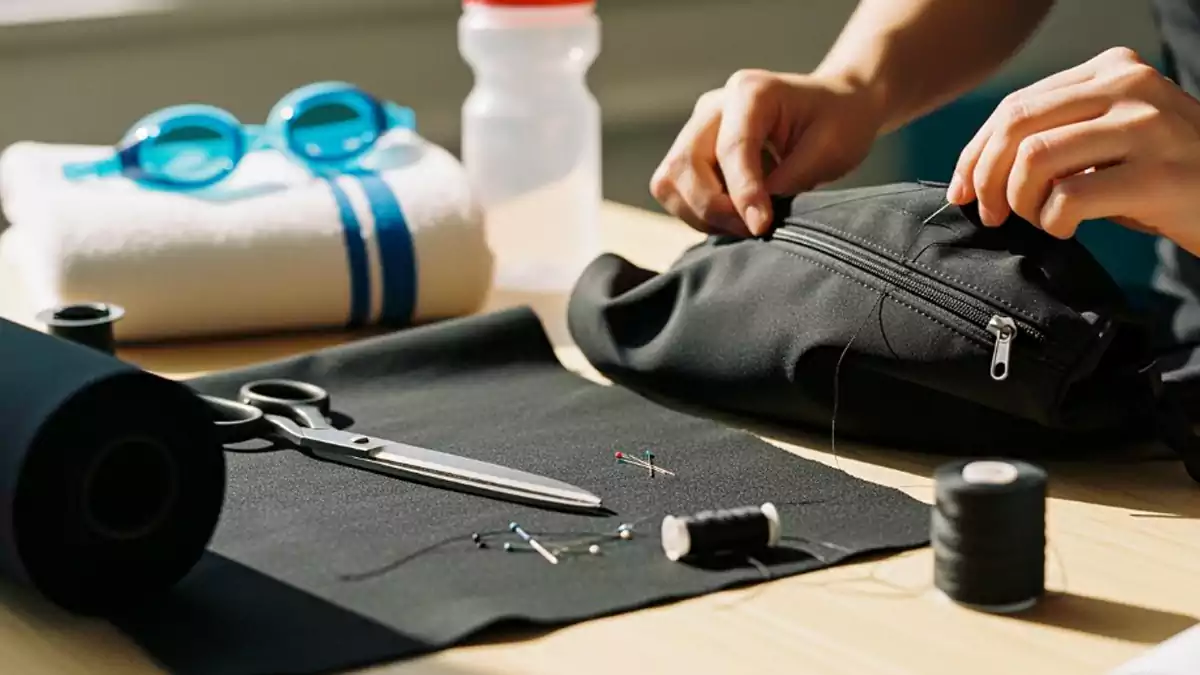
Essential Tools
You don’t need fancy equipment to learn how to make a swimming bag. Here’s what you’ll use:
Sewing Machine or Needle
A sewing machine makes the job faster, but you can sew by hand with a strong needle if you want. Just make sure your needle can handle thick or coated fabrics.
Scissors & Measuring Tape
Sharp scissors help you cut straight lines. A measuring tape keeps your pieces the right size. Don’t skip these—accurate cutting means your bag will look neat.
Pins & Clips
Pins or fabric clips hold your pieces together while you sew. Clips work better for thick or sticky fabrics because they don’t leave holes.
Closures & Accessories
How you close your bag matters for both waterproofing and convenience. Here are some options:
Drawstring Cord
Drawstrings are simple and lightweight. You just pull the cord to close the bag. This style works well for carrying towels or swimsuits, but it’s not fully leak-proof if you have a lot of water inside.
Zipper
Zippers make your bag easy to open and close. They keep things inside, but you need to line up the zipper carefully. If you want a sleek look and quick access, zippers are a good choice.
Eyelets & Handles
Eyelets are small metal rings that protect holes for drawstrings. Handles make your bag easy to carry. You can add padded handles for extra comfort.
Here’s a quick look at how different closures compare:
| Closure Type | Pros | Cons |
|---|---|---|
| Roll-Top Closure Bags | Great waterproofing; very durable | Bulkier; takes longer to open/close |
| Zipper-Sealed Wet Bags | Fast to use; looks neat | Zippers need care; can wear out |
| Drawstring + Lined Pouches | Lightweight; easy to make | Not fully leak-proof; best for light use |
Note: If you want to know how to make a swimming bag that keeps water out, pick a closure that matches your needs. For heavy splashes, try a roll-top or zipper. For everyday use, a drawstring works fine.
Now that you know what materials and tools to use, you’re ready to start building your own swimming bag!
How to Sew a Swimming Bag: Step-by-Step
Ready to get hands-on? Let’s walk through how to sew a swimming bag, one step at a time. You’ll find this process simple if you follow each stage carefully. Grab your supplies and let’s dive in!
Cutting Fabric Pieces
Start by measuring and cutting your fabric. Accurate cutting makes your bag look neat and helps everything fit together. Lay your fabric flat with the printed side facing up. Use a measuring tape and sharp scissors or a rotary cutter for clean edges.
Here’s a handy table with common dimensions for a standard swimming bag:
| Fabric Piece | Dimensions |
|---|---|
| Main Panel (Front) | 14 1/2″ x 17″ |
| Main Panel (Back) | 14 1/2″ x 17″ |
| Lining (Optional) | 14 1/2″ x 34″ |
| Hanging Tab | 4″ x 10″ |
| Pocket (Optional) | 7″ x 9″ |
Tip: Cut your pieces on a single layer for better accuracy. Pay attention to the grainline if your fabric stretches.
If you want to know how to make a swimming bag that lasts, use a stretch needle and polyester thread. These hold up well against chlorine and saltwater.
Preparing Sub-Units
Before you sew the main bag, get your smaller pieces ready. This step helps you stay organized and makes assembly easier.
Adding Pockets
Pockets keep your goggles, keys, or coins safe and easy to find. You can add a simple patch pocket or a zippered one for extra security.
- Cut a rectangle for your pocket (about 7″ x 9″ works well).
- Fold the top edge down by 1/2″ and stitch to make a neat opening.
- Place the pocket on the inside or outside of your main panel, wherever you want.
- Pin or clip it in place, then sew around the sides and bottom.
| Feature | Benefit |
|---|---|
| Wet and Dry Storage | Keeps damp swimsuits separate from dry items |
| Clear TPU Pocket | Keeps small items visible and dry |
Want to keep wet and dry things apart? Add a waterproof pocket inside your bag.
Creating Compartments
Compartments help you organize your gear. You can sew a divider into the lining or add mesh pouches for smaller items.
- To make a divider, cut a piece of fabric the same width as your bag and half the height.
- Hem the top edge, then sew the sides and bottom to the lining before assembling the bag.
- For mesh pouches, use a zigzag stitch to attach mesh to the lining.
You’ll love how easy it is to find your stuff when everything has its own spot.
Sewing Top Edges
Now, let’s finish the top edges. This step keeps your bag looking tidy and helps prevent fraying or leaks.
- Fold the top edge of each main panel over by about 5/8″ (15mm) to the wrong side. This creates a casing for your drawstring or a neat edge for your zipper.
- Pin or clip the fold in place.
- Stitch close to the raw edge to secure the fold.
If you’re using a zipper, try the “fabric sandwich” method. Place your exterior fabric right side up, lay the zipper right side down along the top edge, and put your lining fabric on top, wrong side up. Clip or pin the layers together, then sew about 1/8″ from the zipper teeth. Topstitch for a clean finish.
- Use overlock or zigzag stitches on raw edges if your fabric frays.
- For extra waterproofing, apply seam tape or a liquid seam sealant along the stitches.
Note: Don’t pull the fabric as you sew. Let the machine feed it through to keep the shape right.
You’ve just finished the trickiest part for many beginners! If you want to master how to sew a swimming bag, take your time with these steps. Neat top edges make your bag look professional and last longer.
Assembling Bag Structure
Now comes the exciting part—putting your swimming bag together! You have your fabric pieces ready, your pockets and compartments in place, and your top edges looking neat. Let’s build the main body of your bag so it can hold all your swim gear.
Sewing Sides
Start by placing the two main panels of your bag right sides together. This means the printed or shiny sides should face each other. Line up the edges carefully. Use pins or clips to hold everything in place.
- Sew down each side of the bag, starting from just below the top edge (leave the casing or zipper area open).
- Use a straight stitch about 1/2 inch from the edge. Go slow over thick spots, especially if you added pockets.
- When you reach the bottom, turn and sew across to close it up.
Tip: If your fabric is slippery or sticky, use fabric clips instead of pins. Clips won’t leave holes and make sewing easier.
After sewing, trim any extra threads. If you want a flat bottom, you can box the corners. Just pinch each bottom corner so the side seam lines up with the bottom seam, then sew across about 2 inches from the tip. This gives your bag more space inside.
Reinforcing Seams
Swimming bags carry wet towels, swimsuits, and sometimes heavy bottles. You want your seams to stay strong, even when the bag is full.
- Go over each seam again with a zigzag stitch or an overlock stitch. This helps stop fraying and adds strength.
- For extra durability, you can sew a second straight line about 1/8 inch from your first seam.
- If you have seam tape or waterproof seam sealant, apply it now. This keeps water from sneaking through the stitches.
Note: Reinforcing the seams is a small step that makes a big difference. Your bag will last longer and handle more trips to the pool or beach.
Inserting Drawstring or Zipper
Now you get to choose how you want to close your bag. Both drawstrings and zippers work well, but each has its own perks.
If you picked a drawstring:
- Thread the cord through the casing at the top of your bag. A safety pin attached to the end of the cord helps you guide it through.
- Pull the cord out both sides and knot the ends. If you want backpack-style straps, use two cords and thread them in opposite directions.
- Add eyelets or grommets at the bottom corners for the cords to loop through. This makes the bag easy to carry on your back.
If you chose a zipper:
- Place the zipper along the top edge, right sides together with your fabric.
- Sew the zipper in place, then fold the fabric back and topstitch for a neat finish.
- Make sure the zipper opens and closes smoothly before finishing the sides of your bag.
Here’s a quick comparison to help you decide which closure fits your needs best:
| Feature | Zipper Bag | Drawstring Bag |
|---|---|---|
| Complete Seal | Yes | No |
| Pickpocket Resistance | High | Low |
| Lockable | Often | No |
| Spill & Debris Protection | High | Low |
Drawstring bags make it super easy to grab your things fast. You can open and close them with one hand, which is great when you’re in a hurry. Zipper bags take a little more time to open, but they keep everything inside safe and secure. If you want to protect your phone or wallet, a zipper is the way to go. Drawstrings are perfect for quick trips and light loads.
Tip: If you want the best of both worlds, add a small zippered pocket inside your drawstring bag. You’ll get easy access and a safe spot for valuables.
Once you finish this step, your swimming bag is ready for action! Give it a gentle tug to check the seams and closure. You’ve built a bag that’s both practical and personal.
How to Make a Wet Bag: Waterproofing Tips
Choosing Waterproof Materials
Picking the right fabric is the first step in how to make a wet bag that actually keeps water out. You want something that stands up to splashes, rain, and even spills from inside the bag. Look for specialty fabrics with a waterproof coating. Some of the best choices include:
- 420D Spectron or X-Pac RX30 for heavy rain and wet climates.
- 630D or 1050D HT Ballistic Nylon for steady rain.
- Fabrics coated with urethane and treated with a water-repellent finish.
You can also find bags that use YKK water-repellent zippers or fabric flaps to block water from sneaking in. If you want extra protection, use a specialty fabric on the outside and a water-repellent lining inside. This double layer keeps your gear dry, even if you toss your bag in a puddle.
Tip: Always check the label for “waterproof” or “water-repellent.” Not all nylon or polyester is the same!
Sealing Seams
Even the best fabric can leak if water finds a way through the seams. When sewing your own wet bag, you need to seal every stitch. Here’s how you can do it:
- Use Antiwick Thread. This thread has a wax coating that stops water from leaking through the holes made by your needle.
- Brush on a seam sealer like Iosso Seam Sealer. Cover both sides of the seam for the best results.
- For vinyl or tarp fabrics, try HH-66 Vinyl Cement on the underside of the seam.
- Seam sealers come in liquid or tape form. Both work well, so pick what feels easiest for you.
| Seam Sealing Method | Best For | Application Tip |
|---|---|---|
| Antiwick Thread | All waterproof fabrics | Use in your sewing machine |
| Seam Sealer (liquid) | Most seams | Brush on after sewing |
| Seam Sealer (tape) | Straight seams | Iron or press on |
| Vinyl Cement | Vinyl tarps | Apply to inside of seam |
Don’t skip this step! Sealing seams is what turns a regular bag into a true wet bag.
Using Linings
A good lining does more than just look nice. It adds another layer of waterproofing and helps your bag last longer. When you line your bag with water-repellent fabric, you protect it from spills, wet swimsuits, and even sticky snacks. Linings also make cleaning easy—just wipe or rinse them out.
- PU (polyurethane) linings can handle 2,000–4,000 mm of water pressure. That means they keep water in or out, even in light rain.
- Outdoor dry bags use mesh-reinforced or TPU-laminated linings for extreme conditions.
- Specialty linings keep your bag dry and stop leaks from spreading.
If you want a bag that’s easy to clean and keeps everything dry, always add a lining.
Now you know the secrets to waterproofing when sewing your own wet bag. With the right materials, sealed seams, and a strong lining, your bag will handle anything the pool or weather throws at it.
Reinforcing Stress Points
You want your swimming bag to last, right? Stress points are the spots that take the most pulling, tugging, and weight. If you skip reinforcing these areas, your bag might rip or wear out fast. Let’s make sure that doesn’t happen!
What are stress points?
Stress points are places like the bottom corners, the spots where you attach handles, and the openings for drawstrings or zippers. These areas get the most action every time you pack, carry, or hang your bag.
Why Reinforce Stress Points?
When you toss in wet towels or heavy gear, the seams and corners feel the strain. If you don’t add extra strength, you might see holes or tears after just a few uses. Reinforcing these spots keeps your bag strong and ready for anything.
Simple Ways to Reinforce Stress Points
Here are some easy techniques you can use:
- Bar-tacking: This is a special sewing method. You sew a short, tight zigzag stitch back and forth over the same spot. Use it at the bottom corners and where the drawstring or handles attach. Bar-tacking stops the fabric from tearing when you pull on the bag.
- Corner Reinforcement: Add a patch of tough fabric, like leather or heavy nylon, to the inside or outside of each bottom corner. This spreads out the pressure and keeps the corners from wearing out.
- Metal Eyelets: If you use a drawstring, punch metal eyelets (also called grommets) into the corners. These metal rings protect the holes from ripping. They also make your bag look neat and professional.
- Double Stitching: Sew over the same seam twice at stress points. This gives extra strength where you need it most.
Tip: Always use strong thread, like polyester, for these areas. It holds up better than cotton when wet.
Quick Reference Table
| Technique | Where to Use | What It Does |
|---|---|---|
| Bar-tacking | Corners, cord channels | Stops tearing under heavy loads |
| Corner Patches | Bottom corners | Spreads out stress, prevents holes |
| Metal Eyelets | Drawstring openings | Protects fabric, adds durability |
| Double Stitching | Handle and strap areas | Adds extra strength |
Make It Last
You don’t need fancy tools to reinforce stress points. A basic sewing machine can do bar-tacks and double stitches. You can buy metal eyelets at any craft store. If you want to use corner patches, just cut small squares from an old backpack or a piece of sturdy fabric.
Take a few extra minutes to reinforce these spots. Your swimming bag will handle heavy loads, wet gear, and busy days at the pool without falling apart. You’ll feel proud every time you grab your bag and head out the door!
Cleaning & Maintenance
Taking care of your swimming bag keeps it looking fresh and working well. You don’t need fancy products or a lot of time. Just follow a few simple steps, and your bag will stay clean, dry, and odor-free.
Washing Instructions
You bring your swimming bag to the pool, the beach, and maybe even the gym. It picks up sand, sunscreen, and sometimes a little bit of that “wet swimsuit” smell. Regular cleaning helps your bag last longer and keeps it safe for your gear.
- For most bags, a quick wipe-down with a damp cloth does the trick. Use a mild soap if you see dirt or stains.
- If your bag gets really dirty, check the care label. Many waterproof bags can handle a gentle hand wash. Some nylon or polyester bags even go in the washing machine on a delicate cycle.
- Always empty out pockets and shake out sand or crumbs before washing.
- For a deeper clean, mix a solution of water and white vinegar. Wipe the inside and outside of your bag to kill germs and remove odors.
- Once a month, give your bag a deep clean. Hand wash or machine wash, depending on the fabric.
Tip: Avoid harsh bleach or strong detergents. These can damage waterproof coatings and make your bag less effective.
Drying & Storage
Drying your swimming bag the right way keeps it waterproof and stops mold from growing. Never toss your wet bag in a dark closet or leave it zipped up with damp towels inside.
- Air-dry your bag in the shade. Hang it up or lay it flat with the pockets open.
- Don’t use a dryer or put your bag in direct sunlight for hours. High heat can crack or fade waterproof fabrics.
- Make sure your bag is completely dry before you store it. This stops moisture from getting trapped inside.
- Store your bag in a cool, dry place. Leave zippers or drawstrings open so air can move through.
Letting your bag breathe keeps it fresh and ready for your next swim.
Preventing Mold & Odor
Nobody likes a musty swimming bag! Mold and bad smells show up when you leave wet gear inside or skip regular cleaning. You can stop these problems before they start.
- After swimming, put wet swimsuits and towels in a separate waterproof wet bag.
- As soon as you get home, take out the wet bag and wash or dry its contents.
- Hang your wet bag and swimming bag to dry right away.
- Wipe down the inside and outside of your bag every week with disinfectant wipes or a mild cleaning solution.
- Once a month, do a deep clean with soap and water or a white vinegar solution.
- If you notice a stubborn smell, sprinkle baking soda inside the bag and let it sit overnight. Shake it out the next day.
| Problem | Quick Fix | Deep Clean Solution |
|---|---|---|
| Musty Odor | Air out and use baking soda | Wipe with vinegar solution |
| Mold Spots | Wipe with disinfectant | Hand wash and dry in shade |
Stay ahead of mold and odor by cleaning your bag often and drying it well. Your swimming bag will always smell fresh and look great!
Customization Ideas
Adding Pockets
You can never have too many pockets in a swimming bag. Pockets help you keep your goggles, sunscreen, and snacks organized. You might want a small zippered pocket for your keys or coins. Mesh pockets work well for wet items because they let water drain out. If you like to keep things separate, try adding a waterproof pocket inside for your phone or wallet.
Here are some pocket ideas you can try:
- Sew a patch pocket on the outside for quick access.
- Add a hidden pocket inside for valuables.
- Use mesh or clear vinyl for see-through pockets.
- Attach a zippered pouch for coins or hair ties.
Pockets make your bag more useful and help you find things fast. You can mix and match different types to fit your needs.
Personalizing Colors & Patterns
Your swimming bag should show off your personality. You get to pick the colors and patterns that make you smile. Bright colors help your bag stand out at the pool. Fun patterns, like stripes or polka dots, add a playful touch. You can even design your own artwork or add custom lettering.
- Choose eye-catching patterns and bold colors to make your bag unique.
- Add custom lettering or artwork to reflect your style.
- Monogram your initials or print your favorite quote for a personal touch.
Want your bag to stand out? Pick a color or pattern that no one else has. You can even use fabric paint or iron-on patches to create your own design.
Name Tags & Labels
You don’t want to lose your swimming bag at the pool. Adding a name tag or label helps you spot your bag quickly. It also keeps your things safe if you leave your bag behind.
The best name tags and labels use strong, waterproof materials. Here’s what to look for:
- Durable 2-sided PVC plastic stands up to lots of use.
- Waterproof and fade-resistant finish keeps your name clear.
- A 6” loop strap makes it easy to attach the tag to your bag.
- Designed for humid and wet environments, so it won’t peel or fall off.
| Name Tag Feature | Why It Matters |
|---|---|
| Waterproof Material | Stays readable when wet |
| Fade-Resistant Finish | Looks new after many swims |
| Easy Attachment Strap | Quick to add or remove |
Add your name, phone number, or even a fun nickname. Your bag will always find its way back to you!
Decorative Elements
Want your swimming bag to stand out at the pool? You can add decorative elements that show off your style and make your bag one-of-a-kind. You don’t need fancy tools or expensive supplies. You just need a little creativity and a few simple materials.
Here are some fun ways you can decorate your swimming bag:
- Iron-On Patches:
Pick patches with your favorite animals, sports, or funny sayings. Place them on the front or sides of your bag. Use an iron to stick them on in seconds. These patches stay put, even after lots of trips to the pool. - Fabric Paints and Markers:
Draw your own designs or write your name with bright, waterproof fabric markers. Try painting waves, suns, or even your swim team logo. Let the paint dry before you use your bag. - Sew-On Appliqués:
Cut shapes from leftover fabric. Sew them onto your bag for a cool, layered look. You can make stars, hearts, or even your initials. - Keychains and Charms:
Clip a fun keychain or charm to your zipper or handle. Choose a waterproof charm, like a mini flip-flop or a rubber duck. These little extras make your bag easy to spot. - Reflective Tape or Stickers:
Add reflective tape for safety if you walk home from the pool at dusk. Stickers with waterproof glue also work well. They shine when light hits them.
Tip: Test your decorations on a small spot first. Make sure they stick well and don’t peel off when wet.
Here’s a quick table with ideas and what you’ll need:
| Decoration Type | Supplies Needed | Best For |
|---|---|---|
| Iron-On Patches | Iron, patches | Fast, bold designs |
| Fabric Paint/Marker | Paints, markers | Custom artwork |
| Sew-On Appliqués | Needle, fabric scraps | Layered textures |
| Keychains/Charms | Keyrings, charms | Quick personalization |
| Reflective Tape | Tape, scissors | Safety and style |
You can mix and match these ideas. Try a painted design with a few patches and a bright keychain. If you want to change things up, swap out charms or add new stickers.
Decorating your swimming bag is a great way to show your personality. You’ll always know which bag is yours. Plus, you’ll have fun making it look awesome!
Get creative! There’s no right or wrong way to decorate your bag. Make it as bold or simple as you like.
Troubleshooting & Common Mistakes
Even the best swimming bags can run into problems. Maybe you spot a leak, wish your bag was bigger, or notice the zipper getting stuck. Don’t worry! You can fix these issues with a few simple tricks. Let’s look at some common problems and how you can solve them.
Fixing Leaks
Leaks can happen if water sneaks through seams or tiny holes. You don’t have to toss your bag if you find a drip. Here’s what you can do:
- Find the Leak: Fill your bag with water and look for wet spots outside. Mark the leaky area with chalk or a pin.
- Seal the Seam: Dry the bag. Brush on a waterproof seam sealer or use seam tape. Press it down well and let it dry before using the bag again.
- Patch Small Holes: Cut a patch from waterproof fabric. Place it over the hole on the inside. Sew around the patch or use fabric glue for a quick fix.
- Check Regularly: Look over your bag every few weeks. Catching leaks early keeps your gear dry.
Tip: Seam sealers and patches work best on clean, dry fabric. Always let repairs dry fully before packing your bag.
Adjusting Size
Sometimes your bag feels too small or too big. You can adjust the size without starting over.
- Make It Bigger: Add a fabric panel to the sides or bottom. Cut a strip of matching waterproof fabric. Sew it between the front and back panels. This gives you more space for towels and gear.
- Make It Smaller: Sew a new seam inside the bag to take in the sides. Trim away the extra fabric. Finish the raw edges with a zigzag stitch to stop fraying.
- Shorten Straps: If the straps are too long, untie the knots or open the seams. Cut off the extra length and sew or knot them again.
You can always tweak your bag to fit your needs. Customizing the size makes your bag perfect for you.
Repairing Closures
Zippers and drawstrings can wear out, but you can fix them at home. Here’s a step-by-step way to repair closures and keep your bag working like new:
- Inspect the Bag: Look for weak spots, holes, or frayed fabric around the zipper or drawstring casing.
- Repair the Casing: For small holes, sew on a fabric patch. If the casing is badly damaged, sew a new one using sturdy waterproof fabric.
- Replace the String: Measure your bag and cut a new drawstring or cord. Make sure it’s the right length and thickness.
- Make It Durable: Tie strong knots, like a double loop knot, to keep the string from slipping. For extra strength, cover the knot with heat shrink tubing if you have it.
If your zipper sticks, rub a little candle wax or soap along the teeth. This helps it slide smoothly.
| Problem | Quick Fix |
|---|---|
| Leaky seam | Seam sealer or patch |
| Bag too small | Add fabric panel |
| Drawstring broke | Replace with new cord |
| Zipper stuck | Rub with candle wax or soap |
You don’t need to be an expert to fix your swimming bag. With these tips, you can handle leaks, size changes, and closure repairs like a pro. Your bag will last longer and stay ready for every swim adventure!
Conclusion
You now know how to make a swimming bag that works for you. Waterproofing and strength are important for these reasons: Swim bags carry wet, sandy, and pool gear. Good linings and strong seams stop mildew and keep things neat. A sturdy bag lasts a long time and keeps your stuff safe. You can make your bag special with colors, pockets, or your name. Want a bag that is extra cool or looks pro? Check out our custom swimming bag services:
| Benefit | Description |
|---|---|
| Customization Options | Pick colors, patterns, and logos you like for a personal look. |
| High-Quality Materials | We use strong fabric so your bag lasts and works well. |
| Branding Support | Make your brand stand out with custom designs and printing. |
Try making your own bag or let us help you make the best one!
FAQ
How do I make my swimming bag completely waterproof?
You need to use waterproof fabric, seal all seams with seam tape or liquid sealer, and pick a water-resistant closure like a zipper or roll-top. Don’t forget to line your bag for extra protection.
Can I wash my homemade swimming bag in the washing machine?
Most swimming bags made from nylon or polyester can go in the washing machine on a gentle cycle. Always check your fabric label first. Air-dry your bag to keep it in good shape.
What size should my swimming bag be?
A good size for most swimmers is about 15″ x 18″. This holds a towel, swimsuit, goggles, and small items. You can adjust the size to fit your needs.
How do I stop my bag from smelling bad?
Take out wet items right away. Wipe your bag with vinegar and water. Let it dry completely before storing. Sprinkle baking soda inside if you notice a smell.
Can I add a pocket for wet swimsuits?
Yes! Sew a waterproof pocket inside your bag. Use mesh or clear vinyl for easy cleaning. This keeps wet swimsuits separate from dry gear.
What thread should I use for sewing a swimming bag?
Use strong polyester thread. It resists water and holds up well. Avoid cotton thread because it weakens when wet.
How do I fix a stuck zipper on my swimming bag?
Rub a little candle wax or soap along the zipper teeth. Move the zipper back and forth gently. This usually helps it slide smoothly again.