You can Make your own stroller bag, even if you feel new to sewing. This tutorial will walk you through each step. You just need a few tools and some fabric. You will see how to make a stroller bag that fits your needs and style. Get ready to create something useful and fun!

Key Takeaways
- Get the main materials like strong fabric, interfacing, and heavy-duty thread. These help your stroller bag last long and look nice.
- Pick a simple sewing pattern that fits your skill level. You can find free patterns online to save money.
- Cut your fabric carefully using the pattern measurements. Always wash your fabric first so it does not shrink later.
- Mark your fabric with care before you put it together. Use heat erase pens or chalk markers for clear marks that go away.
- Hemming the edges stops the fabric from fraying. It also makes your bag look neat. Use double-stitching to make it stronger.
- Add gussets to give your bag more space and a better shape. This helps you organize and store things more easily.
- Make straps that feel comfortable and attach them tightly. Use a box or X pattern to make the straps extra strong.
- Add pockets and decorations to make your bag work better and look cool. Personal touches help your bag stand out.
Materials and Tools
Before you start this tutorial, you need to gather your materials and tools. Picking the right supplies makes your stroller bag sturdy and stylish. You do not need fancy equipment. You just need a few basics and some extras if you want to add a personal touch.
Essential Supplies
You want your stroller bag to last. Choose strong fabrics and reliable closures. Here is a list of what you need:
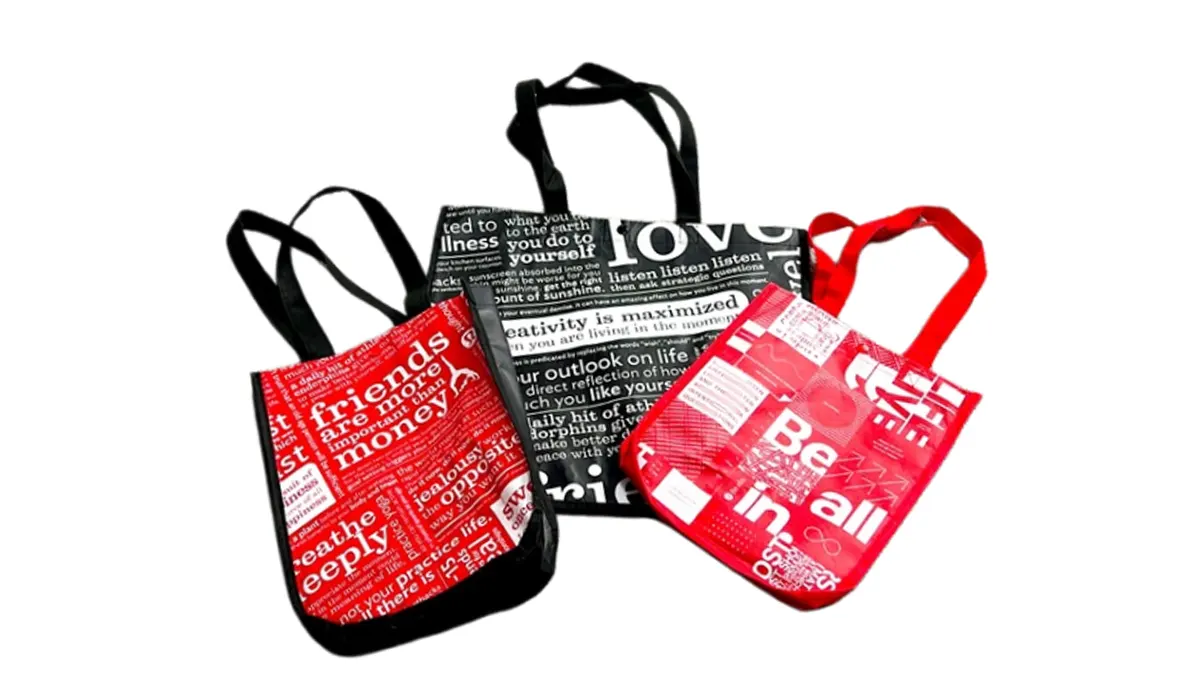
- Bag fabric: Canvas, vinyl, or leather work best. These materials hold up to daily use and keep your bag looking new.
- Interfacing: This adds structure and helps your bag keep its shape. You can find fusible or sew-in types at most craft stores.
- Velcro: Use Velcro for easy openings and secure closures. It is simple to sew and works well for stroller bags.
- Thread: Pick a heavy-duty thread that matches your fabric. Strong thread keeps seams from popping.
- Needles: Use sizes 16 to 23. These needles handle thick fabric and help you avoid breaking them while sewing.
- Lining fabric: Choose a smooth cotton or polyester for the inside. Lining makes your bag look neat and protects your items.
- Strap material: Webbing, sturdy ribbon, or extra fabric strips work for straps. Make sure they feel comfortable in your hand.
Tip: If you want your stroller bag to be waterproof, look for coated fabrics or add a waterproof lining.
Recommended Tools
You do not need a huge toolbox for this project. A few key tools make the job easier and help you get professional results.
- Sewing machine: A basic machine works fine. If you have a heavy-duty model, it handles thick fabrics better.
- Scissors: Sharp fabric scissors give you clean edges. Keep a pair just for fabric to avoid dull blades.
- Pins or clips: These hold your pieces together while you sew. Clips work well for thick materials.
- Measuring tape: Accurate measurements mean your stroller bag fits perfectly.
- Hammer: Use a hammer to flatten seams or set rivets if you add hardware.
- Seam ripper: Mistakes happen. A seam ripper lets you fix them quickly.
Optional Embellishments
Want to make your stroller bag stand out? Try adding a few extras. These details let you show off your style and make your bag more useful.
| Embellishment | Why Use It? |
|---|---|
| Decorative buttons | Add color and personality |
| Iron-on patches | Cover mistakes or decorate |
| Zippers | Secure pockets and openings |
| Rivets | Reinforce stress points |
| Reflective tape | Boost safety for night walks |
You can mix and match these embellishments. Try adding a fun patch or a bright zipper. Your stroller bag will look unique and fit your needs.
Gathering your materials is the first step in this sewing tutorial. When you have everything ready, you can move on to cutting and prepping your fabric. You will find that having the right supplies makes the whole process smoother and more enjoyable.
How to Make a Stroller Bag: Preparation Steps

You are ready to start your project. This part of the tutorial shows you how to make a stroller bag by guiding you through choosing a sewing pattern, cutting your fabric, and marking for assembly. You will see how each step helps you get a neat and professional result.
Choosing a Pattern
Picking the right sewing pattern makes your project easier. You want a pattern that matches your skill level and lets you customize your stroller bag. Many beginners look for a free pattern and tutorial online. These resources help you learn how to make a stroller bag without spending extra money.
Here is a table to help you choose a sewing pattern:
| Factor | Description |
|---|---|
| Simplicity | Choose a pattern with fewer parts and steps. This keeps things simple. |
| Customization Options | Find patterns that let you add or skip pockets. Make your bag fit your needs. |
| Material Requirements | Look for patterns that use canvas or duck cloth. These are easy for beginners. |
| Pre-washing Fabric | Wash your fabric before you start. This stops shrinking later. |
You can search for a free pattern and tutorial that fits these factors. If you want to try something new, pick a sewing pattern with extra pockets or a flap. You will learn how to make a stroller bag that matches your style.
Cutting Fabric
Cutting your fabric is the next step in this tutorial. You need to follow the measurements from your sewing pattern. Most free pattern and tutorial guides give you clear sizes. Here are the standard measurements for a stroller bag:
| Dimension | Measurement |
|---|---|
| Width | 10″ (25 cm) |
| Height | 4¾″ (12 cm) |
| Depth | 4¾″ (12 cm) |
Lay your fabric flat. Use a ruler or measuring tape to mark the sizes. Cut slowly and keep your edges straight. If you use a sewing pattern, double-check each piece before you cut. You want your stroller bag to look neat and fit well.
Tip: Always cut your lining and interfacing at the same time as your main fabric. This keeps everything even.
Marking for Assembly
Marking your fabric helps you put your stroller bag together. You need to transfer all the markings from your sewing pattern. Good marking makes assembly easy and stops mistakes.
Here are some best practices for marking fabric:
- Use heat erase pens. These marks disappear with heat, but cold can bring them back.
- Skip air soluble markers if you need more time. They fade fast.
- Try wax markers for dark fabrics. Remove them with heat.
- Chalk markers work well, but some fabrics hold the marks.
- Use a Hera Marker or point turner for indents if you want no visible marks.
Accurate marking starts at your cutting table. Follow your sewing pattern instructions. Keep your edges neat and transfer all marks carefully. This step helps your stroller bag look professional, not homemade.
You now know how to make a stroller bag by preparing your pattern, cutting your fabric, and marking for assembly. Each step in this tutorial builds your skills and gets you ready for sewing. You can find a free pattern and tutorial that matches your needs and start your project with confidence.
Sewing the Bag Body
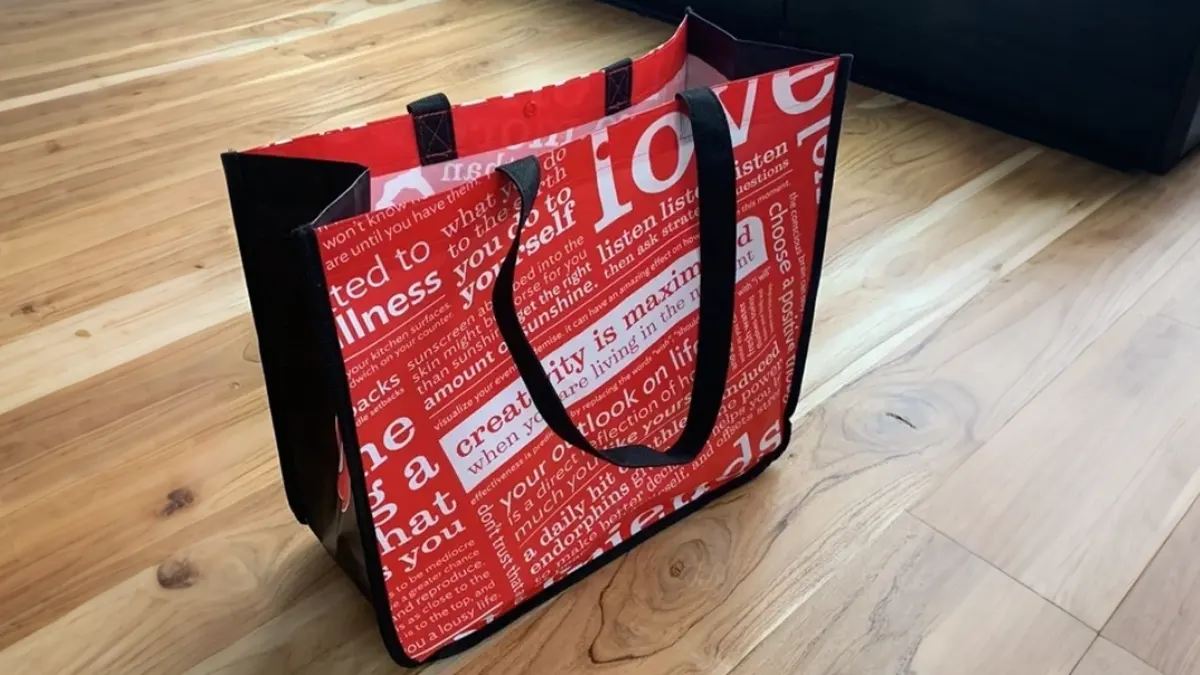
You have your fabric ready. Now you get to sew the main part of your stroller bag. This part of the tutorial helps you build a strong and stylish bag. You will hem the edges, create a flap, and put the panels together. Each step brings you closer to a finished stroller bag you can use every day.
Hemming Edges
Start with the edges. Hemming keeps your bag from fraying and gives it a neat look. You want your stroller bag to last, so use strong stitches. Here are the best ways to hem the edges:
- Double-stitching adds stability. Sew along the edge, then sew again right next to your first line.
- Reinforce the edge that was not hemmed before. Go over it with another double-stitch.
- On the short sides, double-stitch again. These spots get handled a lot, so extra strength helps.
Tip: Press your hems with an iron before you sew. This makes the edges crisp and easier to sew straight.
You can use a straight stitch for most hems. If you want extra durability, try a zigzag stitch on the inside edge. This step in the tutorial makes your stroller bag look professional and helps it last through lots of use.
Creating a Decorative Flap
A flap adds style and keeps your things safe. You can make a simple flap or add decorations. Here’s how you can create a flap that stands out:
- Cut a piece of fabric that matches the width of your bag.
- Fold the fabric in half. Press the fold with an iron.
- Sew along the sides, leaving the bottom open.
- Turn the flap right side out. Press it flat.
- Topstitch around the edge for a finished look.
If you want to decorate your flap, add a patch or sew on a button. You can use a contrasting fabric for the flap to make your stroller bag pop. A decorative flap is easy to sew and gives your bag a custom touch.
Note: Make sure your flap lines up with the opening of your bag. This keeps everything covered and secure.
Assembling Panels
Now you get to put the panels together. This step brings your stroller bag to life. You will sew the front, back, and sides to make the main body.
- Lay out your panels. Match up the edges so everything lines up.
- Pin or clip the panels together. This keeps them from shifting while you sew.
- Sew along the seams. Use a straight stitch for most seams. Double-stitch the corners for extra strength.
- Press the seams open with an iron. This helps your bag keep its shape.
Here’s a quick table to help you remember the steps:
| Step | What to Do |
|---|---|
| Match panels | Line up edges and corners |
| Pin or clip | Hold panels together |
| Sew seams | Use straight stitch, double-stitch corners |
| Press seams | Iron seams open for neat finish |
You have now assembled the main body of your stroller bag. Each seam you sew adds strength and shape. Take your time and check your work as you go. Your bag will look neat and hold up to everyday use.
Callout: If you want to add a pocket, sew it onto a panel before you put the panels together. This makes it easier to attach and keeps your bag organized.
You finished the core steps for sewing the bag body. You hemmed the edges, created a decorative flap, and assembled the panels. Your stroller bag is starting to look real. Keep going, and you will have a bag you made yourself!
Small Gusseted Stroller Bag Construction
You are about to give your stroller bag extra space and a neat shape. This part of the tutorial shows you how to prepare and attach gussets, then finish with turning and topstitching. You will see your small gusseted stroller bag come together with a professional look.
Preparing Gussets
Gussets make your bag roomy and help it stand up straight. You want your stroller bag to hold more and look great. Here’s why gussets work so well:
- Efficient space utilization. Gussets let your bag expand from the sides or bottom. You can pack more inside and your bag stands upright.
- Improved shelf presence. The wide sides give your bag a bold look. You get more space for decorations or labels.
- Versatility in sizes and shapes. You can adjust gussets to fit different needs. Your small gusseted stroller bag can be tall, short, wide, or slim.
- Enhanced product protection. Gussets use strong materials. Your bag keeps out moisture and dirt, so your things stay safe.
To prepare your gussets, follow these steps:
- Cut two gusset pieces using your pattern. Make sure they match the depth of your bag.
- Use interfacing if you want extra structure. Fuse or sew it to the wrong side of each gusset.
- Mark the seam lines on each gusset. Use a fabric pen or chalk for clear marks.
- Press the edges with an iron. This helps you sew straight and keeps the fabric crisp.
Tip: Double-check your measurements before you cut. Gussets need to fit the sides and bottom of your bag exactly.
Attaching Gussets
Now you get to sew the gussets to your bag. This step gives your small gusseted stroller bag its shape and space. You want the seams to line up and look neat.
Here’s how you attach gussets:
- Pin one gusset to the side panel of your bag. Start at the bottom and work your way up.
- Sew along the marked seam line. Use a straight stitch for strength.
- Repeat for the other side. Make sure both gussets match up with the bottom panel.
- Sew the bottom edge of each gusset to the base of your bag. Keep your stitches even.
- Check the corners. Double-stitch them for extra durability.
| Step | What to Do | Why It Matters |
|---|---|---|
| Pin gusset | Hold in place before sewing | Stops shifting and mistakes |
| Sew seam | Use straight stitch | Makes strong, clean seams |
| Double-stitch corners | Reinforce high-stress areas | Prevents tearing |
Callout: Align your seams carefully. If the edges do not match, your bag will look uneven. Take your time and adjust as needed.
Turning and Topstitching
You finished sewing the gussets. Now you need to turn your bag right side out and add topstitching for a polished finish. This step makes your small gusseted stroller bag look store-bought.
Follow these steps for turning and topstitching:
- Gently turn your bag right side out. Push out the corners with a blunt tool.
- Set up your sewing machine with the right needle and thread for your fabric.
- Adjust the tension so your stitches look neat.
- Start topstitching along the seams. Go slow and keep your lines straight.
- Use a guide foot or hump jumper if your seams feel bulky.
- Keep bulk out of the seams. Flatten layers with your fingers or a hammer.
- Finish each line of stitching cleanly. Avoid backstitching if you want a smooth look.
Note: Topstitching not only looks good, but it also reinforces the seams. Your stroller bag will last longer and hold its shape.、
You just finished the hardest part of the tutorial. You prepared, attached, and finished the gussets. Your small gusseted stroller bag now has extra space, a sturdy shape, and a professional finish. You can feel proud of your sewing skills!
Adding Straps and Closures
You have finished the main body of your bag. Now it is time to add straps and closures. This part of the tutorial helps you make your stroller bag easy to carry and secure. You will learn how to sew strong straps, attach them safely, and pick the best closure for your needs.
Making Straps
Straps make your bag easy to carry. You want them to feel comfortable and last a long time. Many people like padded or adjustable straps because they fit well and do not hurt your shoulders. Here is a quick look at what works best:
| Feature | Description |
|---|---|
| Padded shoulder straps | Enhance comfort during carry |
| Adjustable shoulder straps | Allow customization for fit |
To make your own straps, cut strips of sturdy fabric or use webbing. If you want extra comfort, add a layer of batting inside and sew it in place. Fold the strap in half, right sides together, and sew along the edge. Turn it right side out and press it flat. Topstitch both sides for a neat finish.
Tip: Try your strap on your shoulder before you attach it. Make sure it feels good and is the right length for you.
Attaching Straps
Attaching straps the right way keeps your stroller bag safe and balanced. You want to avoid tipping or dropping your bag. Here is a simple way to attach straps securely:
- Choose the right spot on your stroller. Look for places that keep the bag steady. Do not hang heavy bags from the handlebar.
- Attach the bag with stroller straps or clips. Use the points made for bags. If you use universal hooks, check that they are tight and can hold the weight.
When you sew the straps to your bag, use a box or X pattern for extra strength. Go over the stitches more than once. This keeps the straps from pulling loose.
Callout: Always double-check the weight your straps can hold. Strong sewing means your bag will last longer.
Closure Options
Closures keep your things safe inside your bag. You have many choices, and each one has its own benefits. Some parents like drawstrings, while others prefer straps or secure closures. Here is a table with popular options and what people say about them:
| Stroller Bag Model | Closure Feature | User Feedback |
|---|---|---|
| J.L. Childress Gate Check Bag | Adjustable drawstrings | Versatile choice, fits many stroller sizes |
| J.L. Childress Standard & Dual | Adjustable strap | Easy for parents, works for single and double strollers |
| UPPAbaby Vista Compatible Bag | Dual handles and wheels | Lightweight, easy to carry, great for families on the go |
| Heavy-duty Stroller Bag | Secure closure | Best for protecting strollers during air travel |
You can sew Velcro, snaps, or zippers for your closure. Velcro is quick and easy. Snaps give a clean look. Zippers keep everything inside, even if your bag tips over.
Note: Pick a closure that matches how you use your bag. If you open and close it a lot, choose something fast and simple.
You have now learned how to make and attach straps, plus pick the best closure for your stroller bag. This part of the tutorial helps you finish your project with strong, safe, and easy-to-use features.
Stroller Tote Bag Finishing Touches
Adding Pockets
You want your stroller tote bag to keep everything organized. Pockets make a huge difference. Parents say that insulated bottle pockets help keep drinks at the right temperature. You can add a dedicated diaper and wipes pocket for quick changes. Side pockets let you grab snacks or keys fast. A spacious main compartment gives you room for bigger items. Many people like a front pocket with an insulated bottle holder for extra convenience.
Here’s a quick list of pocket ideas for your stroller tote bag:
- Insulated bottle pocket for temperature control
- Diaper and wipes pocket for easy access
- Side pockets for essentials
- Large main compartment for organization
- Front pocket with bottle holder
You can sew these pockets onto the inside or outside of your bag. Try using contrasting fabric for a fun look. If you want to follow the tutorial closely, measure each pocket before you sew it in place. This step helps your stroller tote bag stay neat and useful.
Decorative Details
Decorative touches make your stroller tote bag stand out. You can add patches, buttons, or embroidery. Some people like to use bright zippers or fun fabric prints. If you want your bag to be safe for evening walks, try adding reflective tape. Reflective elements help you stay visible during early mornings or cloudy days. You can also use water-resistant seams to keep your bag dry when it rains.
Here are some ways to decorate and enhance your stroller tote bag:
- Sew on iron-on patches for personality
- Add reflective tape for safety
- Use water-resistant seams to prevent leaks
- Attach colorful buttons or zipper pulls
Tip: Mix and match these details to create a stroller tote bag that fits your style and needs.
Final Inspection
Before you use your stroller tote bag, check that everything works well. You want your bag to be safe and sturdy. Go through these steps to make sure your bag is ready:
- Look for any damage or wear on the bag’s structure.
- Check all straps and handles to see if they are secure.
- Test the closures to make sure they open and close smoothly.
- Inspect the fabric for tears or stains.
- Make sure there are no loose or broken parts.
- Check for sharp edges or anything that could hurt a child.
- Confirm that all pockets and compartments work as planned.
- Look for any small parts that could be a choking hazard.
- Make sure all labels and instructions are easy to read.
If you added waterproofing or reflective tape, test those features too. Your stroller tote bag should feel sturdy and look great. You can now enjoy your new bag with confidence.
Note: A careful inspection helps you catch small problems before they become big issues. Your stroller tote bag will last longer and keep your family safe.
You finished the last steps in this tutorial. Your stroller tote bag is ready for daily adventures. Enjoy your creation and show off your sewing skills!
Tips and Troubleshooting
Common Mistakes
Everyone makes mistakes when learning a new skill. You might run into a few bumps while making your stroller bag. Knowing what to watch for helps you avoid frustration and wasted materials. Here are some of the most common mistakes people make:
- Skipping interfacing, which gives your bag shape and stability.
- Picking cheap fabrics that wear out quickly.
- Forgetting to prewash your fabric, which can cause shrinking later.
- Using the wrong needle, leading to broken needles or skipped stitches.
- Starting with a pattern that is too complicated.
- Ignoring machine maintenance, which can cause sewing problems.
- Trying to sew bags that are too bulky for your machine.
- Not reinforcing important seams, making your bag less sturdy.
- Skipping the pressing step, which affects the final look.
- Not keeping notes for future projects.
- Rushing through binding and topstitching, which can make your bag look messy.
- Using the same materials every time, which limits your creativity.
- Overlooking how the bag will be used, which can make it less practical.
- Avoiding new techniques, which slows your growth as a maker.
- Photographing an empty bag, which does not show off your hard work.
Tip: Take your time and double-check each step. You will catch most mistakes before they become a problem.
Quick Fixes
Mistakes happen, but you can fix most of them without starting over. Here are some quick fixes you can try:
- Use the right interfacing for your fabric to prevent puckering.
- Slow down your stitching speed if you see ripples in the fabric.
- Increase your stitch length for smoother sewing.
- Loosen the tension if the fabric still ripples.
- Guide your fabric gently to keep the tension even.
- Line up side accent seams before sewing and pin them in place.
- Reinforce seams with backstitching for extra strength.
- Hide a turning hole with a zipper pocket for a clean finish.
- Trim seam allowances at an angle to make pressing easier.
Note: Small adjustments can make a big difference in your finished bag.
Time-Saving Tips
You want to finish your project and enjoy your new stroller bag. Try these time-saving tips to work smarter, not harder:
- Cut all your fabric pieces at once to save time later.
- Use clips instead of pins for thick fabrics.
- Keep your tools organized so you do not waste time searching.
- Press seams as you go for a crisp, professional look.
- Write down your measurements and steps for next time.
- Try batch sewing if you plan to make more than one bag.
| Tip | How It Helps |
|---|---|
| Cut all pieces | Speeds up assembly |
| Use clips | Easier with thick fabrics |
| Stay organized | Saves time and stress |
| Press seams | Improves final appearance |
| Take notes | Makes future projects easier |
| Batch sew | Great for gifts or selling |
Callout: The more you practice, the faster and better you will get. Every bag you make teaches you something new.
You now have the tools to avoid common mistakes, fix small errors, and save time. Enjoy the process and celebrate your progress!
Conclusion
You’ve just learned how to sew a stroller bag from start to finish—from choosing materials to cutting fabric and adding personal details. With clear steps and the right supplies, anyone can create a bag that works well for everyday use.
If you’d rather skip the DIY process or need stroller bags in larger quantities, we’re here to help. As a professional stroller bag manufacturer, we offer custom, OEM, and ODM services, so you can choose the size, material, pockets, and even add your own logo. Whether it’s for personal use, retail, or a brand project, we can turn your ideas into high-quality stroller bags made to last.
FAQ
How long does it take to sew a stroller bag?
Most people finish a stroller bag in three to five hours. If you are new to sewing, you might need a little more time. Take breaks and enjoy the process!
Can I sew a stroller bag without a sewing machine?
You can sew by hand, but it takes longer. Use strong thread and small stitches. A sewing machine makes the job faster and gives you sturdier seams.
What fabric works best for stroller bags?
Canvas, vinyl, and duck cloth work well. These fabrics last a long time and hold their shape. If you want a waterproof bag, pick coated fabric.
How do I clean my stroller bag?
Spot clean with mild soap and water. For tough stains, use a gentle brush. Avoid putting your bag in the washing machine unless the fabric allows it.
Can I add extra pockets or features?
Absolutely! You can sew on extra pockets, bottle holders, or even a key clip. Customizing your bag makes it more useful for your needs.
What should I do if my seams look uneven?
Try pressing your seams with an iron. Sew slowly and use pins or clips to hold fabric in place. Practice helps you get straighter seams next time.
Is it safe to hang a heavy bag on my stroller?
Check your stroller’s manual first. Heavy bags can tip some strollers. Use straps designed for stroller bags and keep the weight balanced.