You don’t need fancy skills or years of practice to sew your own makeup bag. If you’re a beginner, you can follow easy steps and see quick results. Many people finish their first project in less than an hour. Check out this table to see how long it usually takes:
| Source | Time Estimate |
|---|---|
| Secret Life of a Seamstress | Under an hour |
| So Sew Easy | Less than 30 minutes |
Gather your fabric and zipper, and let’s dive into how to make a simple makeup bag. I’ll explain every term and share tips so you feel confident at every step.
Key Takeaways
- Sewing a makeup bag is fast and simple. Most beginners finish their first bag in less than an hour.
- Pick easy fabrics like quilting cotton or medium-weight canvas. These fabrics help you sew without trouble.
- Use a regular zipper, either 7-inch or 14-inch. A zipper foot helps you attach the zipper to your bag.
- Wash and iron your fabric first. This removes wrinkles before you cut and sew.
- Interfacing makes your bag strong and helps it keep its shape. It also makes your bag last longer.
- Boxing the corners gives your bag a flat bottom. This makes your bag bigger and easier to use.
- Add your own style with patches, fabric paint, or embroidery. These decorations make your makeup bag special.
- Practice sewing on scrap fabric first. This helps you feel ready and fix problems before you start your real project.
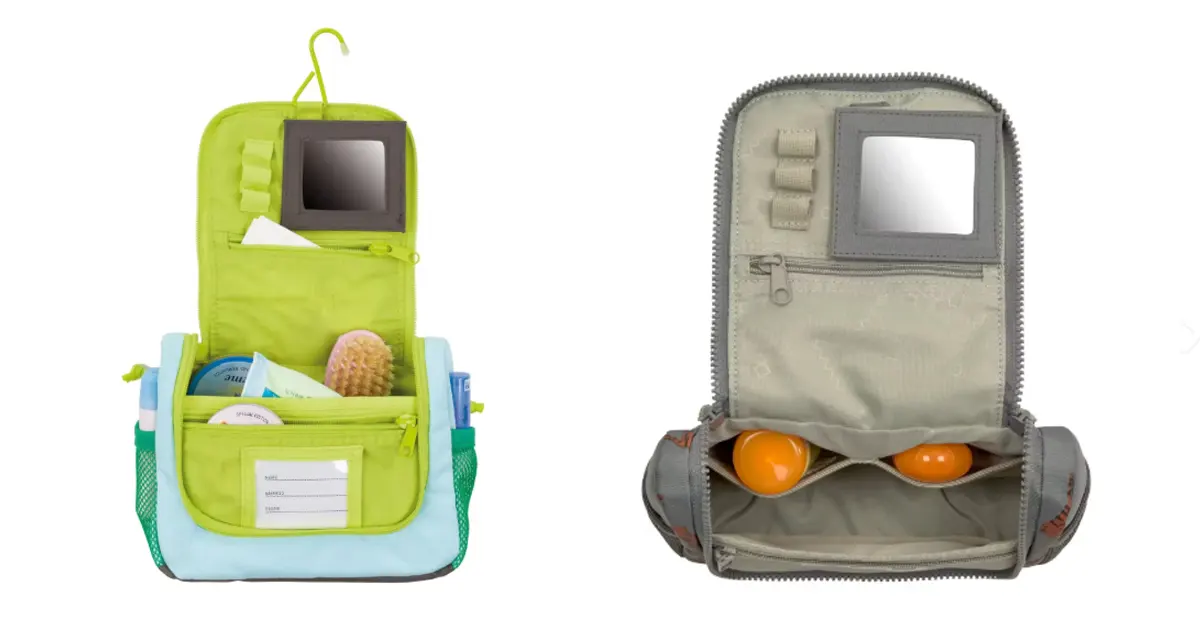
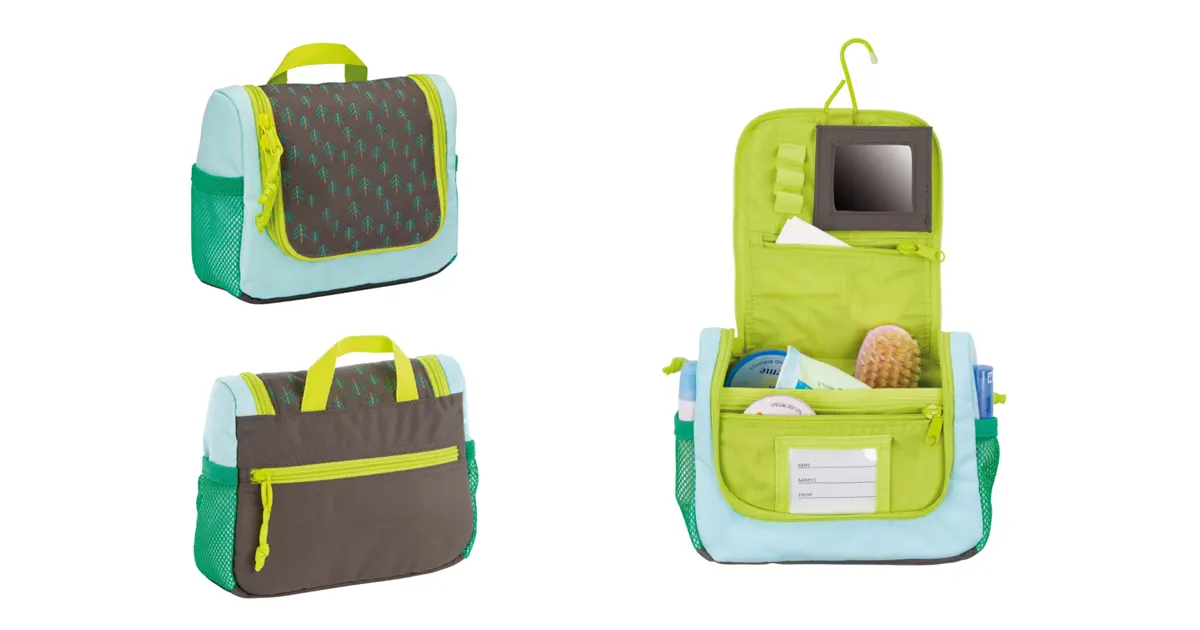
Materials for a Simple Makeup Bag
Before you start sewing, you need to gather the right materials. Picking beginner-friendly supplies makes your project easier and more enjoyable. Let’s break down what you’ll need and how to choose the best options.
Fabric Choices
You have lots of fabric options for your makeup bag. Some fabrics work better for beginners because they’re easy to handle and sew. Take a look at this table to compare popular choices:
| Fabric Type | Characteristics |
|---|---|
| Quilting Cotton | Soft, easy to sew, perfect for lining and outer layers |
| Medium-weight Canvas | Sturdy, works well with home sewing machines |
| Faux Suede | Soft, gives a luxurious feel, simple to stitch |
| Faux Leather | Sleek look, available in many weights, avoid thick types |
| Vinyl | Durable, easy to clean, professional finish |
Best Fabrics for Beginners
If you’re new to sewing, quilting cotton is your best bet. It’s soft, easy to cut, and doesn’t slip around while you sew. Medium-weight canvas also works well and gives your bag more structure. Faux suede feels nice and sews smoothly. You might want to skip thick faux leather or vinyl until you feel more confident.
Tip: Cotton is breathable and hypoallergenic, so it’s great if you have sensitive skin. Synthetic fabrics like nylon and polyester are tough, water-resistant, and easy to clean. Nylon protects your beauty products from moisture, while polyester resists wrinkles and stains.
Zipper and Notions
A zipper keeps your makeup bag secure. For beginners, a standard 7-inch or 14-inch zipper works well. You’ll need a zipper foot for your sewing machine to attach it easily.
Choosing the Right Zipper
Pick a zipper that matches your fabric weight. Lightweight zippers suit cotton and canvas. If you use vinyl or faux leather, choose a sturdier zipper. Make sure the zipper slides smoothly and isn’t too stiff.
Note: You’ll also need fusible fleece or batting to add softness and structure. For drawstring styles, grab a grommet, ribbon, and cord stop.
Basic Sewing Tools
Having the right tools makes sewing much easier. Here’s a quick list of essentials:
Essential Tools List
- Sewing machine (or needle and thread for hand sewing)
- Zipper foot
- Fabric scissors (keep them sharp and closed when not in use)
- Rotary cutter and ruler
- Iron (be careful with hot surfaces)
- Pins or clips (never put pins in your mouth)
- Thread (choose a color that matches your fabric)
- Cutting mat (protects your table)
- Marking pen or chalk
| Material/Instruction | Description |
|---|---|
| Fabric for outside | 20 inch x 20 inch piece |
| Fabric for lining | 20 inch x 20 inch piece |
| Fusible fleece | 20 inch x 20 inch piece |
| Zipper | 7-inch or 14-inch |
| Ribbon | 2 yards (for drawstring styles) |
| Cord stop | Double, secures ribbon |
Safety Reminder: Always cut away from yourself and keep your workspace tidy. Take breaks if you feel tired or frustrated. Supervise kids if they want to help.
Now you’re ready to pick your favorite fabric and gather your supplies. With these beginner-friendly materials, you’ll set yourself up for a smooth sewing experience.
How to Make a Simple Makeup Bag
Ready to start your project? Let’s walk through how to make a simple makeup bag step by step. You’ll see how easy it is to prep your fabric, add structure, and sew with confidence.
Cutting and Prepping Fabric
Before you sew, you need to prepare your fabric. This step helps your makeup bag look neat and last longer. Here’s how to make a simple makeup bag with fabric that’s ready for action:
- Wash and iron your fabric to remove wrinkles and shrinkage.
- Cut a piece of quilting cotton for the lining, about 16 x 13 inches.
- Cut a matching piece of batting, also 16 x 13 inches, to add softness.
- Quilt the fabric if you want a textured look. You can try free motion quilting or simple straight lines.
- Trim your exterior and interior fabrics to a rectangle, about 15 x 12 ¾ inches.
- Make sure your fabric edges are straight and squared. This keeps your bag from looking lopsided.
Using a Pattern
You don’t need a fancy pattern to learn how to make a simple makeup bag. You can use a basic rectangle or download a free template online. If you want to make your own, just measure and cut two rectangles for the outside and lining. Double-check your measurements before you cut. Rushing this step can lead to mistakes.
Tip: Always check the grain of your fabric. Cutting along the grain helps your bag hold its shape and prevents stretching.
Applying Interfacing
Interfacing gives your makeup bag structure and durability. You’ll see a big difference in how sturdy your bag feels when you use the right type.
- Pellon SF-101 Shape Flex Fusible Woven works well for small pouches. It adds a quilt-weight feel without making the bag stiff.
- By Annie’s Soft and Stable is a favorite for structured bags. It gives heavy support and helps your bag stand up on its own.
Here’s a quick table to help you choose the best interfacing for your project:
| Interfacing/Stabilizer | Type | Pros | Cons |
|---|---|---|---|
| SF101 Shape-Flex | Lightweight Fusible | Easy to apply, keeps fabric flexible | Not sturdy for heavy bags |
| Peltex 71F | Ultra-Firm Fusible | Maximum rigidity, great for structure | Harder to fuse, less flexible |
Why Interfacing Matters
Interfacing supports your fabric and makes your makeup bag last longer. It reduces stretch, so your bag keeps its shape over time. Adding thickness also gives your bag a professional look. If you want to know how to make a simple makeup bag that feels sturdy, don’t skip this step.
Note: Pick the right interfacing for your fabric. This helps you avoid puckering and keeps your bag looking smooth.
Quick Sewing Tips
Sewing doesn’t have to be slow or stressful. You can use a few tricks to save time and get great results. Here’s how to make a simple makeup bag without frustration:
- Add interlining to your main fabric before you cut. This keeps everything lined up and accurate.
- Use a zip foot when sewing the zipper. It helps you catch all the layers and keeps your stitches straight.
- Iron the sides flat after pinning. This gives your bag a crisp, neat finish.
- Box out the corners by snipping the seam. Your bag will open wider and sit flat.
- Pin the side seams before sewing. This keeps everything lined up and prevents shifting.
Time-Saving Tricks
Want to finish your project faster? Try these easy tips:
- Slow down your sewing to keep the fabric smooth.
- Use a longer stitch for better control.
- Loosen the tension if your fabric ripples.
- Guide the fabric gently—don’t pull it.
- Hide the turning hole in the lining for a clean look.
Sewing a makeup bag is fun and quick when you follow these steps. You’ll learn how to make a simple makeup bag that looks great and holds up over time.
How to Sew a Cosmetics Bag
Ready to put your pieces together? You’re about to see your project take shape. Let’s walk through the main steps for sewing a cosmetics bag, from attaching the zipper to boxing the corners for a roomy finish.
Sewing the Zipper
Attaching the zipper is easier than you might think. You just need to follow a few steps and use your zipper foot. Here’s a simple way to sew the zipper onto your bag:
- Place the lining fabric over the main piece. Line up all the top edges. The zipper will hang over a little. Pin or clip everything in place.
- Use your zipper foot to stitch from the top end down to just before the pull tab. Keep a ¼-inch seam allowance. Stop, cut the thread, and close the tab. Continue sewing until you’re about ¾ inch from the edge.
- Lay the other lining piece right side up. Put the sewn piece on top, with the lining sides together. Pin or clip again and repeat the sewing steps, leaving a ¾-inch gap at the edge.
- Flip the layers so the right sides face out on both the main and lining fabrics.
Zipper Placement
Getting the zipper straight makes your cosmetics bag look professional. Here are some tips to help you:
- Place pins every three or four inches along the zipper. This keeps it from shifting.
- Keep your fingers on the left side of the zipper as you sew. You’ll have better control.
- Go slow. Rushing can lead to crooked stitches.
- When you reach the zipper slider, stop and move it out of the way. Don’t try to sew around it.
- Apply firm pressure while sewing. This keeps the fabric snug and prevents bubbles.
- You can sew over pins if you want. It saves time and keeps the zipper in place.
Tip: If you’re new to sewing zippers, practice on a scrap piece first. You’ll feel more confident when you sew the real thing.
Assembling the Bag
Once you’ve attached the zipper, you’re ready to assemble the rest of your cosmetics bag. Strong seams help your bag last longer and hold its shape.
- Flip the layers so the zipper tape folds toward the lining fabric. Tuck the extra zipper piece inside the layers.
- Stitch down starting about half an inch from the edge.
- Sew the bottom and side edges with a half-inch seam allowance. Leave a three-inch opening along the lining’s bottom edge. This is where you’ll turn the bag right side out later.
Sewing Sides
Choosing the right stitch makes a big difference. Here’s a table to help you pick the best one for each part of your bag:
| Stitch | Description | Why It’s Used for Bags | Best For |
|---|---|---|---|
| Straight Stitch | Single line of stitches | Strong seams, easy for beginners | Main body panels, pockets |
| Back Stitch | Locks stitches at start and end | Prevents unraveling, adds durability | Securing seams |
| Box Stitch | Square or rectangle pattern | Reinforces high-stress areas | Handles, straps |
| Triple Straight Stitch | Thick, bold line | Extra strength, decorative topstitching | Heavy-duty seams |
You can use a straight stitch for most seams. Add a back stitch at the start and end to lock everything in place. If you want extra strength, try a triple straight stitch or box stitch on the sides.
Note: Topstitching along the zipper and edges gives your bag a neat, professional look. It also helps the seams last longer.
Boxing Corners
Boxing the corners is the secret to making your cosmetics bag roomy and practical. This step gives your bag a flat bottom, so it stands up and holds more items.
- Fold the corners together on all edges. Clip or pin them to keep everything lined up.
- Sew across the corners with a ¼-inch seam allowance.
- Pull the right side out through the lining opening. Your bag will start to look three-dimensional.
Creating a Flat Bottom
Boxing corners transforms flat panels into a spacious, boxy bag. Here’s how it helps:
- Boxing the corners gives your bag a nice, 3D look.
- It turns your flat bag into a roomy, boxy cosmetics bag. You’ll have more space for makeup and brushes.
- The bag stands upright, so you can easily see and grab what you need.
You can use different techniques for boxing corners, like cut and sew, sew and cut, or fold and sew. Pick the one that feels easiest for you.
Boxing corners is a simple trick that makes your bag look professional and work better for everyday use.
Now you’ve learned how to sew a cosmetics bag from start to finish. You’ve attached the zipper, sewn strong seams, and boxed the corners for extra space. Your bag is almost ready to use!
How to Make a Boxy Cosmetic Bag
Are you ready to learn how to make a boxy cosmetic bag? This style stands out because it gives you more space and keeps your makeup safe. You can fit bottles, palettes, and brushes inside without worrying about them getting crushed. Let’s look at what makes this bag different from a flat style.
Boxy Style Features
When you want to know how to make a boxy cosmetic bag, you should understand its special features. Here’s a table that shows the differences between boxy and flat makeup bags:
| Feature | Boxy Style Makeup Bag | Flat Style Makeup Bag |
|---|---|---|
| Structure | Square or rectangular shape with stiffness | Simple, lightweight |
| Capacity | Holds bottles and palettes | Best for small items |
| Organization | Panels or dividers for sorting | Usually one compartment |
| Protection | Shields fragile items | Less protection |
| Portability | Bulky, less portable | Easy to carry |
You get more room and better protection with a boxy bag. If you want to organize your makeup, this style helps you keep everything in place.
Flat Bottom Construction
The secret to how to make a boxy cosmetic bag is the flat bottom. You create this by boxing the corners. When you pinch and sew the corners, your bag stands up and holds its shape. This step turns a flat pouch into a roomy, sturdy bag. You can use your bag for travel, school, or everyday storage.
Tip: Always measure and mark your corners before sewing. This keeps your bag even and helps it sit flat.
Quilted Style Option
Do you want your bag to feel soft and look stylish? Try quilting! Quilting adds texture and makes your bag extra durable. You can use foam or batting between layers for a cushioned feel.
Here’s what you need for how to make a boxy cosmetic bag with quilting:
- Outer fabric (nylon, polyester, or PU leatherette)
- Quilt batting or foam
- Lining fabric (waterproof options work best)
- Zipper (9-10 inches)
- Sewing machine and thread
- Pins or clips
- Scissors and iron
Simple Quilting Steps
Let’s walk through how to make a boxy cosmetic bag with a quilted finish. Follow these steps:
- Gather your materials. Pick strong outer fabric, soft batting, and a waterproof lining.
- Cut two rectangles each for the outer fabric, batting, and lining.
- Layer the outer fabric and batting. Quilt them together using straight lines or fun patterns.
- Attach the zipper to the top edge of your quilted piece.
- Sew the outer and lining panels together, leaving the top open.
- Pinch and sew the corners to create a boxy shape.
- Turn the bag right side out. Tuck in the lining and topstitch around the zipper for a neat finish.
Quilting makes your bag look professional and keeps your makeup safe. You can add embellishments or use colorful thread for a personal touch.
Now you know how to make a boxy cosmetic bag that stands out. You get more space, better protection, and a stylish look. Try quilting for extra softness and durability. Your new bag will hold everything you need and look great wherever you go.
Finishing and Personalizing
Turning the Bag
You’re almost done with your makeup bag! Now comes the fun part—turning your bag right side out and seeing your work come together. This step helps your bag look neat and professional. If you want crisp edges and sharp corners, you need to follow a few simple techniques.
Getting Crisp Edges
Turning your bag right side out can feel tricky, but you can do it without damaging the seams. Here’s a step-by-step method that works well for beginners:
- Fold your fabric so the right sides face each other. This keeps the outside of your bag protected while you sew.
- Pin or clip the sides together. Leave a small opening at the bottom—about two inches. You’ll use this gap to turn the bag inside out later.
- Sew along the edges with a straight stitch. Backstitch at the beginning and end to make the seams strong.
- Reach through the opening at the bottom and gently pull the fabric through. Take your time so you don’t rip the seams.
- Use a blunt tool, like a pencil or chopstick, to poke out the corners. This helps you get sharp, crisp edges that make your bag look polished.
Tip: If you want extra sharp corners, press them with an iron after turning the bag. Just be careful not to burn the fabric.
You’ll notice your bag starts to take shape as you turn it. The corners pop out, and the seams look smooth. This step makes your sewing tutorial feel complete and satisfying.
Adding Embellishments
Now that your bag looks neat, you can add some personal touches. Embellishments make your makeup bag unique and show off your style. You don’t need fancy supplies—just a few simple ideas can make a big difference.
Personalization Ideas
Here are some fun ways to personalize your makeup bag:
- Iron-on patches: Add a cute design or your initials.
- Fabric paint: Draw patterns, doodles, or write your name.
- Buttons or beads: Sew them onto the front for extra flair.
- Ribbon or lace: Attach along the zipper or edges for a soft look.
- Embroidery: Stitch a small flower, heart, or word onto the bag.
| Embellishment | How to Use It | Best For |
|---|---|---|
| Iron-on Patch | Press with hot iron | Quick customization |
| Fabric Paint | Brush or stamp designs | Creative patterns |
| Buttons/Beads | Sew onto fabric | Texture and sparkle |
| Ribbon/Lace | Stitch along seams | Soft, elegant style |
| Embroidery | Hand-stitch designs | Personal messages |
Don’t be afraid to experiment! Try mixing different embellishments or use bold colors. Your makeup bag should reflect your personality.
Personalizing your bag makes it special. You can give it as a gift or keep it for yourself. Every time you use it, you’ll remember the fun you had making it.
Troubleshooting and Beginner Tips
Common Mistakes
Sewing your first makeup bag can feel exciting, but you might run into a few bumps along the way. You may notice seams that look uneven or a zipper that won’t close smoothly. Don’t worry! You can fix most problems with a few simple tricks.
Fixing Seams and Zippers
If your seams look crooked, check your fabric alignment. Make sure you pin or clip the edges before you sew. Use a straight stitch and keep your fabric flat under the needle. If you see loose threads, trim them with sharp scissors. You can always go back and sew over a seam to make it stronger.
Zippers sometimes get stuck or look wavy. If your zipper won’t close, check if you sewed too close to the teeth. Try using your zipper foot and sew slowly. If the zipper puckers, loosen your thread tension and press the seam with an iron. You can also practice how to sew a zipper on scrap fabric before you work on your bag.
Here’s a quick table to help you spot and fix common issues:
| Problem | Quick Fix |
|---|---|
| Crooked seams | Re-pin, sew slowly, use guides |
| Loose threads | Trim, backstitch, reinforce seam |
| Stuck zipper | Check seam allowance, re-sew |
| Wavy zipper | Adjust tension, iron seam |
Tip: Always test your stitches on a small piece of fabric before you start your beginner sewing project. This helps you see how to sew straight and avoid mistakes.
Quick Project Ideas
You might finish your makeup bag and wonder what to do with leftover fabric. You can use scraps for fun, easy projects. These ideas help you practice how to sew and make useful items.
20-Minute Makeup Bag
If you want a fast project, try making a simple pouch. Cut two rectangles of fabric, add a zipper, and sew the sides. You can finish this in about 20 minutes. This is a great way to learn how to sew a basic bag and build your confidence.
You can also use leftover fabric for other small projects. Here’s a creative idea:
Decorative Zipper Pouch Sewing Pattern! This beginner-friendly project allows you to use your favorite fabric scraps, making it perfect for repurposing leftover materials from a makeup bag project.
Other quick ideas include:
- Sew a coin purse with a snap closure.
- Make a small pencil case for school.
- Create a fabric keychain or wristlet.
These projects help you practice how to sew straight seams and attach zippers. You can finish them quickly and use them every day.
If you make a mistake, don’t give up. Every time you sew, you learn something new. Keep trying different beginner sewing project ideas and watch your skills grow. Sewing should feel fun, not stressful. You’ll get better with each project!
Next Steps and Sharing
You’ve finished your makeup bag and learned some cool sewing tricks. Now, you might wonder what to do next. You can keep sewing, try new styles, or share your work with friends. Let’s talk about how you can take your skills further and get creative with your next project.
Customization Inspiration
You don’t have to stop at one makeup bag. You can make more and change up the look each time. Customizing your bag lets you show off your personality and style. You can use different colors, patterns, or add special touches.
Here are some fun ways to customize your next makeup bag:
- Mix and match fabrics: Use two or three different fabrics for the outside and lining.
- Add pockets: Sew a small pocket inside for brushes or lip balm.
- Try bold colors: Pick bright or neon fabrics for a fun vibe.
- Use themed prints: Choose fabric with flowers, animals, or your favorite cartoon.
- Personalize with names: Stitch your name or initials on the front.
Tip: You can make a matching set. Sew a makeup bag, coin purse, and pencil case with the same fabric. This looks cute and helps you stay organized.
You can also swap out the zipper for a different color or style. Try a metal zipper for a trendy look or a chunky plastic zipper for something playful. If you want to get fancy, sew on a tassel or charm to the zipper pull.
Using Different Fabrics
Changing the fabric changes the whole feel of your makeup bag. You can pick soft, sturdy, shiny, or waterproof materials. Each fabric has its own benefits.
Here’s a table to help you choose:
| Fabric Type | Look & Feel | Best Use | Care Tips |
|---|---|---|---|
| Quilting Cotton | Soft, easy to sew | Everyday bags | Machine wash |
| Canvas | Sturdy, holds shape | Travel or big bags | Spot clean |
| Faux Leather | Sleek, modern | Stylish, gift bags | Wipe with cloth |
| Vinyl | Waterproof, shiny | Gym or pool bags | Wipe clean |
| Velvet | Plush, fancy | Special occasion bags | Hand wash |
You can experiment with mixing fabrics. Try canvas for the outside and cotton for the lining. Use vinyl for a waterproof bottom. If you want a fancy bag, pick velvet or faux leather.
Note: Always test your fabric before you sew. Cut a small piece and see how it feels under the needle. Some fabrics need special needles or thread.
You can share your finished bags online. Post photos on social media or join sewing groups. You’ll find lots of inspiration and maybe make new friends. If you want to sell your bags or order custom ones, you can reach out to manufacturers who offer bulk or personalized services.
Keep sewing, keep sharing, and keep having fun. Your next makeup bag can be anything you imagine!
Conclusion
You can make your own makeup bag today. The steps are simple and fun. You will feel proud when you finish your first bag. Share your project with friends or post it online for inspiration. Join sewing groups to meet others who love to create. If you want custom or bulk orders, reach out to us—we are a makeup bag manufacturer and happy to help. Sewing your own bag feels great and gives you something useful and stylish. Give it a try!
FAQ
How do I choose the best fabric for my makeup bag?
Pick cotton if you want something easy to sew. Canvas gives your bag more structure. Vinyl works well for waterproof bags. Test a small piece before you start.
Can I sew a makeup bag without a sewing machine?
Yes! You can sew by hand using a needle and thread. Use small, tight stitches for strong seams. It takes longer, but you can still make a great bag.
What size zipper should I use?
A 7-inch zipper fits most small makeup bags. For larger bags, try a 9-inch or 14-inch zipper. Make sure the zipper matches your fabric weight.
How do I fix crooked seams?
Use pins or clips to hold the fabric straight. Sew slowly and keep the edge lined up with your machine’s guide. If you make a mistake, you can sew over it.
Can I wash my homemade makeup bag?
Most cotton and canvas bags can go in the washing machine. Vinyl and faux leather bags should be wiped clean with a damp cloth. Always check your fabric care instructions.
What’s the easiest way to add a pocket?
Cut a small rectangle of fabric. Fold the edges and sew it onto the lining before you assemble the bag. You can use a straight stitch for quick results.
How do I make my bag look more professional?
Press your seams with an iron. Topstitch around the zipper and edges. Add a label or tag. Use matching thread for a clean finish.
Is interfacing necessary for every makeup bag?
You don’t have to use interfacing, but it helps your bag hold its shape. If you want a soft pouch, you can skip it. For a sturdy, boxy bag, add interfacing.