
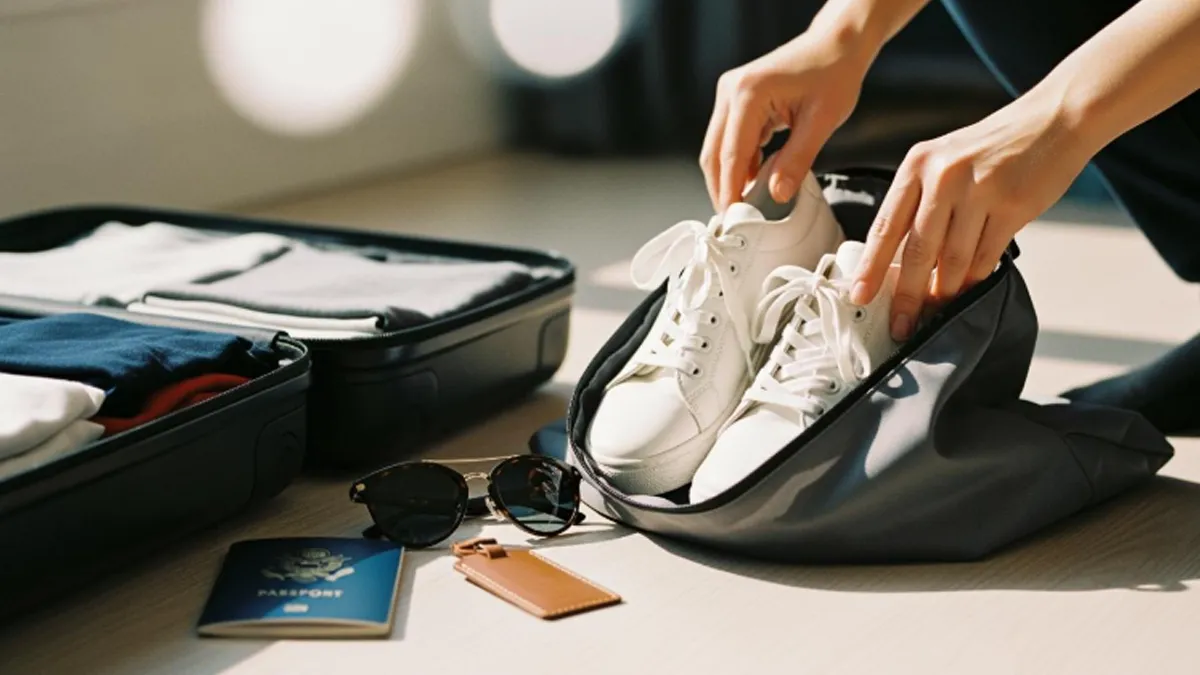
Ready to create an easy to sew storage bag for your next trip? You can make a shoe bag for travel in just a few steps, even if you have never sewn before. This project feels easy and fun—a great beginner project you can finish in about 10-15 minutes. Many travelers love custom shoe bags because they keep shoes organized and prevent scuffs or dirt from spreading in your luggage. Your shoes stay protected from dust and scratches. If you want to learn how to make a shoe bag for travel that’s easy and practical, you’re in the right place!
Key Takeaways
- Making a shoe bag is a quick and fun project that takes about 10-15 minutes.
- Choose durable, water-resistant fabrics like nylon or polyester for best results.
- Use a sewing machine for neat seams, but hand sewing works well too.
- Cut fabric to the right size: 16.5 x 8.3 inches for most adult shoes.
- Add a closure like a zipper or drawstring to keep shoes secure.
- Customize your bag with embroidery or labels to make it unique.
- Wash your shoe bag in cold water and air dry to keep it clean.
- Consider making multiple bags at once to save time and effort.
Materials
Before you start sewing, you need to gather a few simple materials. Picking the right fabric and tools makes your shoe bag last longer and look great. Let’s break down what you’ll need.
Fabric Choices
Choosing the right fabric is the first step. You want something that’s tough, easy to clean, and looks good in your suitcase.
Water-Resistant Options
If you want to keep dirt and moisture away from your shoes, go for water-resistant fabrics. Nylon and polyester work well for travel because they wipe clean and hold up to wear and tear. Here’s a quick look at some popular choices:
| Fabric Type | Durability | Ease of Cleaning | Breathability |
|---|---|---|---|
| Cotton | Good | Machine washable | Good |
| Nylon | Excellent | Wipe clean | Moderate |
| Polyester | Excellent | Wipe clean | Moderate |
| Mesh | Moderate | Rinse under water | Excellent |
Tip: Nylon and polyester are perfect if you want a bag that handles spills or wet shoes. Mesh is great for breathability, but it’s not as sturdy.
Contrasting Fabrics
Want your shoe bag to stand out? Try mixing two fabrics. Use a bold print for the outside and a solid color for the lining. You can even add a strip of mesh for extra airflow. This not only looks cool but also helps you spot your shoe bag in your luggage.
Here’s a quick guide to the pros and cons of each material:
| Material | Advantages | Disadvantages |
|---|---|---|
| Cotton Canvas | Durable, breathable, mildew-resistant, environmentally friendly | Absorbs moisture, not waterproof, needs to be kept dry |
| Nylon | Lightweight, water-resistant, durable, tear-resistant | Poor breathability, can trap odors, larger environmental footprint |
| Polyester | Lightweight, durable, affordable, some water resistance | Limited breathability, less environmentally friendly, can trap moisture |
Note: If you want an eco-friendly option, cotton canvas is a solid pick. Just remember to keep it dry.
Tools
You don’t need fancy equipment to make a shoe bag. Most of these tools are probably already in your home.
Sewing Machine or Hand Sewing
You can use a sewing machine for quick, neat seams. If you don’t have one, hand sewing works too. Just use a strong needle and sturdy thread.
Scissors and Measuring Tape
Sharp scissors help you cut fabric cleanly. A measuring tape keeps your bag the right size for your shoes.
- Sturdy fabrics: Pick canvas or ripstop nylon for a bag that lasts.
- Quality closure: Zippers or drawstrings keep your shoes secure.
- Basic sewing notions: Thread, scissors, and pins make assembly easy.
Tip: Double-check your measurements before you cut. This saves fabric and avoids mistakes.
Extras
Want to make your shoe bag even better? Add a closure to keep everything inside.
Zipper
A zipper gives your bag a sleek, finished look. It keeps shoes from slipping out and adds extra protection.
Drawstring Cord
A drawstring is quick to sew and easy to use. Just pull the cord to close the bag. It’s a great choice for beginners.
Note: Both zippers and drawstrings work well for travel. Pick the one you like best!
Now that you have your materials ready, you’re set to start making your own travel shoe bag.
How to Make a Shoe Bag for Travel
Ready to dive into the tutorial? You’re about to learn how to make a shoe bag for travel that fits your shoes perfectly and keeps your suitcase organized. This tutorial breaks down each step so you can follow along easily. Grab your fabric, tools, and extras, and let’s get started!
Cutting Fabric
You need to cut the fabric before you start sewing. This step sets the foundation for your shoe bag.
Standard Size
Most adult shoes fit inside a bag with these dimensions. Use this table to guide your cutting:
| Dimension Type | Measurement |
|---|---|
| Length | 16.5 inches |
| Width | 8.3 inches |
| Depth | 5.5 inches |
Lay your fabric flat. Mark the measurements with a fabric pen or chalk. Cut the fabric along the lines. Double-check the size before you move on.
Adjusting for Shoe Types
Do you have boots or extra-large sneakers? Adjust the measurements to fit your shoes. Add a few inches to the length and width for bulky shoes. For kids’ shoes or flats, you can make the bag smaller. Always measure your shoes first so you get the right fit.
Tip: If you want to make several bags, cut all your pieces at once. This saves time and keeps your sizes consistent.
Hemming Edges
Hemming the edges helps your shoe bag last longer. You don’t want frayed edges in your suitcase!
Top Edge Hem
Start with the top edge. Fold the edge over about half an inch. Press it flat with an iron. Use a vertical hemming stitch for woven fabrics. If you want a nearly invisible finish, try slip hemming. For heavy-duty bags, use a herringbone stitch. These techniques keep your bag strong and neat.
- Vertical hemming: Great for woven fabrics.
- Slip hemming: Invisible and durable.
- Herringbone stitch: Best for pinked edges.
Binding Strips
Binding strips add extra strength. Cut strips of fabric about one inch wide. Fold them over the raw edges. Stitch them down with a box stitch or triple straight stitch. This step makes your shoe bag tough enough for travel.
- Box stitch: Use for high-stress areas like handles.
- Triple straight stitch: Adds security for seams.
Note: If you want a quick finish, use a blind hemming stitch. It’s fast and easy for beginners.
Sewing Seams
Now you’re ready to sew the main seams. This part brings your shoe bag together.
Assembling Bag Body
Follow these instructions to assemble your shoe bag:
- Cut all the pieces out on the dark line of the patterns.
- Peel the backing paper off the applique pieces and place them on the fabric.
- Use an iron to bond all the pieces to the fabric.
- Stitch around the edges of the shoe with a zigzag, straight, or blanket stitch.
- Prepare the casings by hemming the short ends of the pieces.
- Stitch the front exterior to the back exterior with right sides together.
- Pin the lining pieces together and stitch, leaving an opening for turning.
- Turn the lining right side out and slide it into the exterior.
- Pin around the top and stitch the seam.
- Turn the bag right side out and close the opening in the lining.
- Cut two pieces of cording and attach safety pins to string through the casings.
- Knot the ends to form drawstrings.
You can follow this tutorial step by step. Each part helps you build a sturdy and stylish shoe bag.
Reinforcing Seams
Reinforce the seams for extra durability. Use a box stitch at the corners and handle attachments. Try a triple straight stitch for load-bearing seams. These stitches keep your shoe bag strong, even when packed with heavy shoes.
Tip: Press the seams flat with an iron after sewing. This gives your bag a professional look.
Lay-Flat vs. Boxy Shoe Bags
You can choose between lay-flat and boxy designs. Here’s a quick comparison:
| Feature | Lay-Flat Shoe Bags | Boxy Shoe Bags (not detailed) |
|---|---|---|
| Design | Lay flat when not in use, easy to store | N/A |
| Versatility | Can be used for various items, not just shoes | N/A |
| Size Adaptability | Easy to adapt to any size needed | N/A |
| Protection | Keeps shoes protected from other items in the bag | N/A |
| Popularity | Highlighted as great for travel and organization | N/A |
Lay-flat shoe bags are popular for travel. They store easily and work for many items. If you want a boxy shape, add depth to your measurements and box the corners. Boxy bags hold bulkier shoes and keep their shape.
Tutorial tip: Box the corners by aligning the side seam and bottom seam, then stitch across the straight edge. This gives your bag a structured look.
Now you know how to make a shoe bag for travel from start to finish. This tutorial covers cutting, hemming, and sewing the main seams. You can make a lay-flat or boxy shoe bag, depending on your needs. Try this tutorial and enjoy a custom shoe bag on your next trip!
Closure
You have reached the final step in making your travel shoe bag. Now, you get to choose how you want to close your bag. You can pick a drawstring or a zipper. Each closure has its own benefits for travel. Let’s walk through both options so you can decide which works best for you.
Drawstring Tutorial
Drawstring shoe bags are popular because they are simple and quick to make. You can open and close them in seconds. They are lightweight and easy to pack. Many travelers like drawstring shoe bags for casual trips or everyday use.
Sewing Casing
Start by making a casing for the drawstring. Fold the top edge of your bag down about one inch. Press it flat with an iron. Stitch along the bottom edge of the fold, leaving a tunnel for the drawstring. Make sure you do not sew the ends shut. You want the drawstring to slide through easily.
Tip: Use a safety pin to help guide the drawstring through the casing.
Inserting Cord
Cut a piece of cord that is twice the width of your bag plus a few extra inches. Attach a safety pin to one end and thread it through the casing. Pull the cord until both ends come out. Tie a knot at each end to keep the drawstring from slipping back inside. Now you have a working closure.
Drawstring shoe bags give you quick access to your shoes. You can toss them in your suitcase and grab them when you need them. They are versatile and work for many shoe types. If you want a fast project, adding the drawstrings is the way to go.
Here are some reasons travelers love drawstring shoe bags:
- Lightweight and easy to carry
- Quick to open and close
- Great for casual shoes and sneakers
- Versatile for other items
Zipper Tutorial
If you want more security, try a zipper closure. Zippered shoe bags keep your shoes safe and prevent them from falling out. They work well for dress shoes or delicate styles.
Attaching Zipper
Place the zipper face down along the top edge of your bag. Pin it in place. Sew along the zipper tape using a straight stitch. Flip the zipper up and press the seam flat. Repeat for the other side if you want a double zipper. Test the zipper to make sure it opens and closes smoothly.
Boxy Bag Option
You can make your shoe bag boxy by boxing the corners after you attach the zipper. This shape protects your shoes during travel. It keeps your suitcase organized and controls odors. You can even store accessories or slippers with your shoes. Boxy bags save space by letting you compress your shoes.
Here are some benefits of a boxy shoe bag:
- Protects shoes from damage
- Keeps your suitcase neat
- Controls odors and keeps clothes fresh
- Saves space
- Stores extra items
Both drawstring and zipper closures have their own strengths. Drawstring shoe bags are easy and light. Zippered bags offer more security and durability. Pick the closure that fits your travel style and shoe type.
Finishing
You’re almost done! This last step will make your shoe bag look neat and last longer. Let’s talk about lining, trimming, and pressing so your bag feels just as good as it looks.
Lining
A lining can make your shoe bag feel sturdy and look professional. It also helps protect your shoes and keeps the inside of your bag clean.
Fully Lined Bag
When you add a lining, you give your bag extra strength. The lining helps the bag keep its shape and stops it from sagging. You also get a smooth inside, which makes it easier to slide shoes in and out.
Here are some great materials for linings:
- Ripstop nylon: This fabric is light and water-resistant. It keeps your shoes safe from spills or wet weather.
- Coated polyester: This one is tough and also water-resistant. It works well for travel bags that need to handle a lot.
- Heavyweight cotton canvas: This gives your bag structure and helps it stand up on its own.
- Firm polyester: This adds a bit of cushion and protects your shoes from bumps.
Tip: Pick a lining that matches your main fabric. If you use a water-resistant outer fabric, try a water-resistant lining too.
Neat Finish
A neat finish makes your bag look store-bought. You want to hide all the raw edges inside the lining. When you sew the lining and the outer fabric together, make sure the seams are tucked away. This keeps the inside smooth and stops threads from catching on your shoes.
- Sew the lining with the same care as the outside.
- Turn the bag right side out after sewing, so all seams are hidden.
- Press the bag with an iron to set the shape.
Trimming and Pressing
Now, let’s make your bag look crisp and clean. Trimming and pressing are small steps, but they make a big difference.
Removing Loose Threads
Loose threads can make your bag look messy. After sewing, check all the seams and corners. Use sharp scissors to snip off any extra threads. This keeps your bag tidy and stops threads from unraveling.
Pressing Seams
Pressing seams helps your bag look sharp. Here’s a simple way to do it:
- Turn your bag inside out.
- Finish the raw edges at the top of the bag.
- Clip at the seam line and fold the top side seam allowances in about half an inch. Press with an iron.
- Fold the finished edge about one and a half inches on each side, meeting the marked line. Press again.
You can also use a serger, pinking shears, or a zigzag stitch to finish your seam edges. Press all seams to one side for a smooth look.
Note: Pressing your bag as you go makes sewing easier and gives your finished bag a professional touch.
Now your shoe bag is ready for travel! You’ve added a strong lining, trimmed away loose threads, and pressed every seam. Your bag looks great and will last for many trips.
Customization
You can make your travel shoe bag unique with a few simple custom touches. Customization lets you show off your style and make your bag easy to spot in your luggage. Let’s look at some fun ways to personalize your shoe bag and adjust the size for different needs.
Decorative Touches
Embroidery
Embroidery is a favorite way to decorate shoe bags. You can stitch your initials, a fun design, or even a small logo. This makes your bag stand out and adds a personal touch. Many people love embroidery because it lasts a long time and looks professional. You can use bright thread for a pop of color or stick with classic white for a clean look.
- Embroidery lets you add your name or initials.
- You can stitch flowers, stars, or any design you like.
- Embroidered bags make great gifts for friends and family.
Tip: If you don’t have an embroidery machine, you can use simple hand stitches. Even a small design can make your bag special.
Labels
Labels help you keep track of your bags, especially if you travel with family or in groups. You can sew a fabric label inside or outside your shoe bag. Write your name, shoe size, or a fun message. Iron-on labels work well if you want a quick option. You can also use fabric paint or permanent markers for a creative touch.
- Labels help you find your bag fast.
- Add care instructions or a contact number for peace of mind.
- Use different colors or shapes for each family member.
Size Options
For Boots or Multiple Pairs
Not all shoes are the same size. Some people travel with boots, while others pack sandals or sneakers. You can make your shoe bag bigger or smaller to fit your needs. Compact bags work well for flats or kids’ shoes. Larger bags can fit men’s shoes up to size 16 or even a pair of boots. If you want to carry more than one pair, choose a bag with extra space.
- Compact bags fit smaller shoes.
- Large bags hold boots or big sneakers.
- Choose a size that keeps your shoes safe but doesn’t take up too much space.
Note: Always measure your shoes before cutting your fabric. This helps you get the perfect fit.
Bulk Sewing Tips
If you want to make several shoe bags at once, maybe for a group trip or as gifts, you can save time by sewing in bulk. Cut all your fabric pieces first, then sew each step for all bags before moving to the next. This assembly-line method works well and keeps your sizes consistent.
Here’s a handy table to help you plan:
| Size | Fits Shoe Size | Fabric Needed | Zipper Length |
|---|---|---|---|
| Large | Men up to size 14 | ½ yard fabric (56″ wide) | 18″ or longer |
| Medium | Men up to size 10 / Women up to size 11 | ½ yard fabric (56″ wide) | 16″ or longer |
| Small | Women up to size 7 / Kids sizes | ½ yard fabric (56″ wide) | 14″ or longer |
You can use rip-stop nylon, polyester, cotton, linen, or flannel for your bags. Nylon is great if you want waterproofing. For each bag, you might also want 20 inches of double-fold bias tape for a neat finish.
Tip: Making shoe bags in bulk is perfect for family trips, sports teams, or holiday gifts. You can mix and match fabrics and labels for everyone.
Tips
10-Minute Shoe Bags
Quick Project Steps
You want to make 10-minute shoe bags without any stress? Here’s a simple step-by-step guide to help you finish fast:
- Fold your fabric in half with the printed sides facing in. Cut an 18 x 14-inch rectangle.
- Mark 1.5 inches from the top on one side. This is where your tie will come out.
- Start at the mark and sew around the bag, leaving the top open.
- Fold over the top edge where the tie will go, then fold it again. Sew it down.
- Repeat for the other side of the tie area.
- Fold the top of the bag over about ¾ inch, iron it, and fold again for a neat hem.
- If you use bias tape, fold it in half and sew it.
- Place your tape or ribbon inside the hem at the top.
- Sew the fold down with the tie inside, starting at the side where the tie comes out.
- Turn your shoe bag right side out.
You can finish these 10-minute shoe bags quickly and have them ready for your next trip. They are perfect for last-minute packing or as a quick gift.
Beginner Mistakes to Avoid
When you make 10-minute shoe bags, you might run into a few common problems. Here’s how to avoid them:
- Forgetting to iron seams flat. This makes your hem look messy.
- Not pinning the top edges if your fabric is slippery.
- Missing the gap in the hem for the tie. Always sew above and below the opening.
- Skipping a seam in the middle if you want to keep shoes separate.
- Letting nylon cord unravel. Use a lighter to melt the ends.
- Overloading your fabric or making the bag too small for your shoes.
- Not cutting enough fabric if you want to make several bags at once.
Tip: Cut one yard of fabric to make three 10-minute shoe bags at a time. This saves time and helps with storage for all your shoes.
Care Instructions
Washing
Keeping your shoe bag clean is easy. Use cold water to protect the fabric and colors. For heavy dirt, warm water (no hotter than 30°C) works well. Pick a gentle cycle on your washing machine and use a clear liquid detergent. If your bag smells, add a little baking soda or white vinegar to the wash.
- Always use low or medium spin to keep your bag from warping.
- Never use hot water or high heat. This can damage glue and fabric.
- Don’t overload the washing machine. Your 10-minute shoe bags need space to move.
After washing, air dry your bag. Lay it flat or hang it up. Blot with a towel and stuff with paper to help it keep its shape. Only put your shoes back in when the bag is fully dry.
Storage
Good storage habits help your shoe bag last longer. Here’s how you can keep your 10-minute shoe bags in top shape:
- Spot clean with mild soap and warm water if you see dirt or stains.
- Always air dry your bag before putting it away. Damp bags can grow mildew in storage.
- Fold your shoe bags tightly and store them in dustproof bags. This keeps out dirt and helps with storage in your closet or suitcase.
- Check zippers, seams, and fabric every few uses. Fix small problems before they get worse.
- Store your bags flat to prevent creases and keep them looking new.
Note: Never put away a wet or damp shoe bag. Drying fully is the best way to avoid mildew and keep your storage area fresh.
You can use these tips to keep your 10-minute shoe bags clean and ready for every trip. With the right washing and storage, your bags will last for years and always look great.
Shoe Bag Tutorial FAQs
Common Questions
You might have a few questions before you start your shoe bag tutorial. Many people wonder about the best materials, sewing methods, and how to get a neat finish. Let’s answer some of the most popular questions so you feel confident when you make your own travel shoe bag.
Fabric Choices
What fabric works best for a shoe bag tutorial? You want something strong, washable, and easy to sew. Here’s a quick table to help you pick:
| Fabric Type | Pros | Cons |
|---|---|---|
| Cotton Canvas | Durable, easy to sew | Not waterproof |
| Nylon | Water-resistant, lightweight | Can be slippery |
| Polyester | Tough, dries fast | Less breathable |
| Mesh | Breathable, light | Not sturdy for heavy shoes |
Cotton canvas feels soft and holds up well. Nylon and polyester keep water out and clean up fast. Mesh lets air flow, but it works best for sandals or lightweight shoes. You can mix fabrics for style and function. Try a sturdy base with a mesh panel for breathability.
Tip: Always wash your fabric before you start your shoe bag tutorial. Pre-washing helps prevent shrinking and keeps colors bright.
Sewing Techniques
You might ask, “Do I need a sewing machine for this shoe bag tutorial?” You don’t! You can sew by hand or use a machine. Both ways work. If you use a machine, straight stitches make strong seams. For hand sewing, use a backstitch for extra strength.
Here are some easy steps for neat sewing:
- Pin your fabric before you sew. This keeps edges straight.
- Use matching thread for a clean look.
- Press seams with an iron after sewing. Your bag will look crisp.
If you want to add a zipper or drawstring, follow the steps in the shoe bag tutorial. Zippers give you a secure closure. Drawstrings make the bag easy to open and close. Both options work well for travel.
Note: Don’t worry if your stitches aren’t perfect. Practice makes it easier. Your shoe bag will still work great!
You can finish your shoe bag tutorial with a lining for extra strength. Trim loose threads and press the bag for a professional finish. Now you know the answers to the most common questions. You’re ready to start your own project!
Conclusion
You can sew a travel shoe bag in just a few minutes. Even beginners can do this project with simple sewing skills. Your own bag will keep your shoes clean and easy to find on every trip. This project is quick and fun for anyone to try. If you want many bags or special designs, our company can help. We offer wholesale, OEM/ODM, and eco-friendly choices. Look at the chart below to see the smallest order you can make:

| Material Type | Features |
|---|---|
| Non-woven polypropylene | Lightweight, economical |
| Canvas and cotton | Durable, premium feel |
| Nylon and polyester | Water-resistant, strong |
| Sustainable Materials | rPET, organic cotton, biodegradable fabric |
You can contact us if you need a big order, want a special design, or need your bags shipped fast.
FAQ
What size should I make my shoe bag?
You can use 16.5 x 8.3 inches for most adult shoes. Measure your shoes first. Add extra space for boots or bulky sneakers. Smaller bags work for kids’ shoes or sandals.
Can I wash my shoe bag in the washing machine?
Yes! Most fabric shoe bags are machine washable. Use cold or warm water. Choose a gentle cycle. Air dry your bag to keep it in good shape.
Do I need a sewing machine to make a shoe bag?
No, you don’t. You can sew by hand with a needle and strong thread. A sewing machine makes the job faster, but hand sewing works well for beginners.
What fabric is best for a travel shoe bag?
Pick a fabric that is durable and easy to clean. Nylon and polyester are water-resistant. Cotton canvas is sturdy. Mesh adds breathability. Choose what fits your needs.
How do I keep my shoe bag from smelling?
Tip: Wash your bag often. Let it dry completely before storing shoes. You can add a small sachet of baking soda or lavender inside to keep things fresh.
Can I use my shoe bag for other items?
Absolutely! You can store socks, underwear, or toiletries in your shoe bag. It works for gym gear, electronics, or even snacks. The bag is versatile for travel and home.
How do I add a name or label to my shoe bag?
You can sew on a fabric label, use iron-on patches, or write with a permanent marker. Embroidery adds a personal touch. Labels help you find your bag fast.
What closure is better: drawstring or zipper?
Drawstrings are quick and easy. Zippers give more security. If you want fast access, pick a drawstring. For extra protection, choose a zipper. Both work great for travel.


