Yes, you can learn how to make a PVC tote bag at home with just a few simple tools. PVC tote bags stand out for their clear and glossy look, making them popular for events and everyday use. If you love a good DIY project, you will enjoy this hands-on tutorial on how to make a PVC tote bag. You do not need fancy skills—just a little patience and creativity. You can sew your bag or follow a no-sew method. If you prefer to watch a video tutorial, you will find the steps easy to follow. Let’s get started on your new favorite tote!
Key Takeaways
- Collect important materials like clear PVC sheets, scissors, and a sewing machine to begin your tote bag project.
- Pick if you want to sew or use glue or heat sealing to connect the panels of your tote bag.
- Measure and mark your PVC or vinyl carefully so you get straight cuts and a neat look.
- Make the handle attachments stronger with extra fabric or vinyl to help them last longer and stop them from ripping.
- Put on closures like zippers or snaps to keep your things safe inside the tote.
- Make your tote special with decorations like paint, stickers, or fabric patches to show your style.
- Take care of your tote by washing it with mild soap and not using strong chemicals so it stays looking nice.
- Fix common problems like rips or loose handles with easy repairs to make your tote last longer.
How to Make a PVC Tote Bag: Materials & Tools
Essential PVC and Clear Vinyl Materials
You need the right materials to start your clear vinyl tote bag project. For most utility tote bag designs, you can use either PVC or clear vinyl. Both work well for a diy clear stadium bag or a stylish utility tote. Choose a thick, flexible sheet for the main body. Most crafters pick 12-gauge or 16-gauge clear vinyl because it is strong but still easy to cut. You can find these sheets at craft stores or online.
Here’s a quick list of what you need for your clear vinyl tote bag:
- Clear PVC or clear vinyl sheets (12-gauge or 16-gauge)
- Optional: colored vinyl for accents or bottom reinforcement
- Lining fabric (if you want a softer inside)
- Extra vinyl or fabric for pockets
You can also add decorations like stickers, paint, or patches to make your utility tote bag unique. If you want a sturdy bottom, cut a piece of cardboard or thick plastic and cover it with vinyl.
DIY Tools for Cutting and Measuring
You want your utility tote to look neat and last a long time. Good tools help you get clean lines and perfect shapes. Here are the basic materials and tools you need for measuring and cutting:
- Sharp scissors or rotary cutter
- Ruler or measuring tape
- Washable marker or chalk for marking lines
- Cutting mat to protect your table
Power tools are recommended for efficient cutting of PVC, with a circular saw being ideal for straight cuts. It’s crucial to use a carbide-tipped blade with 60-80 teeth to avoid melting edges. For curved cuts, a jigsaw with a fine-toothed blade is preferred, and adjustments in technique are necessary to prevent damage.
If you want to try power tools for your utility tote bag, remember to ask an adult for help and wear safety glasses. For most clear vinyl tote bag projects, sharp scissors or a rotary cutter work best.
Sewing Machine, Needles, and Thread
If you want to learn how to make a pvc tote bag with strong seams, you need the right sewing tools. A basic sewing machine works for most clear vinyl tote bag projects. Use a heavy-duty needle, like a size 16 or 18, because regular needles can break. Pick strong polyester thread for your utility tote bag. It holds up better than cotton.
Here’s a quick table to help you choose sewing supplies for your utility tote:
| Tool | Best Choice | Why It Works |
|---|---|---|
| Sewing Machine | Basic or heavy-duty model | Handles thick materials |
| Needle | Size 16 or 18, sharp | Goes through vinyl easily |
| Thread | Polyester, heavy-duty | Strong and long-lasting |
If you do not want to sew, you can use clear vinyl glue or double-sided tape. These work for simple seams on a utility tote. You can also try heat sealing if you have the right tools.
Now you know how to make a pvc tote bag and how to make a clear vinyl tote bag with the best materials and tools. You are ready to start your own utility tote bag project!
Adhesive and Heat Sealing Options
You have a few choices when you want to join the panels of your clear vinyl tote bag. If you do not want to sew, you can use glue or heat to bond the pieces together. Some glues work better than others for PVC and clear vinyl. Here are some top options:
- Tarpo-S glue is popular in Europe. You can find it from Planenwelt in Germany. This glue works well for both soft and hard PVC. It resists plasticizers and aging, so your clear vinyl tote bag will last longer. It also does not turn yellow over time.
- Two-part primer and PVC solvent cement are easy to find in most hardware stores. These products help you make strong, waterproof seams. You just brush on the primer, then add the cement, and press the panels together.
If you want to try heat sealing, you need a special tool called a heat sealer. This tool melts the edges of the vinyl and bonds them together. You can use a home iron for small projects, but you must be careful not to melt the vinyl. Always place a piece of parchment paper between the iron and the vinyl to protect your clear vinyl tote bag.
Tip: Test your glue or heat method on a scrap piece first. This helps you avoid mistakes on your main project.
Some crafters like to use double-sided tape for quick fixes. This works for light-duty bags, but it may not hold up if you carry heavy items. For a strong and lasting clear vinyl tote bag, stick with glue or heat sealing.
Handle and Reinforcement Materials
Handles make your clear vinyl tote bag easy to carry. You can use many different materials for handles. Some people cut strips from leftover PVC or vinyl. Others use webbing, rope, or even old belts. Choose a handle that feels comfortable in your hand and matches your style.
If you want your bag to last, reinforce the spots where you attach the handles. You can sew a small patch of extra vinyl or fabric behind each handle. This spreads out the weight and keeps the handles from tearing the bag. For a no-sew option, use extra glue or heat seal the patches in place.
Here are some ideas for handle and reinforcement materials:
- PVC or clear vinyl strips (match your bag)
- Cotton or nylon webbing (soft and strong)
- Rope or cord (gives a casual look)
- Old belts (great for upcycling)
- Extra vinyl or fabric patches for strength
Note: Reinforcing the bottom of your clear vinyl tote bag helps it keep its shape. You can slide in a piece of cardboard or thick plastic, then cover it with vinyl for a neat finish.
With the right materials and a little creativity, you can make a clear vinyl tote bag that looks great and lasts a long time.
DIY Clear Vinyl Tote Bag Preparation
Measuring and Marking PVC or Vinyl
You want your tote to look neat and professional. Start by deciding how big you want your bag. Most people like a medium-sized tote for everyday use. You can follow popular patterns to get the right size. Check out this table for standard measurements:
| Size Category | Dimensions (W × H × D cm) | Approximate Capacity | Handle Length | Common Uses |
|---|---|---|---|---|
| Medium | 38 × 42 × 12 | 15-20 liters | 55-65cm | Corporate events, everyday use |
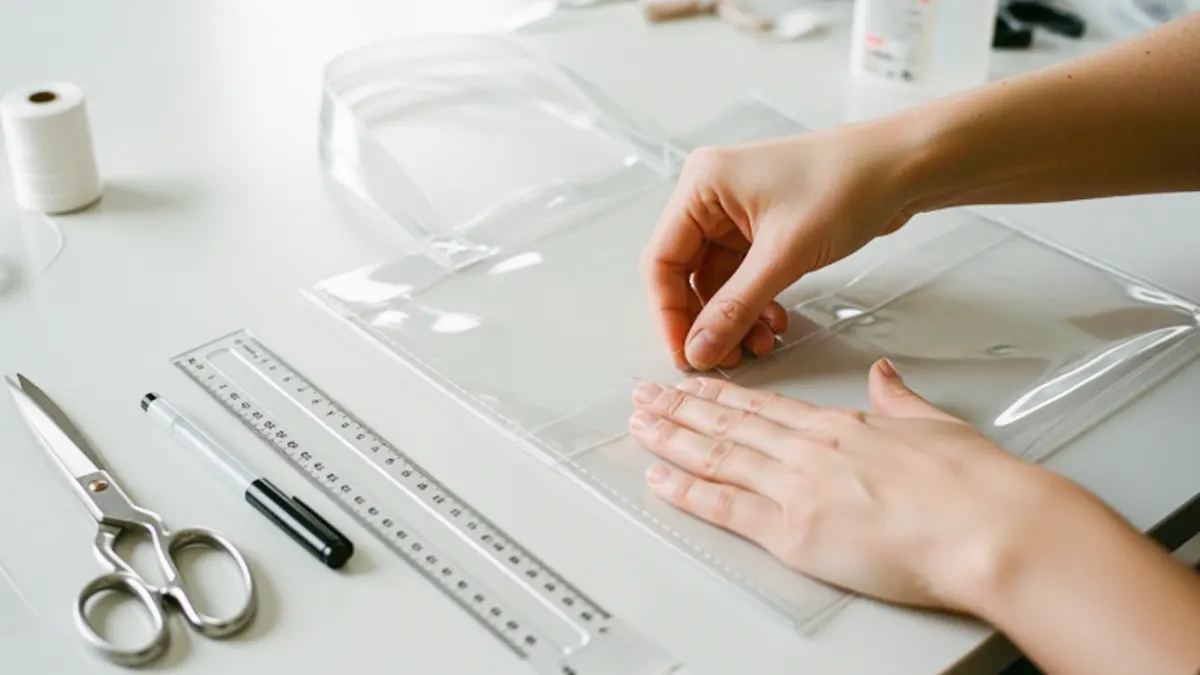
Grab your ruler or measuring tape. Lay your PVC or clear vinyl sheet flat on your workspace. Use a washable marker or chalk to mark the lines for each panel. Draw rectangles for the front, back, sides, and bottom. Make sure your lines are straight. Double-check your measurements before you cut. If you want pockets or a reinforced bottom, mark those pieces now.
Tip: Mark your panels on the protective film side of the vinyl. This keeps your tote clean and prevents smudges.
Cutting Panels Safely
Cutting PVC or clear vinyl can be easy if you follow a few safety steps. You want to protect yourself and keep your workspace tidy. Here are some important safety tips:
- Wear anti-static safety glasses. Tiny particles can fly up when you cut.
- Set up proper dust collection. This keeps the air clean and helps you breathe easily.
- Check your blade often. A dull blade can melt the PVC and release fumes. Replace or sharpen it right away.
- Support your sheet well. Let waste pieces fall away so you don’t struggle with the material.
Use sharp scissors or a rotary cutter for straight lines. If you need to cut curves, try a fine-toothed jigsaw. Always cut slowly and follow your marked lines. Keep your fingers away from the blade. If you use power tools, ask an adult for help.
Note: Cutting on a mat protects your table and keeps your panels smooth.
Setting Up Your Workspace
A good workspace makes your diy project easier. Choose a flat, sturdy table with plenty of room. Lay out all your tools before you start. Keep your PVC or vinyl sheets away from direct sunlight. Sunlight can warp the material and make it sticky.
Clear away clutter so you can move around easily. Place your cutting mat in the center. Keep your ruler, marker, scissors, and other tools within reach. If you plan to use glue or heat sealing, set up a spot for those supplies. Make sure you have good lighting. You want to see your lines and cuts clearly.
Callout: A clean workspace helps you avoid mistakes and keeps your tote looking sharp.
Now you’re ready to measure, mark, and cut your panels. Careful prep makes the rest of your tote project go smoothly!
How to Make a Clear Vinyl Tote Bag: Assembly Steps
Joining Panels: Sewing vs. No-Sew
You have two main ways to join the panels for your clear vinyl tote bag. You can sew the panels together or use a no-sew method like glue or heat sealing. Both options work well for a utility tote bag, so you can pick the one that fits your skills and tools.
Here’s a step-by-step guide for joining PVC or vinyl panels:
- Prepare the edges. Make sure the edges of your panels are clean and straight.
- Choose your joining technique. Decide if you want to use sewing, adhesive bonding, or heat welding.
- Overlap the edges. For heat welding, overlap by about 25-50mm. For sewing and adhesive, adjust the overlap as needed.
- Align the panels. Place the panels together and make sure the edges line up.
- Join the panels. If you sew a clear bag, use a heavy-duty machine and strong thread. For glue, cover the edges with adhesive and press firmly. For heat sealing, follow the tool’s instructions for temperature and airflow.
Tip: Always follow the instructions from the glue or heat sealer manufacturer. This helps you get strong seams and avoid mistakes.
Let’s compare sewing and no-sew methods for your utility tote bag:
| Method | Advantages | Disadvantages |
|---|---|---|
| Traditional Sewing | 40% higher seam strength, 93.75% seam efficiency | Less stiffness compared to ultrasonic welding |
| Ultrasonic Welding | Increased bending stiffness, enhanced durability | 56% seam efficiency, lower mean seam strength |
If you want a strong and flexible clear vinyl tote bag, sewing is a great choice. If you need extra stiffness or want a quick no-sew method, try heat sealing or glue.
Gluing and Heat Sealing Methods
You can make a utility tote without sewing. Glue and heat sealing are easy ways to join panels for a clear vinyl tote bag. Here’s how you do it:
- Use a strong PVC adhesive. Spread the glue along the edges, press the panels together, and hold them until the glue sets.
- Try heat sealing. Overlap the panels, use a heat sealer or iron (with parchment paper), and press the edges together. Follow the tool’s instructions for best results.
Note: Test your glue or heat method on a scrap piece first. This helps you avoid ruining your main panels.
Sewing Machine Tips
If you want to sew a clear bag, you need a heavy-duty sewing machine. Use a size 16 or 18 needle and strong polyester thread. Set your machine to a longer stitch length. This keeps the vinyl from tearing. Go slow and steady. If the vinyl sticks to the machine, place tissue paper under the panels and tear it away after sewing.
Callout: Sewing gives your utility tote bag strong seams and a professional look. You can watch a video tutorial to see the process step by step.
Attaching Handles
Handles make your utility tote easy to carry. You can use PVC strips, pre-made handles, webbing, rope, or even old belts. Pick handles that feel good in your hand and match your style.
PVC Strips vs. Pre-Made Handles
PVC strips work well if you want your handles to match your clear vinyl tote bag. Cut strips from leftover vinyl and attach them to the top edges. Pre-made handles, like webbing or rope, add color and comfort. You can buy handles at craft stores or reuse straps from old bags.
Tip: Make sure your handles are long enough for easy carrying. Most utility tote bags use handles about 55-65cm long.
Reinforcing Handle Attachments
You want your handles to stay strong. Here are some ways to attach and reinforce handles:
- Sew the handles with a box stitch or a square with an ‘X’ in the middle. This gives extra strength.
- Use grommets. Punch holes in the bag, insert metal grommets, and thread the handles through.
- Try rivets. Rivets add strength, especially for heavy straps.
- Use clips and rings. These let you remove or adjust the handles.
- Always reinforce the attachment spots. Add extra vinyl or fabric patches behind the handles to prevent tearing.
Callout: Reinforcing the handle spots helps your utility tote last longer and carry more weight.
Finishing Edges and Seams
You want your clear vinyl tote bag to look neat and feel smooth. Finishing the edges and seams prevents fraying and splitting. Here are some easy ways to finish your utility tote:
Edge Binding Options
- Use bias tape. Wrap it around the edges for a clean finish.
- Try iron-on hem tape. Place the tape between layers and press with a hot iron.
- Sew a zigzag stitch along the edge. This keeps the vinyl from fraying.
- Overcast the edges by hand for a finished look.
- Apply Fray Block. Dab it along the edges to stop fraying.
- Make French seams. Enclose the raw edges for a strong and professional finish.
Note: Bias tape and French seams give your clear vinyl tote bag a polished look. They also protect the edges from wear.
Smoothing Rough Edges
After you finish the seams, check for rough spots. Trim any uneven edges with sharp scissors. If the vinyl feels sharp, sand it lightly with fine-grit sandpaper. You can also use a lighter or heat tool to gently melt the edge, but be careful not to burn the material.
Tip: Smooth edges make your utility tote comfortable to carry and help it last longer.
Now you know how to make a pvc tote bag and how to make a clear vinyl tote bag with strong seams, sturdy handles, and neat edges. This tutorial gives you all the steps you need to assemble your utility tote bag. If you want more help, watch a video tutorial or ask a friend to join you. Your clear vinyl tote bag will look great and work well for everyday use!
Adding Closures & Customization
You’ve finished the main steps for your clear vinyl tote bag, but now comes the fun part—making it your own! Closures and decorations add style and function. You can choose from several options to keep your tote secure and show off your personality.
Snaps, Zippers, Velcro
Closures help keep your things safe inside your tote. You can pick from snaps, zippers, or Velcro. Each one works well with PVC and clear vinyl tote bag projects. Here’s a quick look at how they compare:
| Closure Type | Compatibility with PVC Tote Bags |
|---|---|
| Zip Closure | Yes |
| Velcro/Snap Closure | Yes |
If you want to add a zipper, follow these best practices to make sure it lasts:
- Choose a zipper that fits the width of your tote’s opening.
- Place the zipper face down along the top edge and use clips to hold it.
- Use a zipper foot on your sewing machine. Sew slowly and keep the zipper straight.
- Test the zipper by opening and closing it a few times.
- Mark where you want the handles.
- Punch holes with an eyelet tool at each spot.
- Add eyelets and press them until they snap tight.
- Thread ribbon, rope, or webbing through the eyelets and tie knots to secure.
Snaps and Velcro are easy to attach. You can sew them on or use strong adhesive. These closures work great if you want a quick way to open and close your tote.
Tip: Always test your closure on a scrap piece first. This helps you avoid mistakes on your finished clear vinyl tote bag.
Decorative Elements: Paint, Stickers, Fabric
Now it’s time to get creative! You can decorate your tote with paint, stickers, or fabric patches. Many people love to add minimalist music player designs, inspirational quotes, or retro styles. Some even draw cute food illustrations or show support for their favorite sports teams.
| Decorative Element | Description |
|---|---|
| Minimalist Music Player | Add sheet music or musical symbols for a personal touch. |
| Inspirational Quotes | Use quotes that inspire you or reflect your values. |
| Retro Styles | Try vintage colors and fonts for a nostalgic look. |
| Food Illustrations | Draw or stick on fun food images, perfect for grocery totes. |
| Sports Team Support | Show off your favorite team with custom logos or colors. |
You can use acrylic paint for bold designs. Stickers and patches are easy to apply and change whenever you want a new look. Fabric accents add texture and color.
Callout: Let your imagination run wild! Your tote can match your mood, your outfit, or even the season.
Personalizing with Pockets or Charms
Personal touches make your tote stand out. You can sew extra pockets inside or outside for keys, phones, or snacks. If you want a no-sew option, use clear adhesive to attach pockets. Charms and keychains add a playful vibe. Clip them onto the handles or zipper pulls for a custom look.
You can also add fabric lining for a pop of color or extra softness. Try using leftover material from other projects. If you want to learn how to make a clear vinyl tote bag that’s truly unique, experiment with different trims, tassels, or even iron-on patches.
Note: Personalizing your tote makes it special. You’ll love carrying a bag that shows off your style and creativity.
Now you know how to finish your clear vinyl tote bag with closures and custom details. Whether you love sewing or prefer no-sew methods, you can create a tote that’s both useful and one-of-a-kind.
Tips for DIY PVC and Clear Vinyl Tote Bags
Cutting and Shaping Tricks
You want your tote bag to look sharp and clean. Start with a fresh, sharp pair of scissors or a rotary cutter. Dull blades can make jagged edges and ruin your panels. If you use a ruler, hold it steady and cut along the edge for straight lines. For curves, move slowly and turn the vinyl, not your scissors. This helps you get smooth shapes.
If you find the vinyl slipping, place a non-slip mat under your work. You can also use painter’s tape to hold the vinyl in place while you cut. When you finish cutting, check the edges. Trim any rough spots with small scissors. If you see sharp corners, round them off for a softer look and safer bag.
Tip: Practice on a scrap piece before you cut your main panels. This builds your confidence and helps you avoid mistakes.
Preventing Sticking and Warping
Clear vinyl and PVC can stick to your sewing machine or even to itself. You can stop this by placing a sheet of tissue paper under the vinyl when sewing. Tear it away after you finish. If your presser foot sticks, try a Teflon foot or add a strip of painter’s tape to the bottom.
Warping is another problem you might face. You can prevent this with a few simple steps:
- Keep your PVC sheets in a cool, stable place. Heat and sunlight can make them bend or curl.
- Use UV-protective sprays or coatings if your bag will be in the sun a lot.
- Apply a waterproof sealant to block moisture and keep the shape strong.
- Store your vinyl flat and don’t stack heavy things on top.
These tricks help your diy tote bag keep its shape and look new for a long time.
Cleaning and Maintenance
PVC and clear vinyl are easy to clean. Wipe your tote bag with a damp cloth and a little mild soap. Dry it with a soft towel. Avoid harsh cleaners or scrubbing pads. They can scratch the surface and make it look cloudy.
If you spill something inside, clean it up right away. For sticky spots, use a bit of rubbing alcohol on a cotton ball. Always test on a small area first. If your bag gets wrinkled, lay it flat in a warm room. The wrinkles will relax on their own.
Callout: Take care of your tote and it will last for years. Regular cleaning keeps it looking shiny and fresh.
With these tips, you can handle cutting, sewing, and caring for your clear vinyl tote bag like a pro. Your diy project will turn out great, and you’ll enjoy using your custom bag every day!
Troubleshooting & Inspiration
Common Issues and Solutions
You may face some problems when making your clear vinyl tote bag. Don’t worry! Most issues are easy to fix. Look at this table for common problems and what you can do:
| Issue | Suggested Solution |
|---|---|
| Low UV Resistance | Use newer PVC materials with better UV resistance. |
| Lack of Privacy | Put small bags or compartments inside your tote for privacy and organization. |
| Environmental Impact | Pick PVC from trusted brands that follow safety rules to help the environment. |
| Limited Comfort | Change your design to make it more comfortable, like using softer materials or adding padding. |
| Prone to Scratches | Keep sharp items in pouches or separate compartments so they don’t touch the PVC surface. |
Tip: If your bag feels stiff or hurts your hand, add a fabric lining or padded handles. This makes carrying your tote much easier.
Repairing Tears or Loose Handles
Sometimes your clear vinyl tote bag gets a tear or the handles start to loosen. You can fix these problems without much trouble. For small tears, use clear vinyl glue. Clean the area, apply the glue, and press the edges together. Let it dry completely before using the bag again.
If a handle comes loose, reinforce the spot with extra vinyl or fabric. Sew a patch over the area or use strong adhesive. For bigger repairs, you might need to replace the handle. Cut a new strip and attach it using the same method you used before.
Callout: Always check your bag for weak spots. Fixing small issues right away keeps your tote strong and ready for anything.
Customization Ideas and Accessories
You can turn your clear vinyl tote bag into a work of art. DIY communities love to share creative ideas. Here are some fun ways to customize your bag:
- Fabric paint for hand-painted designs
- Embroidery for custom stitching
- Iron-on transfers for easy application
- Screen printing for professional-looking designs
- Stenciling for precise patterns
- Heat transfer vinyl (HTV) for durable designs
- Monogramming for personalized touches
- Nature-inspired designs for a botanical theme
- Abstract art for a modern look
- Quotes and sayings for motivational messages
- Holiday-themed bags for festive occasions
You can add charms, keychains, or even pockets for extra flair. Try mixing different styles to match your mood or the season. Your tote can be bold, simple, or anything in between.
Note: Customizing your clear vinyl tote bag makes it unique. You get a bag that fits your personality and stands out wherever you go.
Conclusion
You now know how to make a clear vinyl tote bag and create a utility tote bag that fits your style. Making a utility tote can be fun and easy. You can try different ways to build your utility tote bag. If you make a mistake, you learn and get better. Every utility tote you finish shows your creativity. Share your utility tote bag ideas or ask questions below. If you want custom or bulk utility tote bag orders, we offer OEM and ODM services. Try making your own utility tote today and see how to make a clear vinyl tote bag your new favorite project!
FAQ
Can I make a PVC tote bag without a sewing machine?
Yes! You can use strong glue or a heat sealer instead of sewing. These no-sew methods work well for beginners. Just follow the instructions for your adhesive or tool.
What thickness of PVC or vinyl should I use?
Most people choose 12-gauge or 16-gauge clear vinyl. These thicknesses are strong but still easy to cut and shape. Thicker vinyl can be harder to work with.
How do I keep my tote bag from turning yellow?
Store your bag away from sunlight and heat. Use PVC or vinyl that resists yellowing. Some brands offer UV-protected materials. Always check the label before you buy.
Can I wash my PVC tote bag in the washing machine?
No, you should not put your PVC tote bag in the washing machine. Wipe it clean with a damp cloth and mild soap. Let it air dry for best results.
What should I do if my bag gets wrinkled?
Lay your bag flat in a warm room. The wrinkles will relax on their own. You can also use a hair dryer on low heat, but keep it moving to avoid melting the vinyl.
Are PVC tote bags safe for kids to use?
Yes, as long as you use non-toxic, BPA-free PVC or vinyl. Always check the product label. Make sure there are no sharp edges or small parts that could be a choking hazard.