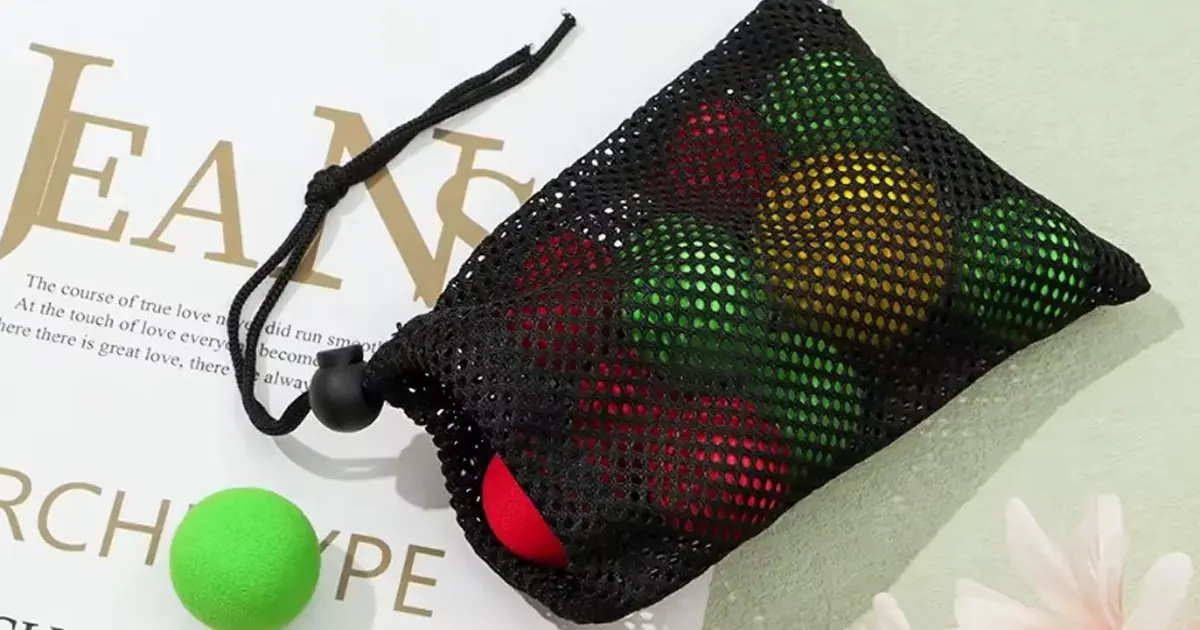
A mesh drawstring bag is a simple and useful project that combines function with style. It is lightweight, reusable, and perfect for everyday storage, shopping, travel, or organizing small items. This guide will walk you through each step of the process, from preparing your materials to finishing the final details. With a little time and a few sewing tools, you can make a bag that is both practical and easy to personalize.
Key Takeaways
- Get all your materials before you begin. You will need mesh fabric, thread, scissors, and a sewing machine.
- Pick eco-friendly fabric like cotton. You can also use synthetic fabric like RPET because it lasts longer. Each fabric has good points.
- Use the best tools for cutting and pinning mesh. A rotary cutter and fine pins help you cut straight edges.
- Choose the right needle and thread. A ballpoint needle is good for stretchy mesh. Polyester thread makes strong seams.
- Finish the bag’s edges so they do not fray. Use a zigzag stitch or a serger to make the bag look neat.
- Follow each step in the tutorial closely to make your bag. Each step is important for a good result.
- Make your bag special by using different fabrics or adding labels. This shows your style and makes the bag useful.
- Take care of your bag by washing it often. Store it the right way to help it last longer.
Materials to Make Reusable Produce Bags
Get your materials before you start sewing. The right fabric and tools make things easier. They also help your bag last longer.
Mesh Fabric Types
There are a few mesh types you can use. Each one is good for different reasons. Pick the one that works best for you.
Cotton Netting
Cotton netting is a top pick for eco-friendly bags. It feels soft and bends easily. Cotton comes from plants that grow again and again. This mesh breaks down over time, so it won’t fill up landfills. It does not make microplastics. That means it is safe for nature. But, growing cotton uses a lot of water. Think about this if you want the greenest choice.
- Cotton is a natural fiber and renewable.
- Cotton mesh produce bags break down over time, so they won’t add to landfill waste.
- These bags don’t contribute to plastic pollution.
- They’re safe for ecosystems since they don’t shed microplastics.
- Cotton farming does use a lot of water, so consider this if you want the most sustainable option.
Synthetic Mesh
Synthetic mesh, like nylon and RPET, is very strong. It is light, dries fast, and does not tear easily. Some types are made from recycled things, which helps cut down on waste. Here are some tough mesh fabrics:
| Fabric Type | Features |
|---|---|
| Hemp | Very strong, mold-resistant, antibacterial, biodegradable |
| Bamboo Fiber | Smooth, lightweight, antimicrobial, hypoallergenic, renewable |
| RPET | Made from recycled materials, water-resistant, strong, washable |
| Nylon | High tensile strength, lightweight, quick drying, tear-resistant |
Tip: Want a bag that lasts a long time? Try RPET or nylon mesh. If you want a bag that breaks down, use cotton or hemp.
Drawstring Choices
The drawstring keeps your bag shut and makes it easy to hold. You can use different materials for it. Here is a quick look:
| Material | Advantages |
|---|---|
| Polyester | Affordable, durable, resists mildew, easy to clean, dries quickly |
| Mesh Fabric | Breathable, lightweight, lets you see what’s inside |
- Polyester drawstrings are good for daily use and sports bags.
- Mesh fabric drawstrings are nice if you want more air flow.
Tools Needed
You do not need special tools to make a mesh bag. Here is what you need:
- Two pieces of mesh or cotton fabric (about 12” x 15” for a medium bag)
- Matching thread
- Scissors or rotary cutter
- Pins
- Safety pin (for threading the drawstring)
- Cord or ribbon for the drawstring
- Sewing machine
Note: You can make bags in many sizes. Small bags (5 × 7 in) are good for herbs. Big bags (18 × 24 in) are good for large produce.
Now you have your materials for reusable produce bags. Pick the fabric and drawstring you like. Gather your tools before you start.
Tips for Working with Mesh
Cutting Mesh
Cutting mesh can feel tricky at first, but you can get clean, straight edges with the right tools and a little patience. Mesh fabric likes to shift around, so you want to keep it steady while you cut. Here are some tips to help you out:
- Use a rotary cutter and a self-healing mat. This combo gives you sharp, precise cuts and helps prevent jagged edges.
- Place pattern weights on your mesh instead of pinning. Weights keep the fabric flat and stop it from sliding.
- Cut one layer at a time. If you try to cut several layers, the mesh might shift and your pieces won’t match up.
Take your time with this step. Clean edges make sewing much easier later on.
Pinning and Handling
Mesh fabric can slip and stretch, so you need to secure it before you sew. Regular pins sometimes leave holes or marks, so try these ideas:
- Use fine silk pins or Wonder Clips. Place them within the seam allowance so any tiny holes won’t show.
- Space your pins or clips about 1-2 inches apart. This keeps the mesh from bunching up or moving.
- Try hand basting if you want extra control. A few quick stitches will hold everything in place until you sew.
- For delicate or waterproof mesh, use fabric clips instead of pins. Clips won’t poke holes or snag the fabric.
Handle your mesh gently. Don’t pull or stretch it, or your bag might end up the wrong shape.
Needle and Thread Selection
Choosing the right needle and thread makes sewing mesh much smoother. You want a needle that glides through the fabric without snagging, and a thread that holds strong. Here’s a quick guide:
| Needle Type | Size | Thread Material |
|---|---|---|
| Ballpoint needle | 70/10 | Polyester |
| Universal needle | 70/10–80/12 | Polyester |
A ballpoint needle works well for stretchy mesh, while a universal needle is great for most other types. Polyester thread is strong and flexible, so your seams will last.
Tip: Always test your needle and thread on a scrap piece of mesh before you start your project. This helps you avoid skipped stitches or puckering.
Preventing Fraying
When you work with mesh fabric, you might worry about the edges coming apart. The good news? Mesh doesn’t fray as much as other fabrics. Sometimes, you can even leave the edges unfinished, and your bag will still look neat and hold up well. But if you want your bag to last longer or just like a polished look, you have a few easy ways to keep those edges tidy.
Let’s talk about some simple tricks you can use:
- Sew a zigzag stitch along the edge. Most sewing machines have a zigzag setting. Run this stitch right along the raw edge of your mesh. It helps lock the threads in place and keeps the edge from unraveling.
- Use a serger if you have one. Sergers trim and wrap the edge with thread at the same time. This gives your bag a professional finish and makes the seams extra strong.
- Try folding the edge under before you sew. Fold the raw edge over once or twice, then stitch it down. This method hides the rough edge inside the seam and adds strength.
Tip: If you want a super quick project, you can skip finishing the edges. Mesh fabric often holds up just fine without extra steps. But if you plan to wash your bag a lot or carry heavy items, finishing the edges is a smart move.
You can also keep your mesh bag looking fresh by taking care of it after you sew. Dirt and tiny bits can get stuck in the holes of the mesh. If you brush your bag with a soft-bristled brush now and then, you’ll help prevent pilling and keep the fabric smooth. This simple habit keeps your bag looking new and helps the mesh last longer.
Here’s a quick checklist for keeping mesh edges neat:
- Use a zigzag stitch or serger for a clean finish.
- Fold and sew the edge if you want extra strength.
- Leave the edge raw for a fast, easy bag—mesh usually won’t fray much.
- Brush your bag gently to keep it clean and smooth.
You get to choose the method that fits your style and how you’ll use your bag. Whether you want a quick project or a bag that lasts for years, these tips will help you make a mesh drawstring bag you’ll love.
How to Make a Mesh Drawstring Bag: Tutorial Steps
Ready to dive in? This part of the tutorial will walk you through how to make a mesh drawstring bag from start to finish. You’ll find each step clear and easy to follow. Let’s get started!
Preparing Materials
Before you begin, lay out all your supplies. This helps you stay organized and makes the process smoother. Here’s what you should do:
- Wash and dry your mesh and cotton fabrics. Prewashing helps prevent shrinking later and makes the fabric softer.
- Iron your cotton fabric if it’s wrinkled. Smooth fabric is easier to cut and sew.
- Cut your mesh and cotton pieces to the size you want. For a standard bag, try 12” x 15”. You can adjust the size if you want a bigger or smaller bag.
- Gather your thread, pins, scissors, safety pin, and drawstring cord.
Tip: Prewashing mesh fabric makes it more flexible and easier to handle during sewing.
Now you’re set up for success. You’re ready to move on to the next step in this how to make a mesh drawstring bag tutorial.
Stitching Mesh and Cotton
This step joins your mesh and cotton pieces. You’ll create the main body of your drawstring bag. Follow these steps for a neat finish:
- Place your mesh fabric on a flat surface. Put the cotton fabric on top, matching the right sides together along the longest edge.
- Pin the edges to keep them from slipping. Use fine pins or fabric clips. Space them about every 2 inches.
- Set up your sewing machine with a ballpoint or universal needle. These glide through mesh and cotton without snagging.
- If your mesh is very delicate, place a strip of tissue paper under it. This stops the mesh from getting caught in the machine.
- Stitch the two layers together with a 1/4-inch seam allowance. Go slow and steady for straight seams.
- Remove the pins as you sew. Don’t sew over them.
- Fold the bag in half lengthwise, right sides together. Pin the sides and bottom.
- Mark a 1-inch opening about 1 inch from the top edge. You’ll need this for the drawstring channel later.
- Sew down the side and across the bottom. Leave the 1-inch opening unstitched.
Note: You can use an overlocking stitch for extra-strong seams. It works better than a zigzag stitch for joining mesh and cotton.
You’ve finished the main body. You’re halfway through learning how to make a mesh drawstring bag!
Creating Drawstring Channel
The drawstring channel lets you open and close your bag with ease. Take your time here for a clean look.
Folding and Ironing Hem
Start by making the top edge neat and ready for the channel:
- Turn the top raw edge of the cotton down by 1/4 inch to the wrong side. Press with an iron.
- Fold it down again, this time by 2 inches. Press again to hold the fold in place.
Tip: Pressing each fold helps keep your fabric flat and makes sewing easier.
Forming Channel
Now you’ll sew the channel for your drawstring:
- Stitch close to the first folded edge (the 1/4-inch fold) to secure it.
- Fold the top edge under by another 1 cm and press. Then fold under by 4 cm and press again.
- Stitch along the bottom folded edge to create the channel. Make sure you don’t sew the channel shut—leave both ends open so you can thread the drawstring through.
You’ve now created a neat channel for your drawstring. This step is key in how to make a mesh drawstring bag that works well and looks great.
You’re almost done! The next part of the tutorial will show you how to insert the drawstring and finish your bag.
Inserting Drawstring
You’re almost done! Now it’s time to add the drawstring so you can open and close your mesh bag with ease. This part is simple, but it makes your bag super handy. Let’s walk through the steps together.
Using Safety Pin
A safety pin is your best friend for this step. It helps you guide the drawstring through the channel you just made. Here’s how you do it:
- Cut your cord or ribbon. Make sure it’s about twice as long as the width of your bag. This gives you enough length to tie a knot and pull the bag closed.
- Attach the safety pin to one end of the drawstring. Pinch the fabric of the cord and close the pin tightly.
- Push the safety pin into one end of the channel. Use your fingers to feel the pin inside the fabric.
- Gently work the safety pin through the channel. Bunch up the fabric, then pull the pin forward. Keep going until the pin comes out the other side.
- Pull the rest of the drawstring through. Remove the safety pin.
Tip: If your drawstring gets stuck, wiggle the safety pin back and forth. This helps it slide past any tight spots.
You don’t need any fancy sewing tools for this step. A simple safety pin does the trick!
Tying Ends
Now you need to finish the ends of your drawstring so they don’t slip back into the channel. Here’s what you do:
- Hold both ends of the drawstring. Make sure they are even.
- Tie a simple knot at each end. This keeps the cord from fraying and makes it easier to grab.
- If you want, tie the two ends together in a bow or double knot. This adds a cute touch and keeps your bag closed tight.
If you used a synthetic cord, you can melt the tips with a lighter to stop fraying. Just be careful and ask an adult for help if you’re not sure how to do this safely.
Note: If you want a double drawstring, repeat the steps with a second cord starting from the opposite side. This lets you pull both sides to close the bag even tighter.
You’ve now finished the main steps of making your mesh drawstring bag. Give the drawstring a tug and watch your bag close up! You did all the sewing and finishing yourself. Doesn’t that feel great?
Customizing Your Bag
You can make your mesh drawstring bag stand out with a few creative touches. Customizing your bag lets you show off your style and make it fit your needs. Let’s explore some fun ways to personalize your bag.
Decorative Options
Want your bag to look unique? You have lots of choices for decoration. Here are some ideas you can try:
- Choose special fabrics like organza if you want a lightweight and elegant look.
- Pick from a wide range of Pantone colors. You can match your favorite shade or use color swatches to find the perfect fit.
- Add your own designs or logos using printing techniques. Silk screen printing, heat transfer printing, woven labels, and digital printing all work well for mesh bags.
Tip: Try mixing different colors or prints to make your bag pop. You can even add a fun pattern or your initials.
Adjusting Size
Sometimes you need a bigger bag for groceries. Other times, you want a smaller one for snacks or small items. You can change the size of your mesh bag in a few easy ways:
- Fold and tuck the sides inward. This trick makes your bag smaller for a short time.
- Sew along the sides to make the bag narrower. Use a zigzag stitch to keep the mesh from fraying.
- Attach elastic or a cord around the top or bottom. This lets you cinch the bag in and create a smaller shape.
If you want a bag for different uses, try making a few in different sizes. You can use one for produce and another for sports gear.
Adding Labels
Labels help you organize your bags and add a professional touch. You can pick from several types, each with its own style and way to attach. Here’s a handy table to help you choose:
| Label Type | Description | Attachment Method |
|---|---|---|
| Woven Labels | Made by weaving threads, durable and high-quality. | Sewn into the bag |
| Printed Labels | Designs printed on fabric, cost-effective for complex designs. | Sewn or heat-pressed |
| Leather Labels | Luxury look, customizable through various methods. | Sewn or heat-pressed |
| Wash Care Labels | Provide cleaning instructions for maintenance. | Sewn into the bag |
| Rubber Labels | Waterproof and abrasion-resistant, ideal for outdoor use. | Sewn or attached with adhesive |
| Metal Labels | Premium feel, often electroplated or engraved. | Sewn or attached with screws |
| Hang Tags | Decorative tags that hang from the bag, made from various materials. | Not sewn, attached with string or loop |
You can sew a label inside your mesh bag to show your name or add wash care instructions. Hang tags work well if you want to add a gift note or a logo.
Adding a label makes your bag easy to identify and gives it a polished look.
Customizing your mesh drawstring bag is simple and fun. Try different decorations, adjust the size, or add a label to make your bag truly yours.
Troubleshooting & Care
Fixing Frayed Edges
Frayed edges can make your mesh drawstring bag look messy. You can fix them quickly with a few easy tricks. Here’s what you can try:
- If you see fraying on a synthetic drawstring, grab a lighter. Gently melt the end of the cord. The heat seals the fibers and stops more fraying. Just be careful and work in a safe spot.
- For cotton or other non-synthetic cords, clear nail polish works well. Brush a little on the frayed end. Let it dry. This keeps the threads together.
- Sometimes, the drawstring gets too damaged. You can replace it. Attach a safety pin to the new cord. Thread it through the channel, pulling out the old one as you go.
Tip: If you notice fraying on the bag itself, use a zigzag stitch or a serger along the edge. This adds strength and keeps the mesh from unraveling. You can do this by hand or with your sewing machine.
Adjusting Drawstrings
Drawstrings can slip out or get stuck. You can fix these problems in just a few steps.
- If your drawstring slips inside the channel, use a safety pin to pull it back out. Attach the pin to the end of the cord and guide it through the channel.
- When the drawstring feels too tight, check for knots or twists inside the channel. Straighten them out with your fingers.
- If the cord breaks or wears out, replace it with a new one. Follow the same steps you used when first making your bag.
Sometimes, you might want a double drawstring for a tighter close. Just thread a second cord through the channel from the opposite side.
Washing and Storing
Taking care of your mesh drawstring bag helps it last longer. Good care keeps it looking fresh and strong.
- Wash your bag every 3–5 uses at home. If you use it for work or in a busy place, wash it after each use.
- Use warm water and a mild detergent. Choose gentle machine cycles or hand-washing to protect the mesh.
- After washing, take the bag out of the washer right away. This stops moisture from causing problems.
- Air dry your bag in a well-ventilated spot. Avoid high heat from dryers. If you must use a dryer, pick a low-temperature setting.
- Rinse the bag with clean water every few washes. This keeps the mesh breathable.
- Check the seams and closures often. If you see wear, fix it with a quick sewing repair or replace the part.
- Store your bag in a dry place. This prevents mold and keeps odors away.
Quality mesh or nylon bags can last over 50 washes with good care. Some heavy-duty or eco-friendly bags last even longer—up to 200 cycles!
With these simple steps, you can keep your mesh drawstring bag in great shape for a long time.
Conclusion
You now know how to make a mesh drawstring bag that fits your style and needs. Making your own bag saves money, helps the planet, and lets you get creative. Want to order in bulk or need custom designs? As a professional bag manufacturer, we also provide OEM and ODM services for bulk orders and custom bag designs, helping turn ideas into high-quality products. From sample development to production, quality inspection, packaging, and warehousing, we offer reliable support backed by manufacturing experience. If you are looking for custom mesh bags or wholesale bag solutions, feel free to contact us and share your ideas.
FAQ
Can I sew a mesh drawstring bag by hand?
Yes, you can sew it by hand. Use small, tight stitches for strong seams. It might take longer than using a machine, but you’ll still get a sturdy bag.
What size should I make my bag?
You get to choose! For produce, try 12” x 15”. For snacks or small items, go smaller. Want to carry sports gear? Make a bigger bag.
How do I stop the mesh from stretching while sewing?
Place pattern weights or clips on the mesh. Sew slowly and avoid pulling the fabric. This helps keep the mesh flat and stops it from stretching out of shape.
Can I wash my mesh bag in the washing machine?
Yes, you can. Use a gentle cycle with mild detergent. Air dry your bag to keep it in good shape. Avoid high heat from the dryer.
What can I use instead of a drawstring cord?
- Ribbon
- Twill tape
- Shoelace
- Paracord
Pick something strong and easy to thread through the channel. You can even use a strip of fabric.
Is mesh safe for food storage?
Most mesh bags work well for fruits and veggies. Choose food-safe materials like cotton or RPET mesh. Always wash your bag before first use.
Can I decorate my mesh bag?
Absolutely! Add patches, fabric paint, or labels. Try different colors or prints. You can make your bag as simple or as fancy as you like.