You want to know how to make a leather sling bag at home? You just need to follow clear instructions, grab your template, cut the leather, sew the pieces, and finish the edges. This tutorial makes how to make a leather sling bag super easy, even if you have never tried it before. You will see how to make a leather sling bag step by step. How to make a leather sling bag becomes simple when you use the right tools. If you follow how to make a leather sling bag with patience, you will create a stylish leather sling bag you can use every day.

Ready to get started? Follow how to make a leather sling bag and see how your skills grow!
Key Takeaways
- Pick good leather like full-grain or top-grain. This makes your bag last longer and look nice.
- Get the tools you need before you start. You need a rotary punch, skiving knife, and leather burnisher.
- Use a PDF template to help you cut the leather right. This makes sure the pieces fit together well.
- Cut the leather slowly so you do not make mistakes. This helps you get smooth and neat edges.
- Use a burnisher and edge paint to finish the edges. This makes your bag look shiny and professional.
- Use the saddle stitch to sew the seams. This makes your bag strong and helps it last longer.
- Add hardware like D-rings and rivets to your bag. This makes your bag work better and look cool.
- Take care of your leather often. This keeps it soft, strong, and looking new.
Materials & Tools Tutorial
Before you start your leather sling bag, you need to gather the right materials and tools. This tutorial will help you pick the best supplies for your project. You will also see how a sling backpack free pattern makes the process much easier.
Leather Selection
Choosing the right leather is the first step in this tutorial. You want your leather sling bag to last a long time and look great. Here’s a quick guide to the most common types of leather you might use for a sling backpack free pattern:
| Leather Type | Durability Rating | Description |
|---|---|---|
| Full-Grain Leather | Highest | Most rugged and long-lasting, develops a beautiful patina, resistant to moisture. |
| Top-Grain Leather | High | Good balance of durability and aesthetics, can withstand regular use, develops a charming patina. |
| Genuine Leather | Moderate | More affordable, but less durable than full-grain and top-grain, may not last as long. |
| Bonded Leather | Lowest | Budget-friendly but sacrifices durability, prone to peeling or cracking over time. |
If you want your leather sling bag to last for years, go for full-grain or top-grain leather. These types work well with any sling backpack free pattern. Genuine leather is okay for practice, but it may not hold up as well. Bonded leather is best for quick projects or if you want to save money.
Essential Tools
You don’t need a huge toolbox for this tutorial, but you do need some basic tools. Here’s what you should have ready before you start your sling backpack free pattern:
- Rotary Punch/Punch Set: Makes clean holes for stitching and hardware.
- Skiving Knife: Thins the leather where needed.
- Straight Utility Knife: Cuts leather pieces and trims edges.
- Strap Cutter: Cuts even straps for your bag.
- Tempered Cutting Glass: Gives you a smooth surface for skiving.
- Leather Burnisher: Smooths out the grain and creases.
- Leather Folder/Creaser: Makes sharp folds and creases.
- Cutting Mat: Protects your table and keeps your tools sharp.
- Leather Roughing Tool: Prepares edges for glue.
- Leather Thickness Gauge: Checks how thick your leather is.
- Thread Burner: Seals thread ends so they don’t unravel.
- Ruler: Helps you measure and cut straight lines.
These tools make your sling backpack free pattern look neat and professional. You can find most of them at craft stores or online.
Optional Hardware
You can add hardware to your leather sling bag to make it more useful and stylish. Here are some extras you might want for your sling backpack free pattern:
- D-rings: Attach the strap to your bag.
- Rivets: Add strength to stress points.
- Clasps or buckles: Make the strap adjustable or add a closure.
- Decorative studs: Give your bag a unique look.
Tip: Start simple if this is your first tutorial. You can always add more hardware as you get better at using a sling backpack free pattern.
Now you have everything you need to begin your leather sling bag. The next part of the tutorial will show you how to use your sling backpack free pattern to mark and cut your leather.
How to Make a Leather Sling Bag: Design & Template
Downloading a PDF Template
You want your leather sling bag to look neat and fit together perfectly. The best way to do this is to use a full-scale PDF template. Many makers share a free bag pattern online, so you can print it at home. When you use a sling bag sewing pattern, you save time and avoid mistakes. Just print the template at 100% scale. Check that the measurements match the guide on the pattern before you start. This step helps you get the right size for your sling bag pattern.
Tip: Always double-check your printer settings. If you print at the wrong scale, your pieces will not fit.
Pattern Marking
Now you have your template ready. It’s time to mark your pattern on the leather. Here’s how you can get clean and precise lines every time:
- Start with a sketch. Lay out your pattern pieces on paper first. This helps you see how everything fits.
- Use a flexible ruler or curve. Trace the edges of your pattern onto the leather. This keeps your lines smooth.
- Transfer the pattern to the leather. You can use carbon paper, a leather marking pen, or a scratch awl. Make sure your lines are clear but not too deep.
- Cut out the pattern pieces. Use a sharp knife or rotary cutter. Stay close to the lines for a perfect fit.
- Assemble the pieces. Lay them out in order so you don’t lose track of any part.
You want your sling bag pattern to look sharp. Take your time with this step. If you rush, your leather sling bag might not look as clean.
Measuring Tips
Accurate measuring makes your project easier. You don’t want your pieces to be too short or too long. Here are some tools that help you measure your pattern the right way:
| Tool | Purpose |
|---|---|
| Ruler | Measures straight lines and keeps your cuts even. |
| Flexible measuring tape | Wraps around curves and odd shapes, perfect for a sling bag pattern. |
| Leather marking pen | Draws clear lines for cutting and stitching. |
| Pattern master | Helps you create curves and angles for your pattern. |
| Scratch awl | Makes small marks on the leather without tearing it. |
You can also use a tape measure for straps and pockets. A pattern master is great if you want to design your own shapes. Always measure twice before you cut. This saves you from wasting leather and keeps your sling bag pattern looking professional.
Note: If you follow these steps, your leather sling bag will come together smoothly. A good pattern is the secret to a great bag.
Cutting & Preparing Leather
Cutting Techniques
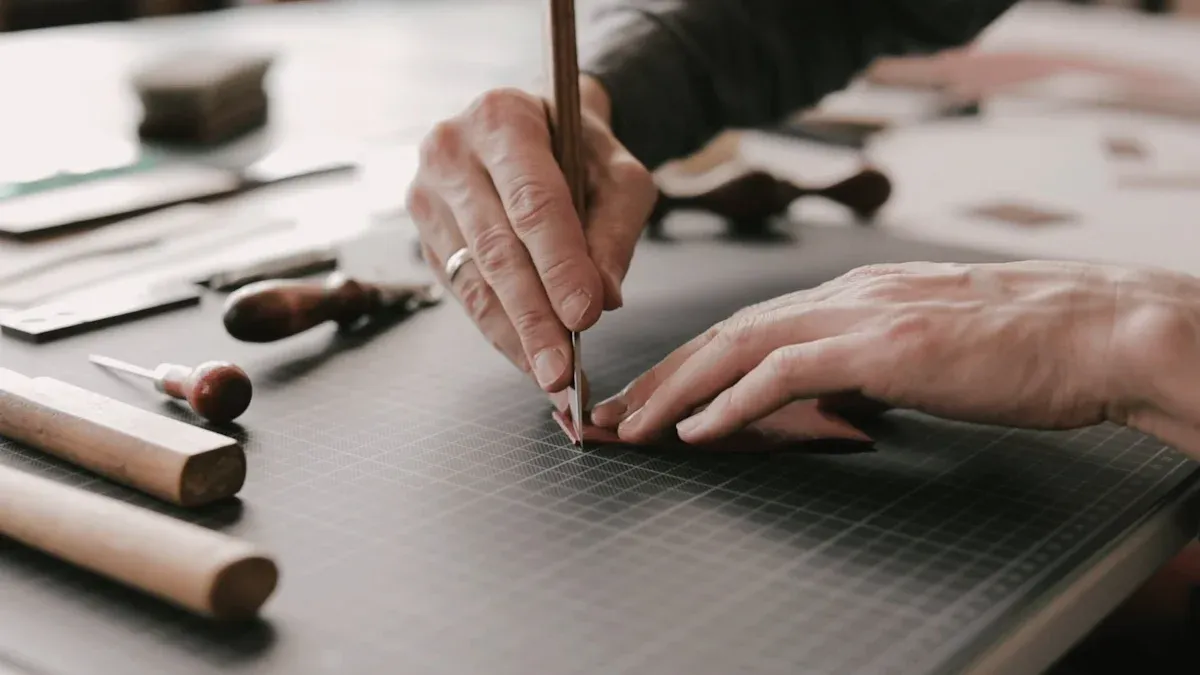
You have your pattern ready. Now it’s time to cut the leather. Place your pattern pieces on the leather and hold them steady. Use a rotary cutter or a sharp utility knife for clean lines. Always cut on a cutting mat to protect your tools and table. A quilting ruler helps you keep the pattern straight and even.
Many people rush the cutting process. This can lead to uneven edges and shapes that do not match the pattern. Take your time. Double-check the pattern placement before you cut. Here are some common mistakes to watch out for:
- Cutting too quickly and making jagged edges
- Not using a ruler, which leads to crooked lines
- Skipping the cutting mat and damaging your tools
- Not following the pattern closely
If you want your leather sling bag to look professional, slow down and follow the pattern carefully. Each piece should match the pattern exactly. This makes sewing much easier later.
Edge Finishing
After you cut the leather, the edges may look rough. You want smooth, polished edges for your leather sling bag. Start by using a leather burnisher to round and smooth the edges. You can also use sandpaper for a softer finish.
Handbag edge paint works great for sealing the edges. It stops the leather from fraying and keeps dirt and moisture out. The paint creates a smooth, even finish that bonds with the leather. Your bag will look polished and last longer. Edge paint also gives your leather sling bag a professional look and protects it from wear and tear.
Tip: Apply edge paint in thin layers. Let each layer dry before adding the next. This gives you the best results.
Punching Stitch Holes
Now you need to prepare the leather for sewing. Use your pattern to mark where the stitch holes go. A rotary punch or hole punch set works well for this step. Place the pattern on the leather and mark each hole with a scratch awl or pen.
Punch the holes along the marked lines. Keep the holes even and close to the edge, but not too close. This helps the sewing stay strong and neat. If you follow the pattern, your stitch holes will line up perfectly when you start sewing.
You are now ready to move on to the sewing part of your leather sling bag. Careful cutting, edge finishing, and punching make the next steps much easier. Your pattern guides you through each step, so trust the process and enjoy making your bag!
Sewing Tutorial: Assembly Steps
Ready to bring your leather sling bag to life? This sewing tutorial will walk you through every step, from lining up your pieces to finishing strong seams. You’ll see how to use the saddle stitch, which gives your bag a professional look and makes it last for years. Let’s dive into the instructions!
Aligning Pieces
Before you start sewing, you need to make sure every piece lines up perfectly. This step sets the stage for a neat finish and makes the rest of the tutorial much easier.
- Clean each leather piece and trim any rough or uneven edges. Smooth edges help your stitches look even.
- Mark your stitching line about 1/8 inch from the edge. Use a wing divider or an awl for this. This line keeps your stitches straight and strong.
- Punch holes along the marked line using a stitching chisel or awl. Even spacing is key for a tidy look.
- Place your pattern pieces together. Double-check that all the edges match up. Use binder clips or small clamps to hold everything in place. These won’t damage your leather.
Tip: Take your time with alignment. If your pieces shift, your leather sling bag might look crooked or feel weak.
Saddle Stitching
The saddle stitch is the star of this sewing tutorial. It’s a classic hand-stitching method that gives your bag extra strength. Many leatherworkers prefer this stitch because it holds up better than machine stitching and adds a unique touch to your project.
Here’s how you do it, step by step:
- Thread a leather needle onto each end of a long strand of waxed thread. Make sure you use UV-treated polyester or PTFE thread for the best durability. Thicker thread means stronger seams.
- Start with the hole closest to you. Push one needle through and pull until you have equal thread on both sides.
- Always start the next stitch with the same hand. For example, use your left hand first every time.
- Push the left needle through the next hole and pull the thread away from you.
- Insert the right needle into the same hole, behind the left thread.
- Pull both needles away from the leather to tighten the stitch. Keep your tension even for a neat look.
- Repeat this process, always starting with the same hand. This rhythm helps your stitches stay consistent.
- When you reach the end, backstitch by making two or three stitches over the last holes. This locks your seam in place.
- Trim the thread ends close to the leather with an x-acto knife for a clean finish.
Note: Hand-stitching with the saddle stitch makes your leather sling bag stronger and easier to repair later. It also gives your bag a one-of-a-kind look that machines can’t match.
Securing Seams
You want your seams to last, so don’t rush this part of the tutorial. Here’s how to make sure your sewing holds up:
- Always use strong, UV-resistant thread. Polyester or PTFE thread works best for leather projects.
- Keep your stitches tight but not so tight that they pucker the leather.
- Double-check your pattern as you sew. Make sure you follow the instructions for each section, especially around curves and corners.
- After finishing a seam, press it gently with a bone folder or your fingers. This helps the stitches settle into the leather.
- If you see any loose threads, use a thread burner to seal the ends. This stops unraveling and keeps your bag looking sharp.
Callout: The saddle stitch is stronger than most machine stitches. If you follow this sewing tutorial and use the right thread, your leather sling bag will last for years.
This sewing tutorial shows you how to align, stitch, and secure your seams for a professional finish. Stick to your pattern, follow the instructions, and enjoy the process. Your leather sling bag will look amazing and stand up to daily use!
Strap & Hardware
Attaching the Strap
You want your leather sling bag to feel strong and comfortable. Attaching the strap the right way makes a big difference. Here’s a simple way to do it:
- Measure the strap length and width based on your pattern. Add a little extra for seam allowance so the strap fits well and stays strong.
- Cut the strap from your leather. Make sure the edges are smooth and even.
- Fold the ends of the strap over a D ring or O ring. These rings help connect the strap to your bag and make it easy to adjust.
- Use a leather needle (at least size 18) and strong polyester or nylon thread. Stitch the folded end of the strap, keeping a small seam allowance. This helps the strap last longer.
- Check that the strap moves smoothly through the ring. If it feels tight, trim a little from the end and try again.
Tip: Always follow your pattern for strap placement. This keeps your bag balanced and comfortable to wear.
Adding D-Rings & Rivets
D-rings and rivets give your sling bag extra strength and style. You can add them with just a few tools and steps:
- Use a 1/8″ drive punch to make a hole in the leather where you want the D-ring.
- Slide the D-ring into place. Make sure it lines up with your pattern.
- Insert the rivet post through the hole. The post should stick out just a little—no more than 1/8 inch.
- Place the rivet cap on top.
- Use a leather working hammer or cobbler’s hammer to set the rivet. Tap gently so you don’t mark the leather.
D-rings make it easy to attach and remove the strap. Rivets hold everything together, even if you carry heavy items.
Note: Always double-check your pattern before you punch holes. This helps you avoid mistakes and keeps your bag looking neat.
Here’s a quick look at common hardware and how it affects your bag:
| Hardware Type | Description | Impact on Durability |
|---|---|---|
| D Ring | Shaped like a ‘D’, for detachable straps | Stable and easy to adjust |
| O Ring | Fully round, links straps flexibly | Adds adaptability and strength |
| Rectangle/Square Ring | Rectangle shape, keeps straps stable | Improves structure |
| Triangle Ring | Triangle shape, unique look | Adds style and durability |
| Oval Ring | Egg-shaped, for adjusting strap length | Custom fit, better use |
| O-Clip | Clip with a gate, easy to attach | Versatile, keeps design clean |
| Strap Hook | Pair of hooks, for shoulder straps | Functional and strong |
Handbag hardware does more than hold things together. It shapes how your bag looks and works every day.
Installing Clasps
Clasps keep your leather sling bag closed and your things safe. You can pick from many types, like magnetic snaps, buckles, or twist locks. Here’s how you can install a simple clasp:
- Mark the spot for the clasp on your pattern. Make sure it lines up with the flap and the body of the bag.
- Use a small punch or awl to make holes for the clasp prongs.
- Push the prongs through the leather and fold them flat on the inside.
- If your clasp needs screws, use a small screwdriver to tighten them.
- Test the clasp to make sure it opens and closes easily.
Callout: A good clasp adds both style and security to your bag. Always check your pattern before you install hardware.
You now know how to attach straps, add D-rings and rivets, and install clasps. These steps help your leather sling bag look great and last a long time. Follow your pattern, use the right tools, and enjoy the process!
Finishing Touches
Edging & Polishing
You want your leather sling bag to look smooth. It should feel nice when you hold it. Edging and polishing help a lot. First, cut the leather edge with a sharp knife. This makes the edge clean and matches your pattern. Next, wet the edge with water or burnishing solution. This helps the fibers stick together.
Now, use a burnisher. Move it back and forth on the edge. Press down firmly as you do this. You will feel the edge get warm. That means you are doing it right. The heat makes the fibers press together and shine. If you want your bag to look even better, use a friction tool. Try a wooden slicker or an agate burnisher. These tools make the edge smooth and shiny.
Here are some products you can use:
| Product Type | Description |
|---|---|
| Friction Tools | Wooden Slickers, Agate or Delrin Burnishers, Canvas / Denim Strips for polishing and finishing. |
| Edge Sealers & Paints | Acrylic Edge Sealers and Rubber-Based Sealers for sealing edges and enhancing durability. |
| Burnishing Compounds | Gum Tragacanth and Beeswax/Oil Blends for effective burnishing and protection of leather edges. |
Tip: Always follow your pattern when you trim and finish edges. This keeps your bag neat and professional.
Conditioning Leather
After you finish the edges, you need to condition the leather. Conditioning keeps your bag soft and strong. It helps your bag look new and last longer. Conditioning stops cracks and keeps the leather flexible.
Here are some benefits of conditioning:
| Benefit | Description |
|---|---|
| Preserves texture | Conditioning helps maintain the rich, supple texture of leather. |
| Prevents cracking | Regular conditioning prevents the leather from cracking and splitting. |
| Prolongs life | Conditioning extends the usable life of leather products. |
| Strengthens leather | Conditioning strengthens the leather, enhancing its durability against wear and tear. |
| Weatherproofing | Leather conditioners provide superior weatherproofing, protecting against moisture and stains. |
| Recommended product | Leather Cream made from natural ingredients like beeswax and seed oils is highly recommended. |
You can use Leather Cream, lanolin, or leather balms. Rub a little on the leather with a soft cloth. Let it soak in for a bit. Then, buff it with a clean cloth. Your bag will feel smooth and look great. Conditioning helps your pattern last for years.
Note: Conditioning leather is not just for looks. It protects your work and keeps your bag ready for anything.
Decorative Elements
Now you can add your own style! Decorative elements make your sling bag special. You can keep it simple or make it bold. Try stamping a design or adding a monogram. You can use colored edge paint too. Maybe sew on a patch or attach a charm.
If you want your pattern to stand out, use contrast stitching. Bright hardware can also look cool. Decorative studs or beads add a fun touch. Plan your decorations before you finish the bag. This way, you do not cover seams or hardware.
- Stamping: Press a design into the leather for a custom look.
- Painting: Use leather paint to add color or patterns.
- Stitching: Try a different thread color for extra flair.
- Hardware: Add decorative rivets, studs, or charms.
Callout: Your bag is your canvas. Try new things and make your pattern your own!
Troubleshooting & Tips
Common Mistakes
You might run into a few bumps when you make your first leather sling bag. Don’t worry—everyone does! Here are some common mistakes and how you can fix them:
- You feel confused by all the tools. You see adjustable groovers, overstitch wheels, and wonder if you need them. Start with basic tools and add more as you learn.
- You think you need expensive gear. You can use templates and simple cutters instead of buying everything at once.
- You skip reading the instructions. Always check each step before you start. This helps you avoid missing important details.
- Your stitching looks uneven. Slow down and use a ruler or wing divider to mark your lines. Punch holes evenly before sewing.
- Your edges look rough. Use a burnisher and edge paint to smooth them out. Wet the edge a little before you polish.
- You forget to check hardware placement. Double-check your pattern before you punch holes for D-rings or clasps.
Tip: If you make a mistake, you can usually fix it. Leather is forgiving. Take your time and follow the instructions closely.
Pro Tips for Beginners
Want your first leather sling bag to look awesome? Try these expert tips:
- Pick chrome tanned leather in 3-4 oz weight. It’s easy to work with and gives your bag a professional finish.
- Measure and cut with a scratch awl. This tool helps you get clean lines and sharp corners.
- Burnish every edge. Use a wooden slicker or canvas strip to make the edges smooth and shiny.
- Secure straps with rivets. Rivets add strength and a cool look to your bag.
- Use an industrial-grade sewing machine if you have one. If you sew by hand, follow the instructions for saddle stitching to make strong seams.
- Check for loose threads and small flaws. Trim and fix them before you finish.
Callout: You don’t need fancy tools to get started. Follow the instructions, use what you have, and your sewing will improve with practice.
Improving Results
You want your leather sling bag to last and look great. Try these advanced techniques to boost your results:
| Technique/Material | Description |
|---|---|
| High-quality leather | Premium leather makes your bag stronger and more stylish. |
| Proper stitching techniques | Strong sewing methods keep your bag together and looking neat. |
| Finishing processes | Use leather conditioner and buffing to protect and shine your bag. |
| Durable hardware | Stainless steel or brass hardware resists rust and adds a polished touch. |
You can also add extra steps to your process. Apply leather conditioner after you finish sewing. Buff the bag with a soft cloth to bring out the shine. Use rust-proof hardware for straps and clasps. These small changes make your bag last longer and look more professional.
Note: Keep learning new techniques. Every bag you make will look better than the last. Follow the instructions, practice your sewing, and enjoy the process!
Conclusion
You just learned how to make a leather sling bag step by step. Start with the right materials, follow your pattern, cut, sew, and finish your bag. Take your time and enjoy the process. Anyone can do this with patience and care!
If you want a custom leather bag or need OEM/ODM services, reach out to us. We love helping you create something special.
FAQ
How long does it take to make a leather sling bag?
You can finish your first leather sling bag in about 3 to 5 hours. If you take your time and follow each step, you get better results. Practice makes the process faster!
Can I use faux leather instead of real leather?
Yes, you can use faux leather. It costs less and comes in many colors. Faux leather is easier to cut and sew. Your bag may not last as long, but it still looks stylish.
What if I don’t have a sewing machine?
You don’t need a sewing machine. You can sew your sling bag by hand using a saddle stitch. Hand stitching gives your bag a strong seam and a classic look.
Do I need special tools for beginners?
You only need a few basic tools: a sharp knife, hole punch, ruler, and needle. You can add more tools as you learn. Start simple and upgrade your kit over time.
How do I fix uneven stitching?
If your stitches look uneven, try marking your lines with a ruler or wing divider. Punch holes evenly before sewing. Slow down and check your work as you go.
Can I wash my leather sling bag?
Don’t put your leather sling bag in the washing machine. Wipe it with a damp cloth and use leather conditioner. This keeps your bag clean and protects the leather.
What’s the best way to add decorations?
You can stamp, paint, or sew on patches. Try using colored thread or decorative studs. Plan your design before you start. This helps your bag look unique and neat.