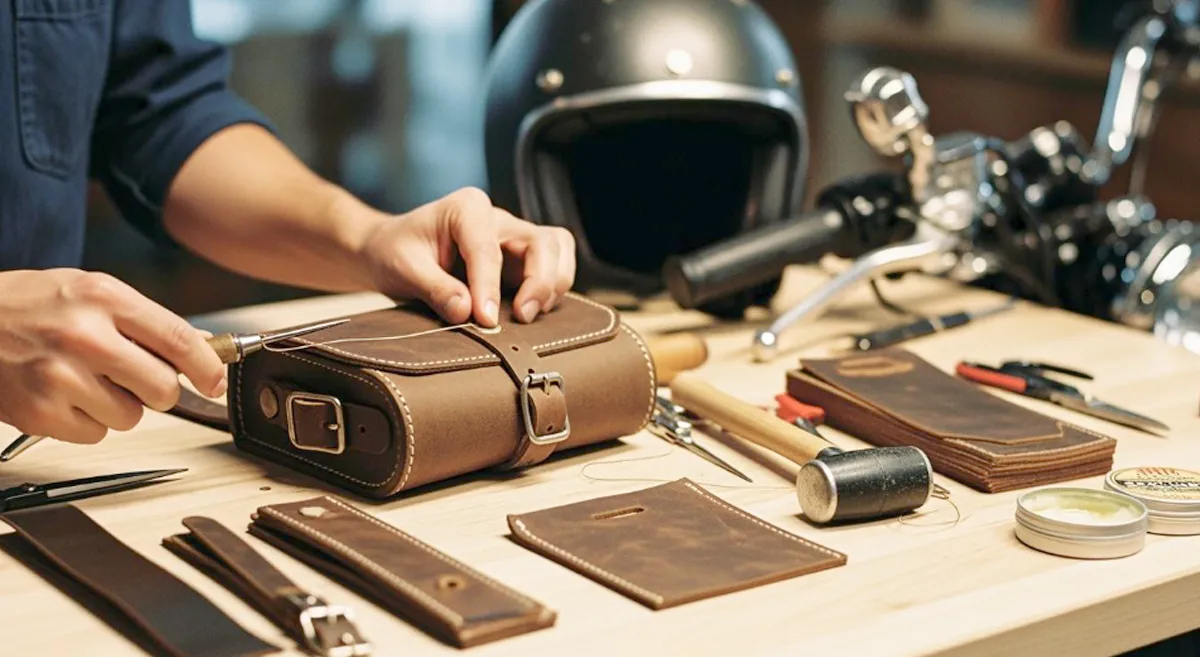
You can learn how to make a leather motorcycle tool bag with a few simple steps. Imagine riding with a bag that showcases your style and fits your bike perfectly. When you use leather, you achieve a retro look that stands out. This material lasts for years, even through rain and rough roads. You can shape it, add pockets, or repurpose old saddles for a unique touch. Your bag becomes an integral part of your journey.
Key Takeaways
- Get important tools like a hammer, hole punch, and razor knife. These tools will help make your project easier.
- Pick the best leather type, like cowhide or recycled leather. This makes your bag strong and stylish.
- Think about your bag’s size and shape before you start. Make sure it fits your motorcycle and holds your tools.
- Make a template before you cut the leather. This helps you see the final shape and stops mistakes.
- Use strong stitching methods like saddle stitching. This will help your bag last during bumpy rides.
- Add your own style with special tools, patches, and colors. This makes your bag look unique.
- Take care of your leather bag often to keep it looking nice. This also helps stop damage.
- Go slow and be careful with every step. Careful work gives you a strong and useful tool bag.
Tools & Materials
Essential Tools
You need the right tools to make your motorcycle tool bag. These tools help you cut, shape, and assemble your project with ease. Here’s a handy table to show you what you’ll use most often:
| Tools | Materials |
|---|---|
| hammer | 3 foot square of leather |
| hole punch | 4 buckles |
| drill | 50 pack of hammerset rivets |
| small anvil | 2 (4″ leather disks) |
| razor knife | 1 (10 1/4 x 18″ piece of leather) |
| straight edge | 5 straps |
| non-permanent marking tool |
You might also want a sewing machine, scissors, or a ruler. Some people use a marking pencil or pins to keep things in place. If you like working with heavy fabric, canvas duck cloth and webbing can add strength to your bag.
Tip: Always use a sharp razor knife for clean cuts. Dull blades can ruin your leather and make your job harder.
Leather Types
Choosing the right leather makes a big difference. You want your bag to last and look good. Here are some popular options:
- Cowhide: This is the most common choice. It’s tough and resists scratches. You get great value for your money.
- Kangaroo: Lighter and thinner than cowhide, but still strong. If you want a bag that’s easy to carry, kangaroo leather works well.
- Goatskin: Soft and comfortable to handle. It’s durable and feels nice when you touch it.
You can also use recycled leather from old saddles or jackets. This gives your bag a unique look and helps the environment. Recycled leather reduces landfill waste, lowers the environmental footprint, and promotes resource efficiency. Here’s a quick look at the benefits:
| Environmental Benefit | Description |
|---|---|
| Reducing Landfill Waste | Diverts leather scraps from landfills, promoting sustainability. |
| Lowering Environmental Footprint | Requires less water, energy, and chemicals than virgin leather. |
| Promoting Resource Efficiency | Enhances the use of existing resources, supporting a circular economy. |
Hardware & Accessories
You need hardware to hold your bag together and keep your tools safe. Buckles, rivets, and straps are essential. Buckles let you open and close your bag quickly. Rivets add strength at stress points. Straps help you attach the bag to your motorcycle or carry it easily.
Some people add extra pockets or compartments. You can use webbing or heavy fabric for these. If you want a custom look, try using colored buckles or decorative rivets. Always choose hardware that matches your style and fits your bike.
Note: Test your hardware before you start. Make sure buckles and rivets work well with your leather and don’t rust easily.
Optional Customization Supplies
You want your leather motorcycle tool bag to stand out. Customization lets you add personality and function. You can make your bag look unique and fit your needs. Here are some supplies and ideas to help you get creative:
Decorative Tools & Supplies
- Leather Stamps: You can press designs, initials, or logos into the leather. Stamping gives your bag a custom look.
- Edge Bevelers: These tools round off the edges. Your bag feels smoother and looks more professional.
- Burnishing Tools: You use these to polish the edges. Burnished edges resist wear and add shine.
- Leather Dyes & Paints: Want a bold color or a vintage finish? Dyes and paints let you change the look of your leather. Try mixing colors for a cool effect.
- Brushes & Sponges: These help you apply dye or paint evenly.
Tip: Test your dye or paint on a scrap piece first. You want to see how the color looks before you use it on your bag.
Personal Touches
- Patches & Appliqués: Sew or glue patches onto your bag. You can use motorcycle club logos, flags, or fun shapes.
- Embroidery Thread: Stitch patterns or initials with colorful thread. Embroidery adds texture and style.
- Decorative Rivets & Studs: Swap plain rivets for ones with designs. Studs give your bag a rugged or flashy look.
- Conchos & Charms: Attach metal conchos or charms for a western vibe. You can find these at craft stores.
| Customization Idea | What It Adds | How To Use It |
|---|---|---|
| Leather Stamps | Personal designs | Press into damp leather |
| Dyes & Paints | Color and finish | Apply with brush or sponge |
| Patches | Club or personal identity | Sew or glue onto surface |
| Decorative Rivets | Style and strength | Replace standard rivets |
| Charms & Conchos | Unique flair | Attach to straps or flaps |
Functional Upgrades
- Extra Pockets: You can sew or rivet small pockets inside or outside. These hold small tools or keys.
- Elastic Bands: Add bands to keep tools in place. Elastic helps organize your bag.
- Reflective Tape: Stick on reflective tape for safety. Your bag will be easier to spot at night.
- Waterproof Liners: Use a waterproof fabric or spray to protect your tools from rain.
Note: Custom features make your bag more useful. Think about what you carry most often and add pockets or holders for those items.
You can mix and match these supplies. Try new things and see what works for you. Your motorcycle tool bag should show your style and meet your needs. Customization makes your project fun and rewarding. You get a bag that is truly yours!
Design & Planning
Choosing Size & Shape
You want your tool bag to fit your bike and hold all your gear. Most riders pick a rectangular or round shape. Rectangular bags give you more room for tools, while round bags look classic and fit well on many bikes. Here’s a quick look at some popular sizes:
| Tool Bag Name | Dimensions (L x W x H) |
|---|---|
| Twist Essential Leather Motorcycle Tool Bag | 11″ x 3.5″ x 5″ |
| 101 Leather Motorcycle Tool Bag | 10″ x 3″ x 6″ |
| Willie & Max Standard Series Tool Bag | 12″ x 5″ x 2.5″ |
You can mount your bag on the front forks, swingarm, or fender supports. Many bags use reinforced synthetic leather, but you can use real leather for a classic look and long-lasting strength. Riders love bags with quick-release buckles and internal support to keep the shape. Think about where you want to place your bag and how much space you need for your tools.
Making a Template
Before you cut anything, make a template. Grab a piece of cardboard or poster board. Draw the outline of your bag. A good starting size is 10.5 by 18 inches, but you can adjust this to fit your needs. Use a ruler to keep your lines straight. If you want gussets for extra space, draw them as separate strips. Add flaps for the top and bottom. Don’t forget to plan for a handle or extra compartments if you want them.
Tip: Making a template helps you see the final shape and size before you cut your leather. You can test the fit on your bike and make changes easily.
Marking & Measuring
Now it’s time to mark your leather. Place your template on the leather and trace around it with a stylus or pen. Use a light touch so you don’t damage the surface. For straight lines, a steel square or large drafting triangle works great. If you want perfect corners, use the steel square for 90-degree angles. A self-healing cutting mat keeps your leather steady while you work.
| Technique | Description |
|---|---|
| Drafting triangles | Use for layout marks before cutting. |
| Marking with stylus or pen | Trace lines lightly to avoid moving the leather. |
| Cutting oversized pieces | Cut a bit larger, then trim for a perfect fit, especially with glued layers. |
| Using a steel square | Helps keep cuts straight and accurate. |
| Self-healing cutting mats | Hold the leather in place and protect your work surface. |
Cut your pieces a little bigger than you need. You can always trim them down for a perfect fit. Careful measuring and marking make your project easier and help you avoid mistakes later.
Cutting Leather
Transferring Template
You have your template ready, so now it’s time to move it onto your leather. Lay your leather flat on a clean table. Place the cardboard or poster board template on top. Hold it steady with your hand or use a few small weights. Grab a pen, stylus, or non-permanent marker. Trace around the edges of your template. Make sure you press lightly. You want to see the lines, but you don’t want to leave deep marks. Double-check that you have traced every part, including flaps, gussets, and any extra pockets you want to add.
Tip: If your leather has a rough side and a smooth side, trace on the rough side. This makes your marks easier to see and keeps the smooth side looking clean.
Cutting Techniques
Now you’re ready to cut. Use a sharp razor knife or rotary cutter for the best results. Place your leather on a self-healing cutting mat to protect your table. Hold your straight edge along the lines you traced. Cut slowly and carefully. Let the knife do the work. Don’t rush, or you might slip and ruin your piece.
Safety matters when you cut leather. Here are some important things to remember:
- Wear protective clothing, like a thick apron and steel-toed shoes.
- Put on protective eyewear to shield your eyes from flying bits.
- Always cut away from your body.
- Keep your fingers away from the blade and other tools.
- Make sure your workspace stays clean and free of clutter.
If you use dyes or adhesives, open a window or turn on a fan. Good ventilation keeps you safe from fumes. After you finish cutting, clean up your area. This helps prevent accidents and keeps your tools in good shape.
Note: Sharp blades make cleaner cuts and are safer than dull ones. Change your blade if it starts to drag or tear the leather.
Punching Holes
You need holes for stitching, rivets, and hardware. Grab your hole punch or rotary punch. Line up the punch with your marks. Press down firmly to make a clean hole. For straight lines of holes, use a ruler or a stitching chisel to keep them even. If you plan to use rivets or buckles, check the size of your hardware first. Make sure your holes match.
- Punch holes before you start stitching or adding hardware.
- Space your holes evenly for a neat look.
- Test your punch on a scrap piece to see how it works.
If you want to add extra pockets or straps, punch those holes now. It’s easier to do this before you start putting your bag together.
Tip: Keep your punches sharp. Dull punches can stretch or tear the leather instead of making a clean hole.
How to Make a Leather Motorcycle Tool Bag: Assembly
Laying Out Pieces
You have your leather pieces cut and ready. Now it’s time to lay everything out before you start putting your bag together. Place the main body piece flat on your work surface. Set the two leather disks for the sides nearby. Arrange your straps, buckles, and any extra pockets or compartments you want to add. This step helps you see how all the parts fit together. You can check if the size matches your motorcycle fork bag or if you want to make any last-minute changes.
Take a moment to double-check your layout. Make sure the main piece is long enough to wrap around your tools. The disks should fit at each end. If you plan to add extra pockets for your motorcycle tool kit or small repair items, place them where you want them to go. Laying out your pieces first makes the next steps much easier.
Tip: Snap a quick photo of your layout. This way, you can remember where everything goes when you start assembling.
Adding Gussets & Structure
Gussets give your bag shape and strength. They help your bag hold more tools and keep its form, even when it’s full. To add gussets, take the two leather disks you cut earlier. These will become the round ends of your bag.
Here’s how to make a leather motorcycle tool bag with strong gussets:
- Place one leather disk at the end of the main body piece.
- Line up the edges so they match evenly.
- Use a hole punch to make holes along the edge of the disk and the main piece. Space the holes about half an inch apart.
- Repeat this for the other end with the second disk.
- Use paracord, strong thread, or rivets to attach the disks to the main body. Start at one end and work your way around, pulling the pieces together as you go.
- Check that the gussets are secure and the bag holds its shape.
If you want to add extra structure, you can use a stiffener or a double layer of leather inside the main body. This helps your bag stay firm and protects your tools. Some people add a thin strip of leather along the bottom for extra support.
Note: Adding gussets can be tricky the first time. Take it slow and make sure your holes line up. If you want more compartments, sew or rivet small pockets to the inside before you close up the ends.
Attaching Straps & Handle
Straps and a handle make your bag easy to use and carry. You need five straps and four buckles for most designs. Here’s a simple way to attach them:
- Decide where you want your straps to go. Most people put two straps on the back to attach the bag to the motorcycle, and two on the front to close the flap. The fifth strap can become a handle on top.
- Use a hole punch to make holes for the straps and buckles. Make sure the holes line up with your hardware.
- Slide the straps through the holes and secure them with rivets or strong stitching. Attach the buckles to the ends of the straps that will close the bag.
- For the handle, fold a strap in half and attach it to the top of the bag with rivets. Make sure it feels strong and comfortable to hold.
- Test the straps and handle by pulling on them gently. They should feel secure and not slip out.
If you want to add more pockets or tool holders, now is a good time. Attach them with rivets or by sewing them onto the inside or outside of your bag. This helps you organize your motorcycle tool kit and makes it easy to grab what you need for a quick repair.
Tip: Use hammerset rivets for extra strength. They hold up well to bumps and vibrations on the road.
Now you know how to make a leather motorcycle tool bag that is sturdy, practical, and ready for your next ride. Take your time with each step, and you’ll end up with a bag that looks great and works even better.
Prepping for Stitching
You have your leather pieces cut, your gussets and straps ready, and your hardware set aside. Now, you need to get everything prepped for stitching. This step is where your project starts to look like a real motorcycle fork bag. If you want to know how to make a leather motorcycle tool bag that lasts, careful prep makes all the difference.
First, check all your punched holes. Hold the pieces together and see if the holes line up. If they don’t, use your hole punch to adjust them. You want the holes to match up so stitching goes smoothly. Lay out your main body, gussets, straps, and pockets in the order you plan to stitch them. This helps you spot any missing holes or pieces before you start sewing.
Next, think about the type of stitching you want. Most people use saddle stitching for strength. If you want a classic look, use waxed thread in a color that matches your bag. Cut your thread about three times the length of the seam you plan to sew. Thread your needles and get ready to stitch.
Here’s a simple checklist to follow before you start stitching:
- Double-check that all holes are clean and even.
- Test-fit your pieces to make sure everything lines up.
- Mark your starting and ending points with a pencil or scratch awl.
- Cut your thread to the right length.
- Wax your thread if it isn’t already waxed.
- Set out your needles, thimble, and stitching pony if you use one.
Tip: If you want your stitches to look neat, use a stitching chisel or pricking iron to mark the holes before punching. This keeps your stitches straight and even.
If you plan to add extra pockets or tool holders inside your bag, attach them now. It’s much easier to sew these on before you close up the main body. You can use the same stitching method or small rivets for extra strength.
When you prep for stitching, you set yourself up for success. You avoid mistakes and make the sewing process much smoother. If you want to master how to make a leather motorcycle tool bag, take your time with this step. Your finished motorcycle bag will look better and last longer.
Stitching & Hardware
Hand Stitching Basics
You have your pieces ready. Now it’s time to stitch them together. Hand stitching gives your bag strength and a classic look. Many crafters use the saddle stitch because it holds up better than a machine stitch. Here’s how you can get started:
- Use a diamond-shaped awl to make neat holes for your stitches.
- Gouge a stitching channel on both sides of the leather. This protects your thread and helps you sew in a straight line.
- Dampen the area where you will stitch. This makes the leather easier to work with.
- Mark your stitch spacing with a stitching space marker. Even stitches look professional.
- Wear textured rubber-palmed gloves for a better grip while you sew.
- Cut your thread about four times the length of your groove line.
- Use two large blunt-tip harness needles. Thread each end of the thread through a needle.
- Hold one needle in each hand. Push one needle through the first hole, then pull it through evenly.
- Insert the second needle into the same hole from the other side. Pull it through.
- Repeat this for each hole. When you reach the end, tie a square knot on the back.
Tip: Use a stitching pony or horse to hold your work steady. This keeps your hands free and your stitches even.
Reinforcing Stress Points
Your tool bag will face a lot of bumps and shakes on the road. You want it to last. Focus on the spots that get the most stress, like the ends, strap attachments, and flap closures. Here are some ways to make these areas stronger:
- Double up your stitches at the ends and corners.
- Add extra rivets where straps connect to the bag.
- Use a thicker thread for these spots.
- Place a small patch of leather behind the rivet or stitch for extra support.
If you ever need to repair your bag, check these stress points first. Fixing a loose stitch or adding a new rivet can keep your bag strong for years.
Note: Strong reinforcement means you won’t have to worry about your tools falling out during a ride.
Installing Buckles & Rivets
Buckles and rivets hold your bag together and keep your tools safe. Choose hardware made for motorcycle use. Full-grain leather bags often use heavy-duty buckles and rivets because they resist wear and tear. Here’s how to install them:
- Mark where you want your buckles and rivets to go.
- Punch holes that match the size of your hardware.
- Slide the buckle or rivet through the hole.
- Use a hammer and small anvil to set the rivet or secure the buckle.
- Check that everything feels tight and secure.
Tip: Test your buckles and rivets before you hit the road. Make sure they open and close smoothly and don’t rust easily.
A well-stitched and properly reinforced bag with strong hardware will serve you well on every ride.
Finishing & Care
Edge Finishing
You want your leather motorcycle tool bag to look sharp and last for years. Finishing the edges makes a big difference. Smooth, polished edges not only look professional but also help prevent fraying and wear. Here’s a simple step-by-step process you can follow:
- Cut the edges flush and sand them so they’re even.
- Bevel the edges if you want a rounded look.
- Paint a thin first layer along the edge.
- Crease both sides of the edge for a crisp line.
- Smooth the edges to help the paint stick.
- Burnish the edge with a clean, dry cloth.
- Sand again using 400 grit sandpaper.
- Apply a thicker layer of paint.
- Repeat painting and sanding until you’re happy with the finish.
- Rub paraffin on the edge and melt it with a heated tool.
- Burnish again with a heavy cloth.
- Admire your finished edge!
Tip: Take your time with each step. Rushing can lead to uneven edges or rough spots.
Conditioning & Dyeing
Leather needs care to stay strong and flexible. Conditioning keeps your bag from drying out or cracking, especially after you dye it. You have several great options for leather conditioners. Here’s a quick guide:
| Product Name | Description |
|---|---|
| Beeswax/Propolis Mixture | Natural waterproofing, resists mold, and keeps leather lubricated for the long haul. |
| Leather Honey | Boosts flexibility and durability, works on many leather items. |
| Weiman Leather Wipes | Easy-to-use wipes with natural oils, also protect against UV rays. |
| Sof Sole Mink Oil | Conditions and waterproofs, shields against water and stains. |
After you finish stitching, apply your chosen conditioner with a soft cloth. Let it soak in, then buff the surface. If you want to change the color, use a leather dye before conditioning. Always test dye on a scrap first to see how it looks. Conditioning also helps if you ever need to repair your bag, since soft leather is easier to work with.
Note: Regular conditioning keeps your bag looking new and ready for any adventure.
Final Touches & Personalization
Now comes the fun part—making your tool bag truly yours! You can personalize your bag in many ways. Some riders love engraving, which uses precise tools to create detailed designs without cutting too deep. Tooling is another classic method, letting you carve patterns or combine with engraving for a bold look.
| Technique | Description |
|---|---|
| Engraving | Uses precision settings to create detailed designs on the leather surface. |
| Tooling | Carves patterns into the leather, can be combined with engraving for extra flair. |
You can also add embroidery for a unique touch. Here are some ideas:
- Leather embroidery gives your bag a one-of-a-kind style.
- Hand embroidery takes time but looks amazing.
- Machine embroidery is faster and works well for larger designs.
- Using the right tools and techniques helps you get neat, eye-catching results.
Tip: Try out your design on a scrap piece first. This way, you can see how it looks before adding it to your bag.
Personal touches make your leather motorcycle tool bag stand out. Show off your creativity and enjoy the compliments on your next ride!
Tips & Troubleshooting
Common Mistakes
You might run into a few bumps when making your leather motorcycle tool bag. Don’t worry—everyone makes mistakes, especially on their first try. Here are some common ones to watch out for:
- Cutting the leather too small. Always double-check your measurements before you cut. It’s easier to trim extra than to add more later.
- Forgetting to punch holes before stitching. If you skip this step, sewing becomes much harder and your stitches may look uneven.
- Using the wrong type of thread or needle. Thick leather needs strong, waxed thread and sturdy needles.
- Rushing the drying time after dyeing or conditioning. Let your bag dry fully so the finish lasts longer.
- Overloading the bag with heavy tools. Too much weight can stretch the leather and stress the seams.
Tip: Take your time with each step. Slow and steady work leads to a bag you’ll be proud to show off.
Durability Tips
You want your tool bag to last for years. Good care and a few smart habits can make a big difference. Try these tips to keep your bag looking and working its best:
- Use a leather repair kit if you notice deep scratches.
- Clean stubborn salt stains with a mix of vinegar and water.
- Protect your bag from humidity. This helps prevent mold and discoloration.
- Waterproof your bag for extra protection, especially if you ride in the rain.
- Pat down your bag with a soft, dry cloth on a regular basis.
- Store your bag in a shaded spot. Sunlight can fade and dry out leather.
- Use a leather conditioner to keep the leather soft and stop it from cracking.
- Clean your bag with a soft cloth. Dirt and dust can wear down the surface.
- Avoid placing sharp or heavy objects on top of your bag.
Note: A little care goes a long way. Regular cleaning and conditioning will keep your bag strong and stylish.
Style Ideas
You can make your leather motorcycle tool bag stand out with a few creative touches. Riders love to show off their style, and your bag can match your bike or your personality. Here are some popular ideas:
| Customization Feature | Description |
|---|---|
| Full Customization | Send your own specs for a one-of-a-kind bag. |
| Leather Color Options | Choose from Black, Brown, White, Tan, and more. |
You can also try these:
- Hand tooled designs for a classic, rugged look.
- Engraved patterns that show off your favorite symbols or initials.
- Match your bag’s leather with popular seat brands like LePera, Mustang, Corbin, or Saddlemen.
Tip: Don’t be afraid to experiment. Your tool bag should reflect your style and make your ride even more fun!
Conclusion
Making a leather motorcycle tool bag by yourself is fun and feels great. Many riders like how their bags look when finished.
- People often say things like, “Great work!” or “Cool design and build.”
- Some people notice the rough edges or ask what kind of leather you used.
If you want a bag that is different, we can make one just for you. Here’s what you get:
| Advantage | Description |
|---|---|
| Unique Design Options | Pick the colors and materials you like best. |
| Perfect Fit | Get a bag made to fit your motorcycle. |
| Superior Craftsmanship | Skilled makers use strong, high-quality materials. |
You can contact us anytime if you want help or want to order a custom bag.
FAQ
How long does it take to make a leather motorcycle tool bag?
You can finish your bag in a weekend if you have all your materials ready. If you add custom designs or wait for dye to dry, it might take a bit longer.
Can I make a tool bag without special leather tools?
Yes! You can use basic tools like a hammer, scissors, and a needle. A hole punch helps, but you can use a nail and hammer if needed.
What is the best leather thickness for a tool bag?
Most people use leather that is 2.5 to 3.5 mm thick. This thickness gives your bag strength and helps it keep its shape.
How do I waterproof my leather tool bag?
You can use beeswax, mink oil, or a leather waterproofing spray. Apply a thin layer, let it soak in, and buff with a soft cloth. Repeat as needed.
Can I repair scratches or scuffs on my bag?
Yes, you can! Rub a little leather conditioner or oil into the scratch. For deeper marks, use a leather repair kit. Most small scuffs fade with regular care.
Will my homemade bag fit any motorcycle?
You can make your bag fit almost any bike. Just measure your mounting spot before you start. Adjust the straps or size to match your motorcycle.
Is it okay to use recycled leather?
Absolutely! Recycled leather gives your bag character and helps the environment. Old saddles, jackets, or bags work great for this project.
What if I make a mistake while stitching?
Don’t worry. You can pull out the stitches and try again. Use a seam ripper or small scissors. Take your time, and you’ll get it right.