
Wondering how to make a felt wine bag? You can easily create a unique bag with this step-by-step tutorial. When you ask how to make a felt wine bag, you’ll find both sewing and no-sew options work great. This diy project turns a simple piece of felt into a stylish gift. If you love to craft, you can personalize your bag with fun extras. How to make a felt wine bag? Just grab your tools, pick your colors, and let your creativity shine. You’ll see how to make a felt wine bag that stands out at any celebration. Get ready to enjoy the process of how to make a felt wine bag and show off your craft skills!
Key Takeaways
- Get all the materials you need like felt, scissors, and glue before you begin.
- Pick the felt that matches your style and is good for the environment.
- Measure and cut the felt carefully so it fits your wine bottle well.
- Choose to sew or not sew, depending on what you know and how much time you have.
- Add things like ribbons and tags to make your wine bag special.
- Put on handles and closures to make your wine bag useful and stylish.
- Check if your wine bag is strong enough to carry and use.
- Try fun ways to wrap and show your wine bag so it looks great as a gift.
Materials for DIY Wine Bottle Bags
Before you start making wine bottle bags, you need to gather the right materials. The right supplies make your project easier and help your bag last longer. You can choose from many options to match your style and focus on sustainability.
Felt Fabric Choices
You have a few choices when picking felt for your wine bottle bags. Each type has its own look and feel. Some are soft and natural, while others are strong and budget-friendly. Here are the most common types you will find:
- Wool felt: This felt feels soft and warm. It comes from natural fibers and works well for luxury wine bottle bags. Wool felt also supports sustainability because it is biodegradable.
- Polyester felt: This felt costs less and lasts a long time. Many people use it for promotional wine bottle bags. Polyester felt is easy to clean and keeps its shape.
- Blended felt: This felt mixes wool and polyester. You get a balance of style, durability, and sustainability. Blended felt works well if you want custom wine bags that look good and last.
Color & Thickness Tips
Color can make your wine bottle bags stand out. You can pick classic colors like deep red, green, or black. Bright colors work well for parties or custom wine bags. If you want eco-friendly wine bags, look for felt made from recycled materials.
Thickness matters, too. Thicker felt protects your wine bottle and gives your bag a sturdy feel. Most people use felt that is between 2 mm and 3 mm thick. This range gives you the best mix of flexibility and protection. Check out this table for a quick guide:
| Felt Thickness | Description |
|---|---|
| 2 mm to 3 mm | Best balance between flexibility and protection |
If you care about sustainability, choose felt that uses natural or recycled fibers. This helps you make eco-friendly wine bags that look great and help the planet.
Tools Needed
You do not need many tools to make wine bottle bags. Most of these items are easy to find at home or in craft stores. Here is a list to help you get started:
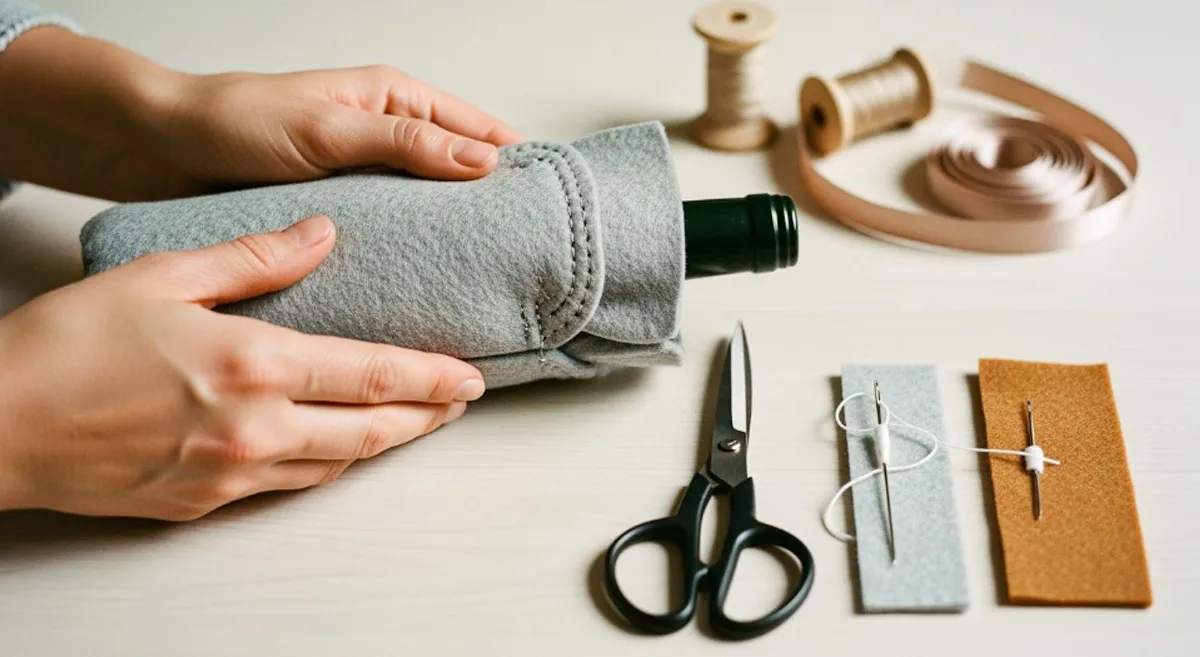
- Scissors: Sharp scissors cut felt cleanly and help you get straight edges.
- Ruler: A ruler helps you measure your felt pieces. This keeps your wine bottle bags the right size.
- Needle: If you want to sew your bag, you need a needle. Choose one with a large eye for thick felt.
- Glue: Fabric glue works well if you want a no-sew option. It holds felt together and dries clear.
You can use these tools for both sewing and no-sew methods. This gives you more ways to learn how to make wine bottle bags.
Scissors, Ruler, Needle, Glue
Keep your tools organized in a small box. This saves time and helps you avoid losing small items when you make custom wine bags.
Decorative Extras
You can make your wine bottle bags special with a few extras. These decorations turn a simple wine carrier into a unique gift. You can match your decorations to the occasion or your personal style.
- Ribbons: Tie a ribbon around the neck of your wine bottle bags. This adds color and makes your bag look festive.
- Tags: Add a tag with a message or the name of the person getting the bag. Tags make custom wine bags feel personal.
- Buttons: Sew or glue buttons onto your felt. You can use them for decoration or as a closure for your wine carrier.
Ribbons, Tags, Buttons
You can also use patches, embroidery, or even small charms. These extras help you show off your creativity and focus on sustainability by using recycled or upcycled materials. When you learn how to make wine bottle bags, you can try new ideas each time.
Note: Using recycled ribbons or buttons supports sustainability and makes your eco-friendly wine bags even better.
Now that you have your materials, you are ready to start learning how to make wine bottle bags that are stylish, strong, and good for the planet.
How to Make a Felt Wine Bag: Measuring & Cutting
You’re ready to start making your felt wine bag. This part is all about measuring and cutting. If you want your bag to fit just right, you need to follow each step carefully. Let’s break it down so you can get perfect results every time.
Drafting the Pattern
Before you cut your felt, you need a pattern. This pattern acts like a map for your project. You can draw it on paper first. Make sure you measure your wine bottle so the bag fits well. Most wine bottles have a standard size. Here’s a quick guide to help you draft your pattern:
| Measurement | Size |
|---|---|
| Width at bottom | 3.5 inches |
| Height | 14.25 inches |
| Handle width | 1.5 inches |
| Carrying space | 2-3 inches |
You can use these numbers for most bottles. If your bottle is bigger or smaller, adjust your pattern. Add a little extra space for seams and handles. This step helps you avoid mistakes later.
Standard Bottle Size Guide
When you draw your pattern, use a ruler for straight lines. Mark the bottom, sides, and handles. Double-check your measurements. If you want, you can make a test pattern with scrap paper first. This lets you see if your wine bottle fits before you cut the felt.
Cutting Felt Pieces
Now you’re ready to cut the felt. Clean, straight edges make your bag look neat and professional. Here’s how you can get the best results:
- Use sharp scissors. Dull scissors can make the felt look fuzzy.
- Trace your pattern with a fabric marker. Cut just inside the lines for a perfect fit.
- Tape down your pattern. This keeps it from slipping, especially if you have small or tricky shapes.
- Try freezer paper. Iron it onto the felt, then cut along the lines for extra accuracy.
The tape method works great for small or detailed shapes. It keeps your template in place and stops the felt from moving. This also helps you avoid marker stains, which is important if you use light-colored felt.
Ensuring Straight Edges
Take your time with this step. Don’t rush. Check your edges as you cut. If you see any uneven spots, trim them with your scissors. Clean edges make your wine bag look store-bought. When you finish this step, you’ll have all the pieces you need for the next part of your project.
Assembly: Sewing or No-Sew DIY Designer Wool Felt Wine Tote
You have your felt pieces ready. Now it’s time to put your wine bottle bags together! You can choose to sew your bag or use glue for a no-sew option. Both ways work well, so pick the one that fits your skills and style. Let’s walk through each method step by step.
Sewing Method
Sewing gives your wine bottle bags a strong and lasting finish. If you enjoy handcrafting, this method lets you add a personal touch. You don’t need a sewing machine—just a needle, some thread, and a little patience.
Stitching Sides & Bottom
- Line Up the Felt Pieces
Place the two main pieces of felt together. Make sure the edges match up. The outside of the bag should face out. - Pin or Clip the Edges
Use sewing pins or clips to hold the sides and bottom in place. This keeps the felt from shifting while you sew. - Start Stitching
Thread your needle with strong thread. Begin at the bottom corner. Use a simple running stitch or a blanket stitch for extra strength. Sew up one side, across the bottom, and up the other side. Leave the top open. - Secure the Seams
When you reach the end, tie a tight knot. Trim any extra thread. Check the seams to make sure they feel sturdy. If you want, sew over the seams again for extra durability.
Tip: Double-stitching the sides and bottom helps your wine bottle bags last longer, especially if you plan to reuse them.
Sewing felt has some great benefits. It makes your diy designer wool felt wine tote durable and gives it a neat look. Here’s a quick comparison of sewing advantages and disadvantages:
| Advantages of Sewing with Felt | Disadvantages of Sewing with Felt |
|---|---|
| Durable and does not wear out | Minimum flexibility |
| Easy to cut into shapes | Coarse texture |
| Inexpensive and accessible | Shrinking potential |
| Versatile for various projects | Difficult to clean |
You get a sturdy bag that holds up well, but sewing can take more time and may feel tricky if you’re new to it.
No-Sew Method
If you want a quick and easy way to make wine bottle bags, try the no-sew method. This is perfect for beginners or anyone who wants a fast diy project. You only need fabric glue and a steady hand.
Using Fabric Glue
- Arrange the Felt Pieces
Lay your felt pieces flat. Make sure the edges line up just like you would for sewing. - Apply the Glue
Squeeze a thin line of fabric glue along the sides and bottom edges. Don’t use too much—just enough to hold the felt together. - Press and Hold
Press the edges together firmly. Hold them in place for a few seconds. You can use clips or clothespins to keep the edges tight while the glue dries. - Let It Dry
Check the glue instructions for drying time. Most fabric glues need at least 30 minutes to set. For best results, let your wine bottle bags dry overnight. - Check the Seams
Once dry, gently tug on the seams. If any spots feel loose, add a bit more glue and let it dry again.
Note: Always use glue in a well-ventilated area. Some glues have strong smells and need fresh air.
Not all glues work the same. Here’s a table to help you pick the best glue for your wine bottle bags:
| Glue Type | Description | Use Case |
|---|---|---|
| Felt Glue | A specialty glue designed specifically for felt. | Ideal for tacking down items or replacing sewing in felt projects. |
| Fabric Fusion | A pricier option that is safe for dry cleaning. | Suitable for projects that may require dry cleaning after assembly. |
| Super Fabric | A strong adhesive that requires ventilation, best for high-wear items. | Recommended for items like shoes or projects exposed to water and wear. |
No-sew wine bottle bags are fast and fun to make. You don’t need any sewing skills, and you can finish your diy project in less than an hour. But glued seams may not last as long as sewn ones, especially if you use your bag often.
Here’s a quick look at the pros and cons of the no-sew method:
| Advantages of No-Sew Methods | Disadvantages of No-Sew Methods |
|---|---|
| Quick and easy to assemble | May not be as durable |
| No sewing skills required | Limited design options |
| Ideal for beginners | Less professional finish |
Which Method Should You Choose?
If you want wine bottle bags that last and look professional, sewing is the way to go. If you need a quick gift or want a simple diy project, glue works great. Both methods let you get creative and make wine bottle bags that fit your style.
Remember: No matter which method you choose, always check your seams. Strong seams keep your wine bottle bags safe and ready for any celebration.
Adding Handles & Closures to Wine Bottle Bags
Handles and closures make your wine bottle bags both practical and stylish. You can pick from different handle styles and closure options to match your needs. Let’s look at some easy ways to add these features to your wine bottle bags.
Handle Styles
Handles help you carry wine bottle bags with ease. You can choose from felt straps or ribbon handles. Each style gives your bag a different look and feel.
Felt Straps, Ribbon Handles
Felt straps work well if you want your wine bottle bags to feel sturdy. Cut two strips of felt, each about 1 inch wide and 10 inches long. Attach one end of each strap to the inside of the bag, near the top edge. Use strong stitches or fabric glue to hold them in place. Felt straps blend in with the bag and give it a classic look.
Ribbon handles add a pop of color to your wine bottle bags. Pick a ribbon that matches your bag or the occasion. Cut two pieces of ribbon, each about 12 inches long. Tie a knot at each end of the ribbon to stop fraying. Glue or sew the ends to the inside of the bag. Ribbon handles feel soft in your hand and make your wine bottle bags look festive.
Tip: Mix and match felt straps and ribbon handles for a custom look. You can even braid ribbons for extra flair!
Closure Options
Closures keep your wine bottle bags secure. They stop the bottle from slipping out and add a finishing touch. You can choose from buttons, Velcro, or drawstrings.
Button, Velcro, Drawstring
Buttons give your wine bottle bags a classic touch. Sew a button near the top edge of the bag. Cut a small slit or sew a loop on the other side. Slip the button through the slit or loop to close the bag. This method works well for gift-giving.
Velcro makes opening and closing wine bottle bags quick and easy. Cut two small pieces of Velcro. Attach one piece to the inside of the front flap and the other to the back. Press the pieces together to close the bag. Velcro works well if you want a simple, reusable closure.
Drawstrings add a fun twist to wine bottle bags. Cut two small holes near the top of the bag, one on each side. Thread a ribbon or cord through the holes. Pull the ends to close the bag and tie them in a bow. Drawstrings keep the bottle snug and add a playful look.
When you want extra security for transporting wine bottle bags, look for closure ideas inspired by travel bags. Some transport bags, like the WineSkin Basics, use a double-adhesive seal. This type of closure holds the bag tightly shut and keeps the bottle safe inside. You can use a strong adhesive strip or even add bubble wrap for extra protection if you plan to travel with your wine bottle bags.
Note: Always check that your closure holds the bottle firmly. A secure closure keeps your wine bottle bags safe during transport and makes them look polished.
Handles and closures turn simple wine bottle bags into useful and stylish carriers. Try different styles to see what works best for you. You can always change things up for each occasion or gift.
Decorating & Customizing Your DIY Wine Tote
You can turn simple wine bottle bags into show-stopping gifts with a few creative touches. This is where you get to have fun and make your project stand out. Let’s look at some easy ways to personalize your wine bottle bags and match them to any occasion.
Personalization Ideas
You have many options to make your wine bottle bags unique. Try these ideas to add a personal touch:
Embroidery, Appliqués, Tags
- Embroidery
Grab some colorful thread and stitch a name, date, or small design onto your wine bottle bags. Embroidery adds a handmade feel and works well for personalized wine bags. You can use simple stitches or try a fancy pattern if you feel bold. - Appliqués
Cut shapes from felt or fabric and glue or sew them onto your wine bottle bags. Think hearts, stars, or even a monogram. Appliqués let you play with color and texture. They also cover up any little mistakes from earlier steps. - Tags
Attach a tag to the handle or neck of your wine bottle bags. Write a message, the year, or the name of the person receiving the gift. You can use cardstock, wood, or even a small piece of felt for your tag. - Lacing and Handles
Punch holes along the sides of your wine bottle bags and lace them up with leather cord or ribbon. This not only looks stylish but also makes the bag stronger. Cut a strip of felt for a sturdy handle, or use ribbon for a softer grip.
Tip: Mix and match these ideas. Try embroidery with a tag, or add appliqués and lacing for a designer look.
Occasion Themes
You can match your wine bottle bags to any event. Customizing for holidays, birthdays, or weddings makes your gift extra special.
Holiday, Birthday, Wedding
- Holiday
Use red and green felt for Christmas, or orange and black for Halloween. Add snowflake appliqués or jingle bells for a festive touch. Embroider a holiday greeting or the year on your wine bottle bags. - Birthday
Pick bright colors and add the birthday person’s name with embroidery or a tag. Stick on felt balloons or stars. You can even use glitter glue for extra sparkle. - Wedding
Choose elegant colors like white, silver, or gold. Add the couple’s initials with embroidery. Attach a small charm or lace ribbon for a romantic feel. Personalized wine bags make great wedding favors or gifts for the happy couple.
You can also design wine bottle bags for corporate events. Upload a logo, pick company colors, or add a special message. Businesses love eco-friendly wine bottle bags for gifting and branding. Here’s a quick look at some options:
| Feature | Description |
|---|---|
| Customization Options | Choose colors, upload logos, add embroidery or printing |
| Eco-friendliness | Use sustainable felt for a green touch |
| Sizes Available | Make bags for 1 to 6 bottles, perfect for any event |
Note: Personalized wine bags show you care about the details. They turn a simple bottle into a memorable gift.
With these ideas, you can create wine bottle bags that fit any style or occasion. Get creative and enjoy making each bag your own!
Finishing Touches for Wine Bottle Bags
When you finish making your wine bottle bags, you want them to last and look amazing. This last step helps you check for strength and add those special touches that make your gift stand out.
Durability Check
You want your wine bottle bags to hold up, whether you use them for a party or give them as a gift. Here are some simple ways to check if your bag is tough enough:
- Try a water resistance test. Splash a little water on your wine bottle bags to see if the felt keeps the bottle dry.
- Place your bag in sunlight for a few hours. This checks if the color fades or stays bright.
- Bend and twist your wine bottle bags gently. This helps you see if the felt cracks or stays flexible, even in cold weather.
- Rub the bag against a rough surface. This shows how well your wine bottle bags handle friction and daily use.
- Store your wine bottle bags in different places, like a warm room or a cool basement. This helps you see if the bag changes shape or texture in different temperatures and humidity.
If your wine bottle bags pass these tests, you know they are ready for anything!
Reinforcing Seams
Strong seams keep your wine bottle bags from falling apart. You want to pay extra attention to the handles and the bottom. Here are some ways to make your seams stronger:
- Double-stitch the sides, bottom, and handles. This gives your wine bottle bags extra support.
- Use a blanket stitch or backstitch for hand-sewn bags. These stitches hold the felt together better than a simple running stitch.
- Add a small patch of felt over the seam at the handles. This spreads out the weight and keeps the handles from tearing.
- For glued wine bottle bags, add a second layer of glue along the seams after the first layer dries.
Tip: Always check the seams before you use or gift your wine bottle bags. A quick tug on the handles or bottom will show if you need to reinforce any spots.
Presentation Tips
You want your wine bottle bags to look as good as they feel. A little extra effort can turn a simple bag into a beautiful gift.
- Personalize your wine bottle bags with a name, date, or special message. This makes your gift feel unique and thoughtful.
- Add decorative extras like ribbons, tags, or buttons. These small touches make your wine bottle bags pop.
- Choose simple designs if you need a last-minute gift. A clean, elegant felt wine bottle bag always looks stylish.
- Use premium felts or add leather accents for a fancy look. These details make your wine bottle bags perfect for retail or special occasions.
- If you want to impress, add a custom logo or brand message. This works great for business gifts or events.
Gift-Wrapping Ideas
You can make your wine bottle bags even more special with creative wrapping. Here are some easy ideas:
- Place your wine bottle bags in a gift box with tissue paper. This adds a layer of surprise and keeps the bag safe.
- Tie a big bow around the neck of the bag. Pick a ribbon that matches the occasion or the colors of your wine bottle bags.
- Add a sprig of greenery or a small charm to the handle. This gives your gift a festive touch.
- For a professional look, use a branded tag or sticker. This works well if you make wine bottle bags for a business or event.
Thoughtful touches in your design and wrapping show you care. Your wine bottle bags will stand out and make any bottle feel like a special gift.
With these finishing touches, your wine bottle bags will be strong, stylish, and ready to impress anyone who receives them.
Conclusion
You have learned how to make wine bottle bags. You can sew or glue them. You can add handles and decorate them for any event. Try making your own wine bottle bags at home. Making wine bottle bags is fun and easy. Share your wine bottle bags or ask questions below. If you need more wine bottle bags for gifts or business, we sell custom and bulk wine bottle bags. You can pick custom colors, logos, and sizes. Our custom wine bottle bags use top materials. Custom orders help you save money and get the best wine bottle bags for you.
Here are some good reasons to order custom or bulk wine bottle bags from us:
| Benefit | Description |
|---|---|
| Personalization Options | Custom logos, messages, and company names help people notice your brand. |
| Premium Materials | High-quality felts and leather make bags strong and feel fancy. |
| Cost-Effectiveness | Buying in bulk lowers costs, so it saves money for businesses. |
You can count on our custom wine bottle bags for any event. Make your wine bottle bags special with custom style and great quality.
FAQ
How do I clean felt wine bottle bags?
You can spot clean wine bottle bags with a damp cloth. Gently dab the stain. Avoid soaking the felt. Let the bag air dry. This keeps your wine bottle bags looking fresh and ready for your next gift.
Can I reuse wine bottle bags for different occasions?
Yes! You can reuse wine bottle bags many times. Swap out ribbons or tags to match the event. These bags stay strong and stylish, so you get lots of use from each one.
What size wine bottle fits in these bags?
Most wine bottle bags fit standard 750ml bottles. If you have a larger or smaller bottle, adjust your pattern before cutting. Always check the fit before finishing your wine bottle bags.
Are wine bottle bags eco-friendly?
Many wine bottle bags use recycled or natural felt. You help the planet when you choose these materials. Reusing wine bottle bags also cuts down on waste. Look for eco-friendly options when you shop or make your own.
Can I decorate wine bottle bags with paint or markers?
You can decorate wine bottle bags with fabric paint or markers. Test your design on a scrap piece first. Let everything dry before using the bag. This adds a personal touch to your wine bottle bags.
What is the best way to store wine bottle bags?
Store wine bottle bags flat in a cool, dry place. Avoid folding them to keep their shape. You can stack several wine bottle bags together. This saves space and keeps your bags ready for your next party.
Do wine bottle bags protect bottles from breaking?
Wine bottle bags add a layer of protection, but they do not make bottles unbreakable. For travel, use extra padding or a special transport bag. Wine bottle bags work best for carrying and gifting, not heavy-duty protection.
Can I make wine bottle bags without sewing?
Yes! You can use fabric glue instead of sewing. Glue the sides and bottom, then let them dry. This method makes wine bottle bags easy for beginners. You still get a strong and stylish bag.


