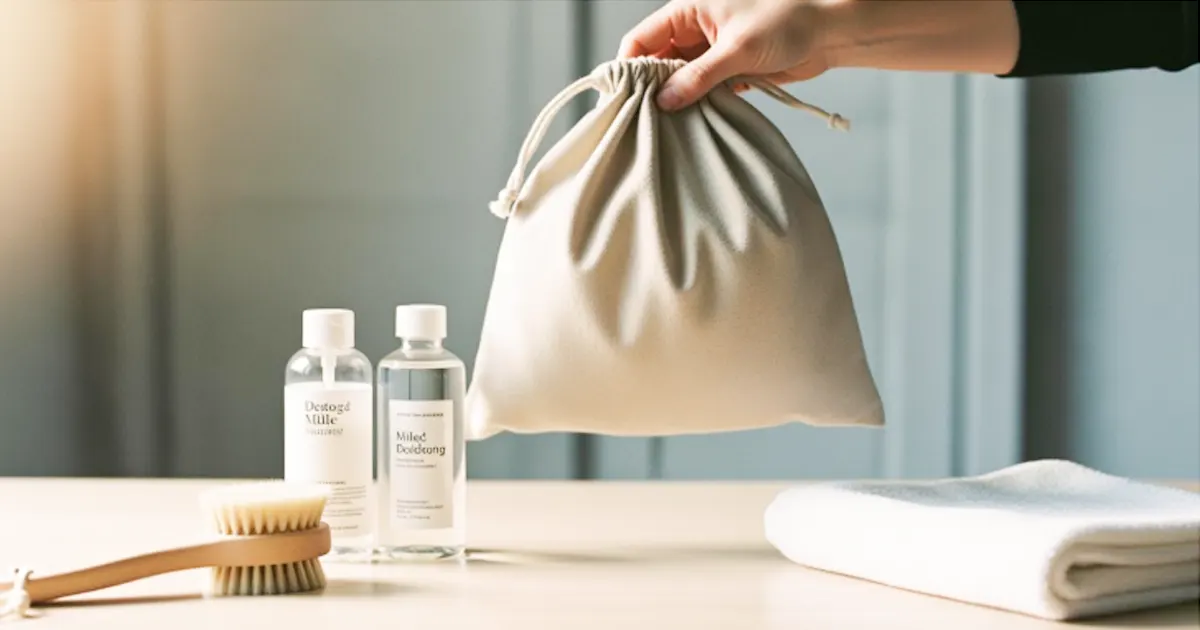
Welcome! You might wonder how to make a felt shopping bag with your own hands. You can jump in, even if you have never tried a craft project before. Felt feels soft, looks stylish, and works great for bags. You only need a few supplies and some creativity. Try making an easy felt tote bag—you will love the results.
Tip: Grab your favorite color of felt to make your bag stand out!
Key Takeaways
- Get the main materials like felt, scissors, and glue first.
- Pick the felt type that fits your bag’s use. Wool looks nice. Polyester lasts longer.
- Cut felt pieces carefully so your bag looks good. Use a ruler to help you cut straight.
- Choose how long you want the handles. Decide how big you want the pockets. This makes your bag easier to use.
- Make the bottom stronger with interfacing or faux leather. This helps your bag hold more weight.
- Make your bag special with decorations. You can use appliqués, fabric paint, or other fun things.
- Look at all the seams to make sure they are strong. This stops your bag from breaking later.
- Have fun making your bag. Try new designs and colors if you want.
Materials for Felt Bag
Before you start making your shopping bag, you need to gather your supplies. Picking the right materials makes your project easier and helps your bag last longer. Let’s look at what you’ll need.
Felt Types
You have a few choices when it comes to felt. Each type has its own strengths. Some work better for fashion, while others are great for crafts or everyday use. Here’s a quick guide to help you decide:
| Type of Felt | Key Features | Best Uses in Bags |
|---|---|---|
| Wool Felt | Soft, natural, eco friendly | Fashion totes, premium handbags, storage bags |
| Polyester Felt | Affordable, durable, easy to print | Promotional totes, shopping bags, bulk orders |
| Blended Felt | Mix of style and toughness | Mid range bags, daily use totes, organizers |
| Needle Felt | Craft friendly, textured surface | DIY projects, artisan pouches, custom designs |
If you want a sturdy bag for groceries, polyester felt works well. Wool felt feels soft and looks fancy, so you might pick it for a stylish tote. Blended felt gives you a balance between strength and style. Needle felt is fun for creative projects and custom designs.
Tip: Try mixing different types of felt for a unique look and feel!
Tools Needed
You don’t need a lot of fancy tools to make a felt shopping bag. Most items are easy to find at home or in a craft store. Here’s a simple list to get you started:
- Sharp scissors (for cutting felt cleanly)
- Ruler or measuring tape (to measure your pieces)
- Fabric glue or a sewing kit (choose glue for a no-sew bag)
- Clips or pins (to hold felt pieces together while you work)
- Pencil or fabric marker (for marking where to cut)
If you want to add extra features, you might also grab a hole punch or a snap fastener kit. These help you make pockets or close your bag securely.
Optional Decorations
Decorating your felt bag lets you show off your style. You can keep it simple or go all out. Here are some popular ways to personalize your bag:
| Decoration Method |
|---|
| Screen Print |
| Embroidery |
| Heat Transfer |
| Direct to Film |
- Screen Print
- Embroidery
- Heat Transfer
- Direct to Film
You can use embroidery to stitch your name or a fun pattern. Screen print works well for bold designs. Heat transfer lets you add colorful images. Direct to film is great for detailed graphics.
Note: Decorations not only make your felt bag look cool, but they also help you spot your bag in a crowd!
Now that you know what materials and tools you need, you’re ready to start making your felt shopping bag. Gather your supplies and get creative!
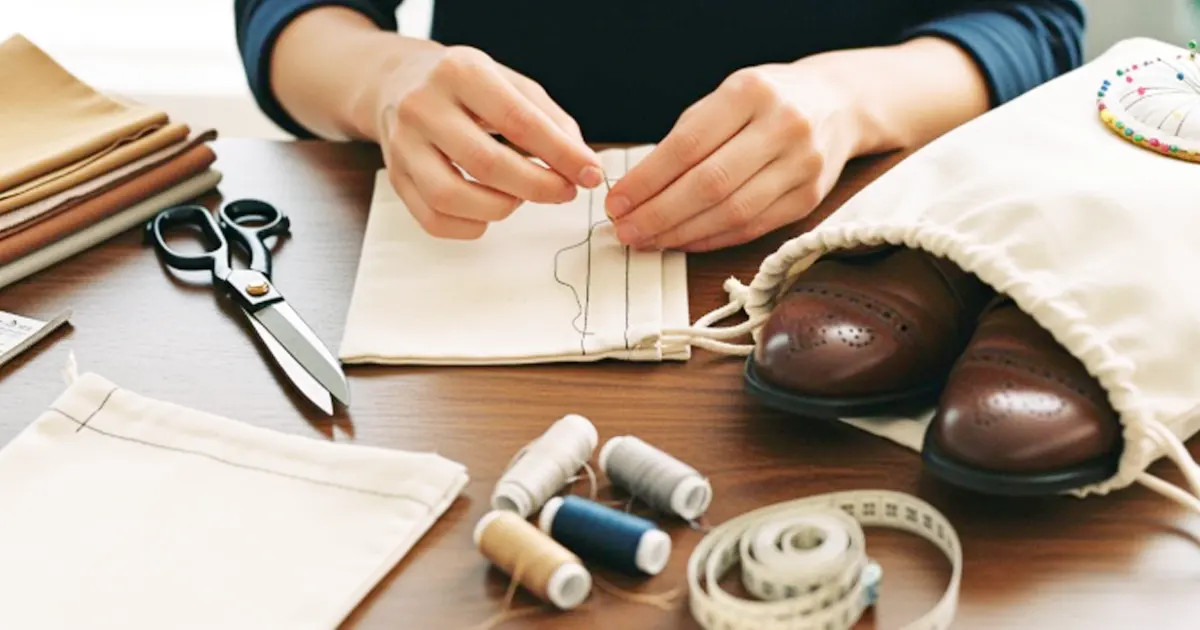
Cut Felt Pieces
Now comes the fun part—cutting your felt pieces! You get to shape your bag just the way you want. Grab your supplies and let’s get started.
Measure for Bag Body
First, decide how big you want your shopping bag. Most people like a medium size, but you can go bigger or smaller. A good size for a basic tote is about 14 inches wide and 16 inches tall. Use your ruler or measuring tape to mark a rectangle on your felt. Draw the lines with a pencil or fabric marker so you can see where to cut.
Tip: If you want a wider bag, add a few extra inches to the width. For a deeper bag, make it taller.
Cut out two identical rectangles. These will be the front and back of your bag. Try to keep your lines straight. If you want a flat bottom, you can cut small squares (about 2 inches) from the bottom corners. This trick helps your bag stand up when you fill it.
Cut Handles and Pocket
Handles make your bag easy to carry. You can choose short handles for a hand-held tote or longer ones for your shoulder. Cut two strips of felt for the handles. Each strip should be about 18 inches long and 2 inches wide. If you want stronger handles, make them a little wider.
Want a pocket? Cut a smaller rectangle from your leftover felt. A good pocket size is 6 inches wide and 7 inches tall. You can put your phone, keys, or shopping list in this pocket. Mark the spot where you want the pocket to go on one of your bag body pieces.
Here’s a quick table to help you remember the sizes:
| Piece | Size (inches) | Quantity |
|---|---|---|
| Bag Body | 14 x 16 | 2 |
| Handle | 18 x 2 | 2 |
| 6 x 7 | 1 |
Prepare Strap Covers
Strap covers make your bag more comfortable to carry. They also add a nice touch to your design. Cut two extra strips of felt, each about 6 inches long and 2 inches wide. You will wrap these around the middle part of your handles. This step is optional, but it feels great on your hands.
Note: If you want extra padding, fold the strap covers in half before attaching them.
You now have all your felt pieces ready. Lay them out on your table and check that everything matches up. If you want to add decorations, you can cut shapes or letters from extra felt now. You’re ready for the next step—putting your bag together!
How to Make a Felt Shopping Bag
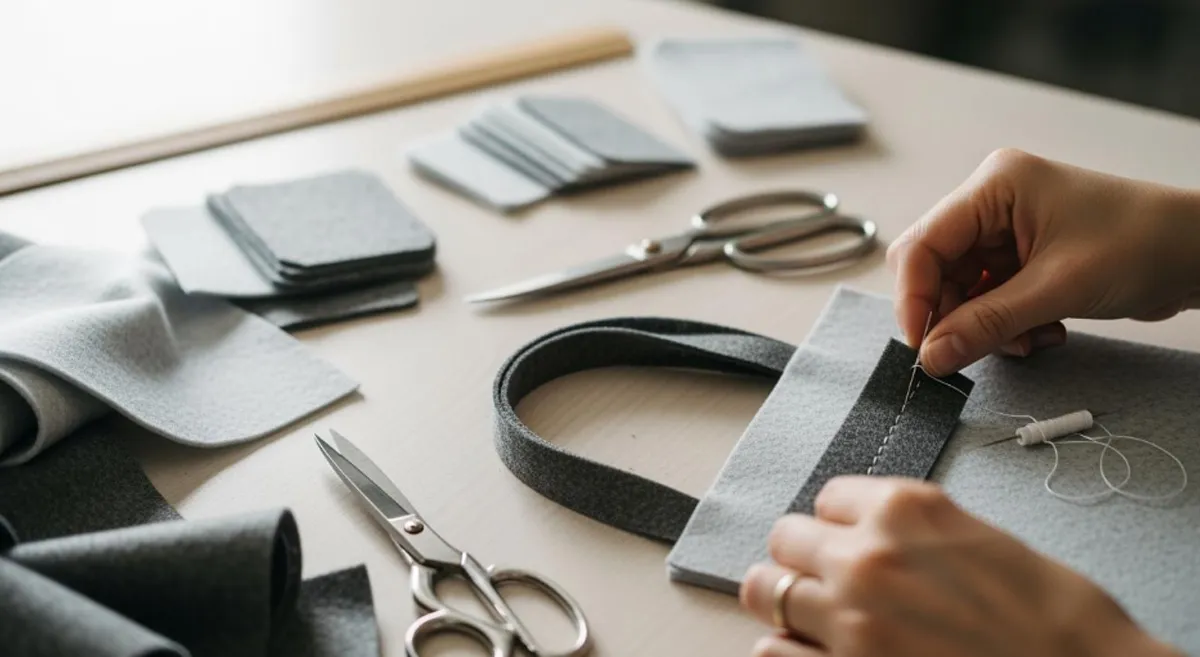
Sew or Glue Sides
You have your felt pieces ready. Now, you can start building your bag. You can sew the sides or use glue. Both ways work well, so pick what feels best for you.
If you want to sew your bag:
- Lay the two main pieces of felt flat on your table. Make sure the outside of the bag faces down.
- Place any lining panels you want to use at each end. Pin them in place.
- Sew across the short sides at the top. This step keeps the top edges neat.
- Fold the bag in half. The slits or cut corners should be on the outside.
- Pin along both sides and the bottom to hold everything together.
- Sew down each side and across the bottom. Use small, even stitches for strength.
- Trim the sides and top so they look straight and even. Cut off any extra felt.
If you want to glue your bag:
- Hot glue works fast and holds strong, but you need to be careful because it gets hot.
- Fabric glue keeps the felt soft and dries clear. It takes longer to dry but is easy to use.
- Aleene’s Fabric Fusion Glue is a good choice for felt. It gives a strong bond and keeps your bag flexible.
To glue your bag, lay the pieces flat and run a thin line of glue along the sides and bottom. Press the pieces together and use clips or pins to hold them while the glue dries. Wait until the glue is fully dry before moving on.
Tip: If you want your bag to last longer, sew the sides. If you want a quick project, glue works fine.
Attach Handles
Handles make your shopping bag easy to carry. You can sew or glue them, just like the sides.
To attach handles:
- Place each handle strip at the top edge of your bag. Leave about 3 inches from each side.
- Make sure the handles are even on both sides. You want them to match up.
- Pin or clip the handles in place.
- Sew the ends of each handle to the bag. Use a square or X pattern for extra strength. If you use glue, add a little extra at the ends and press firmly.
- If you made strap covers, wrap them around the middle of each handle. Sew or glue them in place.
Note: Strong handles help your felt shopping bag carry more weight. Double-check that they are secure before you use your bag.
Add Pocket
A pocket gives your bag a special touch. You can keep your phone, keys, or other small items inside. There are many ways to add a pocket to your felt shopping bag. Here are some popular options:
| Pocket Type | Features | Best For | Difficulty Level |
|---|---|---|---|
| Patch Pocket | Simple rectangle topstitched onto lining | Quick-access items (phone, keys) | ★☆☆☆☆ |
| Slip Pocket | Open pocket split by a vertical seam | Notebooks, pens | ★★☆☆☆ |
| Zipper Pocket | Enclosed, secure compartment | Wallets, small valuables | ★★★★☆ |
| Elastic Pocket | Elastic top for flexible storage | Cosmetics, small bottles | ★★★☆☆ |
| 3D Gusset Pocket | Extra depth, boxy shape | Travel or tool bags | ★★★★★ |
For most bags, a patch pocket is the easiest. Place the pocket piece on the front of your bag. Pin it in place. Sew around the sides and bottom, leaving the top open. If you want, you can use glue instead of sewing. Just make sure the pocket is flat and secure.
Tip: Try a slip pocket if you want to organize pens or a notebook. Add a zipper pocket for extra security.
You now know how to make a felt shopping bag that is strong, stylish, and useful. Keep going to finish your bag and make it your own!
Reinforce Bottom
You want your felt shopping bag to hold up, even when you carry heavy groceries or books. A strong bottom keeps your bag from sagging or tearing. Let’s make sure your bag can handle anything you toss inside!
Here are some easy ways to reinforce the bottom of your felt bag:
- Add Interfacing: Cut a piece of interfacing that matches the size of your bag’s bottom. Place it right in the center on the inside of your felt. Interfacing gives your bag extra strength and helps it keep its shape.
- Use Faux Leather: Faux leather works great for reinforcement. Cut a rectangle of faux leather the same size as your bag’s bottom. This material adds a sturdy layer and looks stylish, too.
- Secure with Double Adhesive Tape: Stick double adhesive tape along the edges of your faux leather piece. Press it firmly onto the interfacing. This step keeps everything in place while you finish your bag.
- Topstitch for Extra Hold: Sew close to the edges of the faux leather piece. Topstitching locks all the layers together and gives your bag a neat, finished look.
Tip: If you don’t have faux leather, you can use another thick fabric or even an extra layer of felt. The goal is to make the bottom firm and supportive.
You can do these steps before you sew or glue the sides of your bag. If you already closed the sides, just slide the reinforced piece into the bottom and secure it with glue or a few stitches.
A reinforced bottom means you can carry more without worry. Your bag will last longer and look better, even after many trips to the store!
Easy Felt Tote Bag Design
You want a shopping bag that looks great and feels easy to make. You can try these two beginner-friendly designs. Both methods use simple steps and help you create a sturdy tote you can use every day.
Simple Two-Square Method
This method works well if you want a classic tote shape. You only need two squares or rectangles of felt. You can finish this project in less than an hour.
Steps:
- Cut two equal squares or rectangles from your felt. You can use the sizes from earlier, or pick your own.
- Place the pieces together, lining up the edges.
- Sew or glue along three sides. Leave the top open.
- Attach handles to the top. You can sew them on or use fabric glue.
- If you want, add a pocket or decoration before you close the sides.
Tip: You can use clips to hold the felt in place while you sew or glue. This helps keep your lines straight.
Here’s a quick table to help you remember the steps:
| Step | What You Do |
|---|---|
| Cut Squares | Two equal felt pieces |
| Join Sides | Sew or glue three edges |
| Add Handles | Attach at top |
| Decorate | Add pocket or design |
You can finish this tote in one afternoon. You get a strong bag that holds books, groceries, or craft supplies.
No-Sew Zigzag Option
You don’t need a sewing machine for this design. You can make a felt tote with just glue and a fun zigzag edge. This style looks playful and works well for kids or quick projects.
How to do it:
- Cut two rectangles of felt for the body.
- Use pinking shears to trim the edges. This gives a zigzag look.
- Glue the sides and bottom together. Press firmly and let dry.
- Attach handles with glue. You can use extra felt strips or ribbon.
- Decorate with stickers, patches, or fabric paint.
Note: Pinking shears help stop the felt from fraying. You get a cool edge and a neat finish.
You can finish this bag in less than 30 minutes. You don’t need any special tools. You can let kids help with the gluing and decorating.
Both designs give you a simple way to make a felt tote bag. You can pick the style that fits your needs. You can always add more decorations or pockets later. Making your own bag lets you show off your creativity and enjoy a useful project.
Decorate Your Felt Bag
You have your felt shopping bag ready. Now, you can make it truly yours! Decorating your bag is the best part. You can add color, texture, and personality. Let’s look at some easy ways to jazz up your tote.
Add Appliqués
Appliqués give your bag a playful look. You can use different shapes, patterns, or even letters. Many people love adding cheerful designs or cute details. Here’s a quick guide to popular appliqué styles:
| Appliqué Type | Description |
|---|---|
| Caravan Appliqué | A cheerful design that adds personality to the bag. |
| Bunting | Cute decorative elements that enhance the visual appeal of the bag. |
| Button Details | Decorative buttons that contribute to the handmade character of the bag. |
| Materials Used | Various fabrics for appliqué, including black and white felt, lace trim, and narrow ribbon. |
You can cut shapes from felt, lace, or ribbon. Try sewing or gluing them onto your bag. Want a fun look? Use button details or bunting. Caravan appliqué brings a happy vibe. Mix and match materials for a unique style.
Tip: Lay out your appliqué pieces before attaching them. This helps you see how your design will look.
Use Fabric Paint
Fabric paint lets you add bright colors and bold patterns. You can draw flowers, write your name, or paint stripes. Some paints work better on felt than others. Here are a few top picks:
| Fabric Paint Name | Best For | Description |
|---|---|---|
| Jacquard Dye-Na-Flow Specialty Paint Set | Light-Colored Fabrics | Acrylic-based, vibrant colors, durable for washing. |
| Jacquard Products Textile Color Fabric Paint | Versatility & Beginners | Well-rounded performance, can be adjusted for thickness, great for beginners. |
| Jacquard Products Neopaque Acrylic Paint | Dark-Colored Fabrics | Fully opaque, high pigment count, vibrant on dark textiles. |
You can use a brush, sponge, or even a stencil. Jacquard Dye-Na-Flow works well on light colors. Neopaque Acrylic Paint pops on dark felt. Textile Color Fabric Paint is easy for beginners. Let your paint dry before you touch or use your bag.
Note: Always test your paint on a scrap piece first. This helps you avoid mistakes.
Attach Embellishments
Embellishments add texture and sparkle. You can glue or sew them onto your bag. Many people use wool fiber bits, silk pieces, or crocheted strips. Here are some favorites:
- Wool fiber bits
- Wool prefelt pieces
- Silk fiber bits
- Silk fabric pieces
- Crocheted cotton strips
You can place these along the edges, on the handles, or in the center. Silk adds shine. Wool gives a cozy feel. Crocheted cotton strips bring a handmade touch. Try mixing different embellishments for a layered look.
Get creative! There’s no wrong way to decorate your felt bag. You can change your design anytime.
Decorating your bag makes it special. You can show off your style and have fun. Try new ideas and see what you like best. Your felt shopping bag will stand out wherever you go!
Finish and Care
Check Seams
You want your new bag to last a long time. Take a few minutes to check all the seams before you start using it. Look at the sides, bottom, and where the handles attach. Gently tug on each seam. If you see any loose threads or gaps, fix them now. You can sew over weak spots or add a little more glue if you used the no-sew method.
Tip: Strong seams help your bag carry heavy items without tearing. A quick check now saves you trouble later.
If you added decorations or pockets, check those too. Make sure everything feels secure. You want your bag to look neat and hold up to daily use.
Clean and Store
Keeping your felt shopping bag clean and fresh is easy. You just need to follow a few simple steps. When you see a small stain or spill, act fast. Spot clean right away so the stain does not set in.
Here’s how you can clean your bag:
- Mix a little mild detergent with cold water.
- Test the solution on a hidden spot first.
- Dampen a soft cloth with the soapy water.
- Gently blot the stain. Do not rub hard.
- Rinse the area with a clean, damp cloth to remove soap.
- Pat dry with a towel.
- Let your bag air dry completely. Keep it away from sunlight and heat.
Note: Always hand wash your bag. Machine washing can damage the felt and change its shape.
You can keep your bag looking good by following these tips:
- Do not overstuff your bag. Too much weight can stretch or distort it.
- Keep your bag dry. Water can shrink or warp the material, especially if you use wool felt.
- Store your bag in a cool, dry place. Hang it up or lay it flat to keep its shape.
A little care goes a long way. Your bag will stay bright and sturdy for many trips to the store or outings with friends. If you treat your bag well, it will look great and last for years.
Felt Bag Tips
Avoid Common Mistakes
You want your felt bag to look great and last a long time. Many beginners make the same mistakes, but you can avoid them with a little care. Here are the most common problems and how you can steer clear of them:
- Skipping interfacing makes your bag floppy. Always add interfacing for shape and support.
- Choosing cheap fabrics leads to bags that fray or fall apart. Pick good quality materials for a sturdy felt bag.
- Forgetting to prewash fabrics can cause shrinking or misshaping after cleaning. Prewash before you start.
- Using the wrong needle might break your needle or damage the fabric. Use a needle made for thick layers.
- Starting with overcomplicated patterns can frustrate you. Begin with simple designs and build your skills.
- Skipping machine maintenance causes skipped stitches and other problems. Clean and oil your machine often.
- Sewing bags too bulky for your machine can break needles or jam your machine. Check your machine’s limits.
- Not reinforcing important seams means your bag might rip. Add extra stitches to handles and stress points.
- Skipping the press leaves your bag looking wrinkled. Press seams for a neat finish.
- Not keeping notes makes it hard to repeat your favorite projects. Write down what works for you.
Tip: Take your time and check each step. You will get better results and enjoy the process more.
Customization Ideas
You can turn a simple felt bag into something special with a few creative touches. Try these fun ideas to make your bag stand out:
- Paper cut out painting lets you create cool shapes and patterns. Use paper as a stencil and paint your design.
- Embroidery adds a personal touch. Stitch your initials, a flower, or any design you like.
- Patches or transfers are easy to use. Iron or glue them on for instant style.
- Random fabric patching gives your bag a unique look. Mix different fabrics for a colorful effect.
Don’t be afraid to experiment. Your bag should show off your personality!
Time-Saving Shortcuts
You might not have hours to spend on every project. Here are some quick tricks to help you finish your felt bag faster:
- Use fabric glue instead of sewing for simple seams.
- Buy pre-cut felt pieces to skip measuring and cutting.
- Choose ready-made handles or straps to save time.
- Decorate with iron-on patches or stickers for instant flair.
- Work in batches if you want to make more than one bag.
Note: Shortcuts can help you finish quickly, but always check that your bag is strong and neat before you use it.
You can make a beautiful felt bag with just a few smart choices. Avoid common mistakes, try new ideas, and use shortcuts when you need them. Enjoy making your bag and have fun with every step!
Conclusion
You just learned how to make a felt shopping bag from start to finish. Most people finish this project in about one hour. Making your own bag is easy and fun. You get to pick the colors, size, and style. Check out these great reasons to make your own:
| Benefit | Description |
|---|---|
| Durability | Felt bags last a long time and stay strong. |
| Sustainability | Felt is eco-friendly and helps the planet. |
| Customization | You can design your bag any way you like. |
| Cost-effectiveness | Making your own bag saves money. |
Try new designs and experiment with decorations. If you want a custom felt bag, we can help. We offer many colors, fast production, and direct support.
| Service Type | Description |
|---|---|
| Customization Options | Choose from many felt colors and materials. |
| Production Process | We finish custom orders in about 30 days after sample approval. |
| Direct Collaboration | Work with our team for a personal touch. |
Let your creativity shine and enjoy your new felt shopping bag!
FAQ
How strong is a felt shopping bag?
Felt bags are sturdy for everyday use. You can carry groceries, books, or craft supplies. For extra strength, reinforce the bottom and handles. Good stitching or strong glue helps your bag last longer.
Can I wash my felt shopping bag?
You should hand wash your felt bag with cold water and mild soap. Machine washing can shrink or warp the felt. Always air dry your bag away from sunlight.
What glue works best for no-sew felt bags?
Fabric glue or hot glue works well. Aleene’s Fabric Fusion is a favorite for felt. It dries clear and keeps your bag flexible. Always let the glue dry completely before using your bag.
Can kids make felt shopping bags?
Yes! Kids can help with cutting, gluing, and decorating. Adult supervision helps with scissors and hot glue. The no-sew zigzag method is perfect for young crafters.
How do I stop felt from fraying?
Felt usually does not fray like other fabrics. If you want extra protection, use pinking shears for a zigzag edge. You can also add a little fabric glue along the cut edges.
What size should I make my bag?
Most people like a bag about 14 inches wide and 16 inches tall. You can make it bigger or smaller to fit your needs. Use a ruler to measure before you cut.
Can I add a zipper to my felt bag?
You can add a zipper for extra security. Sew the zipper to the top edge before you join the sides. Use a zipper foot on your sewing machine for best results.