
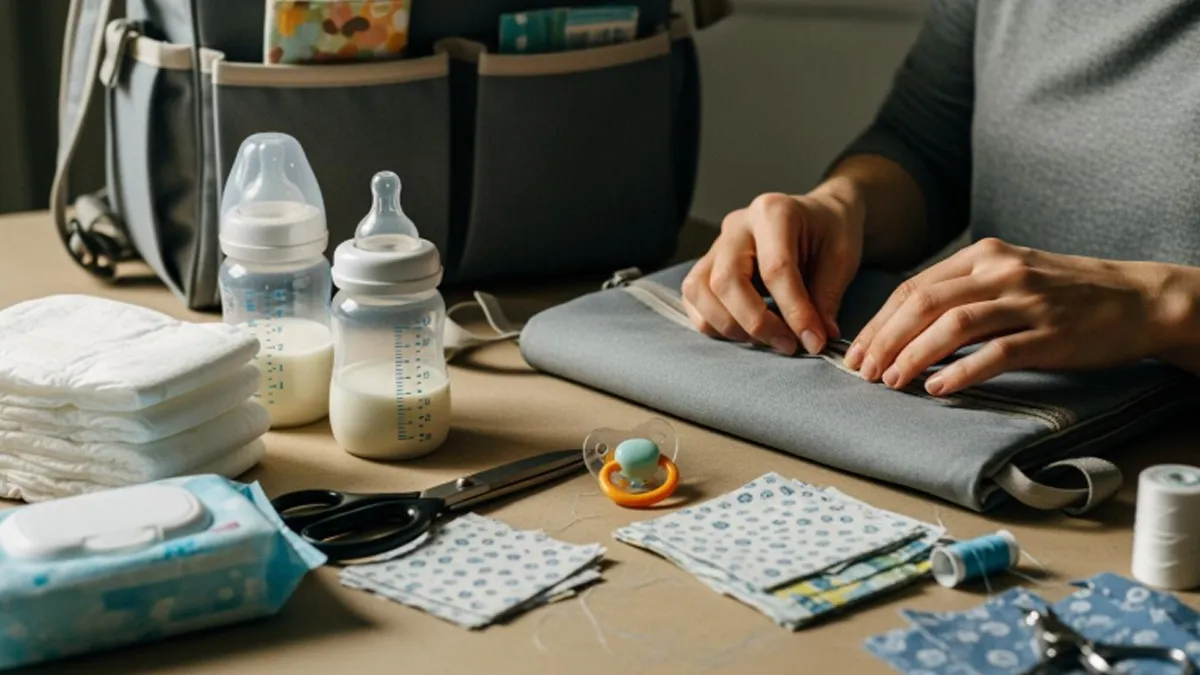
Ready to learn how to make a diaper bag? You can create a bag that fits your needs and style. Sewing your own diaper bag lets you pick the fabric, choose the pockets, and decide on the straps. You don’t have to be an expert. Beginners can follow these steps and feel proud of the results.
Tip: Trust your creativity. You’ll find making a diaper bag is easier than you think!
Key Takeaways
- Pick strong and easy-to-clean fabrics for your diaper bag. Water-repellent and stain-resistant fabrics work best.
- Get important tools like a sewing machine, fabric scissors, and pins. These tools help make sewing easier.
- Choose a pattern that matches your style and needs. Try tote or backpack styles to make your bag more useful.
- Add pockets to help keep things neat. Use inside and outside pockets for quick access to important items.
- Make your bag special with decorations like monograms or patches. This shows your style and makes the bag unique.
- Put interfacing in your bag to give it shape and support. This helps your bag stay firm when you use it every day.
- Make seams and closures stronger to help your bag last longer. This keeps your bag safe from damage during daily use.
- Go slowly while sewing. Measure carefully and pin fabric pieces so you do not make mistakes.
Materials and Tools
Fabric Selection
Choosing the right fabric makes your diaper bag last longer and look great. You want something tough, easy to clean, and safe for your baby’s things. Let’s look at some popular fabric choices and how they hold up:
| Fabric Type | Durability Rating | Cleaning Ease |
|---|---|---|
| Water-repellent | High | Easy to wipe clean |
| Stain-resistant | High | Machine washable |
| PVC (not recommended) | Low | Can harden and crack |
| Antimicrobial finish | Moderate | Easy to maintain |
| Eco-friendly fabrics | High | Varies by material |
Durable Options
You want your diaper bag to handle daily use. Water-repellent and stain-resistant fabrics work best. These materials stand up to spills, drops, and lots of movement. Eco-friendly fabrics like organic cotton canvas or recycled polyester also offer great strength. Avoid PVC, since it can crack and wear out quickly.
Washable Choices
Babies can be messy, so easy cleaning is a must. Stain-resistant fabrics let you toss the bag in the washing machine. Water-repellent fabrics wipe clean with a damp cloth. If you pick an antimicrobial finish, you get extra protection against germs. Always check the care label before you buy.
Essential Tools
You don’t need fancy equipment to make a diaper bag, but a few key tools help a lot.
Sewing Machine
A sturdy sewing machine saves time and gives you neat seams. Look for a machine with a large hoop size if you want to add designs. Make sure it has enough power to sew through thick layers. Adjustable speed and a walking foot attachment help you sew straight and even stitches.
Hand Sewing Tools
Sometimes you need to sew by hand, especially for small details. Keep these tools handy:
- Sharp fabric scissors
- Seam ripper (for fixing mistakes)
- Pins or clips to hold fabric in place
- Measuring tape for accuracy
- Needles for hand stitching
Tip: Organize your tools in small drawers or containers. You’ll find what you need faster and keep your workspace tidy.
Notions
Notions are the small parts that make your bag work well and look finished.
Zippers and Snaps
Zippers keep things secure inside the bag. Choose sturdy zippers that match your fabric. Magnetic snaps or clasps make opening and closing pockets easy. You can also use D rings, buckles, or sliders to attach straps or add style.
Interfacing
Interfacing gives your bag shape and strength. Use it between fabric layers to help the bag stand up and hold its form. Pick a weight that matches your fabric—light for soft bags, heavy for structured ones.
With the right materials and tools, you’re ready to start making your diaper bag. Take your time choosing each item. Your choices will make a big difference in the final result!
Embellishments
You want your diaper bag to stand out, right? Embellishments help you add personality and style. You can make your bag look fun, elegant, or totally unique. Let’s talk about some popular ways to decorate your diaper bag.
Popular Embellishments for Diaper Bags:
- Monograms
- Custom embroidery
- Personalized styles
Monograms are a classic choice. You can add your baby’s initials or your own. This small touch makes your bag feel special. You can use iron-on letters or stitch them by hand. If you want something fancier, try custom embroidery. You can sew cute animals, flowers, or even your baby’s name. Embroidery adds color and texture. It also shows off your sewing skills.
Personalized styles let you get creative. You can pick patches, badges, or even fabric paint. Some people like to add fun buttons or decorative ribbons. You might want to use themed fabric, like animals or stars. You can also sew on appliqués. These are fabric shapes you attach to the bag. Appliqués can be simple or detailed. You decide what fits your style.
Tip: Test your embellishments on a scrap piece of fabric first. You’ll see how they look and make sure they stick well.
Here’s a quick table to help you choose the right embellishment for your bag:
| Embellishment Type | Skill Level | How to Attach | Best For |
|---|---|---|---|
| Monogram | Beginner | Iron-on, hand stitch | Personal touch |
| Embroidery | Intermediate | Hand or machine sew | Custom designs |
| Appliqué | Beginner | Sew or iron-on | Fun shapes, themes |
| Patches | Beginner | Sew or iron-on | Quick style updates |
| Buttons/Ribbons | Beginner | Sew | Colorful accents |
You don’t need to use every embellishment. Pick one or two that match your style. If you want a simple look, stick with a monogram or a small patch. If you love color, try embroidery or ribbons. You can even mix and match.
Embellishments do more than look good. They help you spot your bag quickly in a crowd. They also make your diaper bag feel like yours. You’ll enjoy carrying it every day.
So, grab your favorite decorations and start designing. Your diaper bag will be one-of-a-kind, just like you and your baby!
Preparing Fabric and Pattern
Getting your fabric and pattern ready is a big step in how to make a diaper bag. You want your bag to look great and work well for your daily needs. Let’s walk through the choices and steps together.
Pattern Choices
Picking the right pattern sets the style for your diaper bag. Sewing communities love these popular options:
- Tote bags
- Messenger bags
- Handbags
- Big diaper bags
- Backpack diaper bags
- Wipes and diaper clutches
- Wet bags
Stand-Up Bag
If you want a bag that stands upright, choose a pattern with a flat bottom and sturdy sides. Stand-up bags make it easy to grab things quickly. They often have reinforced panels and a boxy shape. You can add extra interfacing for more structure.
Backpack Style
Backpack diaper bags are perfect for hands-free carrying. Look for patterns with adjustable straps and multiple pockets. Backpack styles usually have a main compartment, side pockets, and a flap or zipper closure. You can adjust the size to fit your needs.
Tip: Sketch your ideal bag before you pick a pattern. You’ll know what features matter most to you.
Measuring and Cutting
Getting your measurements right helps your bag fit together perfectly. Here’s how you can measure and cut fabric like a pro:
Accurate Measurements
Use a measuring tape to check the length and width of each piece. Double-check your numbers before you cut. Write down your measurements so you don’t forget.
Cutting Tips
Cutting fabric can feel tricky, but you can make it easier:
- Use pins when cutting with dressmaking shears.
- Try pattern weights if you use a rotary cutter.
- Place your fabric on a self-healing cutting mat. For small pieces, a rotating cutting mat works well.
- Use acrylic rulers to cut straight and square lines. Line up the fabric with the grid on your mat and the ruler for sharp edges.
| Tool | Best Use |
|---|---|
| Pins | Holding fabric steady |
| Pattern weights | Keeping patterns in place |
| Rotary cutter | Fast, clean cuts |
| Acrylic ruler | Straight, square cuts |
| Cutting mat | Protects surfaces |
Note: Always cut slowly and check your lines. Mistakes happen, but you can fix them before sewing.
Organizing Pieces
Keeping your fabric pieces sorted saves time and stress. Here are some easy ways to stay organized:
- Sort fabric pieces by size and color.
- Use clear storage containers so you can see everything.
- Label each container for quick identification.
- Separate scraps into small, medium, and large categories.
- Group pieces by color for fast access.
You’ll find your workspace stays neat, and you won’t lose important pieces. Organization helps you focus on sewing instead of searching for fabric.
Now you’re ready to move on to the next step. With your fabric and pattern prepared, you’ll find sewing your diaper bag much easier!
How to Make a Diaper Bag: Step-by-Step Sewing
Ready to put your diaper bag together? This is the part where your project starts to look like a real bag. You’ll see how to make a diaper bag by following each step, from pinning the main body to adding structure. Let’s get started!
Assembling Main Body
Building the main body is the foundation of your diaper bag. You want strong seams and a neat shape.
Pinning and Stitching
Here’s a simple way to assemble the exterior:
- Lay out your main fabric pieces. Make sure you have the front, back, and sides ready.
- Place the side pieces face-down on one of the body panels. Line up the edges and pin them in place.
- Sew along the pinned edges with a 1/2″ seam allowance. Take your time to keep the stitches straight.
- Flip the section face-down on the other body panel. Match the edges of the side pieces with the second panel.
- Pin the sides and sew along the edges with the same seam allowance.
- Attach the bottom piece to the body you just assembled. Pin it carefully and sew all the way around.
- Turn the bag right side out. Now you have the basic shape!
Tip: Use lots of pins or clips to keep the fabric from shifting. This helps you sew straight lines and avoid mistakes.
Reinforcing Seams
You want your diaper bag to last. Reinforcing the seams makes a big difference.
- Stitch the inner lining securely. Attach zippers and straps with extra care.
- Use topstitching along the edges. This keeps the seams strong and helps the bag hold its shape.
- Try a box stitch for places that carry weight, like handles and straps. This stitch looks like a square or X and gives extra strength.
- Use a triple straight stitch for seams that need to hold heavy items. This adds more security.
| Stitch Type | Best Use | Strength Level |
|---|---|---|
| Topstitch | Edges and seams | Medium |
| Box Stitch | Handles, straps, high-stress | High |
| Triple Straight | Load-bearing seams | Very High |
If you want to know how to make a diaper bag that lasts, don’t skip these reinforcement steps!
Adding Lining
The lining protects the inside of your bag and keeps things clean. You want a lining that stands up to spills and daily use.
Lining Fabric
Pick a lining that works for busy parents. Waterproof fabrics like TPU-laminated nylon, PU-coated polyester, or PEVA sheets keep the inside dry. PUL (Polyurethane Laminate) is a favorite because it’s waterproof and comes in many colors. Waterproof nylon linings work better than basic cotton, especially if you carry formula or snacks.
- Waterproof lining keeps spills from soaking through.
- Durable lining makes your bag last longer.
- Easy-to-clean lining saves you time.
Tip: Test your lining fabric with a splash of water. If it beads up and wipes away, you picked a good one!
Attaching Lining
Follow these steps to add the lining to your diaper bag:
- Lay the side lining pieces face-down on one of the lining body panels. Line up the edges and pin them.
- Sew along the edges with a 1/2″ seam allowance.
- Flip the assembled lining section face-down on the other lining panel. Match the edges and pin in place.
- Sew along the sides with the same seam allowance.
- Attach the bottom lining piece to the body you just assembled. Pin and sew all the way around.
- Turn the lining right side out.
- Place the lining inside the main body of the bag. Make sure the seams match up.
- Pin the top edges together and sew around the opening to join the lining and main body.
Take your time with the lining. A neat lining makes your bag look professional and keeps everything inside safe.
Creating Structure
You want your diaper bag to stand up and hold its shape. Adding structure is key.
Using Interfacing
Interfacing gives your bag support. It goes between the outer fabric and the lining. Here are some popular options:
| Material Type | Description | Usage in Diaper Bags |
|---|---|---|
| Fusible Interfacing | Firm weight, papery feel (Vilene H250, Pellon 809) | Adds structure and durability |
| Sew-in Interfacing | Thick craft weight (Vilene S80/240, Pellon Peltex 70) | Best for larger, structured bags |
| Stabilizers | Foam, adds bulk and sturdiness | Helps keep shape in bigger bags |
| Fusible Fleece | Soft padding (Vilene H640, Pellon TP971F) | Good for small to medium bags |
| Sew-in Foam | Extra support (Vilene Style-Vil, Pellon FF77) | Enhances shape in large bags |
- Use fusible interfacing for easy application. Just iron it onto the fabric.
- Sew-in interfacing works well for big bags that need lots of support.
- Foam stabilizers help the bag stand up and keep its shape.
- Fusible fleece adds softness without making the bag stiff.
If you want to know how to make a diaper bag that stands up on its own, choose the right interfacing. Match the weight to your fabric for the best results.
Now you’ve finished the main sewing steps. You’ve learned how to make a diaper bag that’s strong, neat, and ready for daily use. Next, you’ll add pockets, handles, and closures to finish your custom creation!
Pockets and Organization
You want your diaper bag to keep everything in its place. Smart pocket design helps you stay organized and find what you need fast. Let’s look at how you can add both interior and exterior pockets, plus tips for custom sizes.
Interior Pockets
Interior pockets make your bag work for you. You can keep bottles, diapers, wipes, and snacks separate. This way, you don’t have to dig around when your baby needs something.
Organization Tips
Think about what you carry every day. You might want a pocket for bottles, one for diapers, and another for wipes. Some bags even have mesh pockets for wet items. Here’s a quick look at how popular diaper bags organize their interiors:
| Diaper Bag Name | Number of Pockets | Insulated Compartments | Special Features |
|---|---|---|---|
| Morgan Diaper Bag | 6 interior, 3 external | N/A | Top grab handle, secured drawstring closure, leather base, gold feet |
| Daphne Diaper Backpack | 9 total | 2 | Adjustable padded straps, water-resistant, stroller attachment straps, foldable changing pad |
| Montrose Diaper Tote | 7 total | 2 | Wide zip-top opening, water-resistant exterior, can be carried as tote/shoulder/crossbody |
You can use these ideas to plan your own pocket layout. More pockets mean better organization, but you want to keep things simple.
Tip: Use clear pockets for small items like pacifiers or creams. You’ll spot them quickly.
Attachment Methods
You can sew pockets right onto the lining. Try these methods:
- Stitch flat pockets for diapers and wipes.
- Add elastic at the top for bottle pockets.
- Use mesh for wet items.
- Sew zippered pockets for valuables.
Pin your pocket pieces to the lining before you sew. Make sure the openings face up. Sew along the sides and bottom, leaving the top open.
Exterior Pockets
Exterior pockets give you quick access to things you use often. You can grab your phone, keys, or a snack without opening the main compartment.
Quick Access
Front or side pockets work best for items you need fast. Slip pockets hold your phone or wallet. Bottle pockets on the outside keep drinks upright and easy to reach.
Note: Place exterior pockets where your hand lands naturally. You’ll save time during busy moments.
Securing Edges
You want your pockets to stay strong. Use these tricks:
- Topstitch the edges for durability.
- Add snaps or Velcro to keep pockets closed.
- Use bias tape for a neat finish.
Custom Pocket Sizes
You can tailor your diaper bag to fit your family’s needs. Custom pockets let you choose the number and size of compartments. Here are some options:
- Pick insulated bottle pockets for keeping drinks cool.
- Add dedicated diaper pockets for easy changes.
- Use mesh compartments for wet items.
- Choose the size based on your trip length—short outings need fewer pockets, long trips need more.
- Think about how many kids you have and what they need.
Customizing your pockets makes your bag unique. You’ll know exactly where everything goes, and you’ll find it fast. That’s a big part of how to make a diaper bag that works for you.
Tip: Sketch your pocket layout before you sew. You’ll see what fits and make changes easily.
Handles and Straps
Handles and straps make your diaper bag easy to carry. You get to choose styles that fit your life. Let’s look at the options and how you can attach them for comfort and strength.
Handle Styles
Handles give you quick grab-and-go convenience. You can sew them on top or along the front section.
Standard Handles
Standard handles sit on the top of your bag. You can grab them with one hand and move fast. These handles work well for tote-style diaper bags. You can make them from sturdy fabric, webbing, or even padded material for extra comfort. Sew them with reinforced stitching so they hold up to daily use.
Tip: Make your handles long enough to slip over your wrist, but not so long that the bag drags on the ground.
Front Section Handles
Front section handles attach to the front panel. You can use these for messenger-style bags or bags with a flap. They give you another way to carry your bag, especially when your hands are full. You can add decorative stitching or padding for a custom look.
Strap Options
Straps let you carry your diaper bag on your shoulder or back. You can pick the style that works best for you.
Shoulder Straps
Shoulder straps make it easy to carry your bag on one side. You can adjust the length for comfort. These straps give you quick access to your bag. If you pack your bag heavy, you might feel some strain on your shoulder.
Backpack Straps
Backpack straps help you carry your bag hands-free. You can walk, push a stroller, or hold your baby without worrying about your bag slipping. Backpack straps spread the weight evenly across your back. You might need to take off the bag to reach inside, but you get more comfort for long outings.
Here’s a quick table to help you compare strap options:
| Strap Type | Advantages | Disadvantages |
|---|---|---|
| Backpack | Hands-free, even weight distribution | Harder to access items quickly |
| Shoulder Bag | Easy one-handed access | Can cause shoulder strain if overloaded |
Note: Try both styles before you sew them on. You’ll find what feels best for your routine.
Attaching Handles and Straps
You want your handles and straps to stay secure. Use these techniques for strong, safe connections:
- Use clips or straps with swivel features for smooth movement.
- Sew or wrap industrial-strength Velcro around stroller handles and backpack straps for easy installation.
- Attach carabiners to backpack loops and clip them onto your stroller frame.
- Knot paracord into loops with adjustable sliders to convert backpack straps into stroller hangers.
- Thread tight elastic wristbands through backpack loops and stroller bars to keep your bag from swinging.
- Distribute weight by packing heavy items close to the stroller frame.
- Secure loose ends of straps to prevent tangling.
- Check fasteners often to make sure everything stays tight.
Tip: Reinforce all attachment points with extra stitching. Your bag will last longer and handle more weight.
Handles and straps make your diaper bag easy to use every day. Pick the styles that fit your life, and attach them with care. You’ll enjoy carrying your custom bag wherever you go!
Closures and Finishing
Adding the right closure to your diaper bag makes life easier. You want to keep everything safe inside, but you also need quick access when your hands are full. Let’s look at the best options and how to finish your bag like a pro.
Zippers and Magnetic Snaps
Closures matter. You want something secure, but you also want to open your bag with one hand. Many parents say magnetic snaps are the easiest. You can close your bag fast, even while holding your baby. Zippers work well too, but they need to move smoothly and not get stuck.
Placement Tips
Think about where you reach for your bag most often. Place your zipper or magnetic snap at the top opening. If you add pockets, put closures on the ones you use most. Magnetic snaps work best on flap pockets. Zippers are great for the main compartment.
Tip: Test your closure before sewing it on. Make sure you can open and close it with one hand.
Installation Steps
Ready to attach your closure? Here’s how you can do it:
- For magnetic snaps, mark the spot on your flap and bag body. Cut small slits for the prongs. Push the prongs through the fabric, then fold them flat on the inside. Add a scrap of interfacing for extra strength.
- For zippers, pin the zipper tape to the top edge of your bag opening. Sew along the tape with a zipper foot. Check that the zipper glides smoothly. If you add a zipper to a pocket, use the same steps.
You want your closure to feel sturdy. Double-check your stitching so nothing comes loose.
Finishing Seams
Neat seams make your diaper bag look professional. You also want to stop fraying so your bag lasts longer.
Trimming Threads
After sewing, you’ll see loose threads. Grab your scissors and snip them close to the fabric. Check every seam, inside and out. Clean edges help your bag look tidy.
Topstitching
Topstitching adds strength and style. Sew a straight line along the edge of your seams. This keeps the lining in place and gives your bag a crisp finish. You can use matching thread for a subtle look or pick a bold color for fun.
Here are some ways to finish seams and prevent fraying:
- Use pinking shears to cut zigzag edges.
- Try an overcast stitch with your sewing machine.
- Sew French seams to hide raw edges.
- Add bias binding for a decorative touch.
- Use a serger for a quick, professional finish.
Note: Pick the seam finish that matches your skill level and the look you want.
Final Assembly
You’re almost done! Now it’s time to put everything together.
- Turn the exterior of your bag right-side out. Keep the lining inside out.
- Slide the exterior into the lining, matching the open edges.
- Line up the side seams. Pin all the way around the top edge.
- Sew a 1/2″ seam around the opening.
- Pull the whole bag through the hole in the lining. Press the top edge flat.
- Topstitch around the top to secure the lining inside.
- Close the hole in the lining by folding in the seam allowance and stitching it shut.
Your diaper bag is ready for action! You’ve added closures, finished seams, and assembled everything with care. Now you can pack up and head out with confidence.
Customization and Troubleshooting
Personalizing Your Bag
You want your diaper bag to show off your style. Personal touches make your bag feel special and unique. You can add decorations or features that fit your needs.
Decorative Touches
You have many ways to decorate your diaper bag. Try adding patches, fun buttons, or colorful ribbons. You can sew on fabric shapes or use iron-on designs. Some parents like to use custom embroidery with their child’s name or a favorite animal. Monograms look classic and help you spot your bag quickly.
- Add your child’s name with embroidery or iron-on letters.
- Sew on patches with cute designs.
- Use ribbons or buttons for extra color.
- Try fabric paint for bold patterns.
Personalized packaging options let you customize diaper packs with your child’s name or a special message. This makes your bag feel more connected to your family and adds a sweet touch.
Extra Features
You can make your bag work better for you. Add insulated pockets to keep bottles cool. Try a key clip so you never lose your keys. Some parents add a changing pad pocket or a spot for wipes. You can sew in a waterproof pouch for wet clothes. If you travel a lot, add a luggage strap or stroller hooks.
Tip: Sketch your ideas before you start. You’ll see what features fit your routine.
Common Issues
Even if you follow every step, you might run into problems. Don’t worry! You can fix most issues with simple tricks.
Fixing Seams
Sometimes seams come loose or look messy. You can fix them by sewing over the seam again. Use a matching thread and sew slowly. If the fabric frays, trim the edges and use a zigzag stitch. For heavy-duty spots, try a box stitch or triple straight stitch.
| Problem | Quick Fix |
|---|---|
| Loose seams | Sew again, use box stitch |
| Fraying edges | Trim, zigzag stitch |
| Uneven seams | Rip out, resew slowly |
Resolving Puckering
Puckering happens when fabric bunches up. You can stop this by loosening your thread tension. Use pins to hold the fabric flat. Press the seams with an iron to smooth them out. If puckering stays, try sewing with a longer stitch length.
Note: Always test your stitches on scrap fabric first.
Beginner Tips
You might feel nervous about how to make a diaper bag. Start simple and build your skills. Use easy patterns and sturdy fabrics. Organize your pieces before sewing. Take breaks if you get stuck. Watch online videos for extra help. Ask friends or join sewing groups for advice.
- Read instructions twice before you cut.
- Pin everything before you sew.
- Use a seam ripper to fix mistakes.
- Practice on scraps before working on your bag.
You can make a diaper bag that fits your life. Personalize it, fix problems, and enjoy the process. Every step brings you closer to a bag you’ll love!
Conclusion
You now know how to make a diaper bag from beginning to end. Try making one and see what you come up with! If you have any questions or want to show your finished bag, leave a comment below. If you want a custom bag or need help making it, our team can help you. Here are some top reasons to work with a professional manufacturer:
| Benefit | Description |
|---|---|
| Material Expertise | Strong, waterproof, and safe fabrics for babies |
| Customization Flexibility | Choose sizes, colors, logos, compartments, and extra features |
| Quality Control | Good prices and careful quality checks |
| Design Collaboration | Work together to design your perfect bag |
| Sustainability Commitment | Use eco-friendly and responsibly sourced materials |
We provide OEM and ODM services for all kinds of diaper bags, from everyday bags to fancy ones. Reach out to us for custom orders or to talk about your ideas!
FAQ
How long does it take to sew a diaper bag?
You can finish a basic diaper bag in about 3 to 5 hours. If you add lots of pockets or decorations, you might need more time. Take breaks and enjoy the process!
What fabric works best for diaper bags?
You want strong, washable fabric. Canvas, nylon, and polyester work well. Waterproof or stain-resistant options help keep your bag clean. Always check the care label before you buy.
Can I make a diaper bag without a sewing machine?
Yes, you can sew by hand. Use strong needles and sturdy thread. Hand sewing takes longer, but you can still make a great bag. Try simple patterns for easier stitching.
How do I keep my diaper bag organized?
Add lots of pockets inside and outside. Use mesh or clear pockets for small items. Label each pocket or use color-coded sections. You’ll find things faster and stay organized.
What size should my diaper bag be?
Pick a size that fits your daily needs. Most diaper bags measure 14–18 inches wide and 12–16 inches tall. Make sure you have room for diapers, bottles, wipes, and extras.
How do I clean my diaper bag?
Check the care label first. Most fabric bags can go in the washing machine. Wipe waterproof bags with a damp cloth. Remove crumbs and shake out the inside often.
Can I add my own style to the bag?
Absolutely! You can use patches, embroidery, or fabric paint. Try adding your child’s name or favorite colors. Personal touches make your bag unique and fun to carry.
What if my seams come loose?
Don’t worry! Grab your needle and thread. Sew over the loose seam with small stitches. Use a box stitch for extra strength. You can fix most problems quickly.


