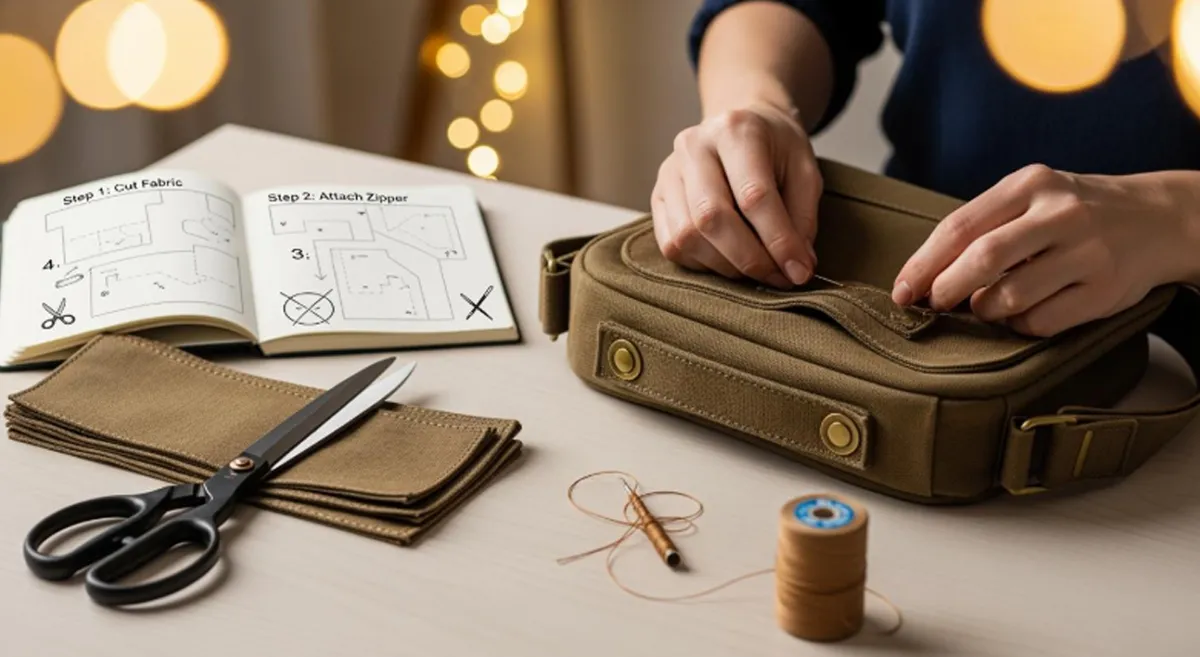
You want to learn how to make a crossbody bag, right? You can start this diy project with just a few supplies. Grab some fabric, pick a simple pattern, and get ready for a fun diy tutorial. You will sew, cut, and finish your own crossbody bag. Making one is easy and rewarding. You just follow clear steps and see your bag come together. Take a look at the table below to see how many steps you will complete:
| Total Steps | Description |
|---|---|
| 19 | Steps involved in making a crossbody bag |
You will build skills, enjoy the process, and finish with a crossbody you made yourself.
Key Takeaways
- Begin your crossbody bag project with easy materials like fabric and a simple pattern.
- Use a clear step-by-step process to cut, sew, and finish your bag.
- Pick fabrics like quilting cotton or canvas because they are easy to use.
- Use important tools like fabric scissors, a sewing machine, and measuring tape to help you work better.
- Add pockets and zippers to make your bag more useful.
- Go slowly with each step to make your bag look neat and professional.
- Make your bag special with decorations like patches, cool straps, or monograms.
- Check your finished bag to make sure it is strong and good for everyday use.
Crossbody Bag DIY Tutorial Overview
What You’ll Make
You will create a stylish crossbody bag that fits your daily needs. This project lets you design a bag that matches your style and holds your essentials. You can choose your favorite fabric and add simple details. Many beginners start with easy patterns. Some popular beginner crossbody bags include:
- Banana Bag by Tropical Research – This fanny pack style crossbody bag has a zipper on the front. You get easy access to your things.
- Simple Sling Bag by TYTKA Studio – This compact bag comes with an adjustable strap. It is perfect for carrying small items.
- Half Moon Round Sling Bag by Sew Stitchery Shop – You can follow easy instructions and add features as you learn.
- Baileigh Bag by Hello Hannah Walker – This bag looks like a bum bag and has clear steps for beginners.
- Crescent Bag by Bag Pattern Studio – This larger bag gives you more space and comes with detailed instructions.
You can pick any of these styles for your diy project. Each one helps you learn new skills and finish with a crossbody you made yourself.
Key Steps
You will follow a simple process to make your crossbody bag. Here are the main steps you will complete:
- Choose your pattern and fabric.
- Cut out the bag pieces.
- Sew the main panels together.
- Add pockets for extra storage.
- Attach the lining for a neat finish.
- Make and attach the strap.
- Add hardware like zippers or rings.
Tip: Take your time with each step. You will see your bag come together as you work through the tutorial.
You will use basic sewing skills. You will learn how to measure, cut, and sew straight lines. You will also practice attaching zippers and making pockets. Each step builds your confidence and helps you master new techniques.
Skill Level and Time
This diy tutorial is perfect for beginners. You do not need advanced sewing skills. You just need patience and a willingness to learn. Most people finish their crossbody bag in a few hours. If you take breaks or add extra details, you might need a bit more time.
| Skill Level | Time Needed | Project Type |
|---|---|---|
| Beginner | 2-4 hours | diy crossbody bag |
You can finish your bag in one afternoon. You will feel proud when you see your finished crossbody. This project is a great way to start sewing and make something useful.
Materials and Tools for Making a Crossbody Bag
Fabric Choices
Picking the right fabric makes your crossbody bag project much easier. You want something that looks good and feels sturdy. Some fabrics are better for beginners because they are simple to cut and sew. You can find many options at your local craft store or online.
Best Fabrics for Beginners
Here’s a quick guide to the best fabrics for your first diy crossbody. Each one has its own benefits, so you can choose what fits your style and needs.
| Material | Why It’s a Good Choice |
|---|---|
| Quilting Cotton | Easy to sew, comes in many prints and colors. Great for small bags or as an accent. |
| Canvas | Strong and sturdy. Perfect for everyday use. Simple to sew and holds its shape well. |
| Faux Suede | Soft and gives your bag a fancy look. Medium weight and easy to work with. |
| Faux Leather & Vinyl | Looks professional, easy to clean, and lasts a long time. Good for a modern crossbody. |
| Home Decor Fabric | Durable and stylish. Comes in many patterns and gives your bag structure. |
| Cork | Natural and flexible. Fun colors and prints. Easy to sew, but can get thick with layers. |
| Oilcloth | Waterproof and easy to wipe clean. Good for lunch bags or outdoor use. |
| Denim | Tough like canvas, with a cool look. Great for a casual crossbody. |
| Essex Linen | Cotton-linen blend that feels nice and looks classy. |
| Waterproof Canvas | No need for extra lining. Stays strong and keeps things dry. |
Tip: If you’re new to sewing, start with quilting cotton or canvas. These fabrics are easy to handle and help you get neat results.
Essential Tools
You don’t need fancy tools to make a diy crossbody bag. A few basic supplies will help you cut, sew, and finish your project. Gather everything before you start, so you can work without stopping.
Cutting and Sewing Supplies
- Fabric scissors: Sharp scissors make cutting fabric easy and clean.
- Rotary cutter and mat: These help you cut straight lines, especially for straps and panels.
- Pins or clips: Hold your fabric pieces together while you sew.
- Measuring tape or ruler: Measure your fabric and pattern pieces for accuracy.
- Sewing machine: Makes the job faster and gives strong seams. You can sew by hand, but a machine is easier for beginners.
- Thread: Choose a color that matches or contrasts with your fabric.
- Seam ripper: Fix mistakes quickly without damaging your bag.
Note: Always use sharp tools and keep your workspace tidy. This helps you avoid mistakes and makes sewing more fun.
Hardware and Accessories
Adding the right hardware gives your crossbody bag a professional finish. You can find these items in craft stores or online. They help your bag open, close, and stay secure.
Zippers, Buckles, Rings
- Zippers: Use for the main opening or pockets. Pick a size that fits your bag.
- Buckles: Adjustable buckles let you change the strap length.
- D-rings or O-rings: Attach the strap to your bag and add style.
- Magnetic snaps: Easy to open and close, perfect for flaps.
- Swivel hooks: Let you remove or switch out the strap.
Tip: Choose hardware that matches your fabric and style. Metal pieces come in silver, gold, or black, so you can customize your crossbody.
Optional Extras
You can make your crossbody bag even more special by adding a few optional extras. These little touches help your bag stand out and work better for your daily life. You do not need to use all of them, but picking one or two can make your project feel unique and personal.
Here’s a quick look at some popular extras you might want to try:
| Optional Material/Feature | Description |
|---|---|
| Crossbody strap | Lets you carry your bag hands-free. You can wear it across your body for comfort and style. |
| Wrist strap | Gives you another way to carry your bag. It adds security and makes it easy to grab and go. |
| Piping | Adds a nice edge around your bag. This detail makes your bag look more finished and professional. |
| Unique bow design | Brings a fun and cute touch to your bag. You can match the bow to your fabric or use a bold color. |
| Adjustable strap | Lets you change the length of your strap. You can wear your bag high or low, just the way you like. |
You might wonder which extras are best for beginners. Try starting with an adjustable strap or a crossbody strap. These options make your bag easier to use every day. If you want to get creative, add piping or a bow. These details do not take much time, but they make your bag look like it came from a store.
Tip: If you want your bag to look neat, use piping along the edges. It hides small sewing mistakes and gives your bag a crisp shape.
Some people like to add a wrist strap for quick trips. You can attach it to a zipper or a ring. This way, you can carry your bag on your wrist when you do not want to use the long strap.
Decorative extras like bows or patches let you show off your style. You can sew on a fabric flower, add a patch, or use a bright zipper pull. These small changes make your bag one of a kind.
You do not have to add extras right away. You can finish your basic bag first. Later, you can come back and try new features as you get more confident with sewing. Each time you add something new, you learn a new skill.
Remember, your crossbody bag is your own creation. Pick the extras that make you happy. Try new ideas and see what works best for you. Sewing is all about having fun and making something you love!
How to Prepare the Pattern
Getting your pattern ready is the first real step in making your crossbody bag. You do not need to feel nervous about this part. With a little patience, you can set yourself up for sewing success.
Choosing a Pattern
You have lots of options when it comes to picking a sewing pattern. Many beginners like to start with a simple design. You can find free and paid patterns online. Some websites even offer step-by-step tutorials that walk you through each part. Here are some popular places to find beginner-friendly crossbody bag patterns:
- Hello Sewing has a big list of easy crossbody bag patterns. You can find links to tutorials and see what each bag looks like before you start.
- Many craft blogs and YouTube channels share free patterns with clear instructions.
- Local fabric stores sometimes give out printed patterns for beginners.
When you choose a sewing pattern, look for one with clear diagrams and simple shapes. Avoid patterns with too many tiny pieces or complicated steps. A basic crossbody bag usually has a front, back, strap, and maybe a pocket. If you want to make things even easier, pick a pattern that uses straight lines.
Measuring and Marking
Once you have your sewing pattern, you need to measure and mark your fabric. This step helps you cut out the right shapes and sizes. Most beginner crossbody bags finish at about 7 inches by 6 inches. To get this size, you will cut your outer bag pieces at 8 inches by 7 inches. This extra space gives you room for seam allowances.
Here’s how you can measure and mark your fabric:
- Lay your fabric flat on a table.
- Place your pattern pieces on top.
- Use a ruler or measuring tape to check the size.
- Mark around the pattern with tailor’s chalk or a washable marker.
Tip: Double-check your measurements before you cut. This helps you avoid mistakes and wasted fabric.
Cutting Pattern Pieces
Now you are ready to cut out your pieces. Use sharp fabric scissors or a rotary cutter for clean edges. Hold your pattern steady with pins or fabric weights. Cut slowly and follow the lines you marked. You will usually need to cut two main panels (front and back), a strap, and any pocket pieces your sewing pattern includes.
If your pattern calls for interfacing or lining, cut those pieces now as well. Keep all your pieces together in a neat pile so you do not lose anything.
Remember, careful cutting makes sewing much easier later. Take your time and enjoy the process!
You have now finished preparing your pattern. You are ready to move on to the next step and start building your crossbody bag.
Cutting and Preparing Fabric for Your Crossbody Bag
Laying Out the Pattern
You have your fabric and your sewing pattern ready. Now it is time to lay out the pieces. This step helps you use your fabric wisely and avoid mistakes. Place your fabric on a flat surface. Smooth out any wrinkles with your hands or an iron. Put your sewing pattern pieces on the fabric. Make sure you follow the arrows on the pattern. These arrows show you the grainline. The grainline keeps your bag strong and helps it keep its shape.
Here are some tips to help you lay out your pattern like a pro:
- Measure twice, cut once. Double-check your pattern placement before you start cutting.
- Align pattern pieces with the grainline. This keeps your bag from stretching out of shape.
- Place pieces on the fold if the sewing pattern tells you to. This gives you a symmetrical bag.
- Look at cutting layout diagrams if your pattern has them. These diagrams help you use less fabric and create less waste.
Tip: Take your time with this step. Good layout means less fabric waste and a better-looking bag.
Cutting Techniques
Cutting your fabric is a big moment. You want clean edges and the right shapes. Use sharp fabric scissors for most pieces. Long, smooth cuts work best, especially on curves. If you have a rotary cutter, use it for straight lines and small pieces. A 45mm rotary cutter is great for beginners. For tiny or tricky shapes, a 28mm cutter helps you stay accurate.
Here are some cutting tools and tips:
- Fabric scissors: Use these for most of your cutting. They work well for curves and big pieces.
- Rotary cutter: This tool is perfect for straight lines and small pattern pieces. It helps you get crisp, even edges.
- Always cut slowly and follow the lines you marked from your sewing pattern.
- Keep your fingers away from the blade. Safety first!
Note: Clean cuts make sewing much easier. If your edges are neat, your bag will look more professional.
Preparing Interfacing and Lining
Interfacing and lining give your crossbody bag extra strength and a nice finish. Interfacing makes the fabric stiffer, so your bag keeps its shape. Lining covers the inside seams and makes your bag look neat.
To prepare these pieces:
- Place your sewing pattern pieces on the interfacing and lining fabric.
- Trace around each piece with a fabric marker or chalk.
- Cut out the interfacing and lining just like you did with the main fabric.
- If your interfacing is fusible, follow the instructions to iron it onto the wrong side of your main fabric pieces.
Pro Tip: Always check the instructions on your interfacing. Some types need steam, while others do not.
Now you have all your pieces ready. You can move on to sewing and see your crossbody bag come together!
Step-by-Step Crossbody Bag Assembly
Sewing Main Panels
You are ready to start sewing the main panels of your crossbody bag. This step brings your project to life. You will join the front and back pieces to form the body of your bag. Lay out your panels with the right sides facing each other. Pin or clip the edges to keep everything in place.
Start sewing along the sides and bottom. Leave the top open for now. Use a straight stitch for most fabrics. If you want extra strength, try a triple straight stitch. This stitch gives your bag strong seams that last. For corners, use box seams. These seams help your crossbody bag hold its shape and stand up to daily use.
Here is a quick look at seam types that work well for crossbody bags:
| Seam Type | Description | Applications |
|---|---|---|
| Flat seams | Minimal bulk, easy for side panels | Side panels of bags |
| Piped seams | Adds style and strength | Decorative edges and curves |
| Box seams | Structured corners, keeps bag sturdy | Base corners of bags |
Tip: Press your seams with an iron after sewing. This makes your bag look neat and professional.
Many beginners make mistakes when sewing the main panels. Watch out for these common issues:
- Using the wrong needle size for your fabric
- Skipping interfacing or stabilizer, which makes your bag flimsy
- Ignoring seam allowances, causing uneven edges
- Rushing the cutting process and ending up with crooked panels
- Not securing layers with basting or clips, leading to misaligned pieces
- Forgetting to prewash your fabric, which can cause puckering later
Take your time and check each step. You want your crossbody bag to look great and last a long time.
Making the Main Pocket
Now you will add the main pocket to your bag. This pocket holds your essentials and keeps things organized. Cut your pocket piece using the pattern. Place it on the front panel where you want it to sit. Pin it in place.
Sew around the sides and bottom of the pocket. Leave the top open. Use a box stitch at the corners for extra strength. This stitch helps the pocket handle daily wear. If you want a decorative touch, add piping along the pocket edge.
Note: Always backstitch at the start and end of your seams. This keeps the pocket secure.
You can make the pocket flat or add a pleat for more space. Try a triple straight stitch if you plan to carry heavier items. This stitch gives your pocket extra durability.
Adding Inner Pocket
An inner pocket gives your crossbody bag even more storage. You can keep your phone, keys, or small items safe inside. Cut the inner pocket piece from your lining fabric. Place it on the lining panel before you sew the lining into the bag.
Pin the pocket in place. Sew along the sides and bottom, leaving the top open. Use a box stitch at the corners for strength. If you want, divide the pocket into sections by sewing a straight line down the middle.
Tip: Use a contrasting thread for the inner pocket. This adds a fun pop of color inside your crossbody.
Check that your pocket sits flat and lines up with the edges. Press the seams for a crisp finish. You are building skills with every step. Your crossbody bag is starting to take shape!
Creating Strap Loops
Strap loops help your crossbody bag hold the strap securely. You want them to be strong and last a long time. You can make strap loops from the same fabric as your bag or pick something tougher. Some materials work better than others for durability.
Here’s a quick look at the best materials for strap loops:
| Material | Strengths | Weaknesses |
|---|---|---|
| Ripstop Nylon | High strength-to-weight ratio, prevents rips from spreading, lightweight | None mentioned |
| CORDURA® Grade Fabrics | Excellent abrasion resistance, high strength-to-weight ratio | None mentioned |
| Canvas | Weatherproofing can be re-proofed, durable | Heavier, more susceptible to abrasions |
Ripstop nylon and CORDURA® fabrics give you strong loops that resist wear and tear. Canvas works well too, but it can feel heavier. If you want a lightweight bag, try ripstop nylon. For a rugged look, canvas is a classic choice.
To make strap loops:
- Cut two small rectangles from your chosen material. Each piece should be about 2 inches by 4 inches.
- Fold each rectangle in half lengthwise. Press with an iron to keep the fold sharp.
- Stitch along the open edge to create a tube. Turn the tube right side out.
- Fold the tube in half so the ends meet. This forms the loop.
- Pin the loops to the side seams of your bag, near the top opening.
- Sew the loops in place with a straight stitch. Go over the seam twice for extra strength.
Tip: Use a matching thread for a clean look. If you want your loops to stand out, pick a bright color.
You now have sturdy strap loops ready for your crossbody strap. These loops help your bag stay secure and comfortable to carry.
Adding Zipper Pocket
A zipper pocket keeps your small items safe inside your bag. You can add it to the outside or inside, depending on your pattern. Sewing a zipper might sound tricky, but you can do it with a few simple steps.
Here are some easy techniques for attaching a zipper pocket:
- Use the zipper teeth as a guide when you sew. This helps you keep your stitches straight and neat.
- Pick a standard presser foot for your sewing machine. It gives you better control and lets you see what you’re doing.
- Don’t worry about the zipper pull or stops. You can sew right past them and trim any extra zipper later.
Start by marking where you want the pocket on your bag panel. Place the zipper face down on the edge of the pocket opening. Pin it in place. Sew along the zipper teeth, keeping your stitches straight. Flip the zipper up and press the seam flat. Topstitch along the edge for a professional finish.
Attach the pocket piece to the back of the zipper. Sew around the sides and bottom to close the pocket. Make sure the zipper opens and closes smoothly.
Note: Always test your zipper before you finish sewing. If it sticks, check your stitching and adjust as needed.
Adding a zipper pocket gives your crossbody bag extra style and function. You can keep your phone, keys, or money safe and easy to reach.
Attaching Lining
Lining makes the inside of your crossbody bag look neat and feel smooth. It also hides the seams and gives your bag a finished look. You want to attach the lining carefully so everything lines up.
Follow these steps for a smooth lining attachment:
- Clip down each side of the bag. Make sure the sides line up evenly.
- Sew both sides. Leave the bottom open so you can adjust the fit.
- For boxed corners, mark a 1-inch square at each corner. Cut through all layers.
- Line up the seams at the corners. Clip them in place before you sew.
- Leave a 4-inch opening at the bottom of the lining. You’ll use this to turn the bag right side out.
- After turning the bag, stitch the bottom opening closed.
Pro Tip: Press the lining with an iron before you sew. This helps you get crisp edges and a smooth finish.
When you attach the lining, take your time. Check that the seams match up and the corners look sharp. Once you finish, your crossbody bag will look polished inside and out.
You’ve now completed the key steps for assembling your crossbody bag. You’re ready to move on to finishing touches and make your bag truly your own!
Finishing and Customizing Your DIY Crossbody Bag
Finishing Edges
You want your crossbody bag to look neat and last a long time. Finishing the edges is a key step. If you leave raw edges, your bag might start to fray or look messy. You have a few easy ways to make those edges smooth and strong.
- Burnishing: Rub the edges with a special tool or even a wooden stick. The friction and heat smooth the edges and make them tough.
- Edge Painting: Use special paint for fabric or leather. Paint the edges in layers. This gives your crossbody a thick, smooth finish.
- Waxing: Rub wax along the edges. This adds a protective layer and helps your bag resist moisture.
Tip: Try edge painting if you want a colorful finish. Waxing works well for outdoor or travel bags.
You can pick the method that fits your diy style. Each one helps your crossbody bag look professional and keeps it in good shape.
Attaching Hardware
Hardware makes your crossbody bag easy to use and adds style. You need to attach things like rings, clips, and buckles. Secure hardware means your strap stays put and your bag feels safe.
Here’s a simple way to attach hardware:
- Check the spots on your bag where you want to add hardware. Make sure the fabric is strong enough.
- Prepare the ends of your strap. Attach clips or rings tightly.
- Clip the strap to the rings on your bag. Make sure everything feels secure.
- Adjust the strap length so your crossbody fits just right.
- Test the hardware by pulling gently. If it feels loose, sew again or use stronger clips.
Note: Always use hardware that matches your bag’s style and strength. Metal pieces last longer than plastic.
You can find hardware at craft stores or online. Pick colors that match your diy crossbody. Silver, gold, and black are popular choices.
Making and Attaching the Strap
The strap is what makes your crossbody bag so handy. You can wear it across your body and keep your hands free. Making an adjustable strap lets you change the length for comfort.
Follow these steps to make and attach your strap:
- Cut a piece of webbing about 4 inches long.
- Slide the strap tab inside a ring.
- Fold the tab with the wrong sides together. Line up the edges.
- Use a zipper foot on your sewing machine. Topstitch close to the ring.
- Mark the wrong side of the rest of your strap.
- Feed one end of the strap around the center bar of a slider. Keep the wrong side against the bar.
- Fold the strap back on itself. Turn under half an inch.
- Stitch the end down.
- Thread the free end through the ring attached to the tab.
- Loop this end around the slider’s center bar.
Tip: Use a 2.5 mm stitch length to join strap pieces. Trim the seam allowance to a quarter inch and topstitch with a 3 mm stitch length for extra strength.
You can fold the strap in half lengthwise or bring both sides to the center. Secure with sewing clips before you sew. Thread one end over the slider buckle and topstitch the end. This gives your crossbody bag a sturdy, adjustable strap.
Your diy crossbody is almost ready! You finished the edges, attached the hardware, and made a strong strap. Now your bag looks great and works well for everyday use.
Decorative Touches
You can make your crossbody bag special with creative ideas. Personalizing your bag is fun and simple. You get to show your style and make your bag unique.
- Try using a decorative strap. Pick a simple strap for a neat look. If you want something bright, choose a strap with color or patterns. Some straps have extra pockets for more space.
- Monograms are a cool way to add your own touch. Use your initials or make a design with flowers or shapes. Some people match their monogram to the season, like snowflakes for winter or hearts for Valentine’s Day.
- For a fancy look, use metallic foils or crystal decorations on your monogram. These details make your bag look expensive.
- Thematic designs are great for special days. Add patches or embroidery that fit the event, like stars for a party or leaves for fall.
- Decorative hardware, like gold rings or colorful buckles, can make your bag stand out.
Tip: Mix different ideas together. You can add a bright strap and a custom monogram. Your bag will get noticed everywhere you go.
You do not need to spend much money to decorate your bag. Small changes can make a big difference. Try sewing on a patch, adding a bow, or using a cool zipper pull. Each detail shows your personality in your crossbody bag.
Quality Check
Before you use your new crossbody bag, check its quality. This step helps you make sure your bag is strong and looks nice.
| Quality Control Step | Description |
|---|---|
| Material and Component Checks | Look at the fabric, zippers, and buckles to make sure they are strong and good quality. |
| Workmanship and Stitching | Check the stitching and how the bag is put together. This keeps your bag strong and easy to use. |
| Functionality and Performance Testing | Test the pockets, straps, and fasteners to see if they work well. |
| Aesthetic and Finish Details | Make sure the colors look good and the surface is smooth. |
| Packaging and Labeling | Check the packaging and labels to keep your bag safe when shipping. |
- Quality checks help your bag last longer and stay nice.
- A good bag keeps its shape and color after many uses.
- High-quality bags make people want to use them again.
Note: If you see loose threads or weak spots, fix them before you use your bag. Taking care now helps your crossbody last longer.
You have finished your crossbody bag and checked it carefully. Now it is ready for everyday use. Enjoy carrying your new bag!
Conclusion
You finished making your crossbody bag all by yourself. You learned new things and made a bag that matches your style. If you had trouble, you can use diy kits next time. You can also watch videos or pick easy materials. Try different designs and keep practicing your skills. If you want a special crossbody bag for your brand, INITI can help. They offer custom designs, eco-friendly materials, quick samples, and ship worldwide.
| Benefit | Description |
|---|---|
| Full Control | You get to pick every part of your crossbody bag. |
| Brand Differentiation | Special crossbody styles make your bag unique. |
| Cost Efficiency | You save money by making more bags at once. |
Want to make another crossbody bag? You can contact INITI for custom orders and expert advice.
FAQ
How do I choose the right fabric for my first crossbody bag?
Start with quilting cotton or canvas. These fabrics are easy to cut and sew. They hold their shape well. You can find them in many colors and patterns. Pick one that matches your style.
Can I sew a crossbody bag without a sewing machine?
Yes, you can sew by hand. Use a strong needle and thick thread. Hand stitching takes longer, but you can still make a sturdy bag. Try small projects first to practice your stitches.
What size should my crossbody bag be?
Most beginners make bags about 7 inches by 6 inches. This size holds your phone, wallet, and keys. You can adjust the size to fit your needs. Use your favorite bag as a guide.
How do I attach a zipper if I am new to sewing?
Pin the zipper in place first. Use a zipper foot on your sewing machine. Sew slowly and keep your stitches straight. Practice on scrap fabric before you sew the real thing.
What if my bag looks uneven after sewing?
Don’t worry! Small mistakes are normal. Trim any uneven edges. Press your seams with an iron. Add piping or binding to hide rough spots. Each bag you make will look better.
Can I wash my DIY crossbody bag?
Most fabric bags are washable. Use cold water and mild soap. Air dry your bag to keep its shape. If you use faux leather or special hardware, spot clean those areas.
How can I personalize my crossbody bag?
You can add patches, embroidery, or a fun strap. Try using colorful zippers or unique hardware. Add a monogram or sew on a bow. Your bag should show off your style!