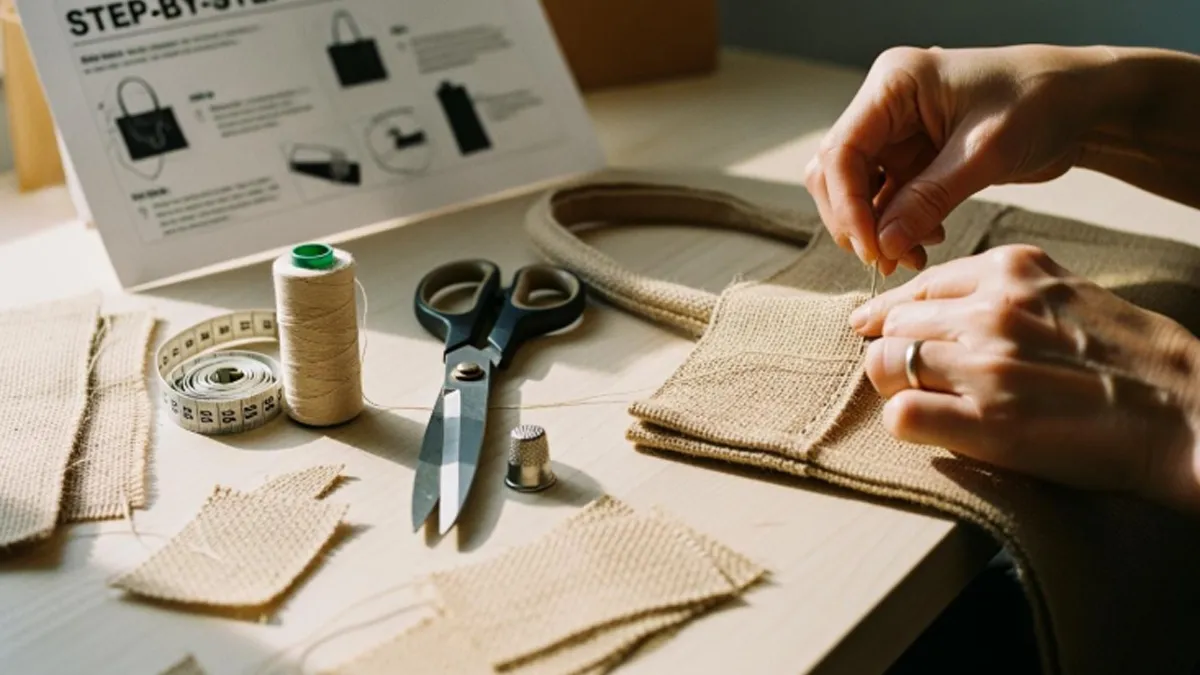
Ready to dive into a fun diy project? You can create a sturdy, stylish burlap tote bag with just a few simple steps. Even if you’re a beginner sewist, you’ll find these instructions easy to follow. You don’t need fancy skills to make a handmade burlap tote that works for everything, from shopping to daily errands. Burlap grocery bags look great and last a long time. Grab your burlap and get started—how to make a burlap tote bag has never been this easy. Join other fans of burlap tote bags and see what you can make!
Key Takeaways
- Gather the main materials like medium-weight burlap, scissors, and a sewing machine. These are needed to start your tote bag project.
- Pick eco-friendly burlap to help reduce waste. This choice also supports sustainability in your craft.
- Measure and cut your burlap with care. This helps make sure your tote is even and comfortable.
- Use interfacing to make your tote stronger and last longer. It helps the bag keep its shape over time.
- Sew the bag body with a 1-inch seam allowance for more strength. Finish the edges with a zigzag stitch to stop fraying.
- Attach the handles tightly using backstitching and extra stitches. This makes sure your tote can hold heavy things.
- Think about adding a lining for a neat look and more strength. A lining is helpful, especially if you live in a humid place.
- Make your tote special with decorations like pockets, fabric paint, or eco-friendly items. This lets you create a tote that is just for you.
Materials and Tools for a Burlap Tote Bag
Before you start making your tote, you need to gather the right materials and tools. Having everything ready will make the process smooth and fun. Let’s break down what you’ll need and why each item matters.
Select Burlap Fabric
Standard Size and Weight
You want to pick burlap that feels sturdy but not too stiff. Most crafters use medium-weight burlap for a tote. This fabric holds its shape and stands up to daily use. A standard size for a burlap tote bag is about 23 inches by 15 inches, but you can adjust the size to fit your needs.
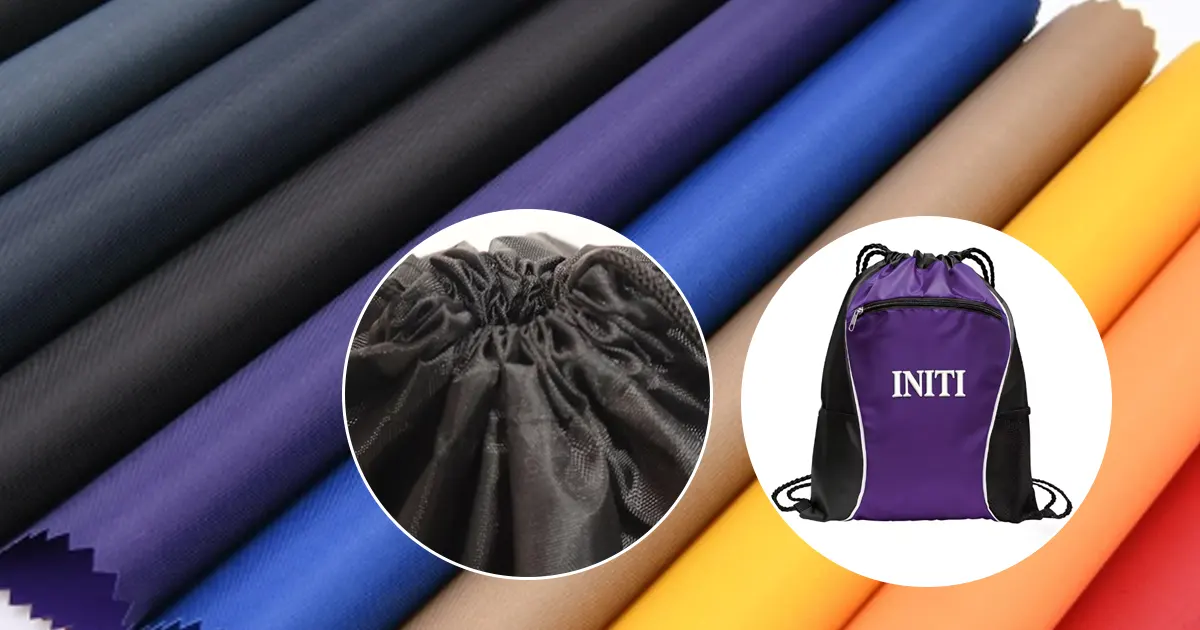
Upcycled and Eco-Friendly Options
If you care about the environment, you can choose upcycled or eco-friendly burlap. This type of burlap comes from old sacks or leftover fabric. It’s a smart way to reuse materials and cut down on waste. Here are some reasons why eco-friendly burlap is a great choice:
- Burlap breaks down naturally, so it won’t add to landfill waste like plastic bags.
- It comes from plants, which makes it a renewable resource.
- Using burlap tote bags helps lower plastic pollution.
- Jute and burlap bags need less energy to make, so they have a smaller carbon footprint.
Essential Tools
Scissors, Pins, Measuring Tape
You need sharp scissors to cut your burlap and lining. Pins help hold the fabric in place while you sew. A measuring tape lets you get the right size for your tote pieces.
Sewing Machine or Needle
A sewing machine makes the job faster, but you can sew your tote by hand with a strong needle. Both methods work well for burlap.
Tip: Use a heavy-duty needle if you sew by hand. Burlap can be tough to stitch through with a regular needle.
Additional Supplies
Interfacing for Structure
Interfacing adds strength to your tote. It helps the bag keep its shape and last longer. You can find interfacing at most craft stores. If you want to stay eco-friendly, look for interfacing made from recycled fibers.
Handles and Lining
Handles make your tote easy to carry. You can use cotton webbing, canvas straps, or even braided jute. For a softer inside, add a lining. Cotton or recycled fabric works well for this step.
Here’s a quick look at common materials for making a tote:
| Material | Description |
|---|---|
| Burlap | A natural fiber known for its durability. |
| Cotton | Lightweight and eco-friendly fabric. |
| Canvas | Strong and durable, often used for bags. |
| Jute | Similar to burlap, eco-friendly and sturdy. |
| Recycled Fabrics | Sustainable option, made from repurposed materials. |
With these materials and tools, you’re ready to start your burlap tote bag project. Pick what fits your style and values, and get creative with your tote design!
How to Make a Burlap Tote Bag: Cutting and Preparing
Measure and Cut Burlap
Standard Dimensions (e.g., 23″ x 15″)
You want your tote bag to look balanced and feel comfortable. Start by deciding on the size. Most people like a bag that’s roomy but not too bulky. Here’s a handy table to help you pick the right measurements for your burlap tote:
| Dimension Type | Measurement Range |
|---|---|
| Width | 12 to 16 inches |
| Height | 12 to 18 inches |
| Depth (gusset) | 4 to 10 inches |
If you want a classic grocery tote bag, try cutting your burlap to about 15 inches wide and 16 inches tall, with a 6-inch gusset. This size works well for everyday use. When you prepare the bag pieces, make sure to follow ASTM D5431-08 standards for seam strength and load capacity. Keep the depth under 40% of the width so your bag keeps its shape.
Cutting Techniques for Clean Edges
Burlap can fray easily, so you need to use smart techniques for neat edges. Before you cut, wash the burlap to help reduce fraying. Use sharp scissors and measure carefully. You can also finish the edges with netting material for a tidy look.
Using white netting material to finish the edges of burlap without doing a lot of sewing is an effective technique for achieving clean edges.
Here are some quick tips:
- Wash burlap before cutting to minimize fraying.
- Use netting material to finish edges for a neat appearance.
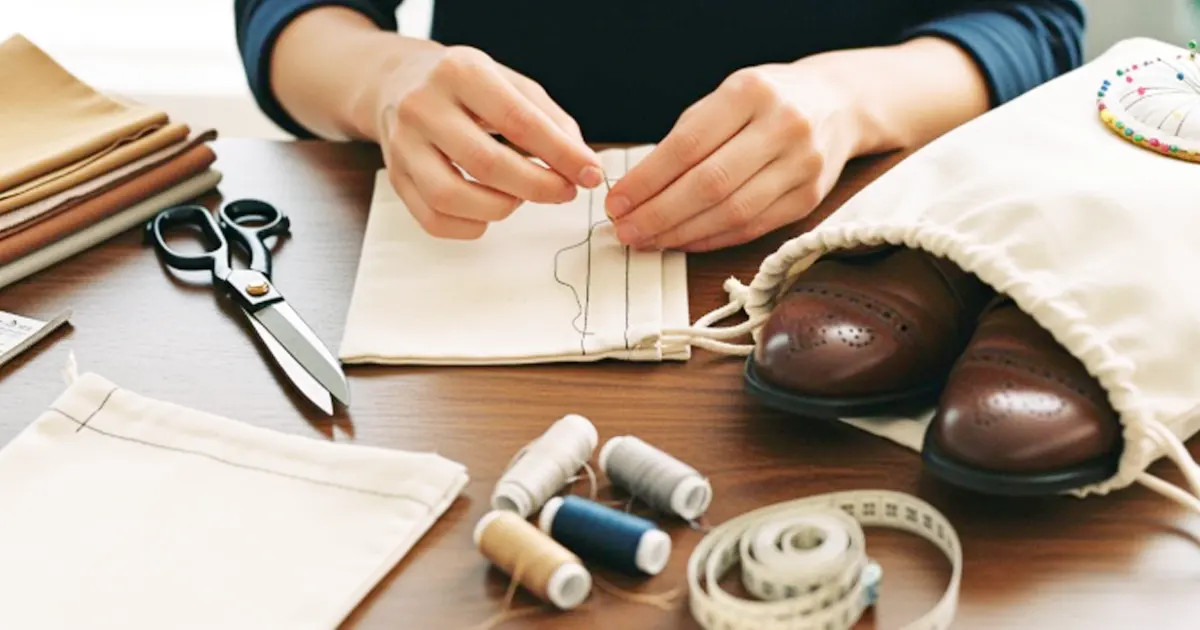
Prepare Handles and Interfacing
Cut Handles to Size
Handles make your tote easy to carry. You want them strong and comfortable. Cut your handles to at least 50cm (about 20 inches) if you plan to carry the bag on your shoulder. When you prepare the bag panels, reinforce the handle areas for extra strength. Here’s a table with reliable handle methods:
| Method | Description |
|---|---|
| Reinforcement | Use interfacing or double layers in high-stress areas to prevent tearing. |
| Sewing | Attach handles with a box stitch or an ‘X’ stitch for durability, using strong thread and a heavy-duty needle. |
| Grommets | Create holes for rope or leather straps, reinforcing the area to prevent tearing. |
| Rivets | Add rivets for extra strength, especially with heavy straps, ensuring proper alignment before punching holes. |
| Clips and D-rings | Allow for interchangeable handles, ensuring strong stitching and hardware to handle stress. |
Add Interfacing for Durability
Interfacing helps your tote keep its shape and last longer. You can use fusible interfacing on the outer burlap fabric for strength without making it stiff. If you want a super sturdy bag, try Timtex, but remember it’s harder to sew. Soft and Stable, Stiff Stuff, and Pellon fusible fleece also work well for different levels of support.
- Fusible interfacing adds strength without bulk.
- Timtex gives a stiff structure but is tough to sew.
- Soft and Stable, Stiff Stuff, and Pellon fusible fleece offer varying support.
Now you’re ready to prepare the bag pieces and move on to sewing. Take your time with these steps, and your burlap tote will look neat and last a long time.
Sew a Burlap Tote Bag: Assembly Steps
Now that you have your pieces ready, it’s time to sew a burlap tote bag. This part brings your project to life. Follow these instructions step by step, and you’ll see how to make a burlap tote bag that looks neat and lasts a long time.
Pin and Sew the Bag Body
Pin Sides and Bottom
Lay your burlap panels flat on a table. Place the two main pieces together, with the right sides facing each other. Line up the edges so everything matches. Use pins to hold the sides and bottom in place. Make sure the pins go in straight, about an inch from the edge. This helps keep the fabric from shifting while you sew the panels together.
Tip: If you want your tote to have a flat bottom, pinch the corners and pin them at a right angle. This creates a gusset, which gives your bag more space inside.
Use a 1″ Seam Allowance
Set your sewing machine to a straight stitch. Start at one top corner and sew down the side, across the bottom, and up the other side. Use a 1-inch seam allowance for extra strength. This wide seam helps your burlap tote bag hold heavy items without tearing. If you sew by hand, use small, tight stitches and strong thread. Take your time and check that your stitches look even.
Note: Don’t sew the top edge closed. You need to leave it open so you can finish the bag and add handles later.
Reinforce and Finish Edges
Zigzag Stitch to Prevent Fraying
Burlap loves to fray, so you need to protect those raw edges. After you sew the panels together, switch your machine to a zigzag stitch. Sew along the raw edges inside the seam allowance. This stitch moves side to side, locking the threads and stopping the fabric from unraveling. Here’s a quick look at the best stitches for this job:
| Stitch Type | Description | Use Case |
|---|---|---|
| Zigzag Stitch | A stitch that goes from side to side in a zigzag pattern. | Finishing raw fabric edges to prevent fraying. |
| Box Stitch | A square or rectangular stitch pattern, often with an ‘X’ stitched inside. | Provides reinforcement to high-stress areas like handles. |
| Triple Straight Stitch | A thick, bold stitch created by stitching forward, backward, and forward. | Excellent for reinforcing seams on heavy-duty bags. |
You can also try these extra tricks to keep your tote looking sharp:
- Finish with a serged seam if you have a serger.
- Use hem tape for added durability.
- Apply a line of hot glue along the edges to prevent unraveling.
For edges that tend to unravel, a serged seam, hem tape, or even a line of hot glue can help. These methods keep the edges tidy and add a professional touch to your burlap tote bags.
Turn Bag Right Side Out
Once you finish the seams and reinforce the edges, reach inside the bag and gently turn it right side out. Push out the corners with your fingers so they look crisp. Now you can see how to make a burlap tote bag that’s sturdy and ready for the next steps. Your tote should stand up on its own and look neat. If you spot any loose threads, trim them away for a clean finish.You’ve just completed the main body of your burlap tote bag! The next steps will show you how to finish the bag, add handles, and personalize your new tote. Keep following these instructions, and you’ll have a handmade bag you can use every day.
Attach the Handles to the Bag
Adding handles is the step that turns your burlap tote into a bag you can carry everywhere. You want your tote to feel comfortable and look neat. Let’s walk through how to attach the handles to the bag so you get a strong, balanced finish.
Position and Pin Handles
Handles need to sit at the right spot. If you place them too close together, your tote will bunch up. If you set them too far apart, the bag might sag. You want your tote to hang straight and feel good in your hand or on your shoulder.
Measure Equal Distances
Lay your tote flat on the table. Use your measuring tape to find the center of the top edge. Mark this spot with a pin or chalk. Now, measure out from the center to place each handle. Most people like to set the handles about 4 inches from each side seam. This gives your tote a balanced look and helps it hold weight evenly.
Tip: Double-check your measurements before you pin. Uneven handles can make your tote twist or feel awkward.
Pin the ends of each handle to the inside of the tote. Make sure the handles don’t twist. The raw ends should line up with the top edge of the bag. Pin both handles in place, then lift the tote to see if they look even.
Here are some best practices for positioning and pinning handles:
- Use X-box stitching at the base of each handle for extra strength.
- Try multiple backstitching passes to secure the handles.
- Add small reinforcement patches or bar tacks where the handles meet the tote.
- Double or triple stitch the handle area for more durability.
- For a stylish touch, use riveted metal accents.
Secure Handles with Stitching
Now you’re ready to sew the handles in place. This step makes sure your tote can carry groceries, books, or anything else you need.
Backstitch for Strength
Start by sewing a straight line across the base of each handle. Use a backstitch at the beginning and end. This locks the thread and keeps the handles from pulling loose. For even more strength, sew a square or X-box pattern where the handle meets the tote. This spreads out the stress and helps your burlap tote bag last longer.
If you want to go the extra mile, add a second row of stitching or a bar tack. Some people like to use a zigzag stitch for a decorative look. You can also sew a small patch of fabric under the handle for extra support.
Note: Take your time with this step. Strong handles mean your tote will last for years.
Once you finish, check that the handles feel secure. Give them a gentle tug. If they hold tight, your tote is ready for action. You’ve just learned how to attach the handles to the bag like a pro!
Add Lining and Personalize Your DIY Burlap Tote Bag
You can make your tote stand out and last longer by adding a lining and some personal touches. This part of the diy project lets you get creative and make your bag truly yours.
Add a Lining (Optional)
A lining gives your tote a smooth inside and helps it last longer. It also keeps small items from poking through the burlap. You can choose to add a lining based on your needs and style.
Choose and Attach Lining Fabric
Pick a soft cotton or recycled fabric for your lining. Cotton feels nice and comes in many colors and patterns. Recycled fabric is a great choice if you want to stay eco-friendly. Cut the lining fabric to match the size of your tote panels. Sew the sides and bottom of the lining, just like you did with the main bag. Slip the lining inside the tote, wrong sides together, and fold the top edge under. Pin it in place and sew around the top to secure it.
Adding a lining can make a big difference in how long your tote lasts, especially in different climates. Take a look at this table to see how lining affects the lifespan of a burlap tote bag:
| Climate Type | Avg. Humidity | Unlined Jute Lifespan | PE-Lined Jute Lifespan | Recommended Construction |
|---|---|---|---|---|
| Arid/Desert | <30% | 2-3+ years | 3-5+ years | Either construction suitable |
| Temperate | 30-60% | 1-2 years | 2-4 years | Either suitable; lining for premium bags |
| Subtropical | 60-70% | 6-12 months | 2-3 years | PE lining highly recommended |
| Tropical | >70% | 2-6 months | 1-2 years | PE lining essential; consider treatments |
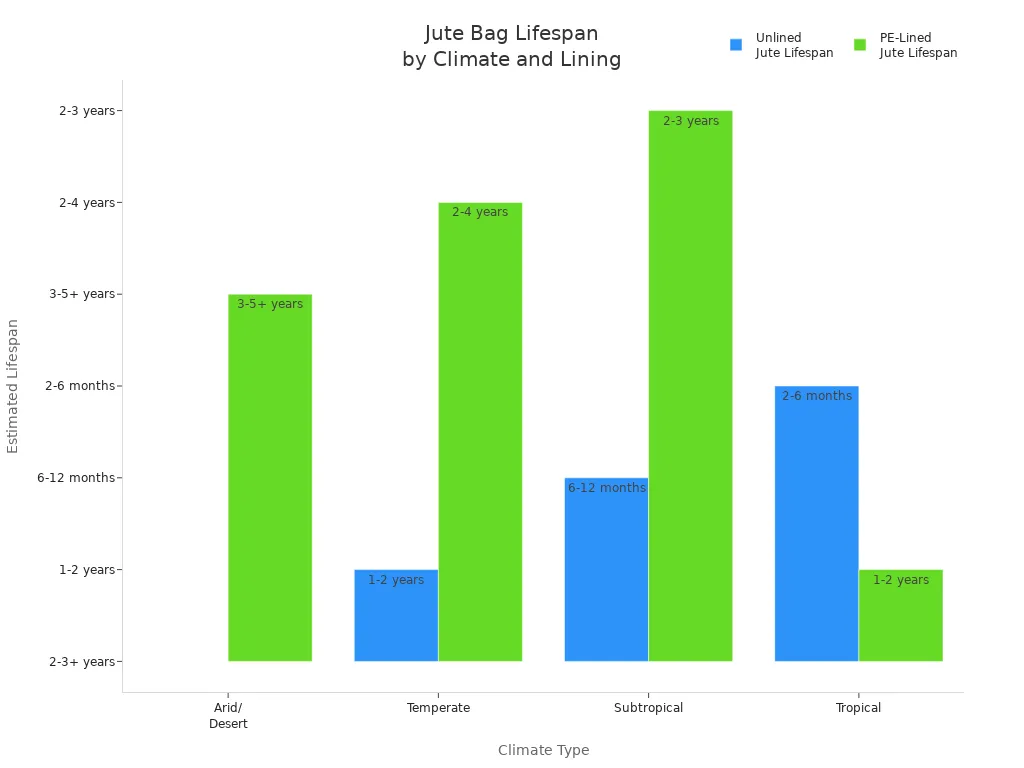
Tip: If you live in a humid area, a lining will help your tote last much longer.
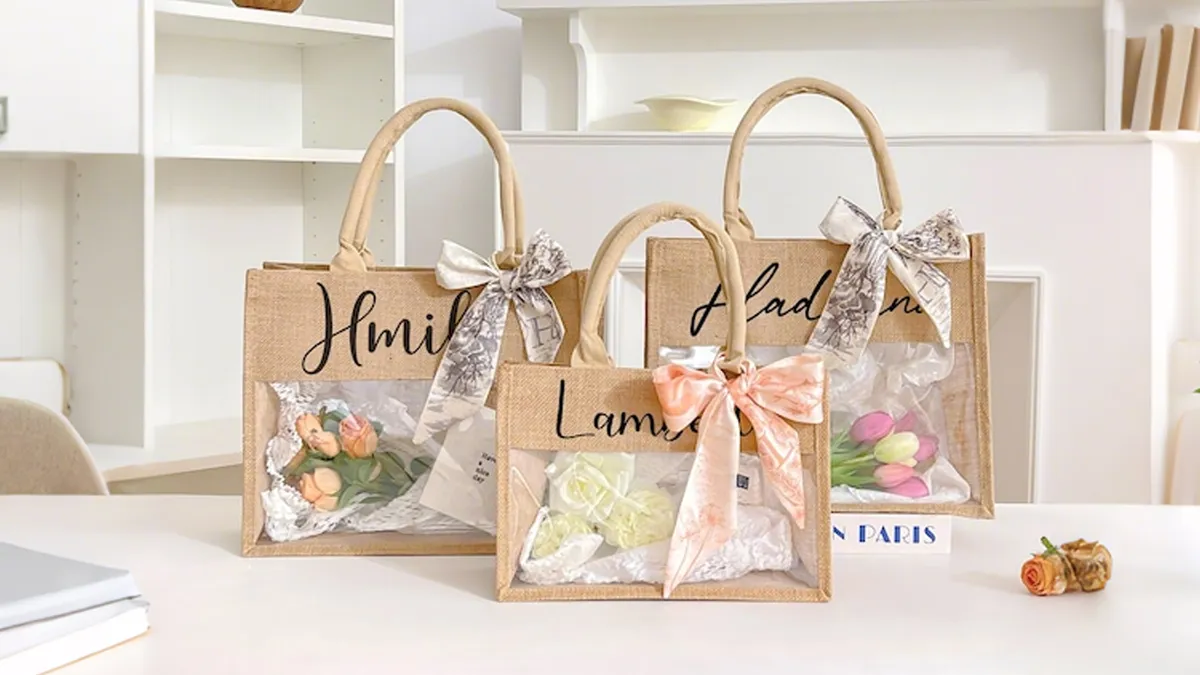
Personalize and Decorate
Now comes the fun part! You can decorate your tote to match your style or make it a special gift. There are many ways to add your own touch.
Pockets, Stencils, and Paint
You can sew a pocket inside or outside your tote for keys or a phone. Try using fabric paint and stencils to create cool designs. Want to get even more creative? Here are some top ways to personalize your tote:
- Hand-painted designs with fabric paint
- Embroidery for names or patterns
- Screen printing for sharp, bold images
- Stenciling with fabric paint for easy shapes
- Monogramming for a classic look
- Themed designs for parties or gifts
- Eco-friendly touches that show you care about the planet
Note: Always let paint dry fully before using your tote.
Eco-Friendly Embellishments
You can keep your tote green by choosing earth-friendly decorations. Here are some ideas:
- Hand-painted designs
- Stenciled motifs
- Custom screen prints
- Lace, ribbon, or twine embellishments
Jute burlap bags come from plants, so they break down naturally. When you use these bags and add eco-friendly decorations, you help the planet and show off your creativity. Your burlap tote bag becomes more than just a bag—it becomes a statement about your style and your values.
DIY Tips for a Professional Finish
You want your tote bag to look neat and last a long time. These tips will help you get a polished result and avoid common problems.
Prevent Fraying and Mess
Use Interfacing and Zigzag Stitch
Burlap can fray easily, but you have several ways to keep edges tidy. You can use interfacing to add strength and help the fabric hold its shape. A zigzag stitch along the raw edges locks the threads and stops them from unraveling. If you want extra protection, try these tricks:
- Apply Fray Check to the edges before sewing.
- Soak the fabric in liquid starch for a budget-friendly fix.
- Spray the edges with hair spray to help prevent fraying.
Tip: Serging the edges or using hem tape also helps keep your tote looking sharp.
If you notice loose threads, trim them right away. This keeps your workspace clean and your bag looking fresh.
Achieve a Neat Look
Press Seams and Trim Threads
Pressing seams makes a big difference in how your tote looks. Use an iron to press seams open before you turn the bag right side out. This helps the bag keep its shape and gives it a smooth finish. Trimming threads reduces bulk and keeps the inside tidy. After sewing, trim seam allowances, especially in boxed corners. Grading the layers of seam allowance prevents them from stacking up, so your bag feels soft and looks professional.
Note: Always check for stray threads before finishing your project. A quick trim makes your tote look clean and well-made.
If you want to decorate your bag, use a stencil brush and tap gently to avoid paint bleeding. Line up letters carefully and let the paint dry before using your tote. Slow and steady work gives you the best results.
Troubleshooting Tips for Common Issues
Sometimes things don’t go as planned. Here are some quick fixes for common problems:
- Gusset not lining up? Pin the midpoints first, then ease the curve with small snips.
- Fabric puckering? Use proper interfacing, slow down your stitching, increase stitch length, and loosen tension.
- Seams misaligned? Line up accent seams before sewing and reinforce with backstitching.
- Turning holes showing? Hide them in zipper pockets for a seamless look.
If you take your time and follow these tips, you’ll end up with a tote bag that looks store-bought and feels sturdy.
A little extra care at each step helps you create a bag you’ll be proud to use or give as a gift.
Conclusion
You just learned how to make your own burlap tote bag from start to finish. Even beginner sewists can handle this diy project and create a tote that fits any style. Many people love using their tote for shopping or gifts, but some notice a burlap smell—try airing it out or washing it. Want to show off your tote? Share your photos or questions below! If you need custom, wholesale, OEM, or ODM tote solutions, our team offers eco-friendly options that boost your brand and save money.
FAQ
How do I wash my burlap tote bag?
You can hand wash your tote in cold water with mild soap. Let it air dry. Avoid using a dryer because burlap can shrink or lose its shape.
Can I sew a burlap tote bag without a sewing machine?
Yes! You can sew by hand with a strong needle and thick thread. It takes more time, but you still get a sturdy bag.
What can I use for handles?
You can use cotton webbing, canvas straps, or even braided rope. Choose handles that feel comfortable and match your style.
Does burlap smell? How do I remove the odor?
Burlap sometimes has a natural, earthy smell. Air out your bag outside for a day or two. You can also sprinkle baking soda inside and shake it out.
Will my tote bag fray over time?
Burlap can fray, but you can prevent this. Use a zigzag stitch or apply Fray Check to the edges. Lining your bag also helps.
Can I decorate my tote with paint or markers?
Absolutely! Use fabric paint or permanent markers. Let the paint dry completely before using your bag. Try stencils for fun designs.
Is a burlap tote bag strong enough for groceries?
Yes, it is! Burlap is tough and can hold groceries, books, or daily essentials. Just make sure you reinforce the seams and handles.
What size should I make my tote?
Most people like a tote that’s about 15 inches wide and 16 inches tall. You can adjust the size to fit your needs.