
Ever wondered how to fold a paper lunch bag so it stays neat and secure? You’re in the right place! You can master this skill with a simple step by step approach. The process is easy and works for everyone, no matter your age. Just follow each step by step instruction, and you’ll create a tidy lunch bag every time. Grab a bag and join in—you’ll see how to fold a paper lunch bag with confidence.

Key Takeaways
- Gather the right materials: Use kraft bags for moist foods and brown paper bags for dry snacks.
- Start with a flat surface: A clean, flat area helps create sharp creases and neat folds.
- Create a sturdy base: Fold the bottom edge of the bag up to ensure it stands straight when filled.
- Make sharp creases: Press down on all folds to keep the bag’s shape and ensure it stays closed.
- Balance your lunch: Place heavier items at the bottom and lighter snacks on top to prevent tipping.
- Secure your bag: Use tape or stickers to keep the bag closed and add a personal touch.
- Avoid overfilling: Leave space at the top to make sealing easier and prevent tearing.
- Practice makes perfect: The more you fold, the better your bags will look and function.
Materials Needed
Before you start folding, you’ll want to gather a few simple items. You don’t need much, but having the right materials makes the process easier and helps you get a neat result. Let’s look at what you’ll need.
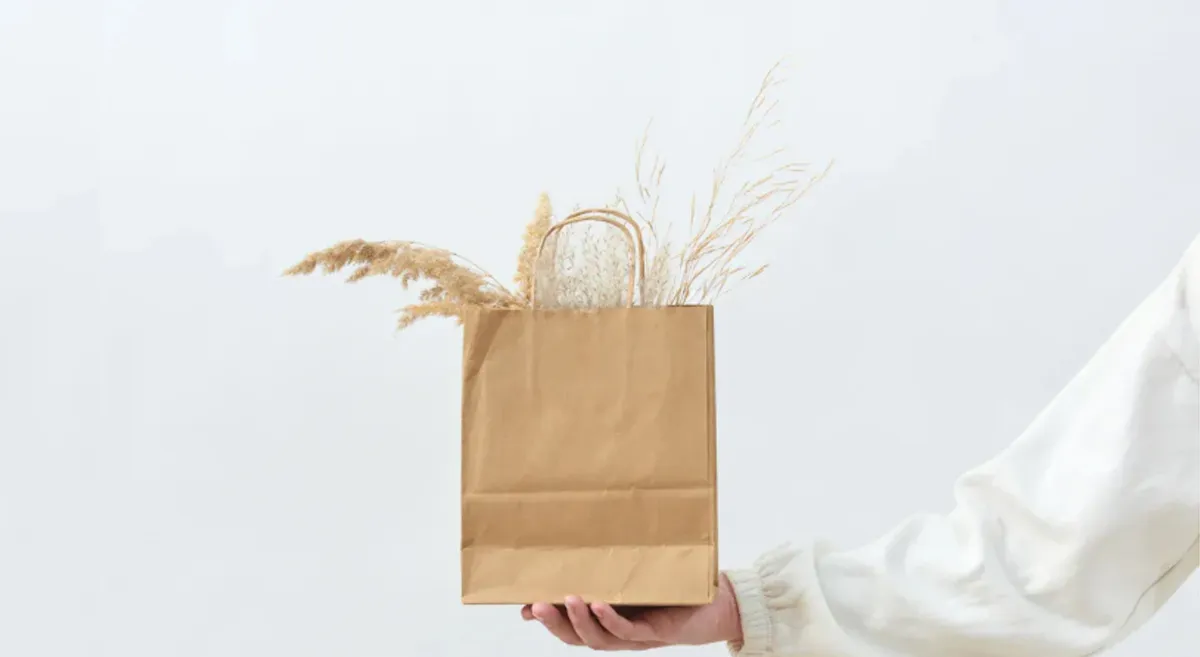
Paper Lunch Bag
You’ll need a paper lunch bag. Most people use either kraft bags or brown paper bags. Kraft bags feel thicker and sturdier. You can pack heavier or moist foods in them without worrying about tears. Brown paper bags work well for dry snacks, but they can break down if they get wet. If you want your lunch to stay safe and your bag to hold up all day, kraft bags are the better choice.
Tip: If you’re packing a sandwich with fruit or something juicy, go for a kraft bag. You’ll notice it resists tearing and keeps your lunch secure.
Here’s a quick look at the typical sizes for different paper bags:
| Bag Type | Capacity | Length | Width | Height |
|---|---|---|---|---|
| Lunch Bags | 1/2 – 5 lb. | 11″ | 3 – 5 1/4″ | 5 – 10″ |
| Grocery Bags | 2 – 25 lb. | 17″ | 4 – 12″ | 7 – 18″ |
| Beer, Liquor, and Wine Bags | Varies | Varies | 3 – 10″ | 11 – 16″ |
Lunch bags usually hold between half a pound and five pounds. They measure about eleven inches long, with widths ranging from three to five and a quarter inches. Heights fall between five and ten inches. These sizes work well for most lunches and snacks.
You might wonder which bag is best for your lunch. Here’s a quick rundown:
- Kraft bags are thicker and designed for heavier or moist foods. They show higher tear resistance.
- Brown paper bags are thinner and better for dry items. They break down more easily when wet.
If you want a bag that lasts through the day, kraft is your best bet. If you’re packing chips or crackers, brown paper bags work fine.
Flat Surface
You’ll need a flat surface to fold your bag. A kitchen table, desk, or even a clean countertop works great. When you use a flat surface, you can make sharp creases and keep your folds straight. This step helps your bag look neat and keeps it from tipping over when you fill it.
Note: If your surface is slippery, put down a placemat or towel. This keeps your bag from sliding around while you fold.
Optional: Tape or Stickers
You can use tape or stickers to seal your bag or add a personal touch. Tape helps keep the bag closed, especially if you pack bulky items. Stickers make your lunch bag fun and unique. You can use them to decorate or label your bag with your name.
If you want extra security, place a small piece of tape on the folded edge. If you want to get creative, grab some colorful stickers and let your personality shine.
Pro Tip: Stickers are a great way to personalize your lunch bag, especially for kids. You can use them to mark whose lunch is whose or just to add a little fun to your day.
Now that you have your materials ready, you’re set to start folding. Grab your bag, find a flat spot, and get your tape or stickers if you want. Let’s move on to the folding steps!
How to Fold a Paper Lunch Bag
Folding a paper lunch bag might look simple, but each step matters if you want a neat and secure result. Let’s walk through the steps together so you can master how to fold a paper lunch bag with confidence.
Flatten Bag
Start by placing your paper lunch bag on a flat surface. Smooth out any wrinkles or bumps with your hands. You want the bag to look as flat as possible before you begin. This first step helps you get sharp creases later and makes the brown paper bag fold much easier.
Tip: If your bag has been crumpled, run your hand over it a few times. Press gently from the bottom to the top. This will help you get a crisp, clean fold.
Fold Bottom Edge
Now, let’s work on the bottom edge. Hold the bag so the opening faces up and the bottom sits closest to you.
Create Base
Take the bottom edge and fold it up about one inch. Press down to make a crease. This fold creates a sturdy base for your lunch bag. If you want a stronger base, you can fold it up twice. Just make sure each fold is even.
- Use your fingers to press along the crease.
- Run your thumb along the edge to sharpen the fold.
This step is important for the brown paper bag fold because it helps the bag stand up straight when you fill it. A strong base keeps your lunch from tipping over.
Fold Top Edge
After you finish the base, move to the top edge. This is where you will form the opening of your bag.
Form Opening
Fold the top edge down about one to two inches. This fold will help you close the bag later. Make sure the fold is straight and even. Press along the crease with your fingers to keep it sharp.
Note: If you want to make your bag extra secure, you can fold the top edge down twice. This makes it harder for the bag to pop open.
You have now completed the first main steps in how to fold a paper lunch bag. Each step builds on the last, so take your time and make sure your folds are neat. These steps are the foundation for a perfect brown paper bag fold every time.
Fold Sides In
Now you’re ready for the next step in how to fold a paper lunch bag. This part shapes the bag and helps it stand up straight. Lay your bag flat on the table. Look at the sides. You’ll see creases running from the top to the bottom. These creases are your guides.
- Pinch the left and right sides of the bag gently.
- Push the sides inward along the creases. The bag will start to collapse in on itself.
- Flatten the bag again, making sure the sides are tucked in neatly.
You want the sides to fold in evenly. If one side looks bigger than the other, adjust it with your fingers. This step gives your bag a crisp, rectangular shape. It also makes the next step much easier.
Tip: If you want a really sharp fold, run your fingernail along the creases after you fold the sides in. This helps the bag keep its shape when you fill it later.
Shape Triangular Top
This step adds a little style and makes your bag easier to close. After you fold the sides in, look at the top of the bag. You’ll see two small triangles at each end.
- Take one top corner and fold it down toward the center of the bag. The edge should line up with the middle crease.
- Repeat with the other top corner. You’ll see a triangle shape form at the top of your bag.
This step is simple, but it makes a big difference. The triangular top helps you close the bag tightly. It also gives your lunch bag a neat, finished look.
Note: If you want to decorate your bag, this is a great time to add a sticker or write your name on the triangle.
Make Sharp Creases
You’re almost done! The last step in how to fold a paper lunch bag is to make all your creases sharp and strong. This helps your bag hold its shape and keeps your lunch safe.
- Press down on every fold you made. Use your fingers or the edge of a ruler.
- Run your hand along the bottom, sides, and top triangle.
- Check each step to make sure the folds are even and the bag stands up on its own.
If you see any loose spots, press them down again. Sharp creases make your bag look tidy and help it stay closed. You’ve now learned how to fold a paper lunch bag from start to finish!
Pro Tip: Practice each step a few times. The more you fold, the neater your bags will look. Soon, you’ll be able to fold a paper lunch bag without even thinking about it.
Secure and Finish
You have folded your paper lunch bag, but you want to make sure it stays closed and your lunch stays safe. This part shows you how to secure your bag so nothing falls out. Let’s look at a few easy ways to finish your bag and keep everything inside.
Roll Sides
Rolling the top of your bag is a classic way to keep it closed. You can do this in a few simple steps. This method works well for most lunches and helps prevent spills.
- Press the top of the bag flat with your hand. This makes the next steps easier.
- Fold the top edge of the bag downward two or three times. Each fold should be about an inch wide. Try to keep the folds even and tight.
- Tuck the rolled edge under the back of the bag. This locks the roll in place and keeps the bag from popping open.
Tip: If you want extra security, press down on the rolled part with your palm. This helps the folds stay sharp and tight.
Rolling the sides like this gives your bag a neat look. It also helps keep air out, which keeps your food fresh.
Closed Sink Folds
If you want a more advanced way to close your bag, try the closed sink fold. This method tucks the top of the bag inside itself. It creates a strong seal and looks very tidy.
- Start by folding the top edge of the bag down, just like before.
- Open the top of the bag slightly and push the folded edge inside the bag.
- Press along the new crease to keep it in place.
This fold works well if you carry small snacks or want to keep your lunch extra secure. It also makes the bag easier to stack or store in a backpack.
Note: Closed sink folds take a little practice, but you will get the hang of it quickly.
Use Tape or Stickers
Sometimes you need even more security, especially if your bag is full or you want to decorate it. Tape and stickers help keep your bag closed and add a personal touch. Some stickers and labels even show if someone has tried to open your bag.
Here’s a quick look at some options:
| Product Name | Description | Security Features |
|---|---|---|
| Sealed For You Tamper Evident Stickers | Ideal for food delivery, these stickers indicate if tampering has occurred. | Provides safety and reassurance to customers regarding food safety. |
| FindTape Tamper Evident Labels | Cost-effective solution for food packaging with clear evidence of tampering. | Shows hidden messages if tampered with, ensuring food integrity. |
| Restaurant Stickers & Labels | Used for sealing food containers and bags to prevent tampering. | Ensures safe delivery and enhances customer trust. |
Pro Tip: Use a fun sticker to seal your bag and write your name on it. This keeps your lunch safe and makes it easy to spot.
Tape and stickers do more than just close your bag. They help you feel confident that your lunch will stay safe until you are ready to eat.
Instructions for Filling and Closing
Filling your paper lunch bag seems easy, but a few smart steps can make a big difference. You want your lunch to stay fresh and your bag to stay strong. Let’s walk through the instructions for packing and sealing your bag so you get the best results every time.
Add Lunch Items
Start by choosing what you want to pack. Place heavier items, like sandwiches or fruit, at the bottom of the bag. Lighter snacks, such as chips or cookies, go on top. This helps the bag stand upright and keeps everything from getting squished. If you have a drink, use a separate container or make sure it’s sealed tightly before adding it to the bag.
Tip: Keep your lunch balanced. Try to pack a mix of protein, fruit, and snacks for a meal that keeps you full and energized.
When you fill the bag, remember not to exceed the recommended weight limit. Here’s what works best:
- Keep the total weight under 1 kg (about 2 lbs) to avoid tearing.
- If you need to carry more than 1.5 kg (about 3 lbs), switch to a bag with a reinforced bottom or handles.
Packing within these limits helps your bag stay intact and makes it easier to close.
Avoid Overfilling
It’s tempting to stuff your bag with extra snacks, but overfilling causes problems. When you pack too much, the bag can burst or the seams might rip. You also risk the bag tipping over, which can create a mess.
Here’s a quick look at what happens when you overfill:
| Problem Type | Description |
|---|---|
| Bag Failure | Overfilling can lead to the bag bursting due to excessive volume or weight. |
| Seams Ripping | Overloading may cause seams to rip, compromising the bag’s integrity. |
| Safety Hazards | A toppled bag presents safety risks to operators and bystanders. |
To avoid these issues, leave a little space at the top of the bag. This makes sealing easier and keeps your lunch safe. If you notice the bag bulging or struggling to close, remove an item or use a larger bag.
Final Closure Check
Before you head out, check the closure to make sure your lunch stays secure. Follow these best practices:
- Leave enough space at the top so you can seal the bag without forcing it.
- Choose a closure that matches the weight of your lunch. Use tape or staples for heavier items, and simple folds for lighter ones.
- Make sure any tape or staples don’t damage the paper. Gentle adhesives work best.
Give the bag a gentle shake. If nothing shifts or falls out, you’ve done it right. These instructions help you keep your lunch safe and your bag looking neat.
Note: A well-packed and properly closed bag makes lunchtime easier and more enjoyable. Take a moment to double-check before you go.
Tips for Neat Folds
Folding a paper lunch bag can feel tricky, but you can make every bag look sharp with a few simple tricks. These tips help your bag stand tall, keep your lunch safe, and make your folding skills shine.
Align Edges
You might not think much about lining up the edges, but it makes a big difference. When you match up the sides and corners, your bag stands up better and holds more. It also looks much neater on the outside. If you want your bag to carry a sandwich, snacks, and maybe a juice box, you need a strong shape.
Here’s a quick look at how the bag’s shape affects its use:
| Panel Geometry | What It Does | Why It Matters |
|---|---|---|
| Width (W) | Decides how wide the bag opens | More space for lunch items |
| Gusset (G) | Lets the bag expand at the sides | Helps the bag stand and fold |
| Height (H) | Sets how tall the bag stands | Fits taller items like fruit |
When you fold, always check that the width, gusset, and height line up. This helps your bag stand up straight and keeps it from tipping over. You get a bag that looks good and works well.
Tip: Take a second to pinch the corners and run your finger along the edges. You’ll see the bag take shape right away.
Balance Bag
A balanced bag keeps your lunch safe and makes carrying easier. If you put all the heavy stuff on one side, the bag might lean or even tip over. You want to spread out the weight so nothing gets squished.
Try these steps for a balanced bag:
- Place heavier items, like sandwiches or apples, at the bottom.
- Add lighter snacks, like chips or cookies, on top.
- If you pack a drink, keep it upright in the center.
When you balance your bag, you help it stand up on its own. You also make sure nothing gets crushed before lunchtime.
Note: If your bag feels wobbly, open it up and move things around. A quick fix can save your lunch!
Prevent Tears
No one likes a ripped lunch bag. You can stop tears before they start by folding carefully and using a few smart tricks. Some bags come with extra features that help them last longer.
Here are some ways to keep your bag strong:
- Reinforced Bottoms: Some bags have a second layer of paper or a special insert at the bottom. This stops the bag from sagging or tearing when you pack heavier foods.
- Gusseted Sides: Look for bags with folded panels on the sides. These let the bag expand, so the seams don’t get too much pressure.
- Twisted Paper Handles: If your bag has handles, make sure they’re glued on tight. They work well for light lunches.
- Premium Handles: For really heavy lunches, bags with ribbon or fabric handles give extra support and make carrying easier.
You can also help by folding slowly and not stuffing the bag too full. If you see a weak spot, add a little tape for backup.
Pro Tip: Always check the bottom and sides before you leave. A quick look can save you from a lunchtime mess!
With these tips, you’ll fold paper lunch bags like a pro. Your lunches will stay safe, and your bags will look great every time.
Troubleshooting
Even when you follow every step, you might run into a few problems while folding your paper lunch bag. Don’t worry! You can fix most issues with a few simple tricks. Let’s look at some common problems and how you can solve them.
Uneven Folds
Sometimes, your bag just won’t fold straight. Maybe the sides look wavy, or the top edge curls up. This happens to everyone, especially if you rush or use a bag that’s been stored for a while. Here’s a quick table to help you spot what’s going on:
| Cause | Description |
|---|---|
| Curling | The whole sheet rolls or curls. This usually happens when one side expands or shrinks more than the other. |
| Cockling | Only parts of the paper look bumpy or wavy. Uneven drying or moisture can cause this. |
| Roughness | The surface feels bumpy or rough. This comes from uneven fibers in the paper. |
If you see curling, try smoothing the bag out flat with your hands before you fold. For cockling, press the bag under a heavy book for a few minutes. If the bag feels rough, use your fingers to press down on the folds and make them sharper. Taking your time helps a lot. You’ll get neater folds if you go slow and check your work as you go.
Tip: If your bag keeps curling, store your paper bags in a dry place. Humidity can make the paper act up!
Loose Closure
A loose closure can make your lunch bag pop open at the worst time. If you notice the top keeps unfolding, check how much you’ve folded down. Sometimes, you just need to roll the top one more time or press the crease harder. If the bag is too full, take out an item or two so you have more room to fold.
You can also use a small piece of tape or a sticker to hold the fold in place. Stickers add a fun touch and help keep your lunch safe. If you want extra security, fold the top edge twice before sealing.
Note: Always leave a little space at the top of your bag. This makes it easier to close tightly.
Tearing Issues
Tears can ruin your lunch bag, but you can prevent most of them with a few smart moves. Here’s what you can do:
- Put heavier items at the bottom of the bag. This keeps the weight from pulling on the sides.
- Support the bottom with your hand when you carry the bag. This stops the paper from stretching or ripping.
- If a handle breaks, fix it right away. A quick repair can save your bag from bigger tears.
- Store your bags flat and in a dry spot. This keeps them strong and ready to use.
- Hold heavy bags close to your body. This gives better support and keeps the bag from swinging.
If you spot a small tear, patch it with tape before it gets worse. Taking care of your bag means your lunch stays safe all day.
Pro Tip: Always check your bag for weak spots before you pack your lunch. A quick look can save you from a big mess later!
Make a Paper Bag: Customization
Decorating Ideas
You can make a paper bag look amazing with just a few simple craft supplies. Decorating your paper bag turns an ordinary lunch into something special. You might want to add stars, shapes, or even your favorite stickers. Many people love to create wall clusters by grouping stars together. You can glue paper stars onto your bag and then display them on a wall for a starry effect. Hanging decor is another fun idea. Punch a small hole at the top of your bag, tie a string, and hang it from the ceiling. Your lunch bag will look like it’s floating!
If you want a cool centerpiece, place your decorated bag among candles or greenery on the table. This makes lunchtime feel like a party. Some people even put LED string lights inside their bags for a cozy glow. You can use markers, stamps, or washi tape to add color and patterns. Try drawing your favorite animal or writing a fun message. When you make a paper bag, you get to choose how it looks.
Tip: Use bright colors and bold shapes to make your bag stand out. You can change the design every day!
Personalization for Kids
Kids love to make a paper bag their own. You can let them pick their favorite colors or characters. Stickers are a great way to add personality. Write their name on the front so everyone knows whose lunch it is. You can draw cartoons, superheroes, or even silly faces. Some parents like to add a joke or a note inside the bag. This makes lunchtime more fun and helps kids feel special.
If you want to get creative, let your child help with decorating your paper bag. Give them markers, crayons, and stickers. You can even use stamps or stencils for cool shapes. Kids enjoy showing off their designs to friends. Personalizing bags also helps prevent mix-ups at school.
Note: Let your child choose their own decorations. It builds confidence and makes lunchtime exciting.
Custom Sizes
Sometimes you need a bigger or smaller lunch bag. You can make a paper bag in almost any size. If you want to pack a big sandwich or lots of snacks, use a larger sheet of paper. For a small treat, use a smaller piece. You can fold the sides in more or less to change the width. Adjust the height by folding the top down further or leaving it tall.
Here’s a quick table to help you pick the right size:
| Bag Size | Best For | Paper Dimensions |
|---|---|---|
| Small | Cookies, fruit | 8″ x 10″ |
| Medium | Sandwich, snacks | 10″ x 12″ |
| Large | Full lunch, drinks | 12″ x 16″ |
When you make a paper bag, you control the size and shape. You can even create custom bags for parties or gifts. Try making a set of bags in different sizes for your family. It’s easy and fun!
Pro Tip: Measure your lunch items before you start. This helps you make a paper bag that fits perfectly.
Conclusion
You’ve learned how to fold a paper lunch bag step by step. Here’s a quick recap:
- Cut your paper to size.
- Fold in the sides and secure the edge.
- Shape the bottom with neat triangles.
- Reinforce seams for strength.
- Add handles if you want.
A well-folded bag keeps your food fresh and safe.
| Benefit | Description |
|---|---|
| Insulation | Keeps food warm or cold for short periods. |
| Durability | Resists tears and scratches. |
| Sealing | Helps preserve freshness. |
| Preservation | Reduces moisture and keeps food tasty. |
Want custom or wholesale bags? You can get eco-friendly, branded, and fully personalized options in many sizes and styles. Reach out to us for expert help!
FAQ
How do I keep my paper lunch bag from opening by itself?
You can roll the top down tightly and press along the crease. Add a small piece of tape or a sticker for extra hold. This keeps your lunch safe and the bag closed.
Can I reuse a paper lunch bag?
Yes, you can! If your bag stays clean and dry, just fold it flat after lunch. Use it again for snacks, crafts, or even as a gift bag.
What should I do if my bag tears?
Don’t worry. Grab a piece of tape and patch the tear from the inside. For bigger rips, double up the tape or use a new bag to keep your lunch secure.
Are paper lunch bags safe for hot food?
Paper bags work best for cool or room-temperature foods. If you pack something warm, let it cool a bit first. Hot food can weaken the paper and cause leaks.
How can I decorate my lunch bag quickly?
Stickers and colorful markers work great. Draw a smiley face or write your name. You can also use washi tape for fun borders. Quick decorations make your bag stand out.
Can I put a drink inside my paper lunch bag?
You can, but make sure the drink is sealed tight. Place it upright in the center of the bag. If you worry about leaks, use a plastic or reusable bottle for extra safety.
What size bag should I use for a big lunch?
Pick a larger bag, like one that’s 12″ x 16″. This size fits a sandwich, snacks, and a drink. If you pack a lot, check the bag’s weight limit to avoid tears.


