
You want to know how to clean a camera bag? Start by removing everything, then use gentle tools and mild soap to clean your camera bag without soaking it. Regular cleaning keeps your gear safe from dust and helps your bag last longer. Give your bag a little care, and you’ll protect your favorite equipment for years.
Key Takeaways
- First, take everything out of your camera bag. This helps you clean it well.
- Get cleaning items like soft cloths, mild soap, and a soft brush. These will not hurt your bag.
- Look at the care instructions on your bag. This helps you clean it the right way for its material.
- Clean your bag often. This stops dust from building up and keeps your gear safe.
- Let your bag air dry in a place with lots of fresh air. This stops mold and keeps the bag’s shape.
- Put your camera gear in the bag neatly. This makes it easy to find and keeps it safe.
- Put silica gel packs in your bag. They soak up moisture and stop bad smells.
- Think about getting a custom camera bag. It can give you better protection and help you organize your gear for your needs.
Preparation Before Cleaning
Before you start cleaning your camera bag, you need to get ready. Taking a few minutes to prepare will help you avoid mistakes and keep your bag in great shape. Let’s walk through the steps you should follow before you grab the soap and water.
Gather Supplies
You don’t need fancy tools to clean your camera bag, but having the right supplies makes the job easier. Most camera bag manufacturers suggest using gentle products that won’t harm the fabric or your gear. Here’s what you should have on hand:
- Soft microfiber cloths
- Warm soapy water (mild soap works best)
- Soft-bristled brush or old toothbrush
- Grangers Gear Cleaner or a similar gentle cleaner for tough stains
- Small vacuum or handheld blower
- Cotton swabs
- Clean, dry towels
Tip: Always use mild soap. Harsh chemicals or bleach can damage your bag and leave behind strong odors.
You might already have most of these items at home. If you see a stubborn stain, a specialty cleaner like Grangers Gear Cleaner can help. For regular cleaning, warm soapy water and a soft cloth usually do the trick.
Check Care Instructions
Before you start scrubbing, take a look at the care label inside your bag. Manufacturers often include cleaning instructions that tell you what’s safe and what’s not. Some bags can handle a gentle machine wash, but many need hand cleaning. If you can’t find a label, check the company’s website or user manual.
Note: Following the manufacturer’s advice helps you avoid accidental damage and keeps your warranty valid.
If your bag has leather parts, special coatings, or unique fabrics, you’ll want to pay extra attention to the care instructions. Some materials need special products or extra care.
Identify Bag Material
Not all camera bags use the same materials. You might have a nylon, canvas, or leather bag. Each one needs a different cleaning method. Take a close look at your bag and figure out what it’s made of. Nylon bags usually feel smooth and slightly shiny. Canvas bags feel thick and sturdy. Leather bags look and feel soft, but they can get damaged by too much water.
Knowing your bag’s material helps you pick the right cleaning method. For example, you should never soak a leather bag or use harsh cleaners on canvas. If you’re not sure, check the tag or look up your bag’s model online.
Taking time to prepare means you’ll clean your camera bag safely and effectively. You’ll also help your bag last longer and keep your camera gear protected.
How to Clean a Camera Bag: Step-by-Step
Empty the Bag
Start by emptying the bag. Take out every camera, lens, battery, memory card, and accessory. Check all pockets and hidden compartments. You want nothing left inside. This step helps you see every spot that needs cleaning and keeps your gear safe from moisture or cleaning agents.
Tip: Place your gear on a clean towel or mat while you work. This keeps everything organized and prevents scratches.
Remove Debris
Now you need to shake out debris and get rid of dust and crumbs. Dirt can hide in corners and seams, so pay close attention.
Shake Out the Bag
Hold your camera bag upside down over a trash can or outside. Shake it gently. You will see loose dirt, sand, or crumbs fall out. This simple move gets rid of most debris without any tools.
Use a Soft Brush
Grab a soft-bristled brush or an old toothbrush. Brush the inside and outside of the bag. Focus on seams, corners, and pockets. The brush lifts out stubborn particles that shaking misses. You can also use a handheld vacuum cleaner with a brush attachment if you have one. This helps you reach deep into pockets and crevices.
Use a Blower or Compressed Air
Sometimes dust hides in zippers or tight spaces. Use a blower or compressed air to blast away dirt. Blow from the inside out so you do not push debris deeper into the bag. This method works well for cleaning zippers and fasteners, too. Avoid using oil or grease on zippers because it attracts dust and wears them out faster.
Wipe Down Surfaces
After you remove debris, you need to wipe down the interior and exterior. This step keeps your bag looking fresh and helps prevent stains.
Exterior Cleaning with Damp Cloth
Take a soft, damp cloth and dip it in warm soapy water. Wring out the cloth so it is only slightly damp. Wipe the outside of your camera bag. Use gentle strokes. If you see a stain, add a drop of mild detergent and rub softly. Do not soak the bag or use bleach. Harsh chemicals can damage the fabric and leave strong odors.
Note: Always test your cleaning solution on a small, hidden area first. This helps you avoid discoloration or damage.
Interior Lining Care
You also need to wipe down the interior. Use a lint-free cloth that is just a little damp. Wipe down the interior gently. If you find sticky spots or stains, use a tiny bit of mild soap. Make sure the cloth is not wet, just damp. You do not want water soaking into the lining. After you finish, leave the bag open to air dry. This step helps prevent mold and keeps your bag smelling fresh.
Alert: Never submerge your camera bag in water. Always let it air dry completely before you put your gear back inside.
By following these steps, you clean your camera bag safely and keep it ready for your next adventure.
Clean Zippers and Fasteners
Zippers and fasteners can collect dust, sand, and grime over time. If you ignore them, they might get stuck or even break. You want your camera bag to open and close smoothly every time you use it. Let’s make sure your zippers and fasteners stay in top shape.
Remove Dirt from Zippers
Start by checking each zipper and fastener. Look for dirt, crumbs, or lint stuck in the teeth or around the edges. You can use a few simple tools to clean them out:
- Use a Soft Brush: Grab a soft-bristled brush or an old toothbrush. Gently brush along the zipper teeth. Move the brush back and forth to loosen dirt and dust.
- Try a Cotton Swab: For tight spots, dip a cotton swab in a little warm, soapy water. Wipe along the zipper teeth and around the fastener edges. Make sure the swab is damp, not wet.
- Blow Away Debris: Use a handheld blower or a can of compressed air. Aim the air at the zipper to blow out any hidden dust or crumbs.
Tip: Always brush or blow away dirt before you try to zip or unzip. This helps prevent jams and keeps the zipper working smoothly.
If you see sticky spots or stubborn grime, use a slightly damp cloth with mild soap. Wipe gently and dry the area right away with a clean towel.
Lubricate if Needed
Sometimes zippers feel stiff or hard to move, even after you clean them. You can fix this with a little zipper lubricant. You don’t need much—just a small amount goes a long way.
- Choose the Right Lubricant: Use a zipper-specific lubricant, like a silicone-based spray or a zipper wax. Avoid oil or grease. These can attract more dirt and make things worse.
- Apply Carefully: Open the zipper all the way. Put a tiny bit of lubricant on the teeth. Move the zipper pull back and forth a few times to spread the lubricant evenly.
- Wipe Off Extra: Use a dry cloth to wipe away any extra lubricant. You don’t want it to get on your camera gear or the bag’s fabric.
Note: Only lubricate zippers if they feel sticky or hard to move. Too much lubricant can attract dust and cause more problems.
If your bag has snaps, buckles, or Velcro, check those too. Wipe them clean with a damp cloth and dry them well. Make sure everything works before you put your gear back inside.
Keeping your zippers and fasteners clean helps your camera bag last longer. You’ll also avoid annoying jams when you need to grab your camera in a hurry.
Cleaning by Material
Nylon Bags
Nylon camera bags are tough, but you still need to treat them gently. You want to keep the color bright and the material strong.
Spot Cleaning
You can tackle small stains with warm, soapy water. Grab a soft cloth and dip it in the mixture. Wipe the dirty spot, then rinse with clean water. Avoid harsh detergents because they can make the nylon fade or break down. Before you start, empty the bag and vacuum the inside. Use a cloth to brush away dirt from the outside. If you see stubborn stains, use a small cleaning brush and focus on those areas, especially around zippers.
Tip: Always air dry your nylon bag in an open place. This helps prevent mustiness and keeps the bag fresh.
Hand or Machine Wash (If Allowed)
Some nylon bags can handle machine washing, but you need to check the care label first. If machine washing is allowed, use a gentle cycle and mild soap. Never use bleach. If you’re hand washing a camera bag, fill a basin with warm soapy water and gently scrub. Rinse with clean water and let the bag air dry. Never put nylon bags in a dryer.
Canvas Bags
Canvas bags feel sturdy, but they need special care to avoid discoloration or weakening.
Spot and Deep Cleaning
For spot cleaning, use a damp cloth with mild soap. Rub the stain gently. Eco-friendly cleaning products work well for canvas. If you want a natural cleanser, mix vinegar and water. Baking soda helps with tough stains and bad smells. You can also blend essential oils like tea tree or lavender with water for a mild antibacterial cleaner.
If your bag needs a deep clean, hand wash it in lukewarm water with mild detergent. Gently scrub and rinse thoroughly. Never wring out the bag. Always air dry in a shaded area to prevent shrinkage and fading. Hanging the bag in a well-ventilated spot keeps it safe from damage.
Note: Using protective sprays after cleaning helps prevent future stains and fading. Applying a fabric protectant extends the lifespan of your canvas bag, especially if you use it outdoors a lot.
Leather Bags
Leather camera bags look stylish, but they need extra care to stay soft and flexible.
Wipe and Spot Clean
Wipe your leather bag with a soft, dry cloth to remove dust. For minor stains, use a vinegar and water solution. Baking soda helps remove odors. Never soak leather in water. Moisture can cause discoloration, stiffening, and even mold.
Conditioning Leather
Conditioning keeps leather flexible and prevents cracking. Beeswax and coconut oil work as natural conditioners. Neatsfoot oil softens stiff leather. Leather Honey and Sno Seal help maintain and waterproof your bag. Apply a small amount and spread evenly. Let it dry before you use the bag.
Avoiding Water Damage
Water is a silent enemy for leather. Apply a protective leather spray to repel water and dirt. Condition your bag regularly to replenish oils and form a barrier. Store your leather bag in a cool, dry place, using a dust bag to shield it from moisture.
Leather is tough but can be surprisingly delicate when faced with moisture. Ignoring water exposure can lead to stains and damage, so always clean and dry your bag quickly.
Drying and Reassembly
Air Drying
After you finish cleaning your camera bag, you need to let it dry the right way. Air drying works best for almost every camera bag. Place your bag in a well-ventilated area. Open all the zippers and pockets. This helps air move through the bag and speeds up drying. Avoid direct sunlight because it can fade colors and damage some materials. Never use a hair dryer or put your bag in a dryer. High heat can shrink, warp, or weaken the fabric.
Tip: If your bag has removable inserts or padding, take them out and let them dry separately. This helps everything dry faster and prevents mold.
Check the bag after a few hours. If it still feels damp, leave it open overnight. Make sure the bag is completely dry before you put your camera gear back inside. Moisture can lead to mold, bad smells, or even damage your equipment.
Maintain Bag Shape
You want your camera bag to keep its shape while it dries. A bag that loses its shape can make it harder to organize your gear later. To help your bag keep its form, stuff it with clean, dry towels or crumpled paper. This supports the sides and bottom. It also helps air flow through the bag. If your bag has a structured frame or padding, make sure it sits flat and does not bend.
Note: Avoid using newspaper for stuffing. The ink can transfer to the inside of your bag, especially if it is still a little damp.
Once the bag is dry, remove the towels or paper. Give the bag a gentle shake to fluff up the lining and padding. Your bag should look and feel like new.
Organize Gear After Cleaning
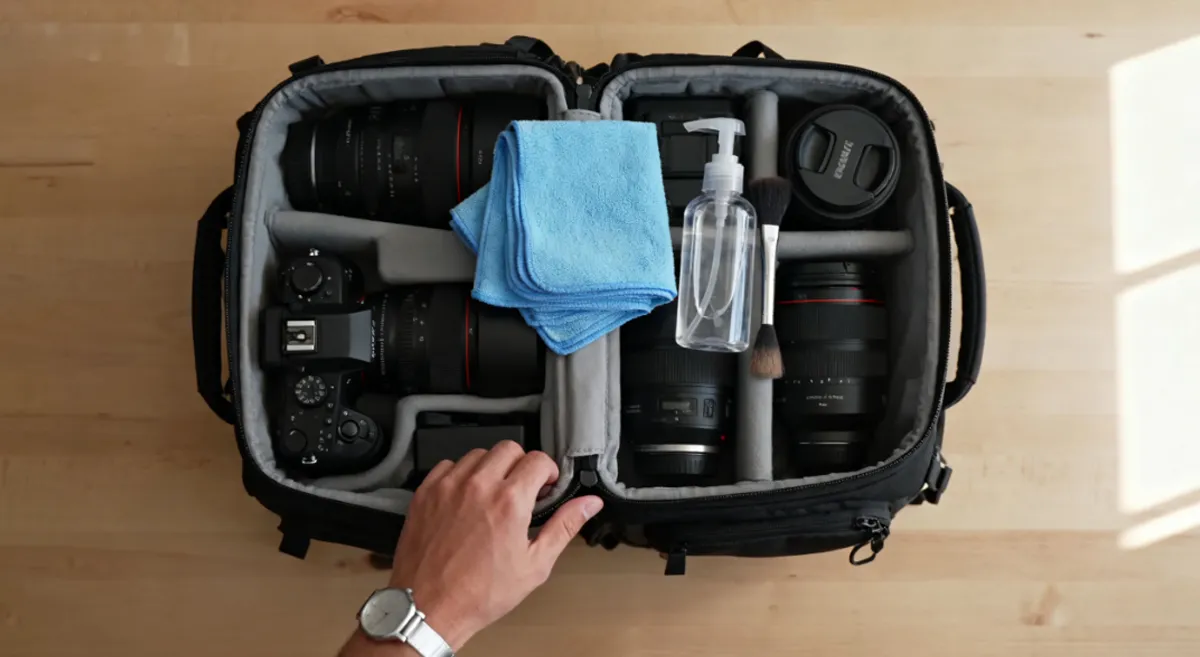
Now comes the fun part—putting your camera gear back in your fresh, clean bag. Good organization keeps your equipment safe and easy to reach. Here are some smart ways to set up your bag:
- Place your camera in the main compartment for quick access and stability.
- Use removable padded sleeves for extra protection around lenses or delicate items.
- Take advantage of quick-access pockets for things you use often, like memory cards or lens caps.
- Arrange other items around your camera to support accessibility and balance.
- Add padded dividers or modular foam inserts to keep gear from bumping into each other.
- Layer your gear in compartments to make everything easy to find and grab.
Keeping your bag organized not only protects your gear but also saves you time when you need to grab your camera in a hurry.
Before you zip up, double-check that everything is dry and clean. A well-organized bag helps you stay ready for your next photo adventure. Enjoy the feeling of a fresh, tidy camera bag!
Maintenance Tips
Regular Cleaning Schedule
You want your camera bag to last and keep your gear safe. Setting up a regular cleaning routine makes this easy. You don’t have to spend hours every week. Just a few simple steps will help you avoid dirt buildup and keep bacteria away.
- Every week, wipe down your bag with a soft, dry cloth. This removes dust and oils before they settle in.
- Once a month, take a closer look. Check for stains, brush out the inside, and spot clean any trouble spots.
Tip: Mark a reminder on your calendar or phone. This way, you never forget to clean your camera bag.
Prevent Mold and Odors
Nobody likes a musty camera bag. Mold and bad smells can sneak in if you store your bag in damp places or forget to dry it after cleaning. You can stop these problems before they start.
- Always let your bag air dry after cleaning or if it gets wet in the rain.
- Store your bag in a cool, dry place. Avoid closets or basements that feel damp.
- Use small silica gel packs inside your bag. These little packets soak up extra moisture and help prevent mold.
- If you notice a smell, sprinkle a bit of baking soda inside. Leave it overnight, then shake it out the next day.
Note: Open your bag and let it breathe every so often, especially after a long trip or a rainy day.
Proper Storage
How you store your camera bag matters. The right spot keeps your bag looking good and protects your gear. Different environments call for different materials and care.
| Environment | Recommended Material | Key Features |
|---|---|---|
| Urban / Everyday | Waxed Canvas or Leather | Stylish, professional appearance |
| Outdoor / Travel | Cordura or Ballistic Nylon | Lightweight, abrasion-resistant |
| Coastal / Humid | TPU-Coated Nylon | Waterproof, mold-resistant |
| Cold / Dry Climates | Full-Grain Leather | Retains shape, resists cracking |
- Re-wax canvas bags every 12–18 months to keep them water-resistant.
- Condition leather bags with a pH-neutral balm. This stops cracking and keeps the leather soft.
- Wipe nylon bags with a damp cloth. Skip harsh cleaners to protect the fabric.
Callout: Never store your bag in direct sunlight or near heaters. Heat and sun can fade colors and weaken materials.
When you follow these tips, you help your bag stay fresh and strong. Your camera gear will thank you!
Quick Cleaning on the Go
You don’t always have time for a deep clean. Sometimes you just need to freshen up your camera bag while you’re out shooting or traveling. Quick cleaning on the go helps you keep your gear safe and your bag looking good, even when you’re busy.
Let’s talk about what you can do when you’re in a hurry:
What to Pack for Fast Cleaning
You can make a simple cleaning kit that fits right in your camera bag. Here’s what you should include:
- Mini microfiber cloth
- Travel-size hand sanitizer (for your hands, not the bag)
- Small soft brush
- A few cotton swabs
- Silica gel packets
- Zip-top bag for trash or dirty items
Tip: Keep your cleaning kit in a side pocket or pouch. You’ll always know where it is.
Easy Steps for On-the-Go Cleaning
You can clean up your bag in just a few minutes. Try these steps when you notice dirt or dust:
- Shake Out Debris: Step outside or find a trash can. Hold your bag upside down and give it a gentle shake. Loose crumbs and dirt will fall out.
- Brush Away Dust: Use your mini brush to sweep out corners and seams. Focus on spots where dirt collects, like zipper edges and pockets.
- Wipe Surfaces: Grab your microfiber cloth. Wipe the outside and inside of your bag. You can use a dry cloth for dust or a slightly damp cloth for sticky spots.
- Clean Zippers: Take a cotton swab and run it along the zipper teeth. This helps remove grit and keeps zippers working smoothly.
- Check for Moisture: If your bag feels damp, add a silica gel packet. These packets soak up moisture and help prevent mold.
Alert: Never use wet wipes with strong chemicals. They can damage your bag’s material and leave behind residue.
Quick Fixes for Common Problems
Sometimes you run into trouble while you’re out. Here’s how you can handle it fast:
| Problem | Quick Fix |
|---|---|
| Mud or dirt | Let it dry, then brush it off |
| Sticky stains | Dab with a damp cloth, then dry |
| Bad smell | Add a silica gel packet |
| Jammed zipper | Brush out dirt, move zipper gently |
You don’t need fancy tools or lots of time. A few smart moves keep your bag clean and your gear safe.
Stay Ready for Anything
You never know when you’ll need to clean your bag. If you keep your cleaning kit handy, you can fix problems before they get worse. Your camera bag will look better, smell fresher, and last longer.
Note: Quick cleaning on the go saves you time and protects your equipment. You’ll always be ready for your next shot!
Repair or Replace
Signs of Wear
You use your camera bag a lot, so it’s normal to see some signs of wear over time. Knowing what to look for helps you decide if your bag needs a quick fix or if it’s time for a new one. Here are the most common signs that your camera bag needs attention:
- Compression: The foam inside your bag might not spring back like it used to. When the padding feels flat, your gear loses protection.
- Tears and Holes: You might spot rips in the fabric or small holes. These can let in dust or even expose your camera to damage.
- Degradation: Sometimes, the foam starts to crumble or gets sticky. This means the material is breaking down and can’t protect your gear.
You can also check this table for a quick overview:
| Type of Damage | Description |
|---|---|
| Fabric Tears | Tears in the fabric can happen from sharp objects or heavy use. These weak spots can put your camera at risk. |
| Repair Methods | You can stitch the tear or use fabric repair tape for a strong fix. |
Tip: Always check your bag after a big trip or outdoor shoot. Early signs of wear are easier to fix.
Repair Options
You don’t always need to buy a new camera bag when you spot damage. Many problems have simple fixes you can do at home. Here’s what you can try:
- Clean the Foam: Use a vacuum cleaner or a lint roller to pick up dust and dirt from the foam padding.
- Fix Small Tears: For tiny rips, apply a strong adhesive or use fabric repair tape. This keeps the tear from getting bigger.
- Restore Compression: If the foam looks flat, try steaming it gently. Sometimes, steam helps the foam puff up again.
- Replace the Foam: If the padding is too far gone, measure the space, buy new foam, cut it to size, and fit it inside your bag.
Note: Most repairs cost less than buying a new bag. You can save money and keep your favorite bag going strong.
When to Buy New
Sometimes, repairs just aren’t enough. If your bag has big holes, broken zippers, or foam that crumbles no matter what you do, it’s time to shop for a new one. Here are some signs you shouldn’t ignore:
- The bag no longer protects your camera or lenses.
- The straps or handles feel weak or about to break.
- The inside smells bad, even after cleaning.
- The bag’s shape is lost, making it hard to organize your gear.
A new camera bag gives you peace of mind and keeps your equipment safe. If you notice more than one problem or repairs don’t last, treat yourself to an upgrade. Your camera gear deserves the best protection!
Custom Camera Bags & Manufacturer Expertise
Benefits of Customization
A custom camera bag fits your gear and your style. These bags do more than look cool. They protect your camera better than regular bags. Custom bags use strong materials and smart designs. You get padded dividers and adjustable cubes for your camera and lenses. Weather-resistant coatings keep your gear dry in the rain. You can move the compartments to fit your equipment. Regular bags have fixed pockets and less padding. If you want the best protection, choose a custom bag.
| Feature | Custom Camera Bags | Standard Models |
|---|---|---|
| Material Quality | High-quality fabrics like 500D–1680D nylon | Varies, often lower quality |
| Weather Resistance | IP-rated seals and water-resistant coatings | Limited protection |
| Modular Design | Adjustable cubes for gear organization | Fixed compartments |
| Impact Resistance | Rated for 100+ kg external pressure | Generally lower ratings |
| Padded Dividers | EVA or high-density foam for cushioning | Basic padding |
| Customization | Modular hook-and-loop mounting | No customization options |
Tip: Custom camera bags help you stay organized and keep your gear safe wherever you go.
Our Manufacturing Experience
You should have a camera bag made by experts. Our team at Zheng knows how to make bags that fit your needs. We offer many ways to customize and brand your bag. You can pick the look and features you want. We also let you test your bag before we make the final version.
| Expertise Area | Description |
|---|---|
| Customization Options | Zheng provides various customization and branding options to meet specific needs of users. |
| Prototyping Services | We offer prototyping services to test and refine designs before full-scale production. |
| Diverse Backpack Range | Zheng manufactures a variety of backpacks tailored for different user scenarios and needs. |
Our skilled workers make each bag with care. We use strong materials and smart designs. Your bag will last and protect your gear. We have made bags for travel, outdoor trips, and daily use. You can trust us to give you quality and style.
Note: Working with experienced manufacturers means you get a camera bag that fits your gear and your life.
How to Order Custom Bags
Ordering a custom camera bag is simple. You get to pick every detail, from the design to the hardware. Here are some things you can choose:
| Customization Options | Description |
|---|---|
| Design Control | Print your designs directly onto the leather exterior. |
| Stitch Color Options | Pick from three stitch colors for the bag body. |
| Metal Hardware Color | Choose gold, silver, or gunmetal for the metal hardware. |
| Strap Options | Select a removable or non-removable leather strap. |
| Handmade Process | Each bag is handmade on-demand by skilled technicians. |
| Printing Process | Designs are digitally printed onto the leather for durability. |
| Customization of Each Panel | Choose the print for every single panel of the bag. |
| Edge Protection | Hand-painted edges on the strap provide durable edge protection. |
First, pick your favorite design. Then choose the stitch color and hardware finish. Decide if you want a removable strap. Each bag is handmade by experts. Your design is printed onto the leather, so it looks sharp and lasts. You can pick the print for every panel. Hand-painted edges help protect your bag from damage.
Callout: Custom camera bags let you show your style and keep your gear safe. You get a bag made just for you.
Conclusion
You now know how to clean a camera bag and keep your gear safe. When you clean your camera bag, you stop dust and dirt from reaching your camera. You also make sure zippers work and straps stay strong. If you organize your equipment, you protect it better. Follow these steps for how to clean a camera bag and enjoy a bag that lasts longer.
- Remove dust and debris to keep gear clean.
- Check zippers and straps for safety.
- Organize your camera and accessories for protection.
- Use these tips for how to clean a camera bag and keep your bag in top shape.
If you need a custom solution, As a professional bag manufacturer, we provide full OEM and ODM services—covering materials, structure, padding, compartments, and branding—so your product fits your exact specifications.
FAQ
How often should you clean your camera bag?
You should clean your camera bag once a month if you use it often. If you travel or shoot outdoors, check it every week. Quick wipes after each trip help keep it fresh.
Can you put a camera bag in the washing machine?
Most camera bags should not go in the washing machine. Always check the care label first. Hand washing with mild soap works best for most materials.
What should you do if your camera bag smells bad?
Sprinkle baking soda inside your bag and let it sit overnight. Shake it out the next day. You can also use silica gel packs to keep things dry and odor-free.
Is it safe to use disinfectant wipes on your camera bag?
You should avoid strong disinfectant wipes. They can damage the fabric or leave residue. Use a damp microfiber cloth with mild soap for safe cleaning.
How do you keep mold from growing in your camera bag?
Always let your bag dry completely before storing it. Store it in a cool, dry place. Add silica gel packs to absorb moisture and prevent mold.
What should you do if your zippers get stuck?
Use a soft brush to clean the zipper teeth. If it still sticks, apply a small amount of zipper lubricant. Move the zipper back and forth to spread it evenly.


