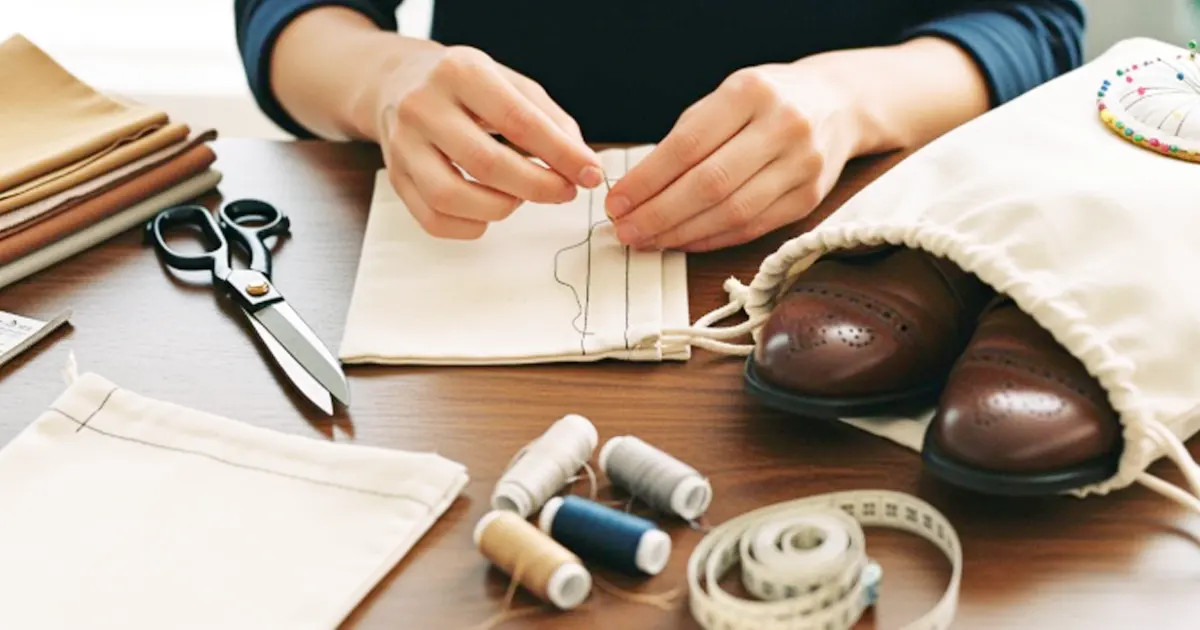
You might think sewing a zipper into a tote bag sounds tricky, but you can do it—no matter your skill level. Adding a recessed zipper gives your bag a boost in both style and function. Here’s why many sewists love this upgrade:
- Provides a clean and sophisticated look
- Ensures secure closure without visible hardware
- Zippered totes keep your things safe and contain spills better than open totes
If you’re curious about how to add a recessed zipper to a tote bag, you probably have questions. Check out some common answers below:
| Question | Answer |
|---|---|
| Can I use a shorter zipper than the width of my bag? | No — for this method, you’ll want a zip longer than your bag width. Continuous zips are ideal because you can add the slider later. |
| What type of fabric works best for tote bags? | Medium to heavyweight fabrics like canvas, denim, or upholstery fabric are great for the outer. For linings, use cotton or polycotton. |
| Do I need a special sewing machine foot for the zipper? | A zipper foot makes the job much easier and gives neater results. |
| Can I add extras like pockets or compartments? | Absolutely — add these before you assemble the lining and outer fabric. |
Ready to give your tote a secure, polished finish? Let’s get started!
Key Takeaways
- Putting in a recessed zipper makes your tote bag look better and work well.
- Pick strong fabrics like canvas or denim for the outside.
- Use cotton for the inside lining.
- Get all your supplies before you start, like interfacing, batting, and a good zipper.
- Cut your fabric pieces carefully so your bag looks neat.
- Use a zipper foot on your sewing machine to sew around the zipper easily. This helps your stitches look nice.
- Sew on top of the zipper panel to make it look finished. This also stops the lining from getting stuck.
- Iron the seams and cut loose threads as you sew. This keeps your bag looking tidy.
- The more you practice sewing, the better you will get.
Materials & Tools
Essential Materials
Before you start sewing, gather everything you need for a smooth project. You want sturdy fabric for the outside of your tote. Waxed canvas, heavy denim, cotton twill, or upholstery fabric work well. For the lining, pick quilt cottons, cotton blends, or linen. You’ll need about 1 ¼ yards of main fabric and the same amount for the lining, both at least 40 inches wide. Grab 1 ¼ yards of interfacing to give your bag structure. Batting or foam stabilizer (about 30 inches) adds extra support. For straps, use ½ yard of fabric or ready-made webbing. If you make your own straps, get ½ to 1 yard of fusible interfacing. The star of this project is the recessed zipper. Choose an 18-inch or longer nylon zipper or zipper tape with a pull. Good quality thread that matches your fabric will help your stitches blend in.
Here’s a quick checklist:
- Sturdy outer fabric (canvas, denim, twill, upholstery)
- Lining fabric (cotton, linen)
- Interfacing (fusible or sew-in)
- Batting or foam stabilizer
- Strap fabric or webbing
- Fusible interfacing for straps
- Recessed zipper (nylon, 18” or longer)
- Matching sewing thread
Tool Checklist
You don’t need fancy equipment to add a recessed zipper, but the right tools make things easier. Set up your sewing machine and use a zipper foot for neat stitches. Sharp fabric scissors help you cut clean edges. An iron and ironing board keep your panels crisp. Flower head pins or sewing clips hold everything in place while you sew. A ruler or measuring tape ensures your pieces fit together. Mark your fabric with a heat-erasable pen for accuracy.
If you want to level up, try a walking foot for thick seams or a bulky seam jumper for tricky spots. A tube turner set helps flip straps right side out. A sewist magic wand can guide fabric under the needle.
- Sewing machine
- Zipper foot
- Fabric scissors
- Iron and ironing board
- Pins or sewing clips
- Ruler or measuring tape
- Fabric marker
- Optional: walking foot, bulky seam jumper, tube turner, sewist magic wand
Choosing Zipper & Fabric
Picking the right recessed zipper and fabric makes your tote look professional. Zippers come in different sizes and types. For a tote, a nylon coil zipper works best. If you want an open end recessed zipper, make sure it’s long enough to span your bag’s width. Locking sliders keep your zipper closed, while non-locking sliders open quickly. Single-pull sliders open from one side, but double-pull sliders work from both ends. If you plan to use your tote outdoors, pick a zipper that can handle the elements.
| Criteria | Description |
|---|---|
| Zipper Size | Zippers are sized by the width of the closed teeth. |
| Type of Zipper Teeth | Coil, molded tooth, and metal offer different strengths and looks. |
| Locking Mechanisms | Locking sliders keep the zipper in place. |
| Slider Types | Single-pull opens one way; double-pull opens both ways. |
| Intended Use | Indoor or outdoor use affects your zipper choice. |
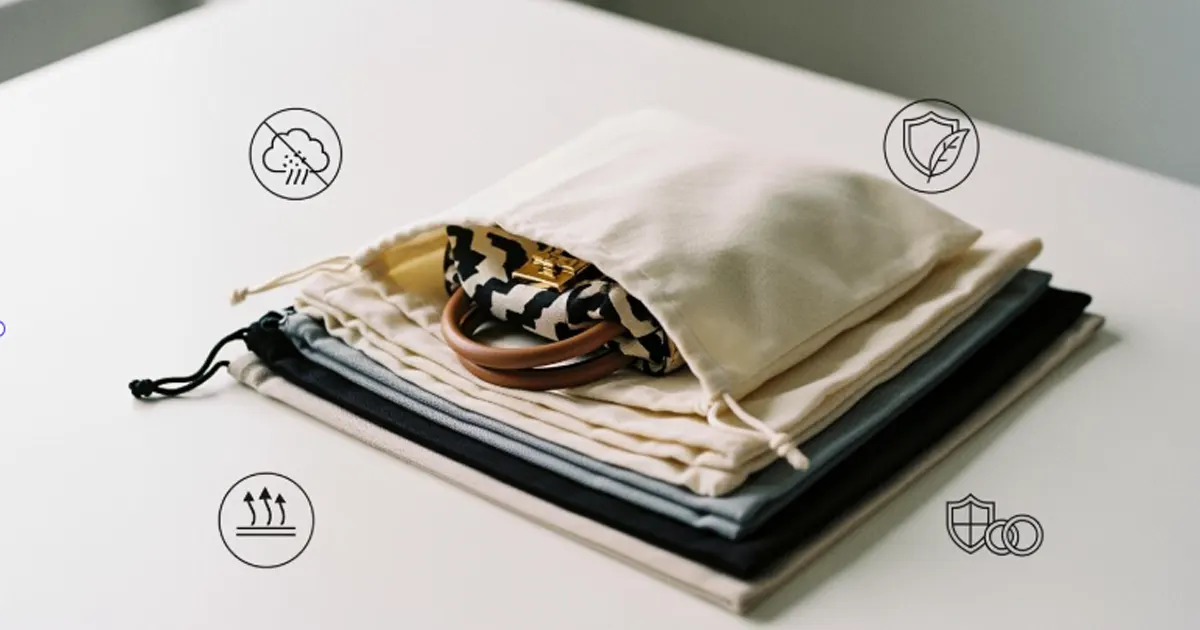
When you choose fabric, think about durability and the environment. Non-woven tote bags help reduce plastic waste and have a lower carbon footprint than plastic bags. They’re recyclable and reusable. Cotton canvas bags look great, but making cotton uses lots of water and pesticides. The carbon footprint for canvas is higher, so consider how you’ll use your tote.
A recessed zipper gives your bag a clean finish and keeps your things safe. If you want an open end recessed zipper, you’ll get easy access and a modern look. With the right materials and tools, you’re ready to start your project.
Measure & Cut Panels
Measure Bag Bottom
You want your tote bag to look neat and hold its shape. Start by measuring the bottom of your bag. Grab your ruler or measuring tape and lay your main fabric flat. Most tote bags work well with a bottom panel that measures 20 inches wide and 15 inches tall. This size gives you plenty of room for books, groceries, or your favorite craft supplies.
Here’s a quick reference for standard panel sizes:
| Fabric Type | Panel Type | Dimensions |
|---|---|---|
| Main Fabric | Bag Panels | 20″ × 15″ |
| Main Fabric | Zipper Panels | 20″ × 4″ |
| Lining Fabric | Bag Panels | 20″ × 15″ |
| Lining Fabric | Zipper Panels | 20″ × 4″ |
If you want a smaller or larger tote, adjust these measurements to fit your needs. Always double-check your measurements before you cut. A small mistake can make your panels uneven, and that makes sewing harder later.
Cut Zipper Panels & Interfacing
Now you’re ready to cut the zipper panels and interfacing. You’ll need two rectangles of main fabric and two rectangles of lining fabric, each measuring 20 inches by 4 inches. These will become the panels that hold your recessed zipper.
Follow these steps for accurate cutting:
- Lay your fabric flat on your cutting mat.
- Use your ruler to measure out two rectangles of main fabric, each 20″ × 4″.
- Cut two rectangles of lining fabric, also 20″ × 4″.
- Draw a ¾” square at each bottom corner of the zipper panels.
- Cut out the squares to create notched corners.
Tip: Notched corners help the zipper panel fit smoothly into the bag. When you sew, align the notched corners of the main zipper panel and the lining panel. Secure them with sewing clips. This step keeps everything in place and helps you get a crisp, professional look.
Don’t forget to cut interfacing for each zipper panel. Match the size to your fabric rectangles. If you use fusible interfacing, press it onto the wrong side of your fabric before you sew.
Press Panel Ends
Pressing your panels makes a big difference in how your tote looks. You want crisp edges and smooth seams. Here’s how you can do it:
- Slide the open end of your bag project onto the rounded end of your ironing board.
- Press along the top edge and where the handles attach.
- Reach inside the bag and flatten the corners. Press any seams around the bottom edge first.
- Use the tip of your iron to press the seam. Apply steam to help the fabric remember the line along the bottom edge.
- Make sure the side seams and front of the bag rest flat on the ironing board. This helps square up the bottom.
- Slide the bag back onto the rounded end of the ironing board. Press out any unwanted creases.
Note: Take your time with pressing. A well-pressed panel gives your tote a clean, store-bought finish. Steam helps set the seams, so don’t skip this step!
You’ve measured, cut, and pressed your panels. Now you’re ready to move on to adding the recessed zipper!
How to Add a Recessed Zipper to a Tote Bag: Step-by-Step
Layer Zipper & Panels
You’re ready to start adding a recessed zipper to your tote bag. This part might look tricky, but you can do it if you take it step by step. Here’s how to add a recessed zipper to a tote bag and get that clean, professional look.
- Lay your main zipper panel right side up on your work surface.
- Place the zipper face down along the top edge of the panel. The zipper pull should point to the left.
- Put the lining zipper panel right side down on top of the zipper. Now you have a sandwich: main panel, zipper, lining.
- Line up all the top edges. Make sure the zipper tape matches the fabric edges.
- Use pins or sewing clips to hold everything together. This keeps the layers from shifting when you sew a recessed zipper.
Tip: Double-check that the zipper teeth are facing the right way. The zipper pull should be between the two fabric layers.
You just finished the first step in how to add a recessed zipper to a tote bag. This layering method helps you get a neat finish and makes sewing easier.
Sew Zipper to Panels
Now you’ll sew a recessed zipper to the panels. Take your time with this part. A little patience here gives you a smooth, even zipper that works well every time.
Align Edges
Before you sew, check that all the edges line up. The fabric and zipper tape should form a straight line. If anything looks uneven, adjust it now. This step is important for adding a recessed zipper that sits flat and looks great.
- Place your ruler along the edge to make sure everything is straight.
- Smooth out any wrinkles in the fabric.
- The zipper teeth should sit just below the fabric edge, not sticking out.
Secure with Pins
Use pins or sewing clips to keep the layers together. Start at one end and work your way to the other. Place pins about every two inches. This stops the zipper from shifting as you sew a recessed zipper.
- Pin perpendicular to the edge for easy removal as you sew.
- If you use clips, make sure they hold all three layers: main panel, zipper, and lining.
- Don’t skip this step! Securing the layers helps you sew a recessed zipper without puckers or wavy seams.
Note: If you’re new to adding a recessed zipper, go slow and check your work as you pin. It’s easier to fix now than after sewing.
Attach Zipper Pull (if using tape)
If you’re using zipper tape instead of a pre-made zipper, you need to add the zipper pull before you finish. This step is simple, but it can feel a little fiddly the first time.
- Trim the ends of the zipper tape so they’re even.
- Slide one side of the zipper pull onto one end of the tape.
- Gently feed the other side of the tape into the pull. Hold both sides and wiggle the pull until it slides onto the tape.
- Tug the pull back and forth to make sure it moves smoothly.
Pro Tip: If the pull gets stuck, try trimming the corners of the zipper tape at a slight angle. This helps the pull slide on more easily.
You’ve just completed the main steps for how to add a recessed zipper to a tote bag. You layered the panels, aligned the edges, secured everything with pins, and attached the zipper pull. These steps set you up for a strong, smooth zipper that looks and works like a pro made it.
Topstitch for Finish
Now it’s time to give your zipper panel a crisp, professional look. Topstitching does more than just look good—it keeps the fabric from getting caught in the zipper and helps everything lay flat.
Here’s how you can topstitch your zipper panel:
- Open up the zipper panel you just sewed. The right sides of the main fabric and lining should face out.
- Gently press the seam away from the zipper with your fingers. You want the fabric to sit flat on both sides of the zipper.
- Use your iron to press along the seam. This step helps set the fold and makes topstitching easier.
- Place the panel under your sewing machine. Line up the edge of the fabric with the edge of your presser foot.
- Start sewing about 1/8 inch from the zipper seam. Go slow and keep your stitches straight.
- Sew all the way down the length of the zipper. Stop, pivot, and repeat on the other side if you want both edges topstitched.
Tip: Use a longer stitch length for topstitching. It looks neater and gives your bag a store-bought finish.
Why does topstitching matter?
- It keeps the lining from getting stuck in the zipper.
- It helps the zipper panel lay flat inside your tote.
- It adds a polished, finished look to your project.
If your stitches start to wobble, don’t worry. Just pause, lift the presser foot, and adjust the fabric. You can always go back and fix a spot if you need to.
Troubleshooting Table
| Problem | What to Try |
|---|---|
| Wavy topstitching | Slow down and guide the fabric with your hand |
| Uneven stitches | Check your stitch length and tension |
| Fabric bunching | Press the seam again before sewing |
Pro Tip: If you want your topstitching to really stand out, use a contrasting thread color. For a subtle look, match your thread to your fabric.
You just finished the topstitching! Your zipper panel should look neat and feel sturdy. This step makes a big difference in how your finished tote bag looks and works.
Assemble Tote Bag
Sew Bag Sides
You’re almost done with your tote bag! Sewing the sides is where your project starts to look like a real bag. Lay your outer panels right sides together. Line up the edges and pin them in place. Use a seam allowance between 5/16″ and 3/8″ for strong seams. Backstitch at the beginning and end of each seam. This keeps your stitches from coming undone when you fill your bag with books or groceries.
Here’s a quick table to help you remember the best sewing methods for neat seams:
| Method | Description |
|---|---|
| Seam allowance | Use 5/16″-3/8″ for strength |
| Backstitching | Reinforce seams at the start and end |
| Zigzagging seam allowances | Zigzag together to prevent fraying and add durability |
| Clipping and trimming | Clip and trim for a better fit and appearance |
After you sew the sides, zigzag the seam allowances together. This step stops the fabric from fraying and makes your tote bag last longer. Clip and trim the seam allowance to help the bag fit together nicely.
Incorporate Zipper Panel
Now you get to add the recessed zipper on a bag. This step gives your tote a professional look and keeps your things safe. Start by measuring the opening at the top of your bag. Decide if you want the zipper to sit right at the edge or drop down for a recessed zipper. Most people like the recessed zipper to sit about 0.6–1 inch below the rim. This makes the zipper less visible and gives your bag a sleek finish.
Follow these steps to add the zipper panel:
- Measure the finished mouth width of your tote bag. Pick a zipper that’s 1–1.5 cm shorter than the opening. This keeps the edges from looking wavy.
- Apply interfacing to the top edge where the zipper will sit. This keeps the zipper teeth straight and stops tunneling.
- Sew the zipper between two facing strips, right sides together on both sides of the tape. Turn and topstitch both sides. You now have a neat zipper bridge.
- Drop the zipper bridge 1.5–2.5 cm below the rim. Stitch the panel to the lining or an inner facing. The outer rim stays clean, and the zipper is hidden from the front.
Tip: Take your time when you attach the recessed zipper panel. Double-check your measurements so the zipper sits flat and works smoothly.
Finish Edges
Finishing the edges makes your tote bag look polished and helps the recessed zipper on a bag work perfectly. Sew along the straight edge formed by the notched corners using a ¾ inch seam allowance. Go slowly through the fabric layers and the zipper. Trim any extra seam allowance to reduce bulk. Topstitch close to the folded edge on both sides of the zipper using your zipper foot. This keeps the fabric from getting caught in the zipper and helps everything lay flat.
Sew all around the top with a ½” seam allowance. Stitch next to the previous line to hide it. Your recessed zipper will look clean and professional.
Note: If you want your bag to last, always trim and press your seams before you finish. This step helps your recessed zipper stay smooth and easy to use.
Your tote bag now has a sturdy body and a recessed zipper that keeps everything secure. You’ve built a bag that looks great and works even better!
Final Steps & Inspection
Turn Bag Right Side Out
You’re almost done! Now, flip your tote bag so the right side faces out. Reach inside and grab the bottom corners. Gently pull them through the opening. You might need to wiggle the fabric a bit, especially if you used thick material. Push out the corners with your fingers or a blunt tool, like the end of a pen. This helps your bag look crisp and square. Take a moment to smooth the seams with your hands. If you see any wrinkles, press them out with your iron. Your tote should start to look like something you’d find in a store.
Check Zipper Function
Before you celebrate, check how your recessed zipper works. Zip it open and closed a few times. The zipper should glide smoothly without catching on the fabric. If you notice any resistance, look for loose threads or bulky seams near the zipper teeth. Sometimes, the lining gets caught. If that happens, gently pull the fabric away and zip again. Make sure the zipper pull moves easily from end to end. A finished recessed zipper should sit flat and look neat inside your tote. If everything works, you nailed it!
Tip: If your zipper feels stiff, rub a little candle wax or a graphite pencil along the teeth. This trick helps the zipper slide better.
Troubleshoot Issues
Sometimes, little problems pop up after you finish your tote. Don’t worry! You can fix most issues with a few simple steps. Here’s a quick table to help you spot and solve common problems:
| Problem | Solution |
|---|---|
| Zipper won’t close | Check for thread in the teeth. Remove gently. |
| Wavy zipper tape | Interface the area or press seams again. |
| Puckered ends | Add zipper tabs or press after sewing. |
| Bulky seams | Open seams and trim excess fabric. |
| Stitches look messy | Use a sharp needle and cut off thread ends. |
Professional bag makers have a few favorite tricks for a clean finish:
- Use a sharp needle and change it often.
- Go slowly when sewing over zipper teeth.
- Press every seam and open them to reduce bulk.
- Use plenty of pins or clips to hold layers together.
- Regularly snip off thread ends.
- Interface the attachment area to keep zipper tape flat.
- Add zipper tabs at the ends to prevent puckers.
- Press after every seam for a polished look.
Note: If you see any loose threads or uneven stitches, trim them now. A little extra care makes your tote look amazing.
You’ve checked your recessed zipper, fixed any small problems, and learned some pro tips. Your finished recessed zipper gives your tote bag a secure, stylish upgrade. Enjoy your new creation!
Tips for a Clean Finish
You want your tote bag to look sharp and last a long time. A clean finish makes your project stand out. Here are some easy ways to get that polished look:
- Press every seam
Use your iron after each step. Pressing helps the fabric lay flat and keeps your stitches neat. Steam works best for thick fabrics. - Trim loose threads
Snip off any stray threads as you sew. This stops tangles and gives your bag a tidy look. - Square your corners
Push out the corners with a blunt tool. You can use a chopstick, the end of a pen, or a turning tool. Sharp corners make your tote look professional. - Check your topstitching
Keep your stitches straight and even. Use a longer stitch length for topstitching. This adds style and strength. - Match your thread color
Pick a thread that blends with your fabric. If you want your stitches to pop, choose a contrasting color. - Use zipper tabs
Add small fabric tabs at each end of the zipper. Tabs hide raw edges and stop puckering. - Clip seam allowances
Trim and clip curves or bulky seams. This helps the bag turn right side out smoothly. - Press the finished bag
Give your tote a final press. This sets the seams and removes wrinkles.
Tip: If you see puckers or uneven seams, press again and smooth out the fabric with your fingers. Small fixes make a big difference.
Here’s a quick table to help you remember what makes a bag look store-bought:
| Clean Finish Tip | Why It Matters |
|---|---|
| Press seams | Flattens fabric, neat edges |
| Trim threads | Stops tangles, looks tidy |
| Square corners | Sharp shape, pro look |
| Straight topstitch | Adds style, keeps lining flat |
| Zipper tabs | Hides ends, prevents puckers |
| Clip seam allowance | Turns bag smoothly |
You can also add a label or tag inside your tote. This gives your bag a custom touch. If you want to go further, try adding a decorative stitch or a fun lining fabric.
Remember, you don’t need fancy tools to get a clean finish. Take your time, check your work, and enjoy the process. Your tote bag will look amazing, and you’ll feel proud every time you use it!
Conclusion
You just learned how to add a recessed zipper to your tote bag. Practice helps you get better each time. When you break the steps down, you start to master the technique. Soon, you can use this skill on all kinds of bags. If sewing isn’t your thing, custom tote bags offer great perks:
- You help the planet by reducing plastic waste.
- Custom totes last longer and keep you organized.
- You get to show off your style with eco-friendly choices.
We are the tote bag manufacturer—offering full customization, OEM/ODM, and wholesale for tote bags and more. Choose fabrics (canvas, denim, recycled cotton), zipper styles (recessed/top/water-resistant), sizes, pockets, and branding (silkscreen/heat transfer/embroidery). Enjoy factory-direct pricing, fast sampling, and reliable lead times. Ready to upgrade your totes? Contact us for a custom quote.
FAQ
Can I add a recessed zipper to any tote bag?
Yes! You can add a recessed zipper to most tote bags. Just make sure your bag has a wide enough opening and sturdy fabric. If your tote is very thin, use interfacing for extra support.
What type of zipper works best for this project?
Nylon coil zippers work great. They’re flexible and easy to sew. Choose a zipper longer than your bag’s opening. Continuous zipper tape lets you customize the length and add the pull yourself.
Do I need a zipper foot for my sewing machine?
A zipper foot helps you sew close to the zipper teeth. You get neat, straight stitches. If you don’t have one, try sewing slowly and guide the fabric carefully.
How do I keep my zipper from looking wavy?
Press your seams after sewing. Use interfacing on the zipper panel. Pin or clip the zipper in place before stitching. These steps help your zipper sit flat and look professional.
Can I wash my tote bag with a recessed zipper?
You can wash your tote bag. Use gentle detergent and cold water. Zip the bag closed before washing. Air dry to keep the zipper working smoothly.
What if my zipper gets stuck?
Try rubbing a little candle wax or a graphite pencil along the zipper teeth. This trick helps the zipper slide better. Check for loose threads or fabric caught in the teeth.
How do I add zipper tabs for a cleaner finish?
Cut small rectangles of fabric. Fold them over each end of the zipper and sew in place before attaching the zipper panel. Zipper tabs hide raw edges and prevent puckering.
Can I add pockets inside my tote bag?
Absolutely! Sew pockets onto the lining before you assemble the bag. You can add zippered, slip, or patch pockets for extra organization.