
You can make your own diy foldable shopping bag at home in about 30 minutes. You only need simple tools, so beginners like you can start easily. Using eco-friendly materials helps you use less single-use plastic bags. Did you know people use about 5 trillion plastic bags every year? Most plastic bags end up in landfills or oceans and stay there for hundreds of years. Reusable diy grocery bags let you wash and use them many times. Look at the table below to see why reusable bags are a smart choice:
| Aspect | Reusable Bags | Disposable Plastic Bags |
|---|---|---|
| Environmental Impact | Lower impact, reduces waste | Major pollution problem |
| Durability | Used many times | Single-use, lots of waste |
| Cleaning | Washed and reused | Must be thrown away |
You get a foldable bag that saves space and helps the planet.
Key Takeaways
- Making a DIY foldable shopping bag takes about 30 minutes.
- You only need simple materials for this project.
- Using eco-friendly fabrics like organic cotton or jute is better.
- These fabrics help reduce plastic waste and are good for the environment.
- Pick strong handles that can hold heavy things.
- Try different handle lengths to find what feels best.
- Reinforce the seams so your bag lasts longer.
- Add batting to make your bag stronger and keep its shape.
- You can decorate your bag with fabric paints or patches.
- Try using special closures to make your bag unique.
- Learn how to fold your bag the right way.
- This helps you store it in your pocket or purse.
- Practice sewing on scrap fabric first to get better.
- This will help you feel ready before you start your real project.
- Using reusable bags is a good habit for the planet.
- It helps protect animals and keeps nature safe.
Materials
Get your materials before you start your diy reusable shopping bag. The right fabric and tools make your project easier. They also help your bag last longer. Let’s look at what you need.
Fabric
Picking good fabric matters a lot. You want it strong, washable, and easy to fold. Many people use cotton, canvas, or recycled polyester for diy foldable reusable grocery bags. These fabrics last long and look nice.
Here’s a quick look at some popular fabric choices:
| Fabric | Pros | Cons | Best Uses |
|---|---|---|---|
| Cotton | Soft, eco-friendly, biodegradable | Can shrink when washed | Everyday totes, grocery bags |
| Canvas | Super durable, washable, handles weight | Heavier and pricier | Heavy-duty bags, multi-use totes |
| Jute | Natural, rustic, biodegradable | Coarse texture, fewer color options | Market bags, eco-friendly promos |
| Recycled PET | Made from recycled plastic, water-resistant | Not biodegradable | Fashion bags, promo bags |
| Nylon | Lightweight, water-resistant, affordable | Not eco-friendly, non-biodegradable | Foldable bags, travel bags |
| Hemp | Sustainable, strong, anti-bacterial | Coarse texture, limited appeal | Eco-friendly, rustic styles |
Eco-Friendly Options

If you want your foldable reusable grocery bag to help the planet, try these eco-friendly fabrics:
- Organic Cotton: Made without chemicals, breaks down, and can be used again.
- Jute: Needs little water, helps farmers, and breaks down in nature.
- Hemp: Grows fast, no need for pesticides, and helps the soil.
- Recycled PET (rPET): Made from old bottles, strong, and keeps water out.
- Cork Fabric: Taken from trees without hurting them, keeps water out, and breaks down.
- Bamboo Fabric: Grows fast, needs little water, and breaks down in nature.
Tip: Wash, dry, and iron your fabric before you start. This stops shrinking and makes cutting easier.
Handles
Handles should feel good and hold heavy groceries. Cut two strips of fabric, each about 30 inches long and 6 inches wide. This size gives you strong handles for your shoulder or hand. Use the same fabric as your bag or pick a different one for style.
Tools
You do not need special tools to make a diy bag. Here is what you need:
- Fabric (see above)
- Thread (polyester is strong)
- Scissors or rotary cutter (for neat edges)
- Measuring tape or ruler (for correct sizes)
- Sewing machine (optional, but faster)
- Fabric chalk or pencil (for marking lines)
- Batting (optional, for shape)
- Snaps, Velcro, or buttons (optional, for closing)
- Decorations (like patches or embroidery, if you want)
Having these materials ready makes your project go smoothly. With the right supplies, you will have a strong, reusable bag. It will fold up small and last a long time.
Pattern
Before you start sewing, you need to get your fabric ready. This part of the tutorial will help you measure and cut your fabric so your diy foldable shopping bag turns out just right. If you follow these steps, you will have a neat and sturdy bag that folds up easily.
Measuring
Grab your measuring tape or ruler. Lay your fabric flat on a clean table. Smooth out any wrinkles with your hands. You want your fabric to be as flat as possible before you start marking.
Here’s what you need to measure:
- Bag Body: Measure a rectangle that is 40 inches long and 21 inches wide. This size works well for most shopping needs.
- Handles: Measure two strips, each 30 inches long and 6 inches wide. These will become your handles.
Use a fabric chalk or pencil to mark your lines. Make sure your lines are straight. If you want, you can use a yardstick or a book edge to help draw straight lines. Double-check your measurements before you cut. A small mistake here can make your bag look uneven later.
Tip: If you want a smaller or bigger bag, you can change the size. Just keep the shape as a long rectangle for the body and two long strips for the handles.
Cutting
Now it’s time to cut your fabric. Use sharp fabric scissors or a rotary cutter. Hold the fabric steady with one hand and cut slowly along the lines you marked. Try not to rush. Clean cuts make sewing much easier.
Here are some safety tips for cutting:
- Keep your fingers away from the blade.
- Cut on a flat, stable surface.
- If you use a rotary cutter, always close the blade when you finish.
If you want to add batting for extra structure, cut a piece the same size as your bag body. Batting makes your bag feel thicker and helps it hold its shape.
Watching a video can help if you feel unsure. Many online tutorials show how to measure and cut fabric for diy foldable shopping bags. You can pause and replay the steps as many times as you need.
You just finished the measuring and cutting part of this tutorial. Now you have all your pieces ready for sewing. Take a moment to check your work. Neat pieces make the next steps much easier!
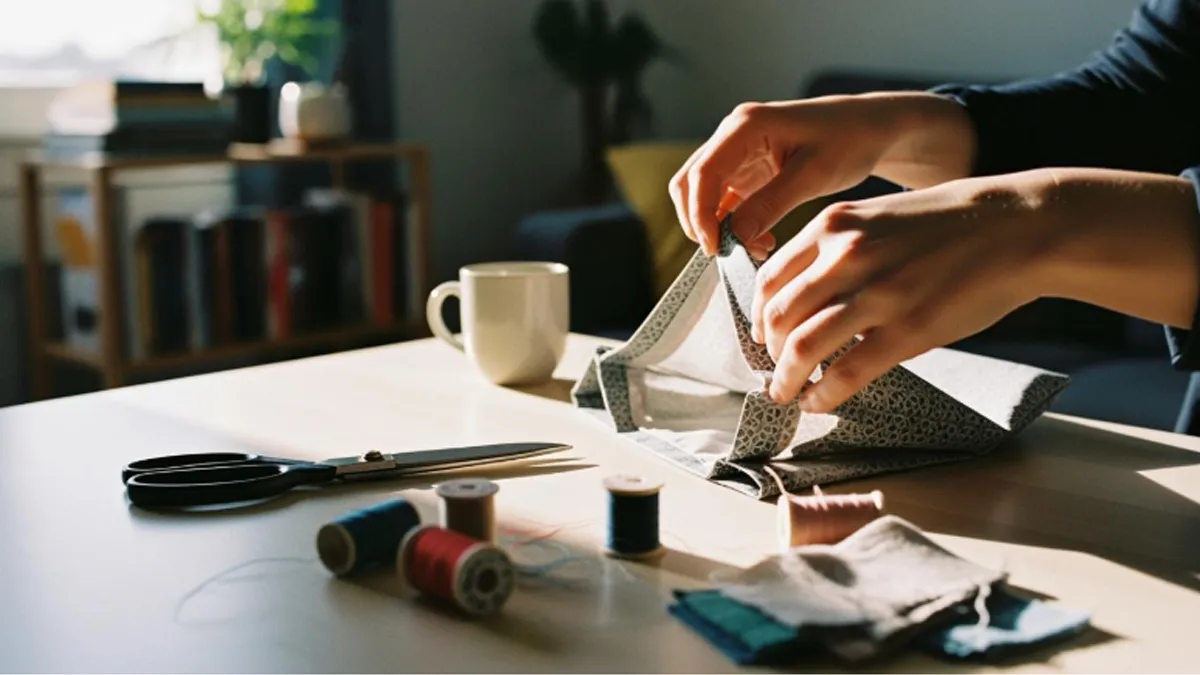
Sewing
Now you have your fabric pieces ready, it’s time to sew your diy foldable reusable grocery bags. This part of the tutorial will walk you through each step. You’ll see how easy it is to make a strong, reusable bag that folds up small.
Main Body
Let’s start with the main body. Follow these instructions to get a neat and sturdy finish:
- Lay out your two rectangles of fabric. If you want a lining, cut two more pieces the same size.
- Place the right sides of the fabric together. If you use a lining, put it on top of the main fabric.
- Pin the edges to keep everything in place.
- Sew around the sides and bottom with a quarter-inch seam allowance. This helps your bag last longer.
- Leave the top open. You’ll need this space for turning and attaching handles.
- If you want your bag to have more depth, create box corners. Pinch each bottom corner so the side seam lines up with the bottom seam. Sew across the corner about two inches from the tip. Cut off the extra fabric.Box corners give your foldable reusable grocery bag a flat bottom. This makes it easier to stand up and hold groceries.
- If you added a lining, repeat the same steps. Keep the lining inside out for now.
Reinforcing Seams
You want your bag to last through many shopping trips. Reinforcing the seams is a smart move. Here are some instructions to help you:
- Double-stitch the high-stress areas, especially where the handles will attach. This keeps the handles from tearing off when you carry heavy items.
- Use a zigzag stitch or overlock stitch along the raw edges. This stops the fabric from fraying.
- For extra strength, seal the seams with a bit of fabric glue. This adds a layer of waterproofing and makes the seams even tougher.
- Topstitch around the top edge of the bag after turning it right side out. This gives your bag a clean look and helps it keep its shape.
Note: Reinforced seams mean you can use your reusable bag again and again without worrying about rips.
Batting
If you want your diy bag to feel sturdy and keep its shape, add batting. Batting is a soft layer that goes between the fabric layers. It makes your bag look and feel more professional.
Here’s how to add batting:
- Cut a piece of batting the same size as your main fabric rectangle.
- Place the batting between the outer fabric and the lining before you sew the edges.
- Pin all the layers together so nothing shifts while you sew.
- Use lightweight interfacing or foam stabilizer if you want structure but still want your bag to fold easily.
- If you want a bag that stands up on its own, try a heavy-weight fabric or a thick batting.
Adding batting improves the stability and shape of your foldable bag. Your bag will look great and work well for groceries or anything else you need to carry.
This tutorial shows you how to make a reusable bag that is strong, stylish, and easy to fold. Follow the instructions step by step, and you’ll have a finished bag in no time.
Handles
Attaching
You want your handles to stay strong, even when you fill your bag with groceries. Here are some easy ways to attach handles so they last a long time:
- Choose grosgrain ribbon if you want handles that feel sturdy and have a nice texture. This ribbon does not stretch and holds up well.
- Cut both ribbons or fabric strips to the same length. This keeps your handles even and your bag balanced.
- Feed each ribbon through the handle opening you made earlier. Pin the ends in place so they do not slip while you sew.
- Let the ribbon tabs stick out past the edge of your project. This gives extra strength where you need it most.
- Make sure the ribbon loop is big enough for your sewing machine’s presser foot to fit. This makes sewing easier and keeps your stitches neat.
- If you want handles you can remove, sew ribbon tabs onto your bag and use removable hardware like clips or rings.
Tip: Double-stitch the spots where the handles meet the bag. This helps your handles hold heavy loads without tearing.
Length Options
Handle length changes how you carry your bag. If you like to carry your bag in your hand, pick shorter handles. These work well for quick trips to the store. If you want to carry your bag over your shoulder, longer straps feel more comfortable and keep your hands free. When you shop for lots of items or visit a farmer’s market, heavy-duty webbing handles with extra stitching give you more support. These strong handles help your bag carry heavier loads without stretching or breaking.
You can try different handle lengths to see what feels best for you. Some people even add both short and long handles for more ways to carry their bag.
Closures
You want your foldable shopping bag to stay closed and keep your things safe. Adding a closure makes your bag more useful. You can pick from Velcro, snaps, or buttons. Each one has its own style and benefits. Let’s look at how each closure works and what you should know before you choose.
Velcro
Velcro is a popular choice for foldable bags. You can open and close it with one hand. It feels simple and quick. If you want a bag that opens fast, Velcro works well. You just press the two sides together, and they stick.
Here’s a quick look at the pros and cons of Velcro and other closures:
| Closure Type | Pros | Cons |
|---|---|---|
| Velcro | Fast, one-handed opening; Adjustable closure; Simplicity | Wear and contamination; Not for loose, small items |
Velcro makes your bag easy to use. You can adjust the closure if your bag is full or almost empty. But Velcro can wear out over time. It also picks up lint and dirt. If you carry tiny things, Velcro might not keep them inside.
Tip: Sew Velcro strips near the top edge of your bag. Make sure both sides line up so the closure works every time.
Snaps
Snaps give your bag a neat look. You press them together, and they click shut. Snaps hold tight, so your things stay safe. You can find plastic or metal snaps in many colors.
Snaps work well for bags you fold up often. They do not wear out as fast as Velcro. You can add one snap in the center or use two for extra hold. Snaps do not catch lint or hair, so they stay clean.
- Easy to install with snap pliers or a simple tool
- Great for kids’ bags because they are safe and easy to use
- Snaps make a soft sound when you close them
If you want a closure that lasts, snaps are a smart pick.
Buttons
Buttons add a classic touch to your bag. You can pick big, colorful buttons or small, simple ones. To close your bag, you push the button through a loop or a buttonhole.
Buttons let you show off your style. You can sew on one button or use a few in a row. If you like to sew, making buttonholes can be fun. Buttons stay strong for a long time.
Note: Use thick thread to sew on buttons. This keeps them from falling off when you use your bag a lot.
Buttons take a little more time to open and close. If you want a secure closure and a personal look, buttons are a great choice.
No matter which closure you pick, you make your foldable shopping bag more useful and stylish. Try different closures to see which one you like best!
Finishing
Edges
You want your shopping bag to look neat and last a long time. Finishing the edges is a big part of that. If you leave raw fabric edges, they can fray and make your bag look messy. There are several easy ways to keep those edges tidy and strong.
Here’s a quick table to show you some popular edge-finishing techniques:
| Technique | Description |
|---|---|
| Hemming | Fold the edge over twice and sew it down. This hides the raw edge inside. |
| Hem Tape | Place hem tape over the edge and iron it. It’s less bulky than a folded hem. |
| Pinking Shears | Cut the edge with zigzag scissors. This helps stop the fabric from fraying. |
| Zigzag Stitch | Sew a zigzag pattern along the edge. This keeps threads from coming loose. |
You can also try these quick tricks:
- Dab a little clear nail polish along the cut edge. This seals the threads and stops fraying.
- If you use synthetic fabric, carefully run a lighter along the edge. The heat melts the fibers and seals them.
Tip: Always test these methods on a scrap piece first. Some fabrics react differently, so you want to make sure you get the best result.
Personalization
Now comes the fun part—making your bag truly yours! Personalizing your foldable shopping bag lets you show off your style and creativity. You can keep it simple or go all out with decorations.
Here are some easy and creative ways to personalize your bag:
- Use fabric paints or markers to draw patterns, doodles, or even your initials. You can make your bag as colorful as you want.
- Add patches or appliques. You can iron them on or sew them for extra strength. Pick fun shapes or your favorite characters.
- Upgrade the handles with leather or faux leather strips. This gives your bag a polished, modern look.
- Attach trims like pom-poms, tassels, or ribbons. These little touches can make your bag playful or elegant.
- Sew on a zipper or add small pockets inside or outside. Pockets help you organize your keys, phone, or wallet.
Note: Personalizing your bag makes it unique. It also makes a great gift for friends or family.
You don’t need fancy tools to make your bag special. Just use your imagination and have fun with it. Every time you use your bag, you’ll feel proud knowing you made it your own.
Folding diy foldable shopping bag

You finished sewing your diy foldable shopping bag. Now, you want to know how to fold it so it fits in your pocket or handbag. This part of the tutorial gives you step-by-step instructions. You will see how easy it is to keep your reusable bag neat and ready for your next shopping trip.
Step-by-Step Folding
Folding your foldable reusable grocery bag the right way helps you save space and keeps your bag looking tidy. Follow these instructions to turn your roomy bag into a small, easy-to-carry bundle:
- Grab the handles and shake out the bag. Make sure it is fully open and flat.
- Lay the bag on a table or smooth surface. Straighten any wrinkles with your hands.
- Fold the bag in half along its length. Line up the edges so the bag looks long and narrow.
- Fold it over twice more. Each fold should make the bag smaller and more compact.
- Pull out the elastic string or closure you added earlier. Wrap it around the folded bag to hold everything in place.
Tip: If your bag does not have an elastic string, you can use a small ribbon or even a hair tie. This keeps your diy bag from opening up in your purse or pocket.
You can use these instructions for almost any foldable reusable grocery bag. Practice a few times, and you will get faster each time. Soon, folding your bag will feel easy and quick.
Compact Storage
You want your reusable bag to fit in small spaces. With the right folding tricks, you can compress even a bulky bag into a tiny pouch. This makes it perfect for stashing in your purse, backpack, or even your jeans pocket.
Here are some smart ways to store your foldable reusable grocery bag:
- Learn the folding method from this tutorial. It helps you make your bag as small as possible.
- Pick a spot in your handbag or backpack just for your diy foldable shopping bag. This way, you always know where to find it.
- Use a compact storage pouch or a zippered pocket. Some bags come with their own pouch, but you can also use a small makeup bag or pencil case.
- If you carry more than one reusable bag, stack them together and wrap them with a single elastic band.
Note: Many people like to keep a foldable bag in their car, office, or locker. This way, you always have a reusable option when you need it.
A well-folded bag takes up very little space. You can slip it into your pocket before you leave home. Some foldable reusable grocery bags get so small that you might forget you are carrying one! This makes it easy to say no to single-use plastic bags and always have a reusable option on hand.
You now have all the instructions you need to fold and store your diy foldable shopping bag. With a little practice, you will always have a neat, compact bag ready for any shopping trip.
diy foldable reusable grocery bags Tips
Quick Project
You want to finish your diy foldable reusable grocery bags fast. Good news—you can complete this project in about 30 minutes if you follow a simple plan. Here’s a step-by-step guide to help you move quickly and get great results:
- Fold your fabric in half with the hemmed edges meeting and the right sides facing out. Pin along the raw edges.
- Stitch along the pinned edges with a ¼-inch seam allowance to create a French seam.
- Turn the bag inside out, push out the corners, and trim the bottom corners to reduce bulk.
- Stitch along the sides again with a ½-inch seam allowance. This will hide the raw edges inside the seam.
- Fold one inside corner into a triangle, mark a 7-inch width, and pin it.
- Stitch across the marked line. Repeat for the other corner.
- You can cut off the extra fabric or stitch it down for more strength.
- Flip the bag right side out and get ready to add the handles.
- Make the handles by folding and pressing the fabric strips, then stitch the edges to keep them neat.
- Measure and pin the handles in place. Stitch them securely using an “X” pattern for extra strength.
If you set up your materials and tools before you start, you can move from one step to the next without stopping. This makes your diy foldable reusable grocery bags project even faster.
Beginner Advice
Starting your first diy foldable reusable grocery bags project can feel a little scary, but you can do it! Many beginners make small mistakes, but you can avoid them with a few smart tips. Here are some things to watch out for:
- Carrying bags loosely or leaving them open can make it easy for someone to grab your things, especially in busy places.
- Using bags without secure fasteners or with weak zippers can put your stuff at risk. Always add a strong closure.
- Not organizing your bag’s contents can lead to fumbling and losing track of valuables. Use pockets or pouches to keep things sorted.
- Placing your bag in unsafe spots, like leaving it unattended, can make it an easy target for theft.
- Using worn-out grips or thin straps can cause your bag to break. Always check your handles and reinforce them if needed.
Tip: Practice sewing on scrap fabric before you start your real diy foldable reusable grocery bags. This helps you get comfortable with your sewing machine and makes your stitches neater.
You can also watch a video tutorial if you get stuck. Many people find it easier to follow along when they see each step. Remember, every diy project gets easier with practice. Soon, you’ll make foldable reusable shopping bags for friends and family, too!
If you want your diy reusable grocery bags to last, always use strong thread and double-stitch the handles. Take your time with each step, and don’t worry if your first bag isn’t perfect. You’ll get better every time you try.
Conclusion
You now know how to make a diy foldable shopping bag at home. Using your diy foldable shopping bag helps the earth and makes shopping simpler. Here are some long-term benefits:
| Benefit | Description |
|---|---|
| Reduction of Plastic Waste | Reusable bags help stop plastic trash from hurting the planet. |
| Resource Protection | You save fossil fuels by not using single-use bags. |
| Wildlife Protection | Fewer plastic bags keep animals safer. |
| Decreased Greenhouse Gas Emissions | Using less plastic helps keep the air cleaner. |
| Promotion of Sustainable Habits | You start good habits that help the future. |
Try making your own diy foldable shopping bag. You can have a bag that matches your style. If you want more ideas or need special or big orders, visit INITI Bag website for more inspiration.
FAQ
How long does it take to make a foldable shopping bag?
You can finish your bag in about 30 minutes. If you are new to sewing, you might need a little more time. Practice helps you get faster!
Can I sew this bag by hand?
Yes, you can sew by hand if you do not have a sewing machine. Use a strong needle and double thread for extra strength. It just takes a bit longer.
What fabric works best for beginners?
Cotton is a great choice. It is easy to cut and sew. Cotton also washes well and folds up nicely. You can find it in many colors and patterns.
How do I wash my DIY bag?
Just toss your bag in the washing machine with cold water. Let it air dry to keep the shape. Avoid bleach so your colors stay bright.
Can I make the bag bigger or smaller?
Absolutely! Change the size of your fabric rectangle to make a larger or smaller bag. Just keep the same basic shape and steps.
What if I don’t have batting or interfacing?
No problem! You can skip batting or interfacing. Your bag will be softer and fold up even smaller. It still works great for light shopping.
How do I fix a broken handle?
Sew the handle back on with strong thread. Use a zigzag stitch or sew an “X” pattern for extra hold. Reinforcing the area helps prevent future breaks.
Can I add a pocket to my bag?
Yes! Cut a small rectangle of fabric. Hem the edges, then sew it onto the inside or outside of your bag. Pockets help you organize small items.


