
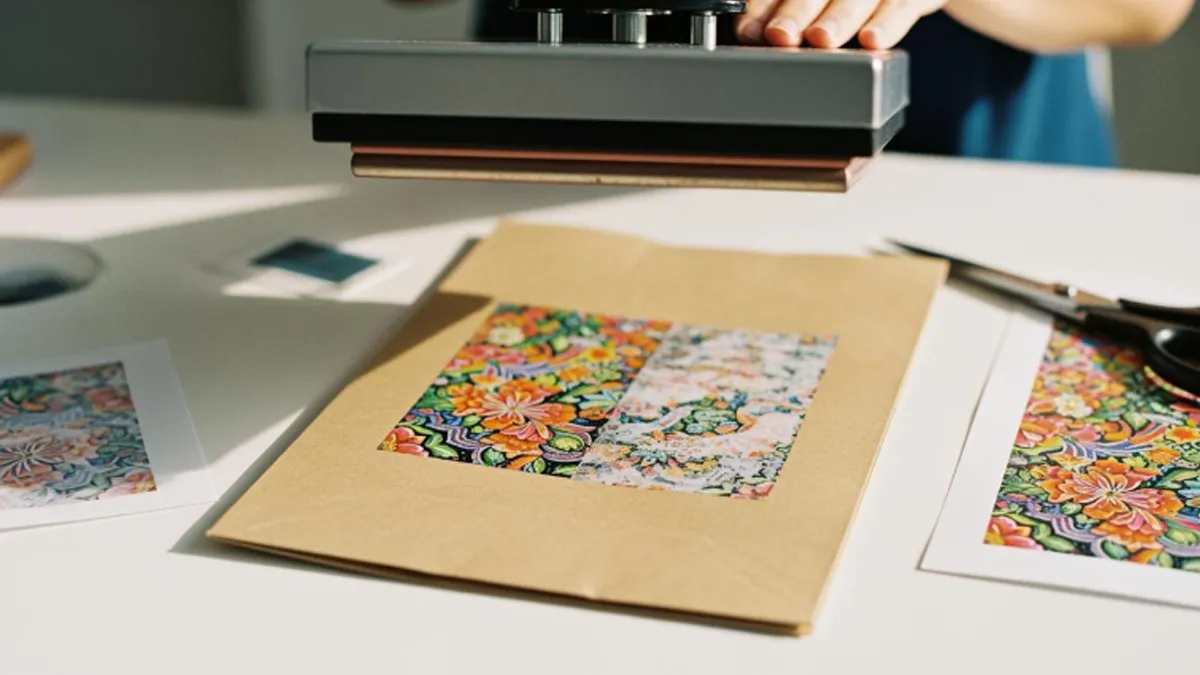
Can you sublimate on kraft paper bags? Yes, you can! Sublimating on kraft paper bags lets you create unique gifts, custom packaging, or eye-catching party favors. You only need the right techniques and materials to make your designs pop. If you love crafts or want to try something new, you will enjoy this project. Grab your favorite kraft paper bags and get ready for some creative fun!
Key Takeaways
- You can use sublimation on kraft paper bags. This lets you make cool and strong designs.
- Use kraft paper bags that are smooth and thick. Make sure they have a polymer coating for the best look.
- Press your bags first to get rid of moisture. This also helps make the surface flat before you print.
- Pick good sublimation inks and papers. This helps your colors look bright and your images look clear.
- Set your heat press between 350°F and 375°F. This helps the ink move to the bag well.
- Always use protective sheets. This stops ink from bleeding and keeps your heat press safe.
- Try your designs on a small spot first. This helps you not make mistakes on a big batch.
- Try fun ways to customize, like adding names or logos. This makes your bags special.
Can You Sublimate on Kraft Paper
How Sublimation Works on Kraft Paper
If you want to know if you can sublimate on kraft paper bags, you might wonder how it works. Sublimation uses heat to change special ink into a gas. The gas goes into the kraft paper bag’s surface and makes a colorful picture. This is not like regular printing. The ink becomes part of the paper instead of just sitting on top.
Kraft paper has some things that change how well sublimation works:
- Additives, pigments, and fillers in the paper can change how it handles heat. Some kraft paper bags have things like silica ash or TiO2. These help the paper stay strong and safe when you use heat.
- The paper’s porosity lets the ink soak in. This helps the ink get absorbed and stops it from pooling.
- A smooth surface gives you better color and sharper images. If the paper is rough or not very porous, your print might look blurry or faded.
Kraft paper bags act differently than other materials. The ink can spread more because the paper soaks it up fast. This can make your print look softer or less sharp. But it also gives a special, handmade look.
Here is a quick table to show how kraft paper compares to other materials for sublimation:
| Substrate Type | Absorption Rate | Image Quality Impact |
|---|---|---|
| Kraft Paper | Higher | Blurred or muted images possible |
| Specialized Sublimation Papers | Lower | Higher quality, sharper prints possible |
| Coated Kraft Papers | Moderate | Better than regular kraft, but not as good as special sublimation papers |
Why Use Sublimation on Kraft Paper Bags
You may wonder why people like to sublimate on kraft paper bags. The answer is easy: you get to be creative and it is useful. When you use sublimation, the ink goes deep into the bag. Your design will not crack or peel, even if you bend or fold the bag.
Here are some reasons to try sublimation on kraft paper bags:
- The ink becomes part of the bag, so your design lasts longer.
- You can make bright colors and smooth blends that are hard to get with other printing.
- You can make transfers ahead of time and use them later, which saves time.
- The process is easy to learn. You do not need a lot of special training or tools, so it is good for beginners and small businesses.
Tip: If you want your kraft paper bags to stand out at parties or in your shop, sublimation printing gives you lots of design choices!
Benefits and Drawbacks
Like any craft, sublimation on kraft paper bags has good and bad sides. You should know both before you start.
Here is a table to help you see the main benefits and drawbacks:
| Benefits of Sublimating on Kraft Paper Bags | Drawbacks of Sublimating on Kraft Paper Bags |
|---|---|
| Personalization and customization options | Limited material compatibility |
| Versatility for various applications | Requires specialized equipment and setup |
| Eco-friendly options | Design restrictions due to material structure |
| Durable for retail and event use | Ink transfer limitations based on polymer content |
You can make each bag special for birthdays, weddings, or business events. Kraft paper bags are also good for the environment. You can use them for many things, like gift bags or product packaging.
But there are some problems. Not every kraft paper bag works well for sublimation. You need the right equipment, like a heat press and special inks. The way the paper is made can limit your design choices. The ink may not always transfer perfectly unless the bag has a special coating.
Still, if you follow the right steps, you can sublimate on kraft paper bags and get great results. Many people like the look and feel of a custom sublimation print on kraft paper. It is a fun way to show your creativity and make something unique.
Materials and Equipment for Sublimation on Kraft Paper
Kraft Paper Bags Types
You need to pick the right kraft paper bags before you start heat transfer printing. Not all bags work the same way. Some bags have a smooth surface, while others feel rough. Smooth bags help you get sharper images with sublimation. You should look for bags that are thick enough to handle the heat press. Thin bags can wrinkle or tear during heat transfer printing.
You can find kraft paper bags in many sizes and shapes. Some have handles, and some are flat. If you want your bags to last longer, choose ones with a reinforced bottom. These bags are great for gifts, parties, or even for sustainable packaging. Always check if the bag has a coating. Coated bags work better for heat transfer printing because the ink sticks well.
Tip: Test a small area of your kraft paper bags before you print your full design. This helps you avoid mistakes and wasted materials.
Sublimation Inks and Papers
You need special inks and papers for heat transfer printing on kraft paper bags. Sublimation inks turn into gas when heated. The gas goes into the paper and makes your design bright and colorful. Regular ink will not work for this process.
The type of ink you use can change how your print looks. Kraft paper bags soak up ink fast because they are rough and porous. This can make your image look faded or blurry. If you want better results, use a polymer coating on the bag. This helps the ink stick and makes colors pop. You also need to set your heat press just right. Too much heat can damage the bag, but too little will not transfer the ink well.
Here is a table with some popular brands and their features for heat transfer printing:
| Brand | Specifications |
|---|---|
| Epson UltraChrome DS | Works best with SureColor printers. Gives bright colors and sharp images. |
| Hiipoo T49M | Good for budget projects. Fits EcoTank printers. Saves money on ink. |
| Sun Chemical Xennia Sapphire | Great for big jobs. Handles banners and mixed-fiber textiles. |
When you choose your sublimation paper, look for one that releases ink evenly. Some papers work better with kraft paper bags than others. Always check the paper’s instructions for heat transfer printing.
- The rough surface of kraft paper bags can make ink soak in unevenly. This affects how clear and bright your print looks.
- Using a polymer coating helps the ink stick better. You get more color and detail.
- You need to adjust your heat press settings to avoid damaging the bag and to make sure the ink spreads evenly.
Sublimation Coating Spray
You need a sublimation coating spray for the best results with heat transfer printing on kraft paper bags. This spray adds a thin layer of polymer to the bag. The polymer helps the ink bond with the paper. Your colors will look brighter, and your design will last longer.
When you use a coating spray, always think about safety. Some sprays have strong chemicals. These chemicals can include VOCs, which are not safe for skin contact. If you want to use your kraft paper bags for food or gifts, pick a spray that is safe and made for personal use.
- Many wood finishes and sprays have harsh chemicals.
- Some sprays release VOCs into the air.
- These chemicals can be unsafe for items that touch skin.
Note: Always use coating sprays in a well-ventilated area. Wear gloves if you need to handle the bags right after spraying.
With the right kraft paper bags, sublimation inks, heat transfer printing paper, and a safe coating spray, you can make beautiful custom bags for any event.
Heat Press and Accessories
You need a good heat press to get the best results when you sublimate on kraft paper bags. The heat press is the tool that transfers your design from the sublimation paper onto the bag. It uses high temperature and steady pressure to make the ink turn into gas and bond with the paper. If you use an iron or a regular household press, you might not get even heat or pressure. Your design could look faded or patchy.
When you pick a heat press, look for one that lets you control the temperature and time. Most sublimation projects need a temperature between 350°F and 400°F. You can set the timer for 30 to 60 seconds, depending on your bag and coating. Some presses have digital displays. These make it easy to see your settings and avoid mistakes.
Here’s a quick table to help you compare popular heat press types:
| Heat Press Type | Best For | Key Features |
|---|---|---|
| Clamshell | Beginners, small spaces | Easy to use, compact design |
| Swing-away | Larger bags, safety | Even pressure, safer handling |
| Draw-style | Frequent use | Smooth operation, quick setup |
You also need some accessories to make your sublimation process smoother:
- Protective sheets: Use parchment paper or Teflon sheets between the heat plate and your kraft paper bag. These stop ink from bleeding onto the press and protect your bag from scorching.
- Heat-resistant tape: Hold your sublimation paper in place on the bag. This keeps your design from shifting during pressing.
- Silicone pads: Place these under your bag to help distribute pressure evenly. They also protect the bag from direct heat.
- Gloves: Wear heat-resistant gloves when you handle hot bags. This keeps your hands safe.
Tip: Always preheat your heat press before you start. This helps you get even results and stops cold spots from ruining your design.
If you want to avoid wrinkles or warping, press your kraft paper bag flat before you add your design. You can use a lower temperature for a few seconds. This step helps you get a smooth surface for printing.
Some heat presses come with adjustable pressure knobs. You can change the pressure to fit the thickness of your bag. If your bag is thin, use less pressure. If it’s thick or reinforced, add more pressure for a solid transfer.
You don’t need the most expensive heat press to start. Many hobbyists use basic models and still get great results. Just make sure your press heats evenly and holds steady pressure. With the right accessories, you can make your sublimation process easier and safer.
If you take care of your heat press and use the right tools, you’ll get bright, long-lasting prints on your kraft paper bags. Try different settings and accessories to see what works best for you. Happy crafting!
Step-by-Step Guide to Sublimate on Kraft Paper Bags
Ready to create your own custom kraft paper bags? This step-by-step guide will walk you through the whole process. You’ll learn how to prepare your bags, design your artwork, and set up your heat press for the best sublimation print results. Let’s get started!
Preparing Kraft Paper Bags
Cleaning and Pre-Treatment
Start by making sure your kraft paper bags are clean and smooth. Dust, oil, or tiny bits of paper can ruin your sublimation print. Use a lint roller or a soft, dry cloth to wipe the surface. If you see any wrinkles, gently flatten the bag with your hands. For stubborn creases, you can pre-press the bag with your heat press for a few seconds at low heat. This step helps remove moisture and gives you a flat surface for your design.
Tip: Skipping the pre-pressing step can cause poor ink transfer and uneven results. Always take a moment to pre-press!
Here are some common mistakes to avoid during preparation:
- Using the wrong type of sublimation paper can lead to poor ink transfer and ghosting.
- Forgetting to mirror your image before printing results in a reversed design.
- Skipping pre-pressing can cause uneven prints.
- Incorrect temperature settings can damage the bag or cause poor ink transfer.
- Not applying the right pressure can leave faded prints or lines.
Take your time with this step. A clean, flat bag gives you the best chance for a sharp, colorful sublimation print.
Applying Sublimation Coating
Most kraft paper bags need a special coating for sublimation. This coating helps the ink bond with the paper, making your colors brighter and your design last longer. Shake your sublimation coating spray well. Hold the can about 8-10 inches from the bag and spray a light, even layer over the area you want to print. Let the bag dry completely. Some sprays dry in minutes, but it’s best to wait at least 30 minutes for a smooth finish.
Note: Always use the coating spray in a well-ventilated area. Wear gloves if you have sensitive skin.
If you want to test your coating, press a small piece of sublimation paper onto the bag and check the results. If the colors look faded, add another thin layer of spray and let it dry again.
Designing and Printing Artwork
Design Tips for Kraft Paper
When you design artwork for kraft paper bags, keep the natural brown color in mind. Bright colors and bold shapes stand out best. Avoid using light pastels or white, as these may not show up well on kraft paper. Try to use high-contrast designs for the most eye-catching results.
The color profile of your artwork matters, too. Using three-color printing on kraft paper bags lets you create vibrant and detailed designs. This makes your bags look more professional and helps your brand or event stand out.
Here’s a quick table of recommended design software and file formats:
| Software | Description | File Formats Supported |
|---|---|---|
| Adobe Illustrator | Great for logos, drawings, and text. Keeps your design sharp. | PNG, JPEG, PDF, SVG, EPS |
| Inkscape | Free vector tool, perfect for logos and image tweaks. | PNG, JPEG, PDF, SVG, EPS |
| GIMP | Free raster tool, best for editing photos and images. | PNG, JPEG, PDF |
Tip: Always save your design in a high-resolution format. This helps your sublimation print look crisp and clear.
Printer Settings
Before you print, check your printer settings. Use the highest quality print mode for the best results. Make sure you select the correct paper type for your sublimation paper. Always mirror your image before printing. This way, your design will appear the right way on your kraft paper bags.
Set your printer to use the correct color profile for sublimation. This helps your colors stay true and vibrant. If you use the wrong settings, your print may look dull or blurry.
- Choose the right sublimation paper for kraft paper bags.
- Set your printer to “High Quality” or “Photo” mode.
- Mirror your image before printing.
- Use the correct color profile for your ink and paper.
Printing your design correctly is a key step in this step-by-step guide. Take a moment to double-check your settings before you hit print.
Heat Press Setup
Temperature and Time
Now it’s time to set up your heat press. For kraft paper bags, a temperature between 350°F and 375°F usually works best. Press your bag for 30 to 45 seconds. If your bag is thicker or has a heavy coating, you might need a little more time. Always test with a sample bag first.
Tip: Too much heat can scorch the bag or make the ink bleed. Too little heat can leave your sublimation print looking faded.
Adjust the pressure on your heat press so it’s firm but not crushing the bag. If you use too much pressure, you might see lines or wrinkles. Not enough pressure can cause faded spots.
Using Protective Sheets
Place a piece of parchment paper or a Teflon sheet on top of your kraft paper bag before pressing. This protects your bag from direct heat and stops ink from transferring onto your heat press. You can also put a sheet inside the bag to keep ink from bleeding through.
Note: Always use protective sheets for every sublimation print. This simple step keeps your bags and your heat press clean.
With your heat press set up and your bag ready, you’re almost done! The next steps will help you press and finish your custom kraft paper bags for a professional look.
Pressing and Finishing
Pressing Steps
Now comes the exciting part—pressing your kraft paper bag! You want your design to look sharp and last a long time. Here’s how you do it:
- Position your bag: Place your kraft paper bag flat on the heat press. Make sure the coated side faces up and your design sits exactly where you want it.
- Secure your transfer: Use heat-resistant tape to hold the sublimation paper in place. This keeps your design from shifting.
- Add protection: Lay a piece of parchment paper or a Teflon sheet on top of the bag. This protects both your bag and your heat press.
- Press: Close the heat press. Apply firm, even pressure. Set your timer for 30 to 45 seconds, depending on your bag’s thickness and coating.
- Release: When the timer beeps, lift the press carefully. The bag will be hot, so use heat-resistant gloves if you have them.
- Remove the transfer: Gently peel off the sublimation paper while the bag is still warm. You’ll see your design appear right away!
Tip: Don’t rush the pressing step. If you open the press too soon or move the bag, your design might blur or ghost.
If you want to avoid common mistakes, always double-check your press settings before you start. Too much pressure can leave marks, while too little can cause faded prints. If you see any wrinkles, try pressing the bag flat for a few seconds before adding your design.
Cooling and Quality Check
After pressing, let your kraft paper bag cool down on a flat surface. This helps the ink set and keeps the bag from warping. Don’t stack bags on top of each other while they’re still warm. Give each bag a few minutes to cool before you touch or move it.
Once your bag feels cool, it’s time for a quality check. You want your custom bag to look great and hold up in real life. Here’s what you should look for:
- Check the print: Look at the colors and lines. Your design should be bright and clear, with no smudges or faded spots.
- Test the strength: Gently pull on the handles and sides. The bag should feel sturdy and not tear easily.
- Inspect the surface: Rub your finger over the print. The design should not scratch off or smear.
- Try a weight test: Put a few items in the bag to see if it can handle the load. This helps you know if the bag is strong enough for gifts or products.
- Look for moisture resistance: If you plan to use the bag for food or in damp places, sprinkle a little water on the surface. The bag should resist soaking through.
- Check the seams and straps: Make sure the handles and glued edges stay tight when you tug on them.
Note: If you spot any problems, like faded colors or weak spots, adjust your pressing time or temperature for the next bag. Sometimes, adding another thin layer of coating spray can help with color vibrancy.
You can also test your bag’s durability by dropping it from a short height or checking if the print holds up in sunlight. These simple checks help you make sure your kraft paper bags look professional and last longer.
If you follow these pressing and finishing steps, you’ll create kraft paper bags that stand out and hold up to real-world use. Enjoy showing off your custom designs!
Common Challenges and Solutions
Ink Bleeding Issues
You might notice ink bleeding when your design looks smudged or spreads past the edges on your kraft paper bag. This problem can make your artwork look messy and less professional. Ink bleeding usually happens for a few reasons:
- The heat press gets too hot and causes the ink to run.
- The kraft paper bag absorbs too much ink because it is very porous.
- You use the wrong type of sublimation paper, which does not hold the ink well.
If you want to avoid ink bleeding, you can try these steps:
- Pick high-quality paper made for your printer. Thicker paper helps stop ink from soaking through.
- Choose the right paper type in your printer settings. This helps the ink absorb properly.
- Use pigment-based inks. These inks do not bleed as much and are water-resistant.
- Do not overfill your ink cartridges. Too much ink can cause messy prints.
- Print at slower speeds. This gives the ink more time to settle and reduces bleeding.
- Store your paper in a cool, dry place. Damp paper can make ink bleeding worse.
- Clean your printer’s print heads often. This keeps your prints sharp.
- Use genuine ink cartridges. These usually give you better results.
Tip: Lower the temperature on your heat press and use good sublimation transfer paper. These simple changes can help you get crisp, clean prints.
Warping or Wrinkling
Warping or wrinkling can ruin the look of your kraft paper bag. You might see the bag bend or wrinkle after you finish the sublimation process. Several things can cause this:
- Uneven moisture levels in the paper make one side bend more than the other.
- Changes in temperature and humidity during handling can lead to warping.
- Uneven pressure from the heat press can cause the bag to wrinkle or deform.
To fix this, you should always pre-press your bag to remove extra moisture. Try to keep your workspace at a steady temperature and humidity. Make sure your heat press gives even pressure across the whole bag. If you see wrinkles, flatten the bag before you start the sublimation process.
Note: Let your bags cool on a flat surface after pressing. This helps them keep their shape.
Color Vibrancy Problems
Sometimes your colors look dull or faded after sublimation. You want your designs to stand out, so this can be disappointing. Color vibrancy problems often happen because the kraft paper absorbs ink unevenly or the coating is too thin. You might also use the wrong printer settings or low-quality inks.
To get brighter colors, use a good sublimation coating spray and let it dry completely. Pick inks made for sublimation and set your printer to the highest quality mode. Always test your design on a sample bag before printing a large batch.
Tip: High-contrast designs and bold colors work best on kraft paper bags. Avoid light pastels, which may not show up well.
Troubleshooting Tips
Sublimating on kraft paper bags can be hard sometimes. But you can fix most problems with easy steps. If your prints look wrong, do not worry. Try these troubleshooting tips to help your next project.
- Faded Colors
If your colors look dull, check your heat press first. Make sure you use the right temperature and time. Good sublimation ink helps a lot. Cheap ink can make prints fade. - Blurry or Distorted Images
Blurry designs can mess up your bag. Always use clear, high-quality images. Check that your design lines up before pressing. If your image moves, you might see ghosting or double pictures. - Uneven Colors or Spots
Sometimes, you see spots or uneven colors. This means the pressure was not even or the bag was dirty. Wipe your bag with a lint roller before starting. Make sure your heat press gives even pressure everywhere. - Ghosting or Double Images
Ghosting happens when the paper moves during pressing. Use heat-resistant tape to hold your paper in place. Keep your workspace dry, because too much humidity can cause ghosting. - Color Shifting
If your colors look different, you may have a temperature problem. Keep your heat press at the same temperature. Hold your paper tight so it does not move. - Paper Jams
Paper jams can slow you down. Always use sublimation paper that fits your printer. Follow the loading steps to stop jams.
Tip: Write down your settings and results in a notebook. Note what works and what does not. This helps you fix problems faster next time.
Here’s a table to match problems with quick fixes:
| Problem | Quick Fix |
|---|---|
| Faded Colors | Check heat settings, use quality ink |
| Blurry Images | Use high-res images, check alignment |
| Uneven Colors/Spots | Clean bag, ensure even pressure |
| Ghosting/Double Images | Secure paper, control humidity |
| Color Shifting | Keep temperature steady, secure paper |
| Paper Jams | Use correct paper, follow loading steps |
You can solve most sublimation problems with patience and practice. Try these tips and your kraft paper bags will look better every time.
Tips for Best Results with Sublimation on Kraft Paper
Expert Advice for Quality Prints
You want your kraft paper bags to look amazing, right? Start with a smooth bag. Rough surfaces can make your sublimation print look fuzzy. Always use a sublimation coating spray. This helps the ink stick and keeps colors bright. Pre-press your bag for a few seconds. This step removes moisture and flattens the surface. Use high-quality sublimation paper and ink. Cheap supplies can ruin your design. Set your heat press to the right temperature. Most people use 350°F to 375°F for kraft paper bags. Test your settings on a sample bag before you print a big batch.
Tip: Mirror your design before printing. If you forget, your artwork will look backward on the bag.
Here’s a quick checklist for quality prints:
- Choose smooth kraft paper bags.
- Apply a thin, even coating spray.
- Pre-press to remove wrinkles.
- Use high-quality sublimation paper and ink.
- Test your heat press settings.
Durability and Longevity
You want your kraft paper bags to last. Use a strong bag with reinforced handles. Thin bags can tear after pressing. Always let your bag cool flat after you finish the sublimation print. This keeps the shape and stops warping. If you plan to use your bags for gifts or shopping, try a sublimation tote bag. These bags hold up well and look stylish. Store your finished bags in a dry place. Humidity can make the ink fade or the bag wrinkle.
A table can help you see what makes a bag durable:
| Feature | Why It Matters |
|---|---|
| Reinforced handles | Stops tearing |
| Thick kraft paper | Handles heavy items |
| Proper cooling | Keeps bag flat |
| Dry storage | Prevents fading |
| Quality coating spray | Makes print last longer |
Note: Eco-friendly packaging does not mean weak packaging. You can find strong, eco-friendly kraft paper bags for any project.
Creative Customization Ideas
You can turn kraft paper bags into something special. Try making a sublimation tote bag for school, shopping, or gifts. Add names, logos, or fun patterns. Use bright colors and bold shapes. These stand out on the natural brown paper. You can mix eco-friendly packaging with creative designs. Add a message about recycling or caring for the planet. People love eco-friendly bags with a personal touch.
Here are some ideas to spark your creativity:
- Make party favor bags with custom names.
- Design a sublimation tote bag for your business.
- Create eco-friendly packaging with holiday themes.
- Add QR codes for digital coupons or messages.
- Use three-color printing for bold, vibrant artwork.
Callout: Eco-friendly kraft paper bags make great gifts. You help the planet and show off your style at the same time!
You can experiment with different designs and techniques. Every sublimation print is a chance to make something unique. Have fun and let your creativity shine!
Conclusion
You can sublimate on kraft paper bags when you use the right materials and steps. Try these tips for bright, long-lasting prints:
- Clean and coat your bags before printing.
- Use bold designs and test your heat press settings.
- Let your bags cool flat for best results.
Want custom kraft paper bags for your event or business? Reach out to us for OEM and ODM solutions. We love helping you create something unique!
FAQ
Can you use any kraft paper bag for sublimation?
You need to pick smooth, thick kraft paper bags. Bags with a polymer coating work best. Thin or rough bags may wrinkle or blur your design.
Do you need a special coating spray for kraft paper bags?
Yes, you do. A sublimation coating spray helps the ink bond with the paper. Your colors will look brighter and last longer.
What temperature should you set your heat press for kraft paper bags?
Set your heat press between 350°F and 375°F. Always test with a sample bag first. Too much heat can scorch the paper.
Will the design fade or peel after sublimation?
No, your design becomes part of the bag. It will not peel or crack. If you use the right coating, your print stays bright for a long time.
Can you sublimate on colored kraft paper bags?
You can, but bright colors work best on natural brown kraft paper. Colored bags may change how your design looks. Test your artwork before printing a batch.
Is sublimation on kraft paper bags safe for food packaging?
Use food-safe coating sprays if you want to package food. Some sprays contain chemicals. Always check the label for safety information.
How do you fix ink bleeding on kraft paper bags?
Lower your heat press temperature. Use high-quality sublimation paper and ink. Pre-press your bag to remove moisture. These steps help you get crisp prints.
Can you reuse kraft paper bags after sublimation?
You can reuse them for gifts or storage. The design stays on the bag. Avoid heavy loads or wet conditions to keep your bag looking good.


