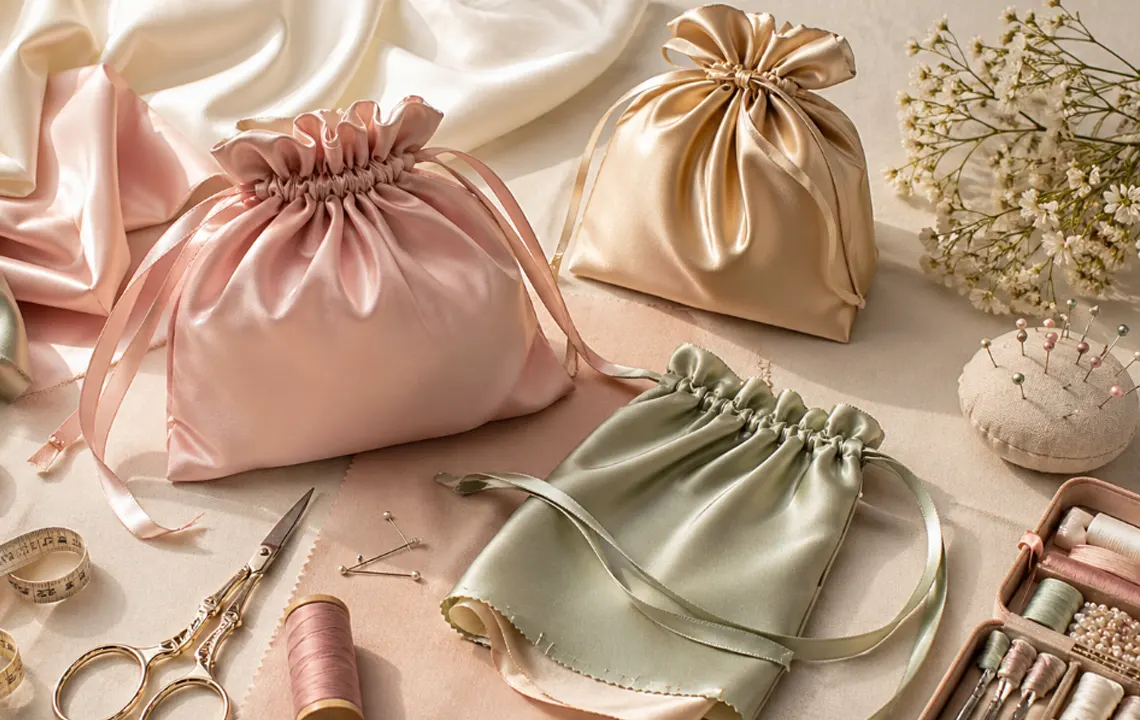
You might think sewing is tricky, but you can learn how to make satin bags at home with just a little practice. Satin feels smooth and looks fancy, so your finished bag will always stand out. This tutorial helps you create something special, whether you want a gift bag, jewelry pouch, or a unique package. Try different colors, shapes, or decorations. Let your creativity guide you and have fun making every bag your own!
Key Takeaways
- Sewing satin bags gets easier as you practice more. Begin with easy designs to help you feel confident.
- Pick the best satin fabric so your bag lasts longer. Cotton sateen and polyester satin work well for bags.
- Choose colors and patterns that fit the event. Make your bags special by adding personal touches for gifts.
- Use fusible fleece or other materials to add shape. This helps your bag keep its form.
- Get important sewing tools like fabric scissors and pins. These tools help make sewing easier for you.
- Measure and cut your fabric with care to avoid errors. Always leave extra space for seams and drawstring areas.
- Try out different drawstring types to see what you like. Ribbons, cords, or shoelaces can change your bag’s style.
- Add beads or charms to decorate your satin bags. These small details make your bags stand out and be remembered.
How to Make Satin Bags: Materials & Tools
Satin Fabric Choices
When you start this tutorial, you get to pick from many types of satin. Each one feels a little different and gives your bag a unique look. Some satin fabrics work better for bags because they hold their shape and last longer. Here are a few popular options:
- Slipper satin feels smooth and strong. It keeps its shape, so your bag looks crisp and neat.
- Cotton sateen has a soft shine and stands up to lots of use.
- Polyester satin is easy to find and comes in many colors.
- Silk satin feels fancy but needs gentle care.
You might wonder which satin lasts the longest. Take a look at this table to compare:
| Satin Type | Durability Level | Notes |
|---|---|---|
| Cotton Sateen | High | Good abrasion resistance and strength. |
| Polyester Satin | Moderate | Offers good durability and abrasion resistance. |
| Silk Satin | Low | Delicate and requires careful handling. |
Color and Pattern Selection
Choosing the right color or pattern makes your bag stand out. You can pick classic colors like black, white, or red for a timeless look. If you want something fun, try bright colors or bold prints. Patterns like florals, polka dots, or stripes add personality. Think about the person who will get the bag or what you plan to put inside. For gifts, match the color to the occasion. For jewelry, soft pastels or metallics look elegant.
Fusible Fleece & Alternatives
Fusible fleece gives your satin bag a little padding and helps it keep its shape. You iron it onto the back of your fabric, and it sticks in place. If you do not have fusible fleece, you can use felt, thin batting, or even a piece of flannel. These options add softness and structure. Some people skip the padding for a lighter bag, especially for small jewelry pouches.
Essential Sewing Tools
You do not need fancy tools for this tutorial. Here is a simple list to get you started:
- Fabric scissors for cutting satin
- Pins or clips to hold pieces together
- A ruler or measuring tape
- Sewing needles and thread
- Safety pin or bodkin for threading the drawstring
Hand Sewing vs. Machine
You can sew your bag by hand or use a sewing machine. Hand sewing works well for small bags or if you do not have a machine. Use small, even stitches for a neat finish. A sewing machine makes the job faster and gives strong seams. If you are new to sewing, try both ways and see which one you like best.
Tip: Satin can be slippery. Use extra pins or clips to keep your fabric in place while you sew.
Now that you know what you need, you are ready to learn how to make satin bags. This tutorial will guide you step by step, so you can create a beautiful bag for any occasion.
Where to Buy Materials
You might wonder where to find everything you need for your satin bag project. Good news! You have plenty of options, both online and in your local area. Let’s break it down so you can shop with confidence.
Local Stores
Local fabric shops are a great place to start when buying satin fabric and sewing supplies. You can touch the fabric, check the color in natural light, and compare different weights before making a choice. This helps you find satin that is smooth, strong, and easy to sew into bags.
Many local stores also carry useful supplies such as fusible fleece, felt, lining fabric, ribbons, cords, thread, needles, pins, scissors, and basic sewing tools. If you live near a large city, you may also find specialty fabric shops with unique colors, patterns, trims, and higher-quality satin options.
You can check these types of stores:
| Store Type | What You Can Find |
|---|---|
| Fabric Shops | Satin fabric, lining fabric, felt, fusible fleece, trims |
| Craft Stores | Ribbons, cords, decorative materials, basic tools |
| Sewing Supply Stores | Needles, thread, pins, scissors, measuring tools |
| Local Markets | Discount fabrics, leftover fabric pieces, unique trims |
Tip: Ask the staff for help if you are not sure which satin works best for bags. They may know which fabrics are easier to cut, sew, and finish neatly.
Online Shopping
Online stores offer a wide range of satin fabrics and sewing supplies. You can find many colors, patterns, fabric weights, ribbons, cords, trims, and basic sewing tools. Shopping online also makes it easy to compare prices, check reviews, and choose materials that fit your project.
Here is a simple guide:
| Website Type | What You Can Find | Buying Tips |
|---|---|---|
| Large Online Marketplaces | Satin fabric, sewing tools, ribbons, drawstrings, kits | Compare prices and read reviews carefully |
| Handmade Marketplaces | Unique fabrics, handmade trims, decorative cords | Check seller ratings and delivery time |
| Specialty Fabric Stores | Premium satin, silk-like satin, lining fabric, trims | Look at fabric weight, width, and care instructions |
| Local Online Sellers | Discount fabrics, small fabric lots, unused supplies | Confirm quality and quantity before buying |
You can also check local fabric shops or nearby craft suppliers if you want to see the fabric color and texture in person. Before placing an order, make sure the satin fabric is suitable for your bag style, especially if you are making satin drawstring bags, gift bags, jewelry pouches, or wedding favor bags.
Buying Tips
- Buy a little extra fabric. Satin can slip while you cut, so having more helps.
- Look for coupons or sales. Many stores offer discounts for first-time buyers.
- Read reviews before you buy online. Other shoppers share helpful info about quality.
Note: If you want eco-friendly options, search for recycled satin or organic cotton sateen. Some shops label these fabrics clearly.
Alternatives and Extras
If you can’t find fusible fleece, try felt or thin batting. You can buy these at most craft stores. For drawstrings, use ribbon, cord, or even shoelaces. Many stores sell beads and charms for decoration.
- Ribbon and Cord: Craft stores, dollar stores, online
- Beads and Charms: Michaels, Etsy, Amazon
You have lots of choices. Explore different stores and websites. Try new materials and see what works best for your style. Shopping for supplies can be fun, and you might discover something special for your next satin bag!
Measuring & Cutting Satin
Bag Size Guide
You want your satin bag to fit your gift or jewelry perfectly. Start by thinking about what you plan to put inside. Small bags work well for rings or earrings. Medium bags suit bracelets or small gifts. Large bags can hold bigger items or multiple pieces.
Here’s a handy table with common sizes for satin bags. You can use these as a starting point or adjust them to fit your needs:
| Color | Size | Best Use |
|---|---|---|
| Beige | 4 x 4 inches | Rings, earrings |
| Beige | 4 x 5 inches | Small pendants |
| Beige | 4 x 6 inches | Bracelets, gifts |
| Beige | 6 x 8 cm | Coins, charms |
| Beige | 6 x 10 cm | Jewelry sets |
If you want a custom size, grab a ruler and measure your item. Add at least one inch to each side for seams and the drawstring channel. This extra space keeps your bag roomy and easy to close.
Tip: If you’re making bags for packaging, measure the product first. You’ll avoid surprises and get a neat fit.
Cutting Techniques
Cutting satin can feel tricky because the fabric slips and slides. You want clean edges and straight lines. Lay your fabric flat on a smooth surface. Use sharp fabric scissors for the best results. If you have a rotary cutter, you can try that for extra precision.
Follow these steps for easy cutting:
- Place your satin on a table or cutting mat.
- Smooth out any wrinkles with your hands.
- Pin the fabric to keep it from moving.
- Mark your measurements with tailor’s chalk or a washable marker.
- Cut slowly along the lines.
Note: Don’t rush. Satin can shift if you cut too fast.
Preventing Fraying
Satin loves to fray at the edges. You want your bag to look neat and last longer. Try these tricks to keep the edges tidy:
- Use pinking shears. These scissors cut a zigzag edge that helps stop fraying.
- Apply a thin line of fabric glue along the cut edge. Let it dry before sewing.
- Sew a zigzag stitch or overcast stitch along the edge if you use a sewing machine.
- For hand sewing, make small stitches close to the edge.
Callout: If you don’t have pinking shears or fabric glue, fold the edge over once and sew it down. This simple step hides the raw edge and keeps your bag strong.
You can handle satin with confidence. Careful measuring and cutting make your bag look professional. Try different sizes and techniques until you find what works best for you.
Easy Drawstring Bag Steps
Preparing Edges
You want your satin bag to look neat and last a long time. The first step in this easy drawstring bag tutorial is preparing the edges. Satin can fray quickly, so you need to finish the seams before sewing. Here’s how to make satin bags with professional-looking edges:
- Use single-layer cutting. This keeps your fabric from shifting and helps you get accurate cuts.
- Align all pattern pieces in the same direction. Satin has a sheen, so this keeps your bag looking consistent.
- Pin your fabric with extra fine dressmaking pins. These pins won’t leave marks or snag the delicate material.
- Try French seams for lightweight satin. This method encloses the raw edges inside the seam, giving your bag a clean finish.
- For heavier satin, use the Hong Kong finish. You wrap the raw edges with bias strips, making them strong and tidy.
- If you have a serger or overlock machine, finish the edges quickly and boost fray resistance.
- A rolled hem works well for a narrow, delicate edge.
Tip: If you don’t have special tools, fold the edge over once and sew it down. This simple step hides the raw edge and keeps your bag strong.
You can choose the method that fits your skill level and tools. Proper seam finishing makes your simple drawstring bag look polished and helps it last.
Sewing Sides
Now you’re ready to sew the sides of your easy drawstring bag. This step gives your bag its shape and strength. You want strong seams that look neat, so follow these best practices:
- Use a straight stitch. This is the basic stitch for sewing seams in bags.
- Pin or clip the edges before sewing. Satin slips easily, so securing the fabric helps you get straight lines.
- Try the stitch-in-the-ditch technique. This hides the stitches and keeps the seam tidy.
- Understitching helps facings roll to the back, so they don’t show on the outside.
- Sew slowly and check your work as you go. Satin can shift, so take your time.
Callout: If you’re hand sewing, use small, even stitches. This gives your bag a strong seam and a neat look.
You can use a sewing machine or sew by hand. Both methods work well for this tutorial. The key is to keep your stitches straight and your edges lined up. You’ll see your easy drawstring bag start to take shape.
Making the Drawstring Channel
The drawstring channel is what lets you open and close your satin bag easily. You want the channel to be smooth and roomy enough for your string or ribbon. Here’s how to make satin bags with a durable drawstring channel:
- Press the top edge of your bag well before stitching. This keeps the channel crisp and easy to sew.
- Fold the top edge down about half an inch (or as needed for your string size).
- Pin the fold in place. Make sure the channel isn’t too tight.
- Sew along the edge with an even seam allowance. Keep your stitches straight for a neat finish.
- Leave openings at both sides so you can thread the drawstring later.
Note: Use a bodkin or safety pin to thread your string through the channel. This makes the job quick and easy.
You can pick different types of string for your easy drawstring bag. Check out this table to see which string fits your style:
| String Type | Description | Best For |
|---|---|---|
| Cotton Cord | Soft, natural, comfortable | Everyday use |
| Nylon Cord | Strong, durable, resists fraying | Heavy-duty bags |
| Paracord | Extremely strong, many colors | Outdoor and rugged use |
| Ribbon | Decorative, easy to tie | Lightweight bags |
| Satin Cord | Smooth, shiny, elegant | Stylish, sophisticated bags |
You can experiment with different strings to match your bag’s purpose. This tutorial gives you the basics, but you can add your own touch.
Tip: Press your channel well before sewing. This helps you get a crisp, professional finish.
You’ve finished the main steps for your easy drawstring bag. The next part of the tutorial will show you how to insert the drawstring and add extra style.
Inserting the Drawstring
You’re almost done with your easy drawstring bag! This part of the tutorial shows you how to add the finishing touch—the drawstring. You’ll love how simple this step feels, and you’ll see your bag come together right before your eyes.
First, grab your string, ribbon, or cord. Make sure it’s long enough to go through the channel and leave extra on both sides for tying. A good rule is to use a piece that’s about two and a half times the width of your bag.
Here’s how you can insert the drawstring:
- Attach a safety pin or a bodkin to one end of your string. This tool helps you guide the string through the channel without any trouble.
- Find one opening at the side of your bag’s channel. Push the safety pin into the opening and start feeding it through the channel. Use your fingers to gently bunch up the fabric and slide the pin along.
- Keep working the pin through the channel until it comes out the other side. Pull the string all the way through.
- If you want your easy drawstring bag to close from both sides, repeat the process with a second string. Start at the opposite side and thread it through the same way. Now you can pull both ends, and the bag will cinch up evenly.
Tip: If your string feels too thick or gets stuck, try a thinner ribbon or cord. Satin bags look great with all kinds of drawstrings, so you can experiment with different styles.
Here’s a quick table to help you choose the best drawstring for your bag:
| Drawstring Type | Look & Feel | Best For |
|---|---|---|
| Satin Cord | Shiny, elegant | Jewelry or gift bags |
| Grosgrain Ribbon | Sturdy, colorful | Kids’ bags, party favors |
| Twisted Cord | Classic, strong | Packaging, keepsakes |
Once you’ve pulled the string through, even out the ends. Tie a knot at each end so the string doesn’t slip back into the channel. You can also add beads or charms for a fun touch. This step makes your easy drawstring bag both useful and stylish.
If you followed this tutorial by hand sewing, you’ll notice the channel feels soft and flexible. If you used a sewing machine, the channel might look extra crisp. Both ways work great, so pick what feels best for you.
Callout: Give your bag a gentle tug to test the drawstring. If it slides smoothly and closes the bag, you did it right!
You’ve finished the main steps in this tutorial. Your easy drawstring bag is ready for gifts, jewelry, or any special surprise. Try making a few more bags with different colors and strings. Each one will look unique and show off your creativity.
Shaping & Stylish Features
Adding Darts for Shape
You want your satin bag to look more polished and less flat. Darts help you create a rounded shape that feels professional. Adding darts is easy if you follow a few simple steps. Here’s how you can do it:
- Mark the dart: Use tailor’s chalk or a washable marker to draw the dart lines on your fabric. This step helps you sew accurately.
- Pin the dart: Fold the fabric along the marked line. Pin it in place so the edges stay aligned.
- Sew the dart: Stitch along the marked line. Use a straight stitch and backstitch at both ends to keep the seam strong.
- Taper the dart seam: As you reach the tip of the dart, make your stitches smaller. This prevents puckering and keeps the shape smooth.
- Tie the threads at the tip: Secure the end by tying the threads or using a machine tack. This keeps the dart from coming undone.
- Press the dart: Use an iron to flatten the dart. Pressing creates crisp folds and helps your bag hold its shape.
Tip: Always press your darts after sewing. This makes your satin bag look neat and helps the shape stand out.
Scrunchie Handle Option
Want to add a playful touch to your satin bag? Try a scrunchie handle. This handle feels soft and looks trendy. You can match the handle to your bag or pick a contrasting color for extra flair.
To make a scrunchie handle, cut a strip of satin that’s longer than your bag’s width. Sew the strip into a tube. Thread elastic through the tube and secure both ends. Attach the scrunchie handle to your bag with a few stitches. Now you have a bag that’s easy to carry and fun to show off.
| Handle Type | Look & Feel | Best For |
|---|---|---|
| Scrunchie Handle | Soft, playful | Kids, parties |
| Ribbon Handle | Elegant, simple | Gifts, jewelry |
| Cord Handle | Classic, sturdy | Packaging |
Note: Scrunchie handles work best on medium or large bags. They add comfort and style without making the bag bulky.
Other Style Variations
You can personalize your satin bag in many ways. Try different shapes, closures, or decorations. Here are a few ideas to inspire you:
- Boxed corners: Sew across the bottom corners to create a flat base. This gives your bag more room and helps it stand upright.
- Envelope flap: Add a flap to the top for a clutch-style bag. Use a snap or button for closure.
- Layered fabrics: Combine satin with lace, tulle, or velvet for a unique look.
- Decorative stitching: Use contrasting thread or embroidery to add patterns and details.
Callout: Don’t be afraid to experiment. Every satin bag you make can reflect your personality and creativity.
You can mix and match these features to create a bag that fits your needs. Whether you want a classic pouch or a bold statement piece, shaping and stylish features help your satin bag stand out.
Customization Ideas
You can turn a simple satin ribbon bag into something truly special with a few creative touches. This part of the tutorial will show you how to add decorations, personalize your bags for gifts or jewelry, and play with different sizes and styles.
Decorative Elements
Decorating your satin ribbon bag is fun and easy. You can use simple supplies to make your bag stand out. Here are some ideas to get you started:
- Attach a pretty ribbon bow to the drawstring for a classic look.
- Sew on beads or pearls for a touch of sparkle.
- Add small charms to the ends of the drawstrings. These can match the occasion or the person receiving the gift.
- Use fabric paint or iron-on patches to create patterns or initials.
- Try layering lace or tulle over the satin for a fancy effect.
Tip: Mix and match decorations to create a bag that feels unique. You can keep it simple or go all out with lots of details.
Ribbons, Beads, Charms
You can use ribbons, beads, and charms to make your satin ribbon bag look elegant or playful. Thread a satin ribbon through the drawstring channel for a soft, shiny finish. String a few beads onto the ends of the ribbon, or tie on a tiny charm for extra personality. These small touches make your bag perfect for birthdays, weddings, or any special event.
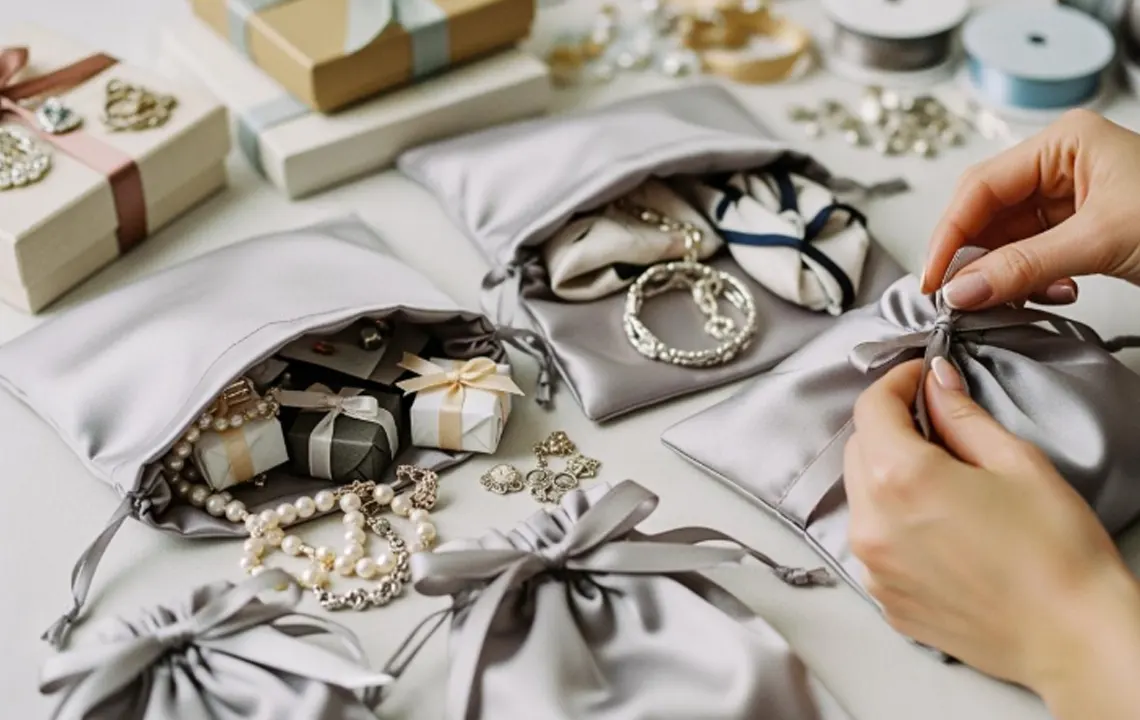
Personalizing for Gifts or Jewelry
You want your gift to feel personal. A satin ribbon bag lets you do just that. Here are some ways you can customize your bag for different occasions:
- Choose white satin for engagement or bridal jewelry. It looks classic and elegant.
- Pick bright colors or fun patterns for birthdays or parties.
- Use organza or jute pouches for a playful twist.
- Add a name tag or monogram to make the bag feel one-of-a-kind.
- Try themed decorations, like hearts for Valentine’s Day or snowflakes for winter holidays.
Drawstring fabric pouches work well for jewelry because they look fancy and don’t cost much. They’re also lightweight and easy to ship, which makes them great for small gifts or even for selling jewelry online.
Size & Style Variations
You can change the size and style of your satin ribbon bag to fit anything from tiny rings to larger gifts. This tutorial gives you the basics, but you can experiment with different fabrics and shapes. Here’s a table to help you pick the right material for your next bag:
| Fabric Type | Weight (g/m²) | Composition | Characteristics |
|---|---|---|---|
| Glossy Satin | 75 | 100% Polyester | Soft, shiny, non-stretch, drapes well |
| Matte Satin | 110 | 100% Polyester | Thick, smooth, stiff, holds shape |
| Artificial Silk | 90 | 97% Polyester, 3% Spandex | Soft, slightly stretchy, comfortable |
You can make a small pouch for earrings or a larger bag for a scarf or keepsake. Try different shapes, like round, square, or even heart-shaped bags. Each style gives your gift a different feel.
Callout: Don’t be afraid to try new ideas. Every satin ribbon bag you make can show off your style and creativity. This tutorial is just the beginning!
Troubleshooting & Tips
Common Mistakes
You might run into a few bumps when making satin bags. Satin can be tricky, but you can fix most problems with a little patience. Here are some mistakes people often make and how you can avoid them:
- Fraying edges: Satin loves to fray. If you skip finishing the edges, your bag might not last. Always use pinking shears, zigzag stitches, or fold the edge before sewing.
- Slippery fabric: Satin slides around. If you don’t pin it well, your seams can turn out crooked. Use extra pins or clips to keep everything in place.
- Uneven stitches: If you sew too fast, your stitches might look messy. Slow down and check your work as you go.
- Drawstring channel too tight: If you fold the channel too small, your string won’t fit. Measure your ribbon or cord before sewing the channel.
- Wrong thread or needle: Using thick thread or a dull needle can snag satin. Pick a fine needle and smooth thread for best results.
Tip: If you make a mistake, don’t worry. You can always unpick stitches and try again. Practice makes perfect!
Care for Satin Bags
You want your satin bags to stay beautiful for a long time. Satin needs gentle care, but it’s not hard to keep your bags looking new. Here’s a simple guide:
| Care Aspect | Instructions |
|---|---|
| Cleaning | Hand wash with cool water and mild detergent. Avoid fabric softeners. Silk satin needs dry cleaning. Treat stains right away. |
| Drying | Air dry flat on a towel. Keep out of direct sunlight. If you use a dryer, pick low heat and remove the bag quickly. Over-drying can damage satin. |
| Ironing | Iron on the reverse side with a pressing cloth. Stay away from embellishments. |
You can wash most satin bags by hand. Silk satin bags need dry cleaning. If you spill something, clean it fast so the stain doesn’t set. Lay your bag flat to dry. Sunlight can fade colors, so pick a shady spot. If your bag has beads or charms, iron around them, not over them.
Note: Always check the care label if your satin is special or mixed with other fabrics.
Success Tips
You can make your satin bags look professional with a few smart tricks. Here are some tips to help you succeed:
- Cut your fabric slowly. Sharp scissors make clean edges.
- Press your seams as you sew. An iron helps your bag look crisp.
- Match your thread color to your satin. This hides stitches and keeps your bag neat.
- Try different drawstrings. Ribbon, cord, or even shoelaces can change the style.
- Decorate with beads or charms for extra flair.
- Make a test bag first. Practice helps you get comfortable with satin.
Callout: Don’t be afraid to experiment. Every bag you make teaches you something new. You’ll get better with each project!
You can handle satin with confidence. Follow these tips, and your bags will shine every time.
Conclusion
You can make satin bags at home with ease. Try new styles and add your own touch. If you want bulk or cYou can make satin bags at home with simple materials and your own creative style. They are great for gifts, jewelry, wedding favors, cosmetics, and small product packaging.
If you need satin bags in bulk or want a custom design for your brand, we can help. As a satin bags manufacturer, we offer flexible OEM and ODM services to meet different packaging needs.
| Customization Aspect | Details |
|---|---|
| Size Options | Small, medium, large, or custom dimensions |
| Color Choices | Wide range of satin colors |
| Logo Printing | Silk screen printing, foil stamping, heat transfer printing |
| Drawstring Styles | Ribbon, twisted cord, rope options |
Custom satin bags can make your packaging look more elegant and professional. You can choose the size, color, logo, and closure style that best fits your products.
Whether you need satin gift bags, satin drawstring bags, jewelry pouches, or promotional packaging, we can create a solution that matches your brand. Contact us to discuss your custom satin bag project.
FAQ
How do I stop satin from fraying when I cut it?
You can use pinking shears, fabric glue, or a zigzag stitch along the edges. Folding the edge over and sewing it down also helps. Take your time and use sharp scissors for the best results.
Can I make satin bags without a sewing machine?
Yes, you can sew satin bags by hand. Use small, even stitches for strong seams. A needle and thread work well for small projects. Hand sewing gives you more control over slippery fabric.
What is the best drawstring for satin bags?
You can use satin ribbon, cotton cord, or even paracord. Satin ribbon looks elegant. Cotton cord feels soft and strong. Pick a drawstring that matches your bag’s style and purpose.
How do I clean my satin bag?
Hand wash your satin bag in cool water with mild detergent. Lay it flat to dry. Avoid wringing or twisting the fabric. For silk satin, dry cleaning works best.
Can I add decorations like beads or patches?
Absolutely! You can sew on beads, attach charms, or use iron-on patches. Just make sure decorations are secure. Try to avoid heavy items that might pull on the fabric.
What size should I make my satin bag?
Think about what you want to put inside. For rings, try 4 x 4 inches. For bracelets, 4 x 6 inches works well. Measure your item and add extra space for seams and the drawstring channel.
Where can I buy satin fabric and supplies?
You can buy satin fabric and sewing supplies from local fabric shops, craft stores, sewing supply stores, or online marketplaces. Look for satin fabric, matching thread, drawstrings, ribbons, needles, and fabric scissors. Before buying, check the fabric weight, color options, customer reviews, and shipping time to make sure the materials meet your project needs.