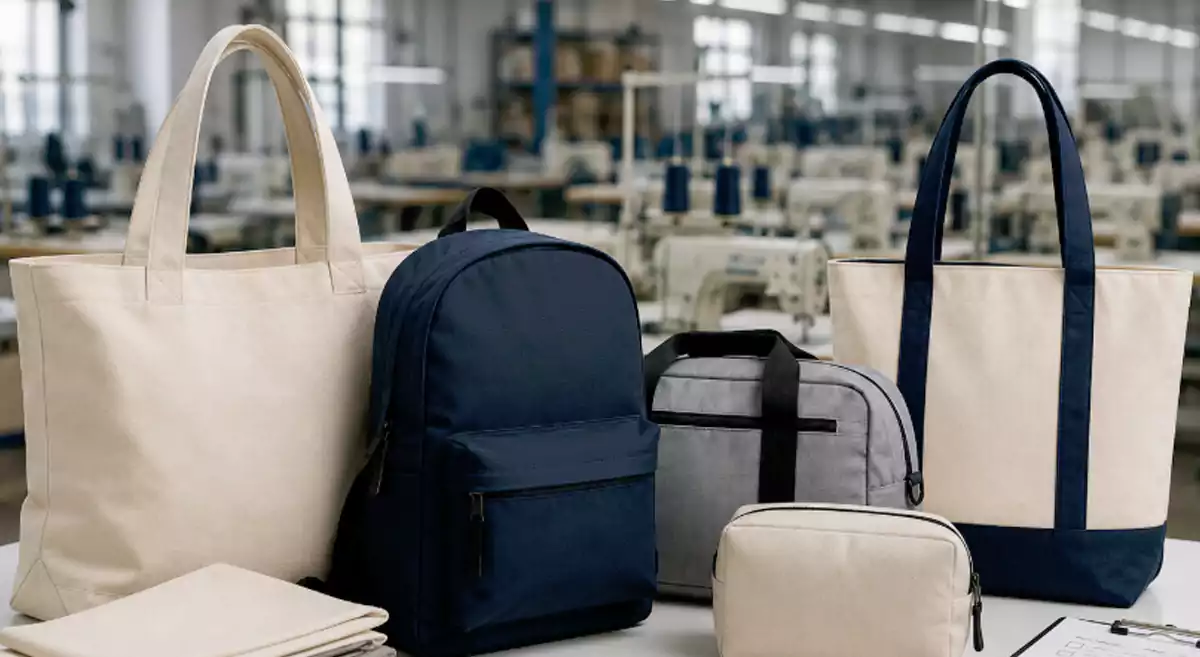
Ever wondered how to make a dust bag right at home? You don’t need fancy skills or special tools. If you want to keep your favorite items clean and dust-free, you’re in the right place. This guide will walk you through simple steps. You’ll find it easy to customize your bag and make it look neat.
Get ready to create something useful and stylish with just a few materials!
Key Takeaways
- Get the materials you need. You will need fabric, scissors, and sewing tools. Make sure you have everything before you start your dust bag project.
- Pick the fabric that works best for you. Cotton feels soft. Linen is strong. Synthetic fabrics last a long time.
- Measure carefully. Always add extra space for seams. This helps your dust bag fit well.
- Pay close attention when sewing. Use a seam allowance. Backstitch to make your seams strong.
- Make a drawstring casing. Fold the top edge of your bag. Sew it, but leave openings for the drawstring.
- Choose the right drawstring material. Velvet is good for delicate items. Cotton works for everyday use.
- Make your dust bag special. Add labels, embroidery, or decorations. This makes it unique and stylish.
- Check your dust bag often. Keep it clean. This helps it last longer.
Materials and Tools
You need to get your materials and tools before you start. Good supplies make your project easier. They also help your dust bag last longer. Here is what you need.
Fabric Selection
Best Fabrics
Picking the right fabric is important. Your dust bag should protect your things. It can be a handbag dust cover or a diy reusable vacuum bag. Here is a table with fabric choices:
| Fabric Type | Advantages | Disadvantages |
|---|---|---|
| Cotton | Breathable, soft, absorbs moisture, easy to wash, safe for delicate items, durable for everyday use | Can wrinkle easily, may shrink after washing, needs more water to produce, not as strong as some synthetics |
| Linen | Natural look, strong, absorbs moisture, keeps items cool | Can feel rough, wrinkles easily, sometimes harder to clean |
| Synthetic | Very strong, durable, blocks dust and water, lightweight, often less expensive | Not breathable, can trap moisture, not eco-friendly, may feel less soft than natural fabrics |
Cotton is soft and easy to wash. Linen looks classic and feels strong. Synthetic fabrics are good for homemade vacuum cleaner bags. They block dust and water.
Durability Tips
Pick a fabric that fits your needs. Use strong fabric if you will use your dust bag a lot. Soft fabric is better for delicate things. Wash and dry your fabric before cutting. This stops shrinking later.
Tools Needed
Sewing Tools
You do not need fancy tools. Here is what you need:
- Sewing machine or needle and thread (for hand sewing)
- Scissors (sharp ones work best)
- Pins or clips (to hold fabric together)
- Iron (for pressing seams)
Measuring Tools
The right size is important. Use these tools:
- Measuring tape or ruler
- Fabric chalk or washable marker (for marking lines)
- Paper and pencil (to create a template for your dust bag)
Tip: Check your measurements twice before you cut. This helps you avoid mistakes. Your handbag dust cover will look neat.
Optional Supplies
Personalization Items
You can make your dust bag special. Add your own style. Here are some ideas in a table:
| Customization Option | Impact on Final Product |
|---|---|
| Size | Maintains shape and provides protection |
| Material | Affects protection and aesthetic appeal |
| Customization | Enhances personal style and uniqueness |
| Branding | Increases brand exposure and professionalism |
| Closure Type | Influences ease of access and item security |
| Printing & Embroidery | Adds a unique touch and personalization |
| Extra Features | Provides enhanced protection and functionality |
You can sew on a label or add embroidery. Print your name or try different closures like drawstrings or snaps. These extras make your dust bag look cool and protect your things.
Now you are ready to begin! Get your materials, pick your fabric, and make a template. You will have your own handbag dust cover soon.
How to Make a Dust Bag: Measuring and Cutting
Getting the right size is the first step in how to make a dust bag that truly fits your needs. You want your dust bag to cover your item completely, but not be too loose or too tight. Let’s break down the process so you can measure and cut your fabric with confidence.
Measure for Fit
Before you grab your scissors, you need to measure the item you want to protect. This could be a handbag, a pair of shoes, or even a camera. Lay your item flat on a table and use a measuring tape to find the height and width. If your item is bulky, measure around the widest part.
Sizing Tips
Always add extra space for seam allowances and ease. This helps your dust bag slide on and off easily. A good rule is to add 2 inches (about 5 cm) to both the height and width. If you want a drawstring closure, add another 1.5 inches (about 4 cm) to the top for the casing.
Here’s a handy table to help you choose the right size based on common bag types:
| Handbag Type | Typical Dimensions | Recommended Dust Bag Size |
|---|---|---|
| Small Leather Goods & Clutches | 8-12 inches wide | 10-14 inches wide |
| Crossbody & Small Shoulder Bags | 8-10 inches high, 9-12 inches wide | 12-14 inches high, 14-16 inches wide |
| Satchels & Medium Totes | 10-13 inches high, 12-15 inches wide | 15-18 inches high, 17-20 inches wide |
| Large Totes & Travel Bags | 13+ inches high, 15+ inches wide | 20×20 inches or 24×24 inches |
Tip: If you’re not sure, make your dust bag a little bigger. You can always adjust it later, but you can’t add fabric once it’s cut.
Cut Fabric
Once you know your measurements, it’s time to mark and cut your fabric. This step is key in how to make a dust bag that looks neat and professional.
Accurate Cutting
Start by laying your fabric flat and smoothing out any wrinkles with an iron. Use a ruler or measuring tape to mark the dimensions you need. Always double-check your measurements before you cut.
There are several tools you can use to mark your fabric. Here’s a quick guide:
| Marking Tool | Description |
|---|---|
| Chalk Wheel | Leaves a crisp, removable chalk line. Great for most fabrics. |
| Washable Markers | Bright lines that wash out easily. Perfect for beginners. |
| Tracing Wheel & Carbon Paper | Transfers lines with carbon. Good for detailed work. |
| Soft Lead Pencil | Easy to find at home. Marks wash out with water. |
| Soap | Works well on sturdy fabrics. Lines disappear with heat or water. |
| Ballpoint Pens | Only use for hidden marks. Ink can stain. |
| Ceramic Lead Pens | Makes clear, removable lines. Can be pricey and harder to find. |
Note: Test your marking tool on a fabric scrap first. Some tools can leave stains, especially on light fabrics.
Here are some quick tips for marking and cutting:
- Use a ruler to mark straight lines and seam allowances.
- Draw your stitching lines with a straight edge for clean results.
- Mark any darts or pleats directly on the fabric for perfect alignment.
- Cut slowly with sharp scissors to avoid jagged edges.
If you want to know how to make a dust bag that fits perfectly, take your time with this step. Careful measuring and cutting will make sewing much easier later. You’ll feel proud when your finished dust bag looks crisp and fits just right.
Remember, how to make a dust bag starts with good prep work. When you measure and cut carefully, you set yourself up for success. If you want to make more than one dust bag, create a paper template. This saves time and helps you get consistent results every time you make a new bag.
You’re now ready to move on to sewing and finishing your dust bag. Keep your measurements handy, and let’s keep going on your how to make a dust bag journey!
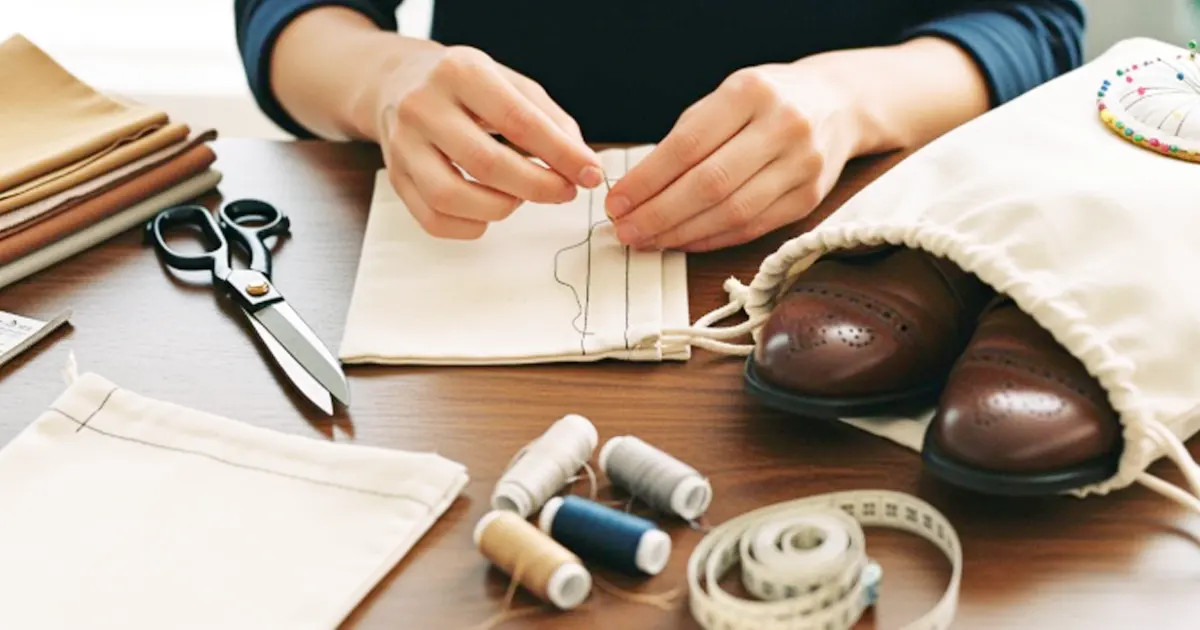
Sew and Finish Edges
Now that you have your fabric pieces ready, it’s time to start sewing your dust bag together. This part will help your bag stay strong and look neat. Let’s walk through each step so you can feel confident at your sewing machine or with your needle and thread.
Sew Sides
You will begin by joining the sides of your dust bag. Place the two fabric pieces together with the right sides facing each other. Line up the edges so everything matches.
Seam Allowance
Leave a seam allowance when you sew. A seam allowance is the space between the edge of the fabric and your stitching line. For most dust bags, a ½ inch (about 1.3 cm) seam allowance works well. This gives your bag enough strength and room for finishing the edges later.
Tip: Use pins or clips to hold the fabric in place before sewing. This helps keep your lines straight.
Backstitching
Start and end your sewing with a backstitch. Backstitching means you sew forward a few stitches, then reverse and sew back over them. This locks the thread in place and keeps your seams from coming undone. You want your dust bag to last, so don’t skip this step!
Finish Edges
After you sew the sides, you need to finish the raw edges. This step stops the fabric from fraying and makes your dust bag look professional. You have two great options: zigzag stitch or serging.
Zigzag Stitch
A zigzag stitch is easy to do on most sewing machines. Set your machine to the zigzag setting and sew along the raw edge of your seam. This creates a barrier that keeps the fabric from unraveling. Zigzag stitches also add strength and can even look decorative if you use a fun thread color.
Serging
If you have a serger, you can use it to finish the edges. Serging trims the edge and wraps it with thread all at once. This method is fast and gives a very clean look. Serged edges are strong and perfect for dust bags that will get a lot of use.
Here’s a quick table showing the benefits of both zigzag stitch and serging:
| Benefit | Description |
|---|---|
| Stops Fraying | Zigzag stitches and serging create a barrier that prevents fabric edges from fraying. |
| Adds Strength | These stitches reinforce seams, making them stronger and more durable for long-lasting use. |
| Flexibility for Stretchy Fabrics | Zigzag stitches allow seams to stretch without breaking, which is great for stretchy materials. |
| Decorative Aspect | Both methods can add a nice look to your dust bag, especially if you use colorful thread. |
Note: If you don’t have a sewing machine or serger, you can use a simple overcast stitch by hand. It takes a little longer, but it still works well.
Taking time to finish your edges will make your dust bag last longer and look neat. You’re almost done with the main sewing steps. Keep going—your dust bag is coming together beautifully!
Make Drawstring Casing
You are almost done with your dust bag! Now, let’s make the casing for your drawstring closure. This part will let you open and close your bag easily. You just need to fold, press, and sew the top edge of your bag.
Fold and Sew Top
Start by laying your dust bag flat with the top edge facing you. Take the top edge and fold it down about ¼ inch. Press it flat with an iron. This small fold hides the raw edge and keeps your bag looking neat.
Next, fold the top edge down again, this time about 1 inch. Press it flat again. This second fold creates the space for your drawstring closure. You want the fold to be even all the way around. Use pins or clips to hold the fold in place.
Now, sew along the inner edge of the fold. Keep your stitching about ⅛ inch from the edge. Go slow and keep your line straight. This will make your casing strong and tidy.
Casing Width
The width of your casing matters. If you use a thin cord or ribbon, a 1-inch casing works well. For thicker cords, you might want to make the casing a little wider. Always check that your drawstring will fit through the space before you sew it closed.
Here’s a quick table to help you choose the right casing width:
| Drawstring Type | Recommended Casing Width |
|---|---|
| Thin Cord | ¾ inch |
| Ribbon | 1 inch |
| Thick Cord | 1¼ inch |
Tip: Always measure your drawstring before you sew the casing. This helps you avoid having to redo your work.
Leave Opening
You need to leave an opening for your drawstring closure. This step is important. If you sew the casing all the way around, you won’t be able to thread the cord through.
When you sew the casing, stop about ½ inch before you reach the side seam. Skip about 1 inch, then start sewing again. Do the same on the opposite side. These small gaps will be your openings for the drawstring.
Placement Tips
- Place the openings on opposite sides of the bag. This makes it easy to pull the drawstring closure tight.
- Make sure the gaps are big enough for your cord or ribbon to fit through.
- Double-check that you did not sew the openings shut by mistake.
Note: If you want a double drawstring closure, you can make two casings or thread two cords through the same casing, each starting from a different side.
You did it! Your dust bag now has a neat casing for the drawstring closure. The next step is to thread the cord through and finish your project.
Insert Drawstring
You’re almost finished with your dust bag! Now, let’s add the drawstring. This step lets you open and close your bag easily. You can choose from different materials for your drawstring. Each one has its own benefits.
Here’s a quick table to help you pick the best drawstring for your dust bag:
| Material | Benefits | Ideal Use |
|---|---|---|
| Velvet | Soft, plush texture; provides extra cushioning; blocks dust and moths | Delicate items like cashmere, silk, high-end handbags |
| Cotton | Lightweight, breathable, eco-friendly; prevents moisture buildup | Everyday storage; natural, minimalist look |
| Satin | Silky, glossy finish; smooth surface prevents friction | Gift packaging; high-end retail items |
Pick a cord that matches your bag and your needs. Velvet feels fancy and protects delicate things. Cotton works well for everyday bags. Satin looks shiny and slides easily.
Threading Methods
Getting the drawstring through the casing can feel tricky, but you have two easy methods. You can use a safety pin or a bodkin. Both work well, so pick the one you have at home.
Safety Pin
A safety pin is a classic tool for threading a drawstring. Here’s how you do it:
- Tie one end of your cord to a large safety pin.
- Push the safety pin into the opening of the casing.
- Slide the pin through the casing, bunching the fabric as you go.
- Pull the pin out the other side. Align the ends of the cord.
- Tie a knot or add a cord stop to keep the drawstring from slipping.
Tip: If your cord is thick, use a bigger safety pin. This makes threading easier.
Bodkin
A bodkin is a special tool for threading cords. It looks like a big needle with a blunt end. You just thread your cord through the eye of the bodkin, then push it through the casing. The bodkin slides smoothly and doesn’t snag the fabric. If you sew often, you might want to keep a bodkin in your toolkit.
Secure Ends
Once your drawstring is in place, you need to secure the ends. This keeps your cord from unraveling and makes your dust bag look neat.
Knotting Tips
You have a few options for finishing the ends:
- Tie a simple knot at each end of the cord.
- Use aglets, which are plastic or metal tips that make the ends neat and strong.
- Heat-seal the ends if you use synthetic cords like nylon or polyester.
You can pick the method that fits your cord and your style. Knots work for most cords. Aglets look professional and last longer. Heat-sealing stops fraying on synthetic cords.
Note: Make sure your knots or aglets are tight. Loose ends can slip out and make your dust bag hard to close.
Now your dust bag is ready to use! You can pull the drawstring to close it and keep your items safe from dust. If you want, you can add beads or charms to the ends for a fun touch. Enjoy your new dust bag and the satisfaction of making it yourself!
Final Touches and Personalization
You’re almost done! Now it’s time to give your dust bag a polished look and make it truly yours. These last steps help your bag last longer and stand out.
Check Seams
Before you call your project finished, take a close look at your seams. Strong seams keep your dust bag together, even with daily use. Here’s a simple way to check if your sewing is up to the task:
- Inspect the Thread: Look at the thread you used. High-quality thread, like UV-resistant polyester or PP, works best. If you used a weak thread, your seams might break over time.
- Check the Stitch Pattern: Examine your stitches. They should look even and tight, with no skipped spots. Patterns like the 3-thread overlook stitch or double-stitching at stress points (like where you pull the drawstring) add extra strength.
- Examine the Seam Type: Focus on areas that get tugged the most. Reinforced seams, especially near the drawstring opening, help your bag last longer.
Tip: Gently tug on the seams. If they hold firm and don’t pull apart, you did a great job!
Trim Threads
Loose threads can make your dust bag look messy. Grab your scissors and snip off any extra threads sticking out from the seams or edges. This step only takes a minute, but it makes your bag look neat and professional.
- Use small, sharp scissors for the best results.
- Check both the inside and outside of your bag.
- Don’t forget to trim around the drawstring casing and corners.
A tidy finish shows you care about your work!
Add Labels or Decor
Now comes the fun part—personalizing your dust bag! You can add a label, your name, or even a special design. This makes your bag unique and easy to recognize.
Here are some popular ways to decorate or label your dust bag:
| Printing Technique | Description |
|---|---|
| Silkscreen Printing | Great for simple logos with bold colors. Works well on cotton, canvas, and non-woven fabrics. |
| Embroidery | Gives a high-end, textured look. Perfect for premium or gift bags. |
| Gold Foil Stamping | Adds a shiny, metallic touch. Looks fancy on velvet or brushed cotton. |
| Digital Printing | Lets you use full-color designs. Good for small batches or custom artwork. |
| Foaming Print | Makes your logo pop with a soft, raised finish. Fun and eye-catching. |
| Embossing | Creates a raised design without ink. Looks clean and modern. |
| Thermal Transfer Printing | Best for small, detailed logos on synthetic materials. |
| Cotton Label | Sew in a tag with your logo, care tips, or a slogan. Easy to customize. |
| Woven Label | Durable and detailed. Sewn into the seam for long-lasting branding. |
You can also try:
- Adding beads or charms to the drawstring ends.
- Using fabric paint for a hand-drawn design.
- Sewing on a patch or badge.
Personal touches make your dust bag special. Show off your style or add your brand for a professional look!
Take a moment to admire your finished dust bag. You made something useful, neat, and unique. Great job!
Troubleshooting and Tips
Even if you follow every step, you might run into a few bumps along the way. Don’t worry! You can fix most problems with a little patience and the right tricks. Let’s look at some common mistakes and how you can solve them.
Common Mistakes
Uneven Seams
Uneven seams can make your dust bag look messy or even come apart. You might notice loose threads or gaps along the edge. Here’s how you can fix this:
- Use a heavy-duty needle and strong thread. This helps your stitches stay tight and secure.
- If you see loose seams, stitch over them again. Make sure there are no gaps for dust to sneak in.
- For lumpy or uneven filling, open the seam, smooth out the fabric, and re-stitch it. This gives your bag a smooth, even look.
Tip: Always check your seams before you finish your bag. A quick fix now saves you trouble later!
Drawstring Issues
Sometimes the drawstring gets stuck or won’t close the bag tightly. Here’s what you can do:
- Make sure the casing is wide enough for your cord or ribbon.
- If the drawstring bunches up, try using a smoother cord like satin or cotton.
- If threading is hard, use a safety pin or bodkin to guide the cord through.
- Tie strong knots at the ends so the cord doesn’t slip back inside.
If your drawstring still feels tight, check for any stitches blocking the casing and remove them.
Care Tips
Taking care of your dust bag helps it last longer and keeps your items safe. Here are some easy ways to keep your bag in top shape:
- Clean your dust bag gently. Use a vacuum or shake out dust. Avoid scrubbing or washing too often, since this can wear out the fabric.
- Store your bag in a cool, dry place. Keep it away from direct sunlight and moisture to prevent fading or mold.
- Check your bag every week. Look for dust buildup, leaks, or loose seams. Fix small problems right away.
- Once a month, inspect the drawstring and seams. Make sure everything works smoothly.
- Once a year, give your dust bag a full checkup. If you see big problems, consider getting help from a professional.
Here’s a quick guide for cleaning different dust bag fabrics:
| Cleaning Method | Description |
|---|---|
| Vacuuming | Use a vacuum to remove dust from the bag’s surface. |
| Compressed Air | Blow out dust using compressed air, especially for thick fabrics. |
| Washing | Some bags can be washed a few times, but always check the fabric first. |
| Caution on Washing | Many fabrics shrink in the wash. Avoid harsh chemicals that can damage the material. |
Remember: Gentle care keeps your dust bag looking new and working well for years!
Conclusion
You just learned how to make a dust bag from start to finish. Try out new fabrics, add your own style, and enjoy the results! If you want something special, I can help. As a professional bag manufacturer, I offer custom dust bags with lots of options:
| Customization | Choices Available |
|---|---|
| Materials | Satin, Velvet, Cotton, Canvas, Non-Woven |
| Closures | Drawstrings, zippers, snaps, ribbons |
| Logos | Embroidery, screen printing, foil stamping |
Want to order custom bags? Here’s how it works:
- Share your idea and needs.
- Pick fabrics, colors, and finishes.
- Get a sample and check the quality.
- Place your order and get support every step.
Feel free to reach out for custom orders or any questions!
FAQ
Can I make a dust bag without a sewing machine?
Yes! You can sew a dust bag by hand using a needle and strong thread. Use small, tight stitches for best results. It takes more time, but you still get a sturdy bag.
What size should my dust bag be?
Measure your item and add 2 inches to each side for seam allowance and ease. If you want a drawstring, add 1.5 inches to the top. Bigger is better if you’re unsure.
Which fabric works best for dust bags?
Cotton and linen work great for most items. Synthetic fabrics block dust and water. Choose soft cotton for delicate things. Use sturdy canvas for heavy items.
How do I wash my dust bag?
Most cotton and linen dust bags can go in the washing machine. Use cold water and mild detergent. Air dry to prevent shrinking. For synthetics, check the care label first.
My drawstring keeps slipping out. What should I do?
Tie a knot or add a bead at each end of the cord. This stops it from slipping back into the casing. You can also use cord stops for a secure finish.
Can I personalize my dust bag at home?
Absolutely! Try fabric paint, iron-on patches, or embroidery. You can sew on a label or add charms to the drawstring. Personal touches make your bag unique.
Do I need to pre-wash my fabric?
Yes, you should pre-wash your fabric. This step prevents shrinking and removes any chemicals. Your finished dust bag will keep its shape and size after washing.