You can learn how to make a camera bag at home. You only need to follow a few easy steps. Many photographers want a bag that fits their gear. They also want a bag that matches their style.

The camera bag industry often uses a ‘one size fits all’ idea. This does not work well for everyone, even with ‘adjustable’ harnesses. That is why mountaineering and trekking bags come in many sizes.
You can pick the materials you like. You can add padding to keep your camera safe. You can also design a look that fits your personality. You do not need any experience to begin. Be creative and let your camera bag show your style!
Key Takeaways
- You can make your own camera bag at home with easy materials and tools.
- Pick strong fabrics like canvas or recycled things so your bag lasts longer.
- Put padding and a soft lining inside to keep your camera safe from bumps and scratches.
- Draw your design first. Show the size, shape, and pockets for your gear.
- Use adjustable dividers to help keep your camera and other items neat.
- Pick closures like zippers or buttons. These keep your bag closed but let you open it easily.
- Make your bag special with decorations like patches or embroidery to show your style.
- Clean and take care of your bag often so it stays nice and lasts a long time.
Materials & Tools
Before you start making your camera bag, you need to gather the right materials and tools. Picking the best supplies helps you create a bag that protects your gear and matches your style.
Essential Materials
Durable Fabrics
You want your camera bag to last. Choose strong fabrics like canvas, denim, or nylon. These materials resist wear and tear. If you like eco-friendly options, try recycled fabric or old jeans. You can find these at craft stores or even in your closet.
Padding Options
Padding keeps your camera safe from bumps. Foam sheets work well. You can also use quilt batting or thick felt. Some people reuse old yoga mats or packing foam. Make sure the padding is thick enough to protect your camera.
Soft Lining
A soft lining prevents scratches. Fleece, microfiber, or cotton flannel are good choices. You can pick a color or pattern you like. If you want to save money, use an old t-shirt or pillowcase.
Fasteners & Straps
Fasteners keep your camera bag closed. Zippers, buttons, or Velcro all work. Sam Brown buttons add a classic look. For straps, use webbing, old belts, or sturdy ribbon. Adjustable straps make your bag easier to carry.
Tip: You can find many of these materials at thrift stores, online marketplaces, or even by repurposing items at home.
Tools Needed
Cutting Tools
Sharp scissors or a rotary cutter help you cut fabric neatly. If you use thick materials, try fabric shears. A craft knife works for foam or padding.
Sewing Tools
You need a needle and thread or a sewing machine. Hand sewing works for small projects. A sewing machine makes the job faster and gives stronger seams. Don’t forget pins or clips to hold pieces together.
Measuring Tools
A ruler or measuring tape helps you cut pieces to the right size. Marking tools like chalk or a fabric pen make it easy to draw lines on your fabric.
| Tool | Purpose | Beginner Alternative |
|---|---|---|
| Scissors | Cut fabric and padding | Kitchen scissors |
| Sewing Machine | Sew seams | Hand sewing needle |
| Measuring Tape | Measure pieces | School ruler |
You don’t need fancy tools to make a camera bag. Start with what you have. If you want to upgrade, look for deals at craft stores or borrow from friends.
Note: Always check your materials before you start. Make sure everything is clean and in good shape.
Now you have your materials and tools ready. You can move on to planning your design and making your camera bag unique.
Plan Your Design
Choose Size & Shape
You get to decide how big your camera bag should be. Think about your camera and the gear you want to carry. Do you need space for extra lenses, batteries, or a tripod? Maybe you want a small bag for quick trips or a larger one for long shoots. The shape matters too. Some people like a classic rectangle. Others prefer a rounded or messenger style.
Photographers care about comfort, waterproofing, and easy access. Take a look at this table to see what matters most:
| Design Feature | Importance |
|---|---|
| Comfort | Adjustable shoulder straps and hip belts help you carry your bag for hours without pain. |
| Waterproofing | Keeps your camera safe from rain and splashes when you shoot outdoors. |
| Accessibility | Water-resistant zippers let you reach your gear quickly, even in bad weather. |
You can pick features that fit your needs. If you hike or travel, waterproof fabric and padded straps make a big difference. If you shoot in the city, you might want a slim bag that fits under your jacket.
Sketch Your Camera Bag
Grab a pencil and paper. Start with simple shapes. Draw a rectangle or oval for the main body. Add lines for pockets or flaps. You do not need to make it perfect. Just get your ideas down.
Here are some easy ways to sketch your design:
- Begin with basic forms before adding details.
- Try different shapes and styles. Have fun with it!
- Keep doodling. You will come up with new ideas fast.
- Let your hand move freely. Random sketches can spark creativity.
- Use digital tools like the Concepts app if you want to sketch on a tablet.
You do not need to be an artist. Your sketch helps you see what your bag will look like. You can change things as you go.
Decide on Compartments
Compartments keep your gear organized. You can add as many as you need. Think about what you carry most often. Do you want a spot for your phone or memory cards? Maybe you need a safe place for your lens.
Front Pocket
A front pocket gives you quick access to small items. You can store your phone, keys, or cleaning cloths here. Make the pocket deep enough so things do not fall out. You can close it with a zipper, button, or Velcro.
Tip: If you use a stretchy fabric, your pocket can hold more without looking bulky.
Adjustable Dividers
Adjustable dividers help you separate your camera and lenses. You can use padded foam or thick felt. Attach the dividers with Velcro so you can move them around. This way, you can change the layout when you get new gear.
You can make dividers in different sizes. Some people like small sections for batteries. Others want big spaces for lenses. Try different setups until you find what works best for you.
Remember, your camera bag should fit your style and your gear. You get to choose every detail!
Select Closure Style
Picking the right closure style for your camera bag makes a big difference. You want your gear to stay safe, but you also want to open your bag quickly. You have a few options. Each one gives your bag a unique look and feel. Let’s check out two popular choices: curved flaps and buttons or zippers.
Curved Flap
A curved flap gives your camera bag a soft, stylish look. You see this design on messenger bags and satchels. The flap covers the top opening and folds over the front. You can make the curve gentle or bold. It’s up to you!
Why choose a curved flap?
- It keeps dust and rain out.
- You can open and close your bag fast.
- It looks modern and neat.
How do you make a curved flap?
- Draw the flap shape on paper. Make sure it’s wide enough to cover the opening.
- Cut your fabric and lining to match the pattern.
- Add padding if you want extra protection.
- Sew the flap to the back of your bag. Make sure the curve lines up with the front edge.
Tip: Use a fabric marker to trace your curve. If you want a perfect curve, try using a plate or bowl as a guide.
You can add a magnetic snap or Velcro under the flap. This keeps it closed when you walk or travel. If you want a classic look, sew a decorative button on top.
Button or Zipper
Buttons and zippers give your bag a secure closure. You can pick from many styles and colors. Each one has its own benefits.
Button Closure
- Easy to sew.
- Adds a vintage or playful touch.
- Works well for small pockets or flaps.
Zipper Closure
- Keeps your gear safe from spills.
- Opens and closes quickly.
- Works best for the main compartment.
Here’s a quick table to help you decide:
| Closure Type | Pros | Cons |
|---|---|---|
| Button | Simple, stylish | May open by accident |
| Zipper | Secure, fast access | Needs careful sewing |
How do you add a button or zipper?
- For buttons, sew a buttonhole on one side and attach the button on the other. Try Sam Brown buttons for a sturdy, classic look.
- For zippers, pin the zipper in place and sew along the edges. Use a zipper foot if you have a sewing machine. If you sew by hand, take your time and make small stitches.
Note: Test your closure before you finish the bag. Open and close it a few times. Make sure it feels smooth and secure.
You can mix and match closures. Try a curved flap with a hidden zipper underneath. Or use buttons on the pockets and a zipper for the main section. Your camera bag should fit your style and your needs. Have fun with it!
How to Make a Camera Bag: Step-by-Step
Cut Materials to Size
You have your design ready. Now, you need to cut your materials. This step sets the foundation for your project. Start by laying out your fabric, padding, and lining on a flat surface. Use your sketches and measurements as a guide.
- Measure each piece carefully. Double-check the size before you cut.
- Mark the outlines with chalk or a fabric pen. Make sure the lines are clear.
- Cut the main body, flap, pockets, and straps. Use sharp scissors or a rotary cutter for clean edges.
- Cut your padding and lining to match the shape of each section. Padding should fit inside the main body and compartments.
Tip: Always cut a little extra fabric for seams. This helps you sew pieces together without losing size.
If you want to know how to make a camera bag that fits your gear, measure your camera and lenses first. Add a few inches for padding and movement. You can use a ruler or measuring tape to keep things accurate.
Add Padding & Lining
Padding and lining protect your camera and make your bag feel soft inside. You want to keep your gear safe from bumps and scratches. Here’s how you add these layers:
- Lay the padding on the wrong side of your main fabric. Make sure it covers the area where your camera will sit.
- Pin or clip the padding in place. If you use foam, you can glue it down for extra security.
- Place the soft lining over the padding. This layer touches your camera and lenses.
- Sew the edges of the lining and padding to the main fabric. Use small stitches for a neat finish.
You can add extra padding to the bottom and sides. This gives your camera bag more protection. If you want to know how to make a camera bag that keeps your gear safe, don’t skip this step.
Note: Soft lining like fleece or microfiber works best. It prevents scratches and feels nice to touch.
Assemble Main Body
Now, you get to put everything together. This step brings your camera bag to life. You want your bag to be strong and organized. Follow these steps:
- Lay out the main body pieces with padding and lining attached.
- Sew the sides and bottom together. Use strong thread for durability.
- Attach the flap to the back edge. Make sure it lines up with the front.
- Add compartments for your camera, lenses, and accessories. Use padded dividers to keep things from moving around.
- Organize small items with Velcro straps or zip pouches. This keeps batteries and memory cards safe.
- Use lens pouches and dividers to prevent scratches and keep gear in place.
Here’s a quick table to help you remember what to include:
| Part | Purpose | How to Make It Durable |
|---|---|---|
| Main Body | Holds camera and gear | Use strong seams and padding |
| Compartments | Organize lenses and accessories | Add dividers and pouches |
| Straps | Carry the bag | Sew with reinforced stitching |
Tip: Distribute the weight evenly. This makes your camera bag comfortable to carry and keeps your gear stable.
If you want to know how to make a camera bag that lasts, focus on strong seams and good padding. Dedicated compartments help prevent damage. Organize your accessories so you can find them fast.
You just finished the main steps for how to make a camera bag. Your project is coming together. Next, you’ll add pockets, closures, and straps to finish your custom bag.
Attach Compartments & Pockets
You want your camera bag to keep everything organized. Adding compartments and pockets helps you find your gear fast. You can use padded dividers for your camera and lenses. These dividers protect your equipment and stop things from moving around.
Start by deciding where you want each pocket. Some people like a front pocket for small items. Others prefer side pockets for quick access. You can sew pockets inside or outside your camera bag. Use strong stitches so the pockets stay in place.
Here’s a simple way to attach compartments and pockets:
- Pin the pocket pieces to the main body of your camera bag.
- Sew along the edges. Make sure you leave the top open.
- For compartments, use padded dividers. Attach them with Velcro so you can move them around.
- Test each pocket. Put something inside to check the size.
Tip: Use stretchy fabric for pockets if you want them to hold more. Try adding a zipper or button to keep things secure.
You can add small pockets for batteries, memory cards, or cleaning cloths. Larger compartments work well for lenses and chargers. If you want to get creative, try making a hidden pocket for valuables.
Here’s a quick table to help you plan your pockets:
| Pocket Type | Best Use | How to Attach |
|---|---|---|
| Front Pocket | Phone, keys, cloths | Sew on outside |
| Side Pocket | Water bottle, lens cap | Sew on side seam |
| Inner Pocket | Memory cards, batteries | Sew inside lining |
| Divider | Camera, lenses | Velcro or sew inside |
Your camera bag will feel more useful with the right compartments. You can change the layout to fit your needs. Try different pocket styles until you find what works best.
Install Closures & Straps
Closures and straps keep your camera bag safe and easy to carry. You want to choose methods that feel secure and look good. There are many ways to install closures. Zippers, buttons, and Velcro all work well. You can use a curved flap with a magnetic snap for a modern look.
To install a zipper, pin it along the opening and sew with small stitches. For buttons, sew a buttonhole on one side and attach the button on the other. Velcro is easy to use and works for pockets or flaps.
Straps help you carry your camera bag comfortably. You can use webbing, old belts, or sturdy ribbon. Sew the straps to the sides of your bag. Reinforce the stitching so the straps hold up over time.
Here are some reliable methods for installing closures and straps:
- Try a DIY paracord wrist strap. Use a 27-inch piece of paracord to make a strong and simple wrist strap.
- Look for a Joby DSLR wrist strap. This strap tightens around your wrist if you drop your camera.
- Use adjustable shoulder straps for comfort. Sew them with reinforced stitching.
- Add a magnetic snap under the flap for quick access.
Note: Always test your closures and straps before you finish your camera bag. Pull on the straps and open the closures a few times. Make sure everything feels secure.
You can mix and match closures to fit your style. Try using a zipper for the main compartment and buttons for the pockets. Your camera bag should feel safe and easy to use every time you grab it.
Customize Your Camera Bag
You can make your camera bag stand out. You get to choose how it looks and feels. This is your chance to show your personality and creativity. Let’s look at some fun ways to customize your bag.
Use Recycled Materials
You can help the planet and save money by using recycled materials. Old jeans, jackets, or canvas tote bags work great for camera bags. You might find sturdy fabric in your closet or at a thrift store. When you use recycled materials, you do more than just create a cool bag.
- You keep materials out of landfills and reduce waste.
- You use less energy and water compared to making new fabric.
- You help conserve natural resources.
- You lower carbon emissions by choosing recycled options.
- You save valuable resources needed for new bag production.
You can cut up old clothes or bags and turn them into something new. Try mixing different textures and colors. You might discover that an old belt makes a strong strap or a shirt pocket becomes a handy compartment. Every recycled piece tells a story.
Tip: Look for fabric with interesting patterns or colors. You can mix and match for a unique look.
Add Decorative Elements
You can decorate your camera bag in many ways. Buttons, beads, and fabric paint add style and personality. You might want to sew on colorful ribbons or glue on patches. Some people use iron-on decals for a quick update.
Here are some ideas to get you started:
- Sew on bright buttons for a playful touch.
- Use fabric markers to draw shapes or write your name.
- Attach beads or charms to the zipper pulls.
- Glue on patches with fun designs or logos.
| Decorative Element | How to Use It | Style Effect |
|---|---|---|
| Buttons | Sew onto pockets | Playful, classic |
| Beads | String on zipper | Fun, boho |
| Fabric Paint | Draw or stencil | Artistic, bold |
| Ribbons | Sew along seams | Colorful, cute |
You can change the look of your bag anytime. Try new decorations as your style changes. Your camera bag can grow with you.
Personalize with Embroidery or Patches
Embroidery and patches make your camera bag truly yours. You can stitch your initials, favorite shapes, or even a camera icon. Embroidery adds texture and color. You don’t need fancy tools. A needle and thread work fine.
Patches are easy to use. You can sew or iron them on. Pick patches that show your hobbies, favorite places, or fun sayings. You might want to add a patch from a trip or a club you belong to.
Note: If you’re new to embroidery, start with simple designs. You can find easy tutorials online.
You can place embroidery or patches anywhere on your bag. Try the front flap, side pocket, or strap. Every stitch and patch makes your bag special. You get a camera bag that fits your gear and your personality.
Your camera bag is more than just storage. It’s a reflection of you. Have fun and make it your own!
Troubleshooting & Tips
Making your own camera bag can feel exciting, but you might run into a few bumps along the way. Don’t worry! You can fix most problems with a little patience and some simple tricks. Let’s look at common mistakes and how you can avoid them.
Common Mistakes
Uneven Seams
You might notice your seams look wavy or crooked. This happens when you rush or skip measuring. Uneven seams can make your bag look messy and weak.
- Always measure and mark your fabric before you sew.
- Use pins or clips to hold pieces together.
- Sew slowly and keep your stitches straight.
- If you see a mistake, stop and fix it right away.
Tip: Practice sewing on scrap fabric first. You’ll get better control and feel more confident.
Loose Fasteners
Loose fasteners can make your bag open by accident. You don’t want your camera to fall out! This problem usually comes from weak stitching or the wrong placement.
- Double-check where you want your fasteners before you attach them.
- Use strong thread and sew fasteners tightly.
- Test zippers, buttons, or Velcro several times.
- Reinforce the area with extra stitches if needed.
Note: If a fastener feels loose, remove it and try again. It’s better to fix it now than risk your gear later.
Beginner Tips
You want your camera bag to work well and feel comfortable. Here are three top tips to help you succeed:
- Comfort: Make sure your bag fits your body. Use padded straps and distribute the weight evenly. You’ll avoid sore shoulders during long shoots.
- Accessibility: Design your bag so you can reach your camera and lenses quickly. Use pockets and compartments that open easily. You’ll capture moments without fumbling.
- Organization: Plan the inside of your bag. Use dividers and pockets to keep everything in its place. You’ll find your gear fast and stay focused on your photography.
Remember, a well-designed bag makes your life easier. You’ll enjoy your shoots more when your gear is safe and easy to reach.
Video Tutorials & Patterns
Sometimes you need to see how things work. Video tutorials can show you each step, from cutting fabric to sewing seams. You’ll learn tricks that make your project easier.
- Search for beginner sewing videos on YouTube.
- Look for camera bag patterns on craft blogs or Pinterest.
- Watch how others add padding, pockets, and straps.
| Resource Type | Where to Find It | What You’ll Learn |
|---|---|---|
| Video Tutorials | YouTube, Skillshare | Step-by-step instructions |
| Printable Patterns | Craft blogs, Etsy | Templates for cutting |
| Community Forums | Reddit, Facebook groups | Tips from other makers |
If you get stuck, pause the video and try the step yourself. You can always rewind and watch again.
You’re not alone in this project. Many people share their ideas and patterns online. You can ask questions, get advice, and show off your finished bag. Have fun and keep learning!
Care & Maintenance
Taking care of your handmade camera bag keeps it looking great and working well. You want your bag to last a long time and protect your gear. Here’s how you can keep it clean, store it safely, and fix small problems at home.
Cleaning Tips
Your camera bag goes everywhere with you. It picks up dust, crumbs, and stains. You can keep it fresh with a few easy steps:
- Empty everything: Take out your camera, lenses, and all accessories. Check every pocket for small items or hidden dirt.
- Shake and brush: Go outside and give your bag a good shake. Use a soft brush or a handheld vacuum to clear out dust and crumbs from the inside.
- Spot clean: Mix a little mild soap with lukewarm water. Dip a soft cloth or sponge in the mix. Dab and gently rub any stains or dirty spots. Don’t soak the fabric.
- Clean the interior: Wipe the lining and padded dividers with the same mild solution. For fabric interiors, a lint roller works well to pick up loose particles.
- Dry properly: Let your bag air dry in a shaded, breezy spot. Keep it away from direct sunlight or heaters.
Avoid bleach, harsh detergents, or rough cleaners. Stick to mild soaps that are safe for your fabric. For nylon or polyester, gentle dish soap works well. If your bag has leather parts, use special leather cleaners and conditioners to keep them soft and shiny.
Keeping your bag clean helps it last longer. Clean fabric and conditioned leather prevent cracks and dryness. If you avoid too much moisture, you also stop mold and mildew from growing in the padding.
Storage Advice
You want your camera bag to keep its shape and stay ready for your next adventure. Here are some simple storage tips:
- Store your bag in a cool, dry place. Avoid damp basements or hot attics.
- Keep your bag out of direct sunlight. Sunlight can fade colors and weaken fabric.
- Stuff your bag with clean towels or bubble wrap when not in use. This helps it keep its shape.
- Leave zippers and pockets open a little. This lets air flow and stops musty smells.
- Hang your bag on a sturdy hook or place it on a shelf. Don’t pile heavy things on top.
Tip: If you store your bag for a long time, check it every few weeks. Make sure it stays dry and clean.
Minor Repairs
Small problems can pop up, but you can fix most of them at home. Here’s what you can do:
- Wipe the outside and vacuum the inside often. This keeps dirt from building up.
- Brush away dirt with a soft cloth. Use soapy water and clean warm water for a deeper clean.
- Clean the zippers with a dry brush. If they stick, rub a little candle wax along the teeth.
- Trim any loose threads with sharp scissors. This stops them from catching or unraveling.
- If a seam comes loose, sew it back with strong thread. For small holes, patch them with a piece of matching fabric.
| Problem | Quick Fix |
|---|---|
| Stuck zipper | Rub candle wax on zipper teeth |
| Loose thread | Trim with scissors |
| Small hole | Patch with matching fabric |
| Loose seam | Sew with strong thread |
Regular care and quick fixes keep your camera bag looking new and working well. You’ll feel proud every time you use it!
Conclusion
You just learned how to make your own camera bag from start to finish. Anyone can do it with a little patience and creativity. When you design the perfect diy camera bag, you get something that fits your style and keeps your gear safe. Custom bags offer great benefits:
- You can pick high-quality, eco-friendly materials.
- Your bag lasts longer because of better craftsmanship.
- You get features that match your needs.
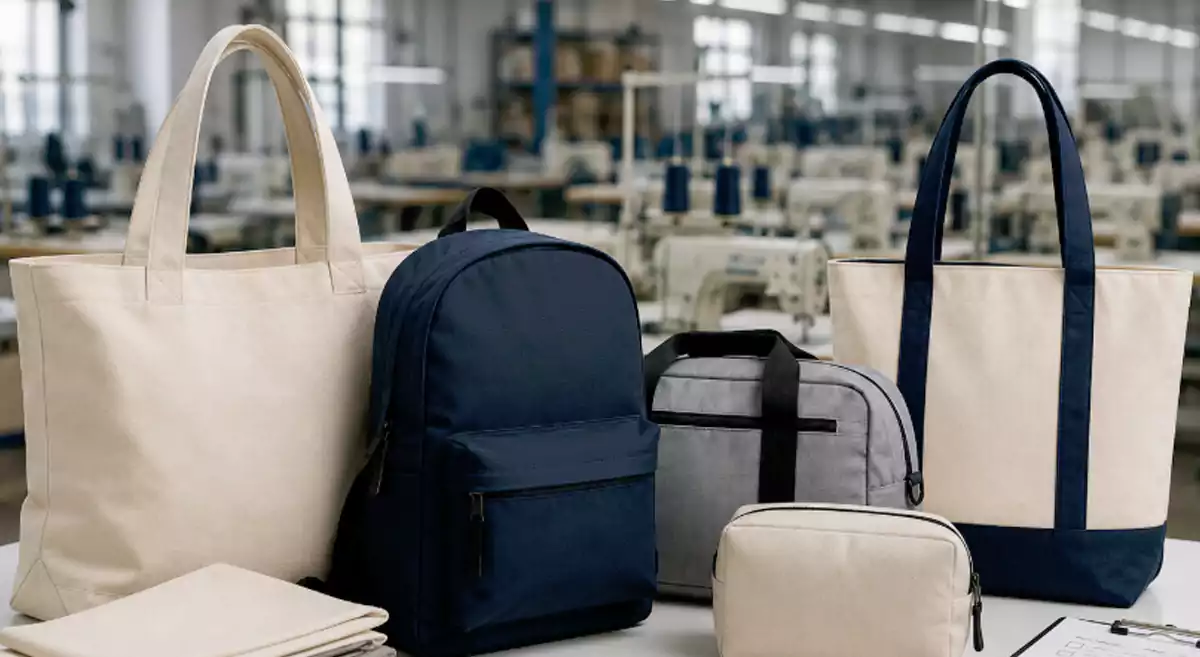
Try making your own bag and enjoy the process! And if you ever need a professional touch, INITI is a dedicated bag manufacturer offering full custom production with OEM/ODM support. We can design and manufacture bags to your exact specifications—materials, structure, size, and branding—perfect for brands, retailers, and businesses.
FAQ
How long does it take to make a camera bag?
You can finish a simple camera bag in one afternoon. If you add lots of pockets or decorations, you might need a weekend. Take your time and enjoy the process!
Can I make a camera bag without a sewing machine?
Yes, you can sew your bag by hand. Use a strong needle and thick thread. Hand sewing works best for small projects or simple designs.
What fabric should I use for a waterproof camera bag?
Pick nylon or canvas with a waterproof coating. You can also use a spray-on fabric protector. Waterproof fabric keeps your gear safe from rain.
How do I add extra padding for my camera?
Cut foam or felt to fit your bag’s inside. Place it between the outer fabric and the lining. You can glue or sew the padding in place for more protection.
Is it possible to make adjustable dividers?
You can make adjustable dividers with foam and Velcro. Attach Velcro strips to the inside of your bag and to the dividers. Move them around to fit your gear.
What if I make a mistake while sewing?
Don’t worry! You can use a seam ripper to remove stitches. Try again and sew slowly. Mistakes help you learn and improve your skills.
Can I wash my homemade camera bag?
Most fabric bags can be spot cleaned with mild soap and water. Avoid soaking the bag. Air dry it in a cool place. Check care instructions for special fabrics.
Where can I find patterns or tutorials?
You can search YouTube, Pinterest, or craft blogs for free patterns and video guides. Many makers share step-by-step instructions and tips online.