Ever had your favorite canvas bag soaked by a sudden rainstorm? You can stop worrying about wet books and ruined gadgets. Yes, you can waterproof a canvas bag at home with simple tricks. If you want protection, durability, and a way to save money, you’re in the right place. Even if you’re new to DIY projects, learning how to make a canvas bag waterproof feels easy and affordable. You get to pick the method that fits your needs best!
Tip: Waterproofing your canvas bag helps keep your stuff safe, even on rainy days.
Key Takeaways
- Making your canvas bag waterproof keeps your things dry. It helps protect electronics and papers from rain and spills.
- A waterproof bag lasts longer. It does not get ruined by bad weather or stains. This helps you save money over time.
- Pick a waterproofing method that works for you. Sprays are easy to use. Waxing makes the bag strong. Seam sealers give extra protection.
- Always clean and dry your bag first. This helps the waterproofing work better.
- Check your bag often to see if it still keeps water out. Put on more waterproofing every few months, depending on how much you use it.
- You can make your own waterproofing with homemade wax. This is good for the environment. You can choose what goes in it.
- Do not wash your waterproofed bag in a machine. Clean spots with gentle soap and water. This keeps the waterproof layer safe.
- Change how you waterproof your bag based on how you use it. This helps your bag stay protected and look the way you want.
Why Waterproof Canvas Bags
Protecting Your Stuff
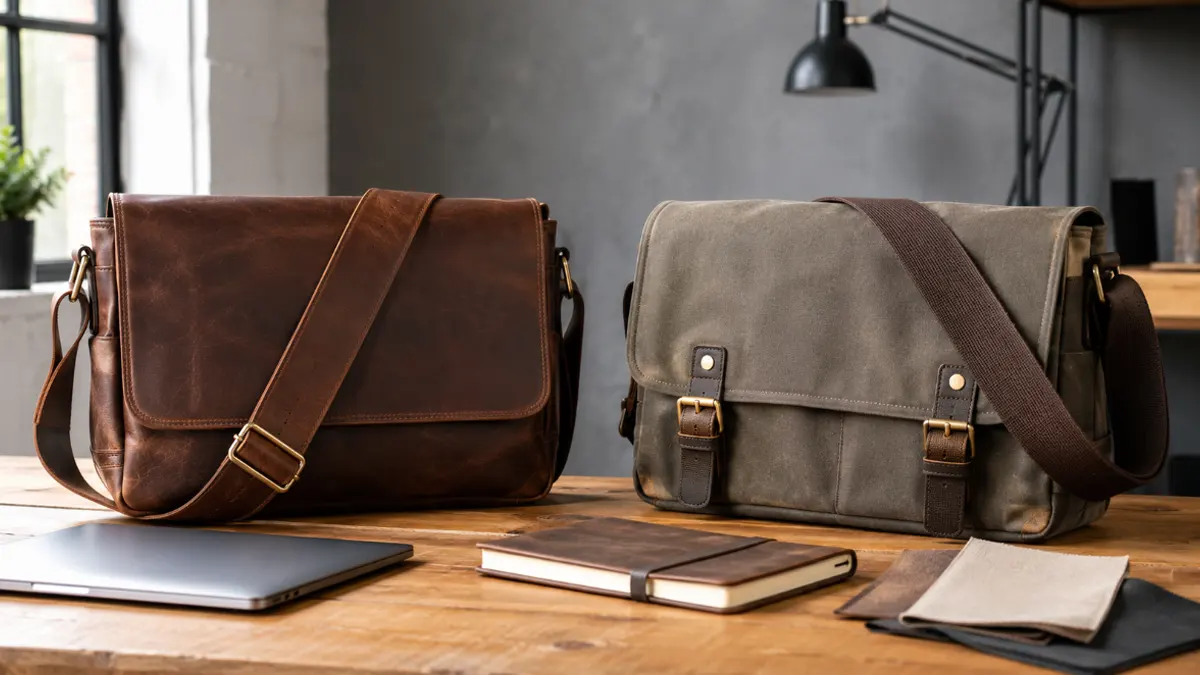
You never know when the weather will turn. One minute, the sky is clear. The next, you are caught in a downpour. If you use a canvas bag, you want to keep your things safe. Waterproofing for canvas material gives you peace of mind. Your electronics, books, and clothes stay dry, even if you get stuck in the rain.
Here are some reasons people choose to waterproof their canvas bags:
- Waterproof canvas bags handle harsh weather.
- They protect valuables like phones and laptops from rain and spills.
- You can use them for all-weather adventures and keep your stuff dry.
- They are easier to clean and maintain than regular canvas bags.
Let’s look at what happens when you use waterproofing for canvas material compared to when you skip it:
| Benefits of Waterproofing | Consequences of Not Waterproofing |
|---|---|
| Protects electronics | Damaged devices |
| Keeps clothes dry | Soggy, uncomfortable wear |
| Preserves documents | Ruined paperwork |
| Extends bag lifespan | Premature wear and tear |
You can see how much protection you get just by adding a waterproof layer. No one wants to open their bag and find a soaked tablet or ruined homework.
Extending Bag Life
Waterproofing for canvas material does more than just keep water out. It helps your bag last longer. When you add a waterproof coating, you create a shield. This shield keeps your bag sturdy and ready for anything. Rain, mud, and spills cannot break down the fabric as quickly.
A waterproofed canvas bag also resists stains. Your bag keeps its clean look, even after many uses. You do not have to worry about ugly marks or fading colors. The waterproof layer helps your bag stay strong and look good for years.
Saving Money
When you use waterproofing for canvas material, you save money in the long run. You do not need to buy a new bag every time yours gets ruined by water. Your bag stays in good shape, so you spend less on repairs or replacements.
Think about it. A small investment in waterproofing can protect your bag and everything inside. You avoid the cost of replacing electronics, clothes, or important papers. You also save time because waterproof bags are easier to clean and maintain.
Tip: Waterproofing your canvas bag is a smart way to protect your stuff, make your bag last longer, and keep more money in your pocket.
How to Make a Canvas Bag Waterproof
So, you want to know how to make a canvas bag waterproof? You have a few great options. Before you start, you need to get your bag ready. Prepping the canvas is the first step to making sure your waterproofing techniques work well.
Prep the Canvas
Cleaning and Drying
You should always start with a clean bag. Dirt and grime can stop the waterproofing solution from sticking to the fabric. Here’s how to prep your canvas bag:
- Shake out your bag to remove loose dirt or crumbs.
- Use a soft brush or cloth to wipe away dust.
- Wash the bag with mild soap and water if it’s very dirty. Rinse well.
- Let the bag dry completely. Damp fabric will not hold the waterproof layer.
Tip: If you plan to use wax, warm it up a little before you start. Soft wax spreads more easily and gives a smoother finish.
Choosing a Method
Now, let’s look at how to make a canvas bag waterproof. You can pick from several methods. Each one has its own pros and cons. Here are the most popular ways people waterproof their canvas bags at home:
- Use a commercial waterproof spray and seam sealer. Spray two coats for the best results.
- Try the wax method. Mix paraffin and beeswax, then rub it into the fabric. Make sure you cover every spot. Reapply once a year for lasting protection.
- Soak your bag in a detergent solution, then in an alum powder solution. This old-school trick gives your bag a water-resistant finish.
Waxing vs. Sprays vs. Sealers
You might wonder which method is best for you. Check out this table to compare the main options for how to make a canvas bag waterproof:
| Treatment Type | Effectiveness | Advantages | Limitations |
|---|---|---|---|
| Waxing | High water resistance, can approach full waterproofing | Excellent durability, good for natural fibers | Impedes breathability, adds weight and stiffness |
| Sprays (DWR) | Good water resistance, not fully waterproof | Preserves fabric breathability, minimal alteration to fabric | Moderate durability, requires reapplication |
| Sealers | High effectiveness for complete waterproofing | Forms a continuous barrier | May reduce fabric breathability significantly |
Waxing gives you the strongest waterproof barrier. It works well if you want your bag to handle heavy rain. Sprays are easy to use and keep your bag light. Sealers create a strong shield but can make the fabric less breathable.
Note: Think about how you use your bag. If you want a tough, waterproof bag for outdoor trips, waxing or sealers might be best. For everyday use, sprays can give you enough protection without changing how your bag feels.
No matter which method you choose, you now know how to make a canvas bag waterproof. Pick the waterproofing solution that fits your needs and enjoy a bag that stands up to the weather!
Materials Needed
Before you start waterproofing your canvas bag, you need to gather the right supplies. The materials you choose depend on the method you want to use. Let’s break down what you’ll need for each approach.
For Waxing
Waxing gives your canvas bag a tough, water-resistant finish. You can use different types of wax and a few simple tools.
Types of Wax (Beeswax, Paraffin, Blends)
You have a few options when it comes to wax. Each type has its own strengths:
- Paraffin wax is affordable and clear. It comes from petroleum, so it’s not the most eco-friendly. Some food-safe versions use vegetable oils.
- Beeswax is natural and has a pleasant scent. It feels hard and crumbly, and it costs a bit more. Beeswax alone does not always give the best results, but it works well in blends.
- Microcrystalline wax is soft, flexible, and very water-repellent. It’s a petroleum byproduct and less common than paraffin or beeswax.
Many people like to mix paraffin wax and beeswax for a balance of durability and natural feel. You can also find ready-made waterproofing gear wax blends in stores.
Tools (Brush, Cloth, Oven, Hair Dryer)
You don’t need fancy equipment to wax your bag. Here’s a quick checklist:
- Clean, dry canvas bag
- Wax block or blend
- Old towel or drop cloth to protect your workspace
- Stiff brush or clean cloth for applying wax
- Hair dryer or heat gun to melt and set the wax
- Oven (optional, for an even finish)
- Gloves to keep your hands clean
Tip: Always test your wax on a small, hidden area first. This helps you see how the fabric will look and feel.
For Sprays and Sealers
If you want a quick and easy way to waterproof your bag, sprays and sealers are a great choice. These waterproofing products work well for everyday use.
Waterproofing Sprays (e.g., Scotchgard, Starbrite)
You can find many waterproofing sprays at outdoor or hardware stores. Popular brands include Scotchgard and Starbrite. These sprays add a water-repellent layer to your bag without changing how it feels. Just spray, let it dry, and you’re ready to go.
- Choose a spray made for fabric or canvas.
- Make sure your bag is clean and dry before spraying.
- Apply in a well-ventilated area.
Seam Sealers
Seam sealers help block water from sneaking in through the stitching. You can use them with sprays or on their own for extra protection.
- Look for seam sealers made for tents or outdoor gear.
- Use a small brush or applicator to cover all seams and stitches.
Note: Seam sealing is especially helpful if you carry electronics or want to use your bag in heavy rain.
Make Your Own Waterproofing Gear Wax
Want to make your own waterproofing gear wax at home? You can create a diy wax recipe with simple, non-toxic ingredients. This is a great way to control what goes on your bag and avoid harsh chemicals.
DIY Non-Toxic Options
You can mix your own waterproofing gear wax using beeswax and other natural ingredients. Here’s a basic recipe:
- 9 parts paraffin wax (effective, but not the most eco-friendly)
- 1 part beeswax
If you want a more natural blend, try this diy wax recipe:
| Ingredient | Purpose | Approx. Quantity |
|---|---|---|
| Beeswax | Main waterproofing and stiffening agent | 1 part |
| Carnauba Wax (optional) | Adds hardness, sheen, and durability | ¼ part |
| Boiled Linseed Oil | Softens wax, improves spreadability | ½ part |
| Coconut or Jojoba Oil | Adds flexibility and nourishment | ¼ part |
| Cedarwood Essential Oil | Neutralizes odor, adds a warm scent (optional) | 10–15 drops per 250 ml |
- Beeswax gives your wax its main waterproofing power.
- Carnauba wax makes the finish harder and shinier.
- Boiled linseed oil helps the wax spread smoothly.
- Coconut or jojoba oil keeps the wax flexible.
- Cedarwood essential oil covers up strong smells and adds a nice scent.
Tip: Melt your ingredients together in a double boiler. Pour the finished wax into a tin for easy storage.
Now you know what you need to make your own waterproofing gear wax. Whether you use beeswax, paraffin, or a blend, you can create a custom solution that fits your needs. Making your own waterproofing gear wax is a fun project and gives you control over the ingredients.
How to Wax Canvas
Learning how to wax canvas can turn your regular bag into a water-resistant powerhouse. You get to choose between two main methods: the rub-on method and the brush-on method. Both work well, but each has its own steps and tricks. Let’s walk through each one so you can decide which fits your style.
Wax Rub-On Method
This classic method works great if you want a hands-on approach. You’ll need a block of beeswax or a wax blend. Here’s how to wax canvas using the rub-on method:
Applying and Melting Wax
- Start by prepping your wax. If it’s warm outside, you can use the beeswax right away. In colder weather, warm the beeswax bar in the sun to make it softer.
- Rub the beeswax onto the canvas using big, even strokes. Make sure you cover every part, especially the corners and seams. Use your fingers to work beeswax into hard-to-reach spots.
- Once you finish applying, grab a hair dryer. Heat the surface of the bag. This step helps the beeswax melt and sink into the fabric, creating a strong barrier.
- Hang your bag in a warm, dry place for a day or two. This lets the wax set. If you see extra wax, use a cloth or heat gun to smooth it out.
Tip: Always test a small area first. Beeswax can darken the fabric a bit, so check if you like the look.
Oven Method for Even Finish
Want a super smooth finish? Try the oven method. After you rub on the beeswax, place your bag on a baking sheet lined with foil. Set your oven to a low temperature (about 150°F). Heat the bag for a few minutes. The beeswax will melt and spread evenly. Take the bag out and let it cool. This step gives your wax coating a professional look.
Wax Brush-On Method
If you like a more controlled approach, the brush-on method might be your pick. This method lets you mix your own beeswax blend and brush it on for even coverage.
Mixing and Brushing Wax
Melt your beeswax in a double boiler. You can add a little paraffin or oil to make the mix softer. Once melted, dip a brush into the wax and paint it onto the canvas. Use circular motions and focus on seams. This step makes sure every inch gets covered.
Heat Setting
After brushing on the beeswax, use a hair dryer to heat the bag. The wax will soak into the fabric. Let the bag dry overnight in a warm spot. If you want a thicker wax coating, repeat the waxing process.
Tips for Waxed Canvas Bags
You want your bag to last, so take care of it. Here are some easy tips:
- Brush off dirt and dust often.
- Use a damp rag or soft brush to clean. Spot-clean with cold water and mild soap if needed.
- Never put your bag in the washing machine or take it to the dry cleaner.
- Store your bag in a cool, dry place away from sunlight.
- If you clean a spot, reapply beeswax to keep the waterproof layer strong.
- Hang your bag to dry after cleaning.
Note: Handle your bag with care. A little attention keeps your waxed canvas looking sharp and working hard.
Now you know how to wax canvas using both the rub-on and brush-on methods. Beeswax gives your bag a natural, water-resistant shield. With the right care, your bag will handle rain, mud, and daily adventures with ease.
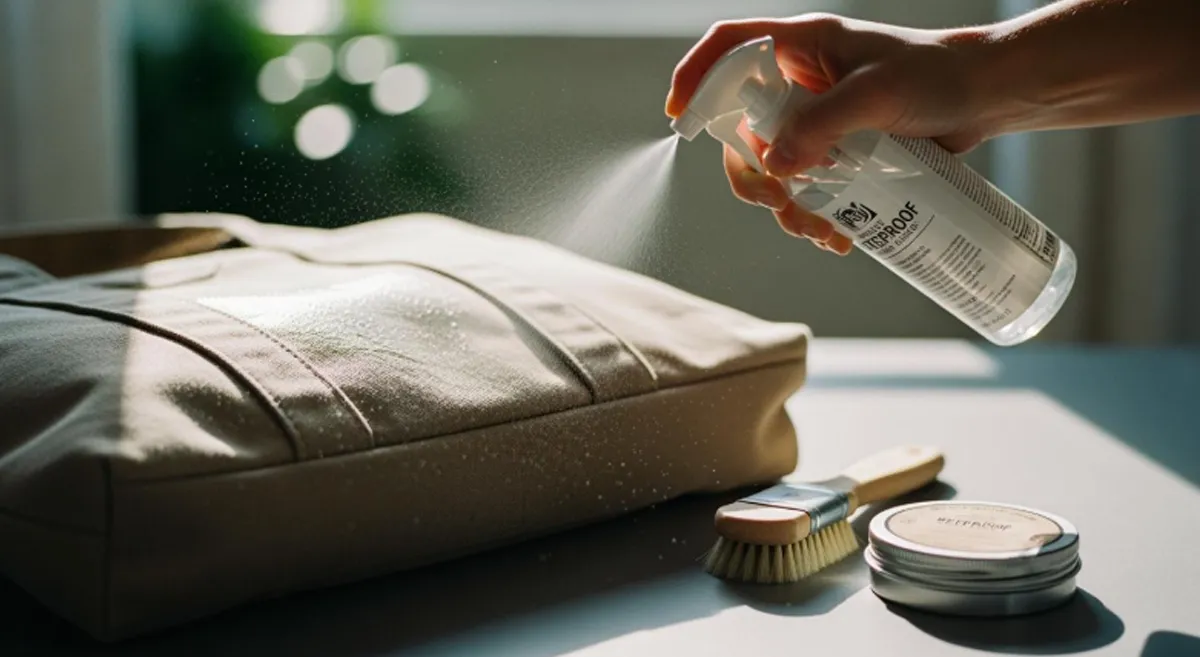
Using Waterproofing Sprays
Waterproofing sprays make it easy to protect your canvas bag from rain and spills. You do not need special skills or tools. You just need a good waterproofing spray and a little time. Let’s walk through the steps so you can get the best results.
Spray Application Steps
Prepping and Spraying Evenly
Start by cleaning your bag. Wipe away dust and dirt. If your bag is very dirty, wash it and let it dry completely. Lay down newspaper or a drop cloth to protect your work area. Now you are ready to spray.
Follow these steps for even coverage:
- Shake the can well to mix the ingredients.
- Hold the can upright, about 6 to 8 inches from the bag.
- Spray in smooth, overlapping strokes. Move your hand steadily for even coverage.
- Focus on seams, zippers, and corners. These spots let water in the most.
- Do not soak the fabric. Apply two light coats instead of one heavy coat.
Tip: Always spray in a well-ventilated area. Outdoors is best.
Drying and Reapplying
After spraying, let your bag air dry in a cool, shaded place. Do not use direct heat or sunlight. Wait until the first coat dries before adding the second. Check for missed spots and spray again if needed. Two light coats work better than one thick coat. This helps the waterproofing spray stick and last longer.
Seam Sealing Tips
Seams are weak spots where water can sneak in. You can use a seam sealer for extra protection. Dab or brush the sealer along all the stitched lines. Make sure you cover every tiny hole. Let the sealer dry fully before you use your bag.
- Seam sealers block water from leaking through stitching holes.
- Even coverage and enough drying time make the seal stronger.
- Seam sealing boosts water resistance, but zippers and openings may still let in some water.
Note: Seam sealing is a smart step if you carry electronics or want to use your bag in heavy rain.
Product Recommendations
You have many waterproofing sprays to choose from. Some work better for canvas bags than others. Here is a quick guide to top-rated products:
| Product Name | Best Use Case | Weight | Price | Description |
|---|---|---|---|---|
| Scotchgard Heavy Duty Water Shield | All outdoor gear | 10.5 fl oz | $13 | Works on canvas, nylon, and leather. Easy to use, but not eco-friendly. |
| Gear Aid: Revivex Instant Water Repellent | GORE-TEX and special fabrics | 10.5 fl oz | $18 | Restores high-end fabrics. Eco-friendly formula. |
| Sof Sole Silicone Waterproofer Spray | Non-specialized fabrics | 12 fl oz | $12 | Long-lasting, but not for GORE-TEX. |
| Atsko Silicone Water Guard | All outdoor gear | 10.5 fl oz | $12 | Budget-friendly, dries clear, and odorless. |
| Kiwi Camp Dry Heavy Duty | All outdoor gear | 10.5 fl oz | $11 | Versatile, but drying takes time. |
| Nikwax: TX.Direct Tent & Gear SolarProof | All outdoor gear | 10 fl oz | $15 | Easy to apply, keeps breathability, eco-friendly. |
| Grangers: Performance Repel, Wash & Repel Down 2-in-1 | High-end gear | 10 fl oz | $16 | Revives down gear, eco-friendly, safe for GORE-TEX. |
Pick a waterproofing spray that matches your needs and your bag’s fabric. Always read the label before you start. With the right spray, you can keep your canvas bag dry and ready for any adventure.
Care for Waxed Canvas Bags
Testing Waterproofing
You want to make sure your waxed canvas bags keep water out. Testing is easy and helps you spot when your bag needs a new coat of wax. Here’s what you can do:
- Watch how water acts on the surface. If you see water bead up and roll off, your bag is still protected.
- If water starts to flatten or soak into the fabric, it’s time to reapply wax.
- Check your bag every few months, especially if you use it a lot or rely on a spray finish.
Tip: Regular checks help you catch problems before your stuff gets wet.
Cleaning and Maintenance
Keeping waxed canvas bags clean helps them last longer and keeps the waterproof layer strong. You don’t need fancy cleaners or harsh chemicals. Just follow these steps:
- Brush off dried mud or dirt with a soft brush or damp rag.
- Wipe the outside with cold water and a sponge. This removes most stains and keeps the wax smooth.
- For tough spots, use a little mild soap. Test it on a hidden area first to make sure it doesn’t change the color.
- Rinse the soap off and let your bag dry in a warm place.
- If the wax coating looks thin, soften some wax in hot water and rub it onto the bag in circles.
- Use a hair dryer to help the wax set evenly.
- Hang your bag overnight so it dries completely.
Note: Never put waxed canvas bags in the washing machine. Machine washing can strip off the wax and ruin the waterproofing.
Reapplying Treatments
Wax wears down over time, especially if you use your bag every day. You need to reapply wax to keep your waxed canvas bags working their best. Here’s a simple guide:
- For heavy use, add a new layer of wax every 3 to 6 months.
- For moderate use, reapply wax every 6 to 12 months.
- If you only use your bag sometimes, waxing once every 12 to 18 months is enough.
You can use a solid wax bar or a spray treatment. After you apply wax, use heat to help it soak in. Always follow the instructions on your wax product for the best results.
| Usage Level | How Often to Reapply Wax |
|---|---|
| Heavy (daily) | Every 3–6 months |
| Moderate | Every 6–12 months |
| Occasional | Every 12–18 months |
Callout: Keeping up with waxing means your waxed canvas bags will stay tough and ready for any weather.
Troubleshooting
You might run into a few problems when you try to waterproof your canvas bag. Don’t worry—most issues have easy fixes. If you want your waxed canvas bags to stay tough and keep your stuff dry, you need to know what can go wrong and how to solve it.
Here are some common problems and what you can do about them:
- Untreated Canvas Gets Damaged
Natural canvas doesn’t have any protection. Rain, mud, and even humidity can cause mold or mildew. If you notice your bag smelling musty or looking stained, it probably needs more waterproofing. You should apply an extra layer of waterproof treatment. This helps block moisture and keeps your waxed canvas bags fresh and strong. - Dirt and Grime Stop Waterproofing from Working
If your bag looks dirty, the waterproofing won’t stick well. You might see water soaking in instead of rolling off. Always clean your bag before you add any waterproofing. Use a soft brush or a damp cloth to wipe away dust and dirt. For tough spots, a little mild soap works wonders. Clean canvas helps waxed canvas bags repel water better. - Wrong Waterproofing Method
Sometimes, you pick a method that doesn’t fit your needs. Maybe you use a spray, but you want heavy-duty protection. Or you try wax, but you don’t like how it changes the color. Wax gives you strong, long-lasting protection, but it can make your bag darker and stiffer. Sprays are easier to use, but you need to reapply them more often. Think about how you use your bag. If you take your waxed canvas bags camping or hiking, wax might be best. For school or work, a spray could be enough. - Water Sneaks in Through Seams and Zippers
Even if the fabric is waterproof, water can still get in through seams and zippers. You might notice wet spots near the stitching or around the zipper. To fix this, seal all seams and zippers with a special sealer or a bit of wax. Pay extra attention to these areas when you treat your bag. This step helps your waxed canvas bags stay dry, even in heavy rain.
Tip: If you ever see water soaking in or your bag feels damp inside, check the seams and corners first. These spots usually need a little extra care.
Troubleshooting keeps your bag working like new. When you know what to look for, you can fix problems fast and keep your waxed canvas bags ready for any adventure.
Custom Canvas Bag Services
About Our Manufacturing
You want a canvas bag that stands out and lasts. Our manufacturing team uses strong, waterproof materials like PVC-coated tarpaulin and recycled RPET. These fabrics keep your bag dry, even during water-based activities. We also offer unique coating treatments that boost water resistance and add stain protection. Your bag will look great and stay clean, no matter where you take it.
We know you care about getting your order on time. That’s why we provide a one-stop delivery service. You can count on us to handle your order from start to finish. We make sure your custom bags arrive when you need them.
Here’s a quick look at what we offer:
| Service Type | Description |
|---|---|
| Waterproof Materials | PVC-coated tarpaulin or RPET for durability and water resistance |
| Custom Designs | Pantone colors, unique sizes, and special features for your business or event |
| Delivery Service | Fast, reliable delivery so you get your bags on schedule |
Tip: You can trust our team to create bags that match your vision and hold up in any weather.
Customization Options
You get to design your canvas bag just the way you want. We offer many ways to personalize your bag, from the look to the features. Want your logo on the front? You can choose screen printing, digital printing, embroidery, or heat transfer. Need a special color or size? We can match Pantone colors and adjust the bag’s shape or handle length.
Here are some popular options you can pick:
- Add extra pockets, zippers, or special closures for more storage.
- Choose custom colors and sizes to fit your needs.
- Select from different waterproofing methods, like sprays or waxing, for the finish you want.
- Request stain-resistant coatings for easy cleaning.
You can also pick how your bag gets waterproofed. Sprays work fast and keep the canvas looking natural. Waxing gives your bag a classic, weathered look and strong water resistance.
Note: If you want a bag that’s both stylish and practical, our customization options make it easy.
How to Order
Ordering your custom waterproof canvas bag is simple. You work with us every step of the way to make sure you get exactly what you want. Here’s how the process works:
| Step | What Happens |
|---|---|
| 1 | You share your design ideas and bag needs with our team. |
| 2 | We show you our past work and answer your questions about our experience. |
| 3 | We talk about the minimum order quantity (usually 100 bags) and pricing. |
| 4 | You get a sample to check the quality and design before we make more. |
| 5 | We check quality during production to make sure every bag meets your standards. |
- Most orders take 1–2 weeks to produce after you approve the sample.
- You can always ask for changes before we start full production.
- We keep you updated, so you know when to expect your bags.
Callout: You get a smooth, worry-free experience from your first idea to the final delivery.
Conclusion
You have lots of ways to waterproof your canvas bag. Here’s a quick look:
| Waterproofing Method | Benefits |
|---|---|
| Spray-on waterproofing | Easy, light protection |
| Wax treatments | Strong, long-lasting barrier |
| Silicone-based products | Keeps fabric soft, repels water |
| Waterproof liners | Extra inside protection |
| DIY methods | Cheap, eco-friendly |
Keep your bag in top shape:
- Wipe it with a damp cloth often.
- Add more waterproofing every few months.
- Spot clean instead of machine washing.
Try what works best for your canvas bag! And if you have questions or want something built exactly to your needs, we’re a professional bag manufacturer offering full custom services.
We customize materials, waterproof coatings, linings, stitching, sizes, pockets, logos—plus full OEM/ODM bag development for canvas bags, tote bags, backpacks, sports bags, and more.
If you need a bag with built-in waterproofing, special fabrics, or your own brand elements, just let us know—we can make it for you from scratch.
FAQ
Can I wash my waterproofed canvas bag in a washing machine?
No, you should not use a washing machine. Hand wash your bag with cold water and mild soap. Machine washing can remove the waterproof layer and damage the fabric.
How often do I need to reapply waterproofing?
You should check your bag every few months. If you use it daily, reapply wax or spray every 3–6 months. Occasional use means you can wait up to 18 months.
Will waxing change the color or feel of my canvas bag?
Yes, waxing can make your bag look darker and feel stiffer. Test a small area first to see if you like the result. Sprays keep the original look better.
Is waterproofing spray safe for all canvas bags?
Most sprays work well on canvas. Always read the label and test on a hidden spot. Some sprays may not suit colored or printed fabrics.
Can I waterproof a bag with leather handles or trim?
Yes, but avoid getting wax or spray on leather parts. Use a cloth to cover leather while you treat the canvas. Leather needs its own care products.
What should I do if water still leaks through seams?
Apply seam sealer or extra wax to the stitched areas. Seams are common weak spots. Make sure you cover every stitch for the best protection.
Are DIY waterproofing methods as good as store-bought products?
DIY methods work well for basic protection. Store-bought products often last longer and give stronger water resistance. Choose what fits your needs and budget.
Can I use waterproofing methods on colored canvas bags?
Yes, you can waterproof colored canvas. Wax may darken colors. Sprays usually keep colors bright. Always test first to avoid surprises.