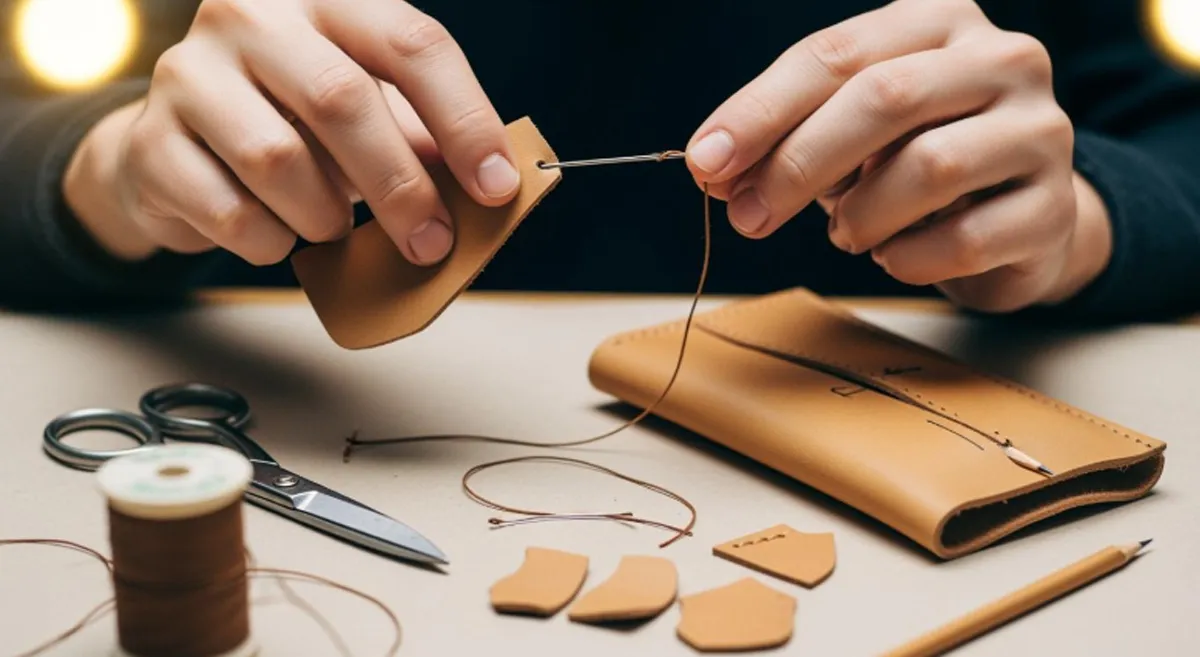
Ever wondered how to make a leather pouch with your own hands? You can start this project even if you have never worked with leather before. Most beginners finish their first pouch in about 8 to 12 hours, so you do not need to rush. You will discover how satisfying it feels to create something useful and unique from scratch. Grab your supplies and get ready for a fun, hands-on experience!
Key Takeaways
- Gather basic materials and tools from local craft stores or online. You don’t need to spend a lot to start your leather pouch project.
- Choose the right type of leather based on your pouch’s purpose. Sheep and goat leather are great for beginners due to their softness and durability.
- Create a template before cutting leather. This helps avoid mistakes and ensures your pouch turns out as planned.
- Mark stitch lines carefully to keep your sewing straight and even. Use a stitching groover for best results.
- Punch holes evenly for sewing. This makes the process easier and helps your pouch look professional.
- Consider both hand stitching and no-sew methods. Each has its benefits, so choose what fits your style.
- Add closures and personal touches to make your pouch unique. Options include drawstrings, snaps, and decorative elements.
- Take care of your leather pouch by cleaning, conditioning, and storing it properly. This helps it last for years.
Materials and Tools
Before you start making your leather pouch, you need to gather the right materials and tools. You do not have to spend a lot of money or buy fancy equipment. Most beginners can find everything they need at a local craft store or online. If you have trouble finding materials and tools, check out beginner kits or ask for help at your local leather supply shop.
Leather Types
Choosing the right leather makes a big difference in your project. Each type has its own feel, look, and durability. Here’s a quick guide to help you pick:
| Leather Type | Characteristics | Ideal Use |
|---|---|---|
| Sheep leather | Soft, light, and flexible; includes Nappa (finest, smooth) and Suede (rough, matte) | Small or delicate bags |
| Goat leather | Resistant, elastic, and durable; grainy texture with rustic appearance | Large or robust bags |
| Porcine leather | Thick, hard, and heavy; rough texture with large pores | Not commonly used for bags |
| Exotic leather | Distinctive scales or marks; luxurious appearance | High-end or limited edition bags |
Choosing Leather
You want to choose leather that matches your pouch’s purpose. For a soft, flexible pouch, sheep or goat leather works well. If you want something that lasts a long time, full-grain cowhide is the most durable. Top-grain leather gives you a smooth look and is still strong. Sheepskin feels soft but does not last as long as cowhide. Exotic leathers look fancy but cost more. Synthetic leather is easy to clean but does not last as long as real leather.
Tip: If you care about the environment, look for sustainable leather. Farms that use eco-friendly methods help reduce waste and protect animals.
Essential Tools
You do not need a lot of tools to get started. Here are the basics:
- Cutting mat: Protects your table and keeps your blade sharp.
- Utility knife or rotary cutter: Cuts leather cleanly.
- Ruler: Helps you measure and cut straight lines.
- Stitching chisels or punches: Makes holes for stitching.
- Saddlers needles: Used for hand stitching.
- Waxed thread: Strong and smooth for sewing leather.
- Edge tools: Smooth and finish the edges.
Cutting Tools
A sharp utility knife or rotary cutter helps you cut leather pieces with clean edges. Always use a cutting mat to keep your workspace safe.
Stitching Supplies
You need stitching chisels or punches to make even holes. Saddlers needles and waxed thread help you sew the pouch together. A stitching pony can hold your leather steady, but you can sew by hand if you do not have one.
Optional Items
You can add extra touches to make your pouch unique.
Decorative Elements
Try using stamps, rivets, or snaps to add style. You can also use colored thread or paint for a personal touch.
Edge Finishers
Edge tools, edge paint, or wax help you smooth and seal the edges. This makes your pouch look neat and last longer.
Note: Most basic tools cost between $10 and $45. You can start small and add more as you learn.
Now you have everything you need to start your leather pouch project!
How to Make a Leather Pouch: Instructions
Making your own pouch is easier when you follow clear instructions. This tutorial will walk you through each step, from drawing your pattern to marking where you will sew. You will learn techniques that help you get professional results, even if you are new to leatherwork.
Create a Template
Before you cut any leather, you need a template. This step helps you avoid mistakes and makes sure your pouch turns out just right.
Sketching Shape
Start by sketching the shape of your pouch on tracing paper. Use a pencil and a ruler to draw straight lines and smooth curves. Think about the size you want. Do you need a small pouch for coins or a bigger one for tools? Once you have your design, cut out the paper template.
Tip: Test your template by folding it into shape. This helps you see if the pouch will close properly and if the size feels right in your hand.
Transferring to Leather
Now, place your paper template on the back side of your leather. Use a scratch awl to trace around the edges. This tool makes a light mark that is easy to see but does not damage the leather. Hold the template steady so it does not slip. When you finish tracing, double-check that all lines are clear.
Cut Leather Pieces
With your lines marked, it is time to cut the leather. Lay your leather flat on a cutting mat. Use a sharp utility knife or rotary cutter for clean, straight cuts. Follow the lines you traced. Take your time—rushing can lead to uneven edges.
Clean Edges
After you cut out your pieces, check the edges. If you see any rough spots, use an edge tool or fine sandpaper to smooth them out. Clean edges make your pouch look neat and help with sewing later.
Mark Stitch Lines
Marking stitch lines is an important part of this tutorial. These lines show you where to sew and help keep your stitches straight and even.
Using a Groover
A stitching groover is a handy tool for marking where your stitches will go. Set the groover to the distance you want from the edge—usually about 1/8 inch. Run the groover along the edge of your leather pieces. This creates a shallow groove that guides your needle and thread.
You can also use a quick-mark equally spacing divider ruler for even more precise marks. This modern tool locks in your spacing, so every stitch is the same distance apart. Some people use wing dividers, but they can be tricky and sometimes give uneven results. For the best look, use a pricking iron to make small marks or holes along your stitch line. This makes sewing easier and helps your pouch look like other sewn leather pouches you see in stores.
Note: Marking your stitch lines carefully saves time later. You will not need to redo any work, and your pouch will look more professional.
This part of the tutorial covers the basics of how to make a leather pouch, from drawing your pattern to marking where you will sew. These techniques are the foundation for all sewn leather pouches. Keep going, and you will soon have a finished pouch you can be proud of!
Punch Holes
Now that you have marked your stitch lines, it is time to punch holes for sewing. This step is important because it makes sewing much easier and helps your stitches look neat. You want your holes to be straight and evenly spaced so your leather pouch looks professional.
Even Spacing
You have a few options for punching holes in leather. Here are some of the most effective tools and methods:
- Stitching chisels: These tools have multiple prongs and can punch several holes at once. You can find chisels with different numbers of prongs, from just one up to ten. Using a chisel helps you keep your holes in a straight line and evenly spaced.
- Awl: An awl is a sharp, pointed tool. You can use it to open up holes after you punch them or to make holes if you have already marked the spots with an overstitch wheel. The awl works well for small adjustments or tight corners.
- Pliers-type punch: This tool has four teeth and can punch four holes at the same time. It works from both sides of the leather, which can be helpful for thicker pieces.
If you want perfect spacing, try using a stitching chisel. You do not need to mark every hole first, and the tool will create a row of evenly spaced holes in one go. For curved areas or tricky spots, switch to a single-prong chisel or an awl.
Tip: Place a scrap piece of leather under your work when punching holes. This protects your tools and keeps your holes clean.
Take your time with this step. Good holes make sewing much easier and help your pouch last longer.
Stitch or Assemble
You have two main ways to put your leather pouch together: sewing by hand or using no-sew methods. Both options work well, so choose the one that fits your style and tools.
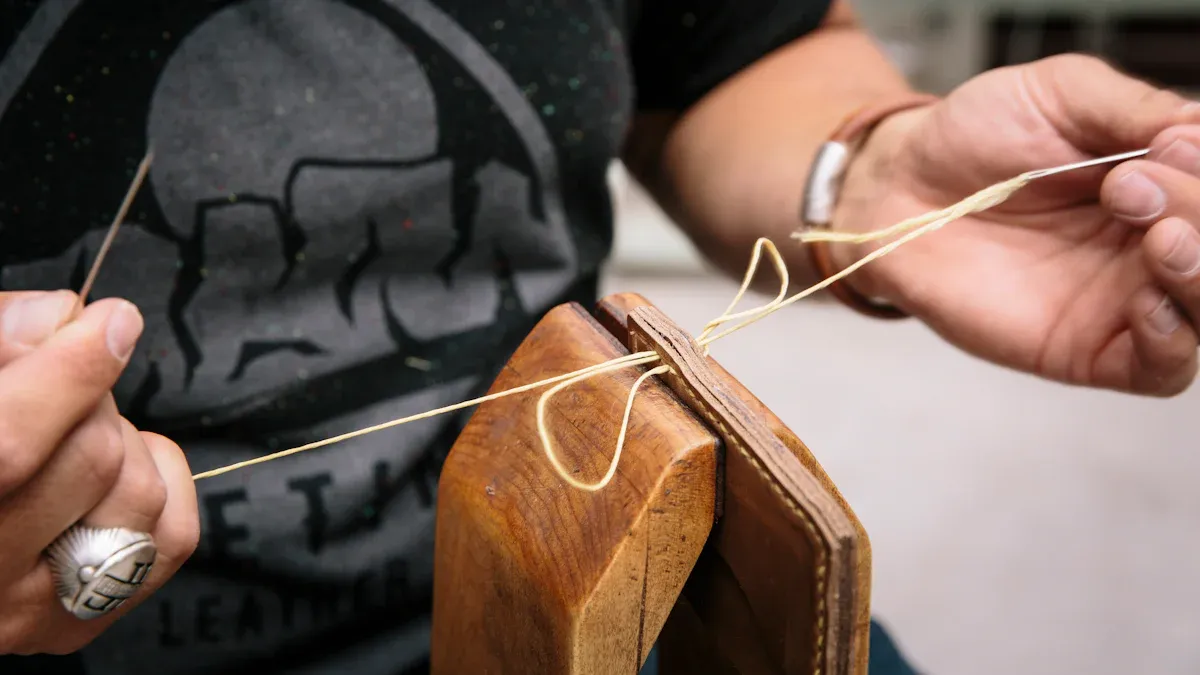
Hand Stitching
Hand sewing gives your pouch a classic look and strong seams. Here is how to make a leather pouch with hand stitching:
- Thread your saddler’s needle with waxed thread. Cut a piece of thread about three times the length of your seam.
- Start at one end of your punched holes. Push the needle through the first hole from the outside.
- Use a saddle stitch for strength. Pass the second needle through the same hole from the other side. Pull both threads tight.
- Continue sewing down the line, always pulling the thread snug but not too tight. This keeps the leather from puckering.
- When you reach the end, tie off your thread with a small knot. Tuck the ends inside the pouch for a neat finish.
Hand sewing takes a little practice, but you will get better with each project. The stitches hold your leather together and give your pouch a handmade touch.
No-Sew Options
If you do not want to sew, you can still make a sturdy leather pouch. Here are some no-sew methods:
- Leather glue: This works best when gluing the flesh side (the rough side) to another flesh side. If you need to glue the grain side (the smooth side) to the flesh side, sand the grain side first. Some brands even make special adhesives for rare cases like grain-to-grain gluing.
- Double-sided tape: Use tape made for leatherwork, usually about 1/4 inch wide. This tape holds seams together without damaging the leather. It is great for tacking pieces in place before final assembly.
- Rivets: You can use small metal rivets to join pieces of leather. Punch holes where you want the rivets, insert them, and set them with a hammer or rivet setter. Rivets add a cool, rugged look and hold the pouch together without sewing.
Note: No-sew methods are quick and easy. They work well for simple pouches or when you want to avoid sewing. Just make sure the glue or tape you use is made for leather so your pouch stays strong.
Now you know how to make a leather pouch using both sewing and no-sew options. Choose the method that feels right for you and enjoy the process!
Leather Pouch Tutorial: Closures & Details
At this step, you add the last details to your leather pouch. These details make your pouch special and useful. Closures help keep your things safe inside. Personal touches show off your style. Let’s see some common ways to finish your pouch.
Adding Closures
There are different ways to close your leather pouch. Each closure looks different and has its own good points. Here is a quick guide to help you pick:
| Closure Type | Advantages |
|---|---|
| Clasp Closure | Very secure, looks fancy, stops pouch from opening by accident, great for fancy bags. |
| Drawstring Closure | Easy to tighten, not expensive, works for many bag types. |
| Flap Closure | Looks nice, keeps pouch safe, hides the closure, gives a neat shape. |
Buttons or Snaps
Buttons and snaps are easy ways to close your pouch. Snaps are simple to put on with a snap setter tool. They hold your pouch shut and open with a press. Buttons give your pouch an old-fashioned look. Sew the button on one side and cut a small slit for the buttonhole on the other. Both are good for small pouches or coin holders.
Tip: Try out where you want your snap or button before you attach it. This helps you avoid mistakes and makes sure your pouch closes well.
Drawstring Option
Many people like drawstring closures for leather pouches. Punch holes near the top edge of your pouch. Thread a cord or leather lace through the holes. Pull the string tight to close the pouch and keep your things safe. This way is easy and you can change the cord for a new color or style anytime.
Drawstring closures are good for pouches that need to open and close fast, like dice bags or small holders. They also give your pouch a relaxed, handmade look.
Personalization
Now you get to make your leather pouch your own! Personalization lets you add details that match your style or make a special gift.
Decorative Touches
There are many ways to decorate your leather pouch. Here are some ideas:
- Add metal studs, buckles, or pins for a bold look.
- Use leather paints or markers for colorful designs. Make sure the paint does not wash off or fade.
- Stencils and templates help you make neat art or letters.
- Charms and chains come in many styles. Mix and match for a custom look.
- Use embroidery thread and needles to sew your own designs.
You can also try these creative ideas:
- Embossing or debossing adds raised or sunken designs for initials or logos.
- Laser engraving makes fine, detailed patterns.
- Hand-painting is great for bright art or special effects.
- Custom stitching with different thread colors or patterns makes your pouch stand out.
Many people like simple monograms or initials for a classic look. Others pick art or patterns that show their culture or hobbies. Some work with craftspeople to add special pockets or sections.
With these ideas, your leather pouch tutorial becomes a way to show your creativity. Try different things and see what you like best!
Finishing Edges Tutorial
You have made your leather pouch and added your favorite details. Now, it is time to finish the edges. Clean, smooth edges make your pouch look professional and feel great in your hand. Let’s walk through the steps to get those edges looking their best.
Smoothing Edges
Trimming
Start by checking the edges of your leather pouch. Sometimes, after cutting and assembling, you might see uneven spots or little bumps. Use a sharp knife or rotary cutter to trim the edges so they are flush. This step helps your pouch look neat and makes the next steps easier.
Next, grab some sandpaper. Begin with a coarse grit and move to a finer grit, finishing at around 1000 grit. Sand the edges gently until they feel smooth. If you glued several pieces of leather together, make sure the edges line up perfectly. This extra care gives your pouch a solid, finished look.
Edge Burnishing
Burnishing is the secret to shiny, rounded edges. You can do this by hand or with a machine. Here’s a simple way to burnish leather edges:
- Bevel the edges with a beveling tool. This rounds them off and stops them from mushrooming.
- Apply a little water, gum tragacanth, or Tokonole to the edge. Let it get tacky.
- Use a wooden or plastic slicker to rub the edge quickly. Listen for a soft ‘click’ sound—that means you are doing it right!
- Repeat the process, adding more burnishing compound if needed, until you see a glossy finish.
Tip: Focus on speed, not pressure, when burnishing. Try different methods to find what works best for you.
Sealing Edges
Edge Paint or Wax
After smoothing and burnishing, you want to seal the edges. Sealing keeps moisture out and helps your leather pouch last longer. You have a few options:
- Edge paint works well for chrome tanned leathers. Many professional makers use Giardini max edge paint because it comes in many colors and stands up to lots of use.
- You can also use beeswax. Rub it along the edge, then buff with a cloth for a natural shine.
- For a super-smooth finish, use a heated edge creaser after painting. This seals the paint and gives your pouch a polished look.
Note: Sealing the edges is the final touch that protects your leather pouch and makes it look amazing.
With these steps, you can turn rough leather edges into smooth, shiny borders. Take your time and enjoy the process. Your pouch will look and feel like something made by a pro!
Success Tips
Making a leather pouch feels rewarding, but you might run into a few bumps along the way. Here are some tips to help you avoid mistakes and get a professional finish every time.
Avoiding Mistakes
Cutting Tips
Cutting leather sounds simple, but it can trip you up if you rush. Always double-check your pattern before you start. Lay out your pieces on the leather and make sure you understand the shape and size. If you skip this step, you might waste material or end up with a pouch that does not work well.
Use a sharp knife or rotary cutter. Dull blades can drag and leave jagged edges. Hold your ruler steady and cut slowly. If you see rough spots, trim them right away. Take your time with this step. Rushing can lead to uneven edges and a pouch that looks messy.
Tip: Plan your cuts so you use the leather wisely. This helps you avoid wasting good material.
Stitching Tips
Stitching brings your pouch together, but small mistakes can add up fast. Punch your holes evenly and keep them in a straight line. If you do not, your stitches might look crooked or loose.
Check your work as you go. If you spot a small misalignment, fix it before you move on. This saves you trouble later. Use the right thread for your leather. Thin thread can break, and thick thread can look bulky.
Some beginners forget to reinforce stress points, like where the pouch opens or where you attach hardware. Add a few extra stitches or a small patch of leather in these spots. This keeps your pouch strong and helps it last longer.
Common beginner mistakes include:
- Rushing the finishing process, which leads to rough edges.
- Not checking your work during assembly, causing bigger problems later.
- Using hardware that does not match your leather, which can break or fall off.
- Skipping steps or not following the right order, making seams hard to reach.
Professional Finish
Straight Lines
Straight lines make your pouch look neat and well-made. Use a ruler or a stitching groover to mark your lines before you cut or sew. Take your time and check your marks twice. If you want extra help, try using a pricking iron or a divider to space your stitches evenly.
Tip: Lightly mark your lines with a pencil or awl. These marks will guide you but will not show on the finished pouch.
Thread Choice
Thread choice matters more than you might think. Pick a thread that matches your leather in both color and thickness. Waxed thread works best for most leather projects. It glides through the holes and holds tight knots.
If you want your stitches to stand out, choose a contrasting color. For a classic look, match the thread to your leather. Always test a small piece before you start sewing the whole pouch.
A good thread keeps your pouch strong and helps it look like it came from a pro shop. Take your time with this detail, and you will see the difference.
Leather Pouch Care
Taking care of your leather pouch keeps it looking great and helps it last for years. You do not need fancy products or a lot of time. Just follow a few simple steps to keep your pouch in top shape.
Cleaning
Regular Care
You want your leather pouch to stay clean and fresh. Here are some easy steps you can follow:
- Dust your pouch with a soft microfiber cloth. This removes dirt and keeps the surface smooth.
- Keep your pouch away from heat and direct sunlight. Too much sun can fade the color and dry out the leather.
- If you spill something, blot the spot right away. Do not rub, or you might spread the stain.
- For light stains, mix three parts water with one part mild soap. Dampen a cloth and gently wipe the area.
- For tough stains, use a cleaner made just for leather. Always test it on a small spot first.
- If your pouch is made of suede or nubuck, avoid liquid cleaners and anything rough. Use a soft brush instead.
Tip: Always empty your pouch before cleaning. Check for stains and treat them as soon as you find them.
Conditioning
Leather Products
Leather needs moisture to stay soft and flexible. If you use your pouch a lot or live in a dry place, you should condition it a couple of times a year. This keeps the leather from cracking and helps it look new.
Here are some popular products you can use:
- Neatsfoot oil: Great for softening old, stiff leather.
- Sno Seal: Protects your pouch and makes it more water-resistant.
- Leather Honey: Keeps your pouch in top shape without leaving a sticky feel.
- Saddle soap: Cleans and conditions at the same time, perfect for older leather.
- Obenauf’s Leather Conditioner: Soaks in well and does not leave an oily finish.
Apply a small amount of conditioner with a soft cloth. Rub it in gently and let the pouch dry at room temperature. Do not use too much, or the leather might feel greasy.
Storage
Avoiding Damage
Storing your leather pouch the right way helps prevent damage. Here are some tips to keep your pouch safe:
- Store your pouch in a dark place. Light can fade the color over time.
- Keep the storage area dry. Too much moisture can cause mold or bad smells.
- Place a silica gel pouch inside to absorb extra moisture.
- Stuff your pouch with white paper to help it keep its shape.
- Hang your pouch in a dust bag if you have one. This stops creases and keeps dust away.
Note: Never store your leather pouch in plastic or airtight containers. Moisture can get trapped and cause mold. Make sure your pouch is dry before you put it away. Do not pack pouches too close together, or they might get marks or lose their shape.
With these simple steps, you can keep your leather pouch looking and feeling its best for a long time.
Conclusion
You now know how to make a leather pouch from start to finish. Here are the main steps:
- Cut your leather to size.
- Add a lining for a smooth inside.
- Fold, pierce, and stitch the edges.
- Attach a closure for easy use.
Anyone can create a pouch with patience and simple tools. Want to share your results or have questions? Drop a comment! If you want custom designs, check out our manufacturing services. We offer many materials and support both OEM and ODM projects.
| OEM/ODM Benefit | What You Get |
|---|---|
| Full Design Control | Make your pouch unique for your brand. |
| Cost Savings | Lower costs with bulk orders. |
| Fast Turnaround | Get your products to market quickly. |
FAQ
How long does it take to make a leather pouch?
You can finish your first pouch in about 8 to 12 hours. If you practice, you will get faster. Take your time and enjoy the process!
Can I make a leather pouch without sewing?
Yes! You can use leather glue, double-sided tape, or rivets. These methods work well for simple pouches. You do not need special sewing skills.
What is the best leather for beginners?
Sheep or goat leather works great for beginners. These types feel soft and cut easily. You can also try top-grain cowhide for more durability.
Do I need expensive tools to start?
No, you do not. You can start with a utility knife, ruler, and basic needles. Most tools cost less than $45. Upgrade as you learn more.
How do I fix a mistake in my leather pouch?
Don’t worry! If you cut wrong, trim the edge or use it as a design. For stitching mistakes, remove the thread and try again. Leather forgives small errors.
Can I wash my leather pouch?
You should not put your pouch in water. Wipe it with a damp cloth for cleaning. Use special leather cleaner for tough stains. Always let it air dry.
How can I make my pouch look more professional?
- Burnish the edges for a smooth finish.
- Use a stitching groover for straight lines.
- Pick matching thread and hardware.
Small details make a big difference!