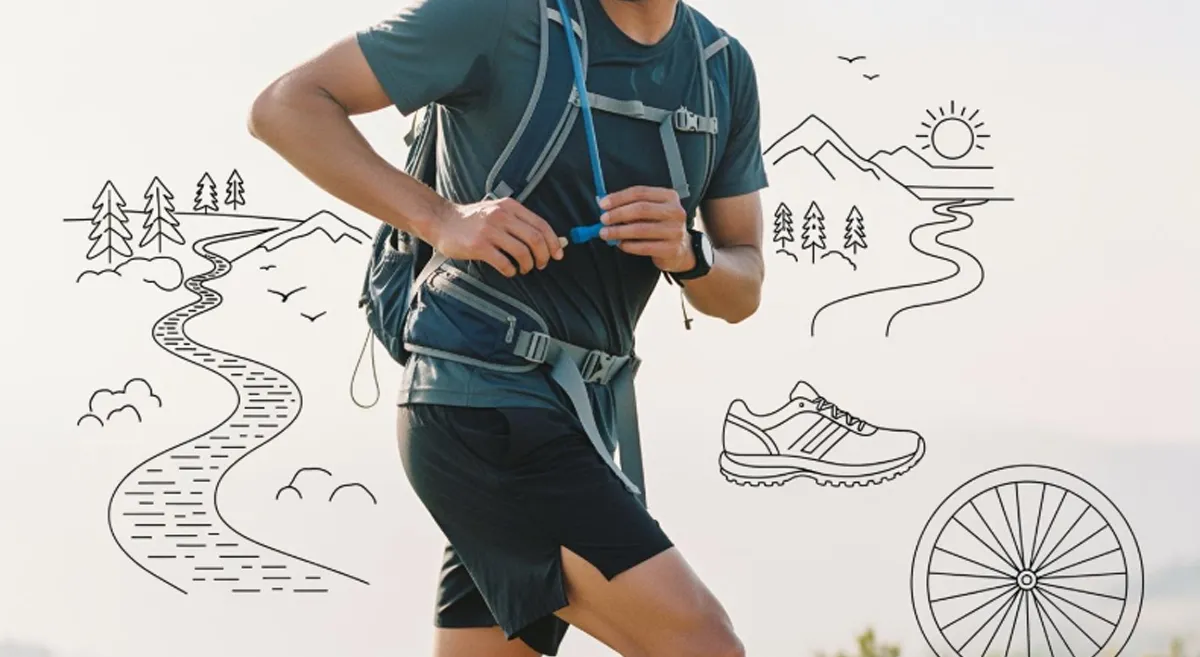
If you want to know how to choose hydration packs, you need to think about what you do most. Ask yourself if you hike, run, or bike. The Best Hydration Backpack helps you stay hydrated on the trail and keeps your gear safe. Make sure the pack holds enough water for your trip and fits your body well. Look for strong materials and smart design. Here are some things people often miss:
- Not picking the right capacity for their activity
- Forgetting about fit and comfort
- Overlooking extra gear storage and durability
Key Takeaways
- First, decide if you will hike, run, or bike. This helps you pick the right hydration pack.
- Pick a pack that holds enough water. Use 2-3 liters for day hikes. Choose a bigger one for longer trips.
- Make sure the straps can be adjusted. This keeps the pack tight and stops it from bouncing.
- Find packs with many pockets. This makes it easy to grab snacks and tools.
- Pick a hydration system with a bite valve that is simple to use. Quick-disconnect tubing makes it easier too.
- Think about weather features like rain covers. Reinforced seams help the pack last longer.
- Clean and dry your hydration pack often. This stops mold and keeps your water safe.
- Try on different packs to see which one fits best. This helps you find the most comfort for your body.
How to Choose Hydration Packs by Activity
Choosing the right hydration pack depends on what you love to do outdoors. Hiking, running, and biking each need different features. You want a pack that matches your activity, fits well, and keeps you comfortable. Let’s break down what works best for each adventure.
Hiking Hydration Pack Types
When you look at hiking hydration packs, you’ll see lots of options. Some are perfect for short trips, while others work better for long journeys.
Day Hike vs. Multi-Day
Day hikes need less gear. You can grab a pack with a 2- to 3-liter reservoir. This size gives you enough water for a few hours. If you plan a multi-day hike, you need more space for food, clothes, and extra water. Larger hiking packs hold 3 liters or more and offer extra pockets for your gear.
Here’s a quick comparison:
| Type of Hydration Pack | Design Purpose | Storage Capacity | Hydration Features |
|---|---|---|---|
| Daypacks with Hydration Reservoir | Great for day hikes | 2-3 liters | Space for snacks and personal items |
| Packs for Hiking and Backpacking | Best for multi-day adventures | 3 liters or more | Lots of storage and hydration options |
Storage Needs
Think about what you want to carry. For a short hike, you might only need water, snacks, and your phone. On longer hikes, you need room for a jacket, first aid kit, and maybe a camera. Hiking packs with more pockets help you stay organized. If you like to keep things simple, choose a smaller pack. If you want to bring extra gear, pick a bigger one.
Tip: Always check if your pack has enough space for your essentials before heading out.
Running Hydration Vests and Packs
Running packs and vests are made for movement. You want something light that won’t slow you down.
Vest vs. Belt vs. Pack
You have three main choices for running: vest, belt, or pack.
- Hydration backpacks carry a 1- to 3-liter reservoir and extra gear.
- Hydration waistpacks work best for short runs.
- Running vests are designed for long-distance trail runs and biking.
Running vests fit snugly and have front pockets for easy access to water. Belts are great for short runs and hold just the basics, like a water bottle and keys. Packs can carry more but may feel bulky.
Here’s a quick look at the differences:
| Hydration System | Advantages | Disadvantages |
|---|---|---|
| Waistpack | Quick access, lightweight, easy for short trips | Limited water, can bounce, may cause chafing |
| Backpack | More water, better gear organization, comfy weight | Heavier, can trap heat, harder to access items |
Bounce and Weight
You want your pack to stay put while you run. Hydration vests usually fit better and bounce less than regular packs. Vests use elastic straps that hug your body. Packs have rigid straps that can move around more. If you run long distances, a vest gives you comfort and stability. For short runs, a belt keeps things light.
- Hydration vests provide a snug fit and less bounce.
- Packs with rigid straps may bounce more.
- Vests use elastic straps to reduce movement.
Biking Hydration Pack Options
Biking packs come in different styles for mountain and road biking. You want a pack that fits your ride and holds your gear.
Mountain vs. Road
Mountain biking hydration packs have more storage. You need space for tools, snacks, and maybe a jacket. Road biking packs are smaller and lighter. They focus on speed and comfort.
| Feature | Mountain Biking Hydration Packs | Road Biking Hydration Packs |
|---|---|---|
| Storage Capacity | Higher for essentials | Lower for speed |
| Fit | Stable for rough trails | Streamlined for comfort |
| Comfort | Ventilated and secure | Lightweight design |
| Strap Systems | Chest and waist straps | Simple straps |
Helmet and Tool Storage
Mountain biking packs often have special pockets for your helmet and tools. You can stash a mini pump, tire levers, and snacks. Road biking packs keep things simple, with just enough room for water and a few essentials.
Note: Always check if your biking pack has a helmet holder and tool pocket if you ride trails.
Hydration Pack Types at a Glance
Here’s a table to help you see which pack fits your activity:
| Hydration Pack Type | Suitable Activities | Key Features |
|---|---|---|
| Hydration Backpacks | Hiking, mountain biking, running | Ample storage for gear, snacks, and essentials |
| Hydration Waistpacks | Short runs, short hikes | Smaller size, minimal gear capacity |
| Running Vests | Long-distance running, biking | Snug fit, front pockets for easy access to hydration |
| Specialized Packs | Specific activities (e.g., skiing) | Insulation to prevent freezing |
You can see that hiking hydration packs work best for longer hikes and mountain biking. Running vests and waistpacks are perfect for runners who want to stay light and fast. If you plan to bike, choose a pack that matches your ride and gear needs.
Best Hydration Backpack Capacity and Reservoir Size
Picking the right hydration backpack means thinking about water and gear. You want to have enough water and carry what you need. But you do not want your pack to feel too heavy. Let’s see how to choose the best hydration reservoirs and storage for hiking, running, or biking.
Water Reservoir Options
Hydration reservoirs come in many sizes. You can find 0.5L, 1L, 1.5L, 2L, and 3L. The size you need depends on your activity and how long you will be outside.
0.5L, 1L, 1.5L, 2L, 3L
Here is a simple guide to help you pick the right size:
| Activity Intensity | Reservoir Size |
|---|---|
| Lower Intensity Activities | 0.5 liters (16 oz) |
| Moderate Intensity | 1 – 1.5 liters (32 – 50 oz) |
| Higher Intensity | 2 – 2.5 liters (70 – 85 oz) |
A 2-liter reservoir is good for day hikes. You will have enough water for a few hours. For longer hikes, you might want a 3-liter reservoir and a water bottle for camp. Your water needs can change with the weather, season, and how easy it is to find water.
Refill and Cleaning
It is important to refill and clean your reservoir easily. Some reservoirs have wide openings or sliders for quick cleaning. Bladders with big openings are easier to wash. Small openings can trap dirt inside. Brands like Osprey Hydraulics and CamelBak Crux make cleaning simple. You can take apart the hose and bite valve to clean them well. Always dry your reservoir after using it. This stops bacteria from growing, especially if you use drink mixes. Warm water and dish soap work well. A long brush helps clean tight spots.
Tip: Pick a hydration reservoir that is easy to clean and refill. This keeps your water fresh and your pack ready for your next trip.
Gear Storage Capacity
You need enough space for your gear, but not too much. The right amount helps you stay comfy and organized.
Essentials for Each Activity
Here is a table to show how much storage you might need:
| Capacity Type | Volume (liters) | Use Case |
|---|---|---|
| Standard Capacity | 1.5 to 2.5 | Good for rides of a few hours |
| High Capacity | Over 2.5 | Ideal for long rides in undeveloped areas |
| Minimum Capacity | Under 4 | Suitable for road cycling and commuting |
| Medium Capacity | 5 to 10 | Great for mountain biking and longer rides |
| Large Capacity | Over 10 | Good for bikepacking setups and errands |
Hikers may want space for snacks, a jacket, and a first aid kit. Runners often just bring water, keys, and a phone. Bikers need room for tools and maybe a helmet.
Balancing Size and Weight
You want enough storage, but not too much weight. Bigger packs hold more, but they are heavier. One liter of water weighs about one kilogram. A 3-liter reservoir adds three kilograms to your pack. Carrying water well helps you keep your balance. Packs that keep water close to your body feel better. They also help your shoulders, back, and hips feel less tired.
- Pick a pack size that matches your trip.
- Only bring what you need for comfort and speed.
- Spread out the weight for better performance.
Note: The right hydration reservoir and storage make your adventure safer and more fun.
Fit and Comfort: Find the Right Hydration Pack
Choosing the right hydration pack means you need to focus on fit and comfort. If your pack feels awkward or rubs the wrong way, you won’t want to use it. A comfy fit keeps you happy on the trail, road, or run. Let’s look at how you can find the best fit and sizing for your needs.
Adjustability and Straps
You want your hydration pack to move with you, not against you. Adjustable straps make a huge difference. Most packs come with adjustable shoulder straps, chest straps, and sometimes waist straps. You can tighten or loosen these to get the right fit. Wearing the pack high on your shoulders helps spread the weight evenly. Some packs include hip belts, which help with load distribution and add comfort.
Shoulder, Chest, Waist
Shoulder straps should sit snug but not pinch. Chest straps keep the pack from sliding side to side. Waist straps, especially on larger packs, help take weight off your shoulders and put it on your hips. Adjustable straps let you tweak each part for your body shape.
Tip: Always check that your pack has adjustable straps in all the right places. This helps you get a secure fit and stops the pack from bouncing.
Load Distribution
A right hydration pack should balance the load. Adjustable straps and hip belts help you carry water and gear without feeling lopsided. If the pack sits too low or too high, you might get sore. Adjust the straps so the pack hugs your back and sits close to your body.
Sizing for Men, Women, and Kids
Not every hydration pack fits every body. You need to look for packs made for your size and shape. Packs come in different sizes for men, women, and kids.
Gender-Specific Packs
Women’s packs have contoured hip belts and shoulder straps. These fit shorter torsos and curve-friendly shapes. Men’s packs focus on stability and support for broader builds. Gender-specific designs are not just for looks—they help you get the right hydration pack for your body.
Youth Options
Kids’ hydration packs are smaller and lighter. They fit shorter torsos and smaller frames. This makes it easy for kids to carry their own water and gear without feeling weighed down.
Here’s a table to show how sizing works:
| Aspect | Details |
|---|---|
| Torso Length | Packs come in various sizes to fit different torso lengths, which vary by manufacturer and gender. |
| Waist Size | Hip belts accommodate a range of hip sizes, typically from mid-44cm to mid-88cm or larger. |
| Women-Specific Packs | Designed with contoured hip belts and shoulder straps for the female form, often fitting shorter torsos. |
- Hydration backpacks for kids, women, and men differ in torso length, strap design, and overall fit.
- Women’s packs offer tailored comfort features.
- Kids’ packs are sized for smaller frames.
Sizing Tips
You want to try on your hydration pack before you hit the trail. Adjust all the straps until the pack feels snug. Make sure it doesn’t move around when you walk or run. If you can, load the pack with water and gear to test the fit. A right hydration pack should feel like part of your body.
Note: If your pack doesn’t fit well, you won’t use it. Adjustable straps and a proper fit make every adventure better.
Key Features in the Best Hydration Backpack
When you look for the best hydration backpack, you want to focus on feature priorities that make your adventure easier and more comfortable. Let’s check out the details that matter most.
Bite Valves and Tubing
A good hydration system starts with the bite valve and tubing. You want water to flow easily when you need it. Bite valves should be soft and easy to use. Some packs have valves that lock, so you don’t get leaks when you toss your bag down.
On/Off Switches
On/off switches help you control water flow. You can turn the valve off when you’re not drinking. This keeps your gear dry and saves water. If you run or bike, you’ll love this feature because it stops drips and messes.
Quick-Disconnect Tubes
Quick-disconnect tubes make cleaning and refilling simple. You can pop the tube off the reservoir without pulling the whole system apart. This saves time and lets you clean the tube separately. If you use drink mixes, this feature helps you keep everything fresh.
Tip: Always check if your hydration backpack has a quick-disconnect tube and a locking bite valve. These feature priorities make your pack easier to use and maintain.
Ventilation and Back Panel
You want your back to stay cool and dry. The right back panel and harness help with airflow and comfort.
Breathable Materials
Many packs use mesh or special foam to let air move across your back. The Hydrobak™ Light uses an Air Support™ Light Back Panel for great ventilation and lightweight comfort. A ventilated harness also helps you stay cool when you hike, run, or bike.
- Mesh panels let air flow and reduce sweat.
- Foam padding adds comfort without trapping heat.
- Ventilated harnesses boost breathability and cooling.
Sweat Management
Sweat can make you feel sticky and tired. Packs with smart back panels pull moisture away from your skin. You stay dry and feel better on long trips. Look for packs that use moisture-wicking fabrics and have channels for airflow.
Note: A well-ventilated back panel keeps you comfortable and helps you enjoy your adventure longer.
Weather Protection and Durability
You want your hydration backpack to last through rain, mud, and rough trails. Strong materials and smart design keep your gear safe.
Rain Covers
Rain covers add a layer of protection when the weather turns bad. You can pull the cover over your pack to keep water out. This helps your gear stay dry and your pack last longer.
- Rain covers boost waterproofing and shield your pack from moisture.
- Nylon covers may wear out at seams and edges over time.
- Silicone covers last longer and resist stretching and tearing.
- Check your rain cover often to make sure it still works.
Reinforced Seams
Reinforced seams stop water from sneaking in through weak spots. They also make your pack stronger and help it hold up to heavy use.
- Sealed seams keep water out and add strength.
- Reliable stitching helps your pack survive tough conditions.
- Quality seams mean your backpack stays in good shape for years.
Many backpacks use membrane technologies like Gore-Tex or eVent for waterproof barriers. These need sealed seams for full protection. Some packs use coatings like polyurethane or silicone for water resistance and durability. Silicone coatings give extra tear resistance and last longer.
Tip: If you want a backpack that stands up to rain and rough trails, look for rain covers, reinforced seams, and tough coatings. These feature priorities help your pack perform in any weather.
Pockets and Organization
When you pick a hydration backpack, you want to know where your stuff goes. Good pockets and smart organization make your adventure easier. You can grab your phone, snacks, or tools without digging through your whole pack. Let’s look at what matters most for pockets and organization.
Phone, Keys, Snacks
You need quick access to your essentials. Most hydration backpacks have special pockets for your phone, keys, and snacks. Some packs, like the CamelBak M.U.L.E. 12 and CamelBak HAWG Pro 20, stand out because they use internal pockets to keep your gear neat and easy to find. You don’t want to waste time searching for your energy bar or phone when you need it.
Many packs use stretchy mesh side pockets. These hold water bottles, snacks, or even a small jacket. Zippered hip belt pockets are perfect for snacks or keys. You can reach them while you walk or ride. The Deuter backpack uses these features to make your trip smoother. You get a large center pocket for clothing and deep main compartments for bigger items. The Gregory Juno/Citro 24 H2O also gives you hip pockets for snacks and phones. You can grab what you need fast.
Here’s a quick table to show common pocket types and what you can store:
| Pocket Type | What You Can Store | Why It’s Useful |
|---|---|---|
| Mesh Side Pockets | Water bottles, snacks | Easy to reach, stretchy |
| Zippered Hip Belt Pockets | Keys, snacks, phone | Quick access, secure |
| Deep Main Compartments | Clothing, larger gear | Organized, roomy |
| Internal Organizer Pockets | Small items, electronics | Keeps gear sorted |
Tip: Always check if your hydration backpack has pockets for your most-used items. You’ll save time and stay organized.
Tool and Helmet Holders
If you bike or ride trails, you need space for tools and your helmet. Some hydration backpacks come with special holders for these items. The MOTO HYDRO 8L hydration backpack uses a main compartment for tools and extra gear. You can fix your bike or adjust your helmet without unpacking everything.
External attachment straps let you carry a jacket or extra equipment. You don’t have to stuff your helmet inside your pack. You clip it on and keep moving. Tool holders keep your repair kit handy. You can fix a flat tire or adjust your brakes on the trail.
Here’s a list of what tool and helmet holders do for you:
- Hold your helmet outside the pack for easy access
- Keep tools organized and ready for quick repairs
- Let you carry extra gear like jackets or pumps
Note: If you ride bikes or go on long hikes, look for packs with tool and helmet holders. These features make your trip safer and more convenient.
Smart pockets and organization systems help you pack better and find your gear fast. You spend less time searching and more time enjoying your adventure. Try out different packs and see which pocket setup works best for you.
How to Choose a Hydration Pack: Decision Checklist
Activity and Use
When you start your hydration pack selection checklist, think about your main activity. Do you hike, run, or bike? Each adventure needs a different style of pack. If you love hiking, you want a backpack with space for snacks and extra gear. Runners need something light that stays close to the body. Cyclists look for packs with tool pockets and helmet holders. Ask yourself what you do most. This helps you choose a hydration pack that fits your lifestyle.
Tip: Pick a hydration pack that matches your activity. You want easy access to water and comfort for all-day wear.
Here’s a quick list to guide you:
- Hiking: Look for bigger packs with more storage.
- Running: Choose a vest or belt for less bounce.
- Biking: Find packs with tool pockets and helmet holders.
Water and Gear Needs
Next, ask yourself, “What size hydration pack do I need?” The answer depends on how long you plan to be outside and what you want to carry. If you go for short trips, a small reservoir works fine. Longer adventures need more water and extra gear. You don’t want to run out of water halfway through your day.
Use this table to help you decide:
| Activity Length | Reservoir Size | Gear Storage Needed |
|---|---|---|
| Short (1-2 hrs) | 0.5-1L | Minimal |
| Medium (2-4 hrs) | 1.5-2L | Snacks, phone |
| Long (4+ hrs) | 2-3L | Jacket, tools |
Think about how to use a hydration pack for your trip. If you need to refill often, pick a pack with a wide opening. If you carry lots of gear, look for extra pockets. Always balance water and gear so your pack doesn’t get too heavy.
Note: Make sure your pack holds enough water for your adventure. You want durability for outdoor use and features like insulation or tool pockets.
Fit and Comfort
Fit matters just as much as size. Try on different packs to see which one feels best. Adjustable straps help you get a snug fit. Shoulder, chest, and waist straps keep the pack steady. If your pack bounces or rubs, you won’t enjoy your trip.
Ask yourself these questions:
- Does the pack sit comfortably on your back?
- Can you adjust the straps for a better fit?
- Is the weight spread out evenly?
If you wonder how to use a hydration pack, start by adjusting the straps. Make sure the pack hugs your body but doesn’t pinch. A good fit means you can move easily and stay comfortable all day.
Tip: Comfort is key. You want a pack that feels like part of you, not something you have to fight with.
By following this hydration pack selection checklist, you make sure your pack matches your activity, holds enough water, and fits well. This helps you enjoy every adventure without worry.
Must-Have Features
When you pick a hydration pack, you want features that make your adventure easier. Some features matter more than others. You should focus on what helps you stay comfortable, organized, and ready for anything. Let’s look at the must-have features you need.
1. Easy-to-Use Bite Valve
You want a bite valve that lets you drink quickly. Soft bite valves feel good and stop leaks. Some valves have a lock so water doesn’t drip when you set your pack down.
2. Quick-Disconnect Tubing
This feature helps you clean and refill your reservoir fast. You can remove the tube without taking apart the whole system. If you use drink mixes, this keeps everything fresh.
3. Adjustable Straps
Shoulder, chest, and waist straps help you get the right fit. You can tighten or loosen them for comfort. Packs with adjustable straps stay in place and don’t bounce.
4. Ventilated Back Panel
You want your back to stay cool and dry. Mesh or foam panels let air flow and pull sweat away. This keeps you comfortable on long hikes, runs, or rides.
5. Multiple Pockets
Pockets help you organize your gear. You need places for your phone, snacks, keys, and tools. Mesh side pockets and zippered hip pockets make it easy to grab what you need.
6. Weather Protection
Rain covers and water-resistant materials keep your gear dry. Reinforced seams add strength and stop water from sneaking in.
7. Tool and Helmet Holders
If you bike, you need holders for your helmet and tools. These features help you fix problems on the trail and keep your gear safe.
Here’s a quick table to help you check for must-have features:
| Feature | Why You Need It | Where to Find It |
|---|---|---|
| Bite Valve | Easy drinking, no leaks | Reservoir tube |
| Quick-Disconnect Tube | Fast cleaning and refilling | Tube connection |
| Adjustable Straps | Custom fit, less bounce | Shoulder, chest, waist |
| Ventilated Back Panel | Cool and dry comfort | Back of pack |
| Multiple Pockets | Organized gear, quick access | Sides, hip belt, inside |
| Weather Protection | Dry gear, longer pack life | Rain cover, seams, fabric |
| Tool/Helmet Holders | Safe storage, easy repairs | Outside of pack |
Tip: Make a list of your top features before you shop. You want a pack that fits your needs and makes your trip better.
If you find a pack with these features, you’ll stay comfortable and prepared. You won’t waste time searching for gear or fighting with your pack. You’ll enjoy your adventure more.
Hydration Pack Care and Maintenance
Taking care of your hydration backpack helps you get safe water access every time you head outdoors. If you keep your pack clean and dry, you avoid mold and bad smells. Let’s look at how you can keep your hydration system fresh and ready for your next adventure.
Cleaning the Reservoir
You want clean water access, so you need to wash your reservoir often. If you skip cleaning, bacteria and mold can grow inside. Here’s a table with the best ways to clean your hydration bladder:
| Best Practice | Description |
|---|---|
| Regular Cleaning | Wash with dish soap and hot water. Use a sponge or brush for tough spots. |
| Use Cleaning Tablets | Drop in cleaning tablets for deep cleaning. Let them fizz and rinse well. |
| Drying | Hang the bladder upside down to dry fully. |
| Storage | Keep the bladder in a cool, dry place. Only use water to avoid sticky mess. |
| Freezing | Freeze the bladder when not in use to stop bacteria from growing. |
You can also follow these simple steps:
- Drain and dry the bladder after each use.
- Use only water in the reservoir to keep it fresh.
- Make sure all parts are dry before you put it away.
If you use cleaning tablets, rinse the bladder well so you get clean water access next time. Brushes help you reach corners and scrub away dirt. Never leave sugary drinks in your reservoir. They leave sticky spots and make cleaning harder.
Drying and Storage
Drying your hydration pack is just as important as cleaning. If you store it wet, mold can grow and ruin your water access. Hang the bladder upside down so air can reach every part. You can prop open the reservoir with a spoon or use a special drying rack. This helps water evaporate faster.
When everything is dry, store your pack in a cool, dry place. Don’t leave it in direct sunlight or a hot car. Heat can damage the plastic and make it smell bad. If you won’t use your pack for a while, try freezing the bladder. Freezing stops bacteria and keeps your water access safe for your next trip.
Tip: Always check that your reservoir is dry before you store it. This keeps your hydration pack fresh and ready.
Replacing Parts
Sometimes, parts of your hydration pack wear out. Bite valves can crack, tubes can get cloudy, and seals may leak. You don’t need to buy a whole new pack. You can replace just the broken part. Most brands sell replacement bite valves, tubes, and reservoir lids.
Here’s what you should look for:
- Cracked or leaking bite valves
- Cloudy or stiff tubing
- Worn-out seals or lids
If you notice any problems, swap out the old part for a new one. This keeps your water access clean and easy. Regular checks help you spot issues before they ruin your trip.
Note: Keeping your hydration pack in good shape means you always have safe water access on your adventures.
Conclusion
You want a great hydration backpack for every trip. First, pick one that matches your activity. Next, check how much water and gear you need to carry. Make sure the pack fits your body and has features you like. Use a checklist before you buy anything. Clean and store your pack so it lasts a long time.
If you want to buy many or design your own hydration backpacks, we can help you. Our OEM/ODM process lets you share your ideas and see the designs before you order. We ship worldwide. You get strong materials, water resistance, and protection from wear and tear. Customization helps your brand in many ways:
| Customization Aspect | Benefit |
|---|---|
| Logo Printing | Makes your brand easy to see |
| Embroidery | Gives a fancy look |
| Color Matching | Matches your brand colors |
| Pocket Arrangement | Fits what users want |
| Internal Structure | Makes the pack work better |
- You can pick polyester, nylon, or canvas for your hydration backpack.
- Our packs are good for outdoor trips, school, or as gifts.
Want to make your own hydration backpack line? Contact us to talk about your ideas. We help businesses and wholesalers who want good quality and cool style.
FAQ
What size hydration pack do I need for a day hike?
You want a hydration pack with a 2-liter reservoir for most day hikes. This size gives you enough water and leaves room for snacks and extra storage. Always check your hydration pack selection for comfort and storage before heading out.
How do I clean my hydration pack after using sports drinks?
Rinse your hydration pack with warm water and mild soap. Use a brush for the tube. Let it dry fully before storing. This keeps your hydration packs fresh and ready for your next adventure.
Can I use running hydration packs for biking?
You can use running hydration packs for biking if you like a snug fit and light storage. However, a cycling hydration pack often has more storage for tools and snacks. Always match your hydration pack selection to your main activity.
What should I store in my hydration pack for a long run?
For long runs, use running hydration packs with enough storage for water, energy gels, your phone, and keys. Some hydration packs have extra storage for a light jacket or first aid kit. Keep your load light for comfort.
How do I stop my hydration pack from bouncing while running?
Adjust all straps on your hydration pack for a snug fit. Choose running hydration packs with chest and waist straps. These features help keep your hydration pack steady and your storage secure during your run.
Are hydration packs good for kids?
Yes, hydration packs work well for kids. Look for smaller sizes with easy-to-use bite valves and simple storage. Kids enjoy carrying their own water and snacks. Always check the hydration pack selection for comfort and fit.
What features should I look for in a hydration pack selection?
Focus on storage, easy-to-clean reservoirs, adjustable straps, and quick-access pockets. Your hydration pack should match your activity. Good hydration packs make it easy to carry water and gear. Always check storage options before buying.
Can I use one hydration pack for hiking, running, and biking?
You can use one hydration pack for different activities if it has enough storage and fits well. However, hydration pack selection for each sport gives you better comfort and storage. Specialized hydration packs work best for each adventure.

