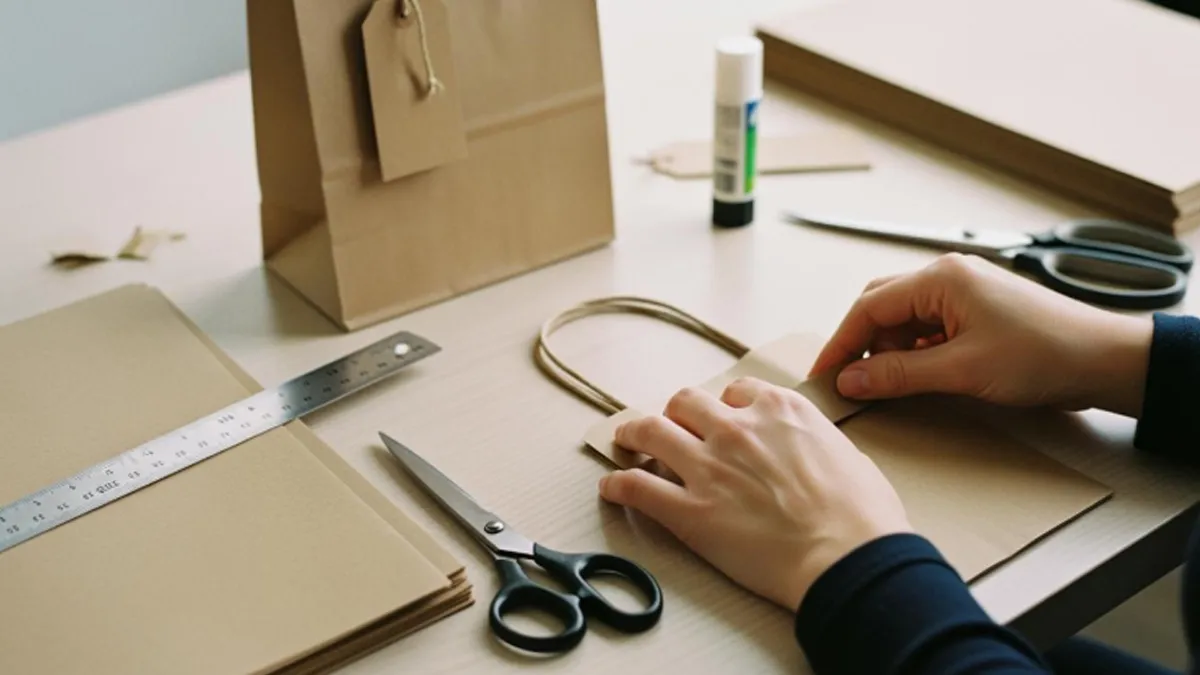
You can make a paper bag at home with just a few easy steps. Grab some kraft paper, glue, and scissors. If you love diy projects, you will enjoy creating a handmade paper bag that suits your style. Want to know how to make kraft paper bag strong and unique? Try adding decorations or double layers. Making a paper bag is eco-friendly and lets you get creative. Give diy a try and see what you can design!
Key Takeaways
- Gather easy materials like kraft paper, scissors, and glue to begin your paper bag project.
- Pick kraft paper that is about 100 gsm thick for a strong and bendy bag.
- Cut, fold, and glue your bag step by step. Make sure the edges are neat and the seams are strong.
- Decorate your bag with stickers, ribbons, or drawings to make it special.
- Use two layers of kraft paper if you want your bag to hold heavier things.
- Try different handle materials like ribbon or cotton to make your bag work better and look nice.
- Change the size and shape of your bag to fit what you need, like small gift bags or big shopping bags.
- Find eco-friendly ways to use your kraft paper bags, like recycling or using them for new projects.
Materials for Kraft Paper Bags
Essential Supplies
You do not need fancy tools to start making your own craft paper bags. Most supplies are easy to find at home or in a local store. Here is a quick list to help you gather everything:
- Craft paper sheets (choose the right thickness for your project)
- Scissors
- Glue stick or double-sided tape
- Ruler
- Pencil
- Decorative items (stickers, stamps, ribbons)
You can also use a hole punch if you want to add handles later. If you want your bag to look neat, keep a clean workspace and use sharp scissors. Craft paper is the main material you will use, so pick sheets that feel sturdy but flexible.
Kraft paper is the primary material for making paper bags. You see it often in grocery stores. This paper is lightweight but strong. It usually weighs between 80 and 120 grams per square meter. You can fold and shape it easily. It resists tearing, so you can carry heavier items without worry. Kraft paper is also budget-friendly, which makes it perfect for DIY projects.
Best Kraft Paper Types
Choosing the right type of craft paper makes a big difference. Some types work better for strong bags, while others are best for decoration. You want your bag to hold up, so look for paper that matches your needs.
Here is a table to help you compare the strongest kraft paper types:
| Type | Appearance | Strength | Best Use Case | Coated Option |
|---|---|---|---|---|
| Virgin Kraft | Brown, unbleached | Very High | Food, industrial packaging | Optional |
| Sack Kraft | Brown, heavy-duty | Very High | Bulk product bags | No |
Virgin kraft paper looks natural and works well for food or packaging. Sack kraft paper is heavy-duty and perfect for carrying bulk items. Both types offer great strength, so your craft paper bag will last longer.
Tip: If you want a sturdy bag, pick craft paper with a thickness of around 100 gsm. This weight gives you a good balance between flexibility and strength.
- The recommended thickness of craft paper for sturdy paper bags is 100 gsm.
Optional Decorations
You can make your craft paper bag stand out with simple decorations. Personal touches turn a plain bag into something special. Try these ideas:
- Draw patterns with markers or colored pencils
- Add stickers or stamps for fun designs
- Glue on ribbons or lace for a fancy look
- Use washi tape to create borders or stripes
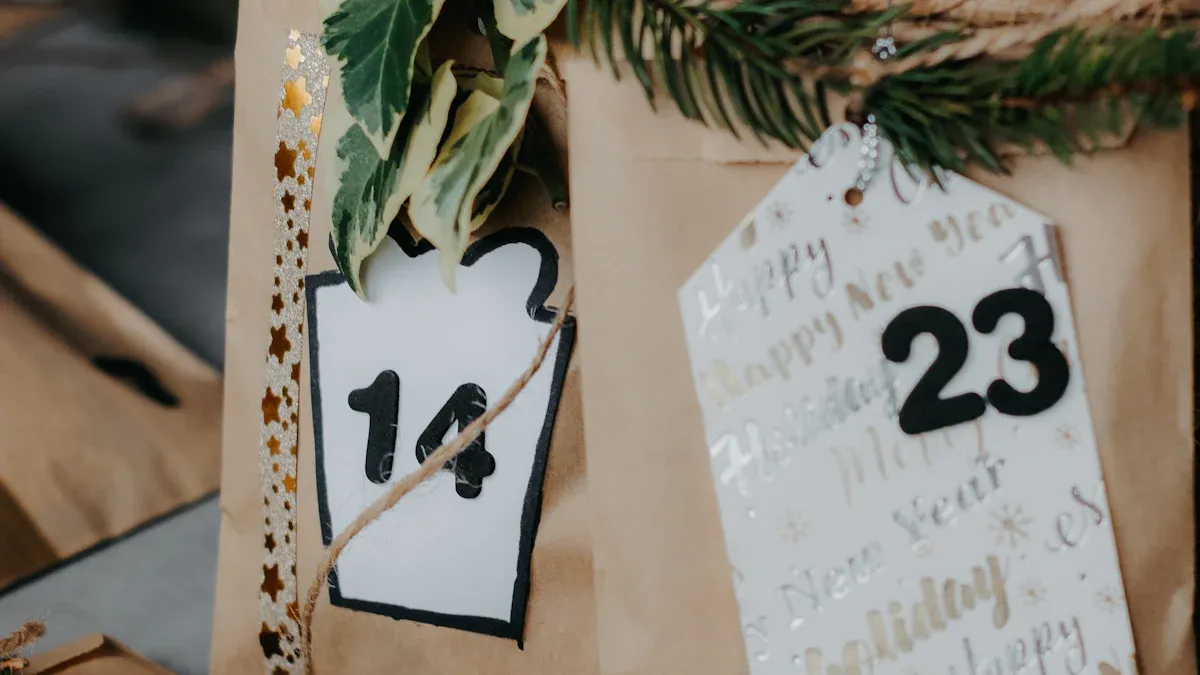
- Attach small tags for names or messages
Decorating your craft paper bag lets you show off your style. You can match colors to a holiday or event. You can even use recycled materials for an eco-friendly touch. Get creative and enjoy the process!
How to Make Kraft Paper Bag: Step-by-Step
Cut the Paper
Ready to start your diy project? The first step in how to make kraft paper bag is cutting your kraft paper to the right size. You want your bag to look neat and hold up well, so grab a ruler and follow these steps:
- Take a section of kraft paper that measures 9 inches by 15 inches. This size works great for a standard bag.
- Place the paper on a flat surface with the longest side running left to right.
- Fold the bottom edge upward by 2 inches. Make sure both sides line up for a straight fold.
- Press down to crease the paper. This crease marks the bottom of your bag.
- Unfold the paper and use the crease as your guide.
- Use a ruler to divide the width into four equal sections. Mark each section lightly with a pencil.
- Divide the width by four to figure out the size of each section.
You can adjust the measurements if you want to make a paper bag that’s bigger or smaller. Cutting the paper carefully helps your paper bag making project look professional.
Tip: Always use sharp scissors for clean edges. If you want to decorate your bag later, leave extra space at the top.
Fold the Base
Now, let’s move on to folding the base. This step is key in how to make kraft paper bag that’s sturdy and can hold weight. You want the bottom to be strong, so follow these folding techniques:
- Fold in from each long side about 1 inch to create side flaps.
- Fold the paper in half lengthwise. Line up the edges carefully.
- Secure the edge with glue or tape. Press firmly so the seam holds.
- Open the folded tube and flatten the bottom edges.
- Fold two triangles inward from the corners. This creates a squared bottom.
- Crease all the folds well. A sharp crease helps the bag stand upright.
If you want extra strength, you can double up the layers on the base. Glue a second piece of kraft paper underneath before you finish folding. This makes your diy bag even stronger.
Note: Reinforcing the edges with clear tape helps prevent tearing. You can also use water-based or starch-based adhesives for an eco-friendly option.
Shape the Sides
Shaping the sides gives your bag its final look. You want the sides to be even and the bag to stand up straight. Here’s how to make kraft paper bag sides that look great:
- Use the marks you made earlier to fold the paper into four sections.
- Press each fold firmly to create crisp edges.
- Stand the bag up and gently open it. Push the sides out so the bag takes shape.
If you want a medium-sized bag, check out these common dimensions:
| Category | Common Dimensions | Typical Use Cases |
|---|---|---|
| Medium | 10″ × 5″ × 12″ | Clothing boutiques, light electronics, books |
| Medium | 11″ × 6″ × 15″ | Clothing boutiques, light electronics, books |
| Medium | 13″ × 7″ × 17″ | Clothing boutiques, light electronics, books |
You can adjust the size to fit your needs. Paper bag making lets you customize every detail. If you want to make a paper bag for gifts or shopping, just change the measurements.
Tip: For a neat finish, run your fingers along each fold. This helps the bag keep its shape and stand upright.
You’ve finished the first steps in how to make kraft paper bag. Next, you’ll secure the seams and reinforce the bottom for extra strength. Keep going with your diy project and see how creative you can get!
Secure with Glue or Tape
Now you have the basic shape of your bag. It is time to make sure everything stays together. You want your bag to be strong and neat, so pay close attention to this step. When assembling your paper bag, you can use glue or double-sided tape. Both work well, but tape is less messy and dries faster.
Here is how you can secure your bag:
- Lay your folded paper flat with the seam facing up.
- Run a line of glue or place a strip of tape along the edge where the paper overlaps.
- Press the seam down firmly. Hold it for a few seconds so it sticks well.
- If you see any loose edges, add a little more glue or tape.
- Let the glue dry for a few minutes before moving on.
Tip: If you want extra strength, use both glue and tape. Glue gives a strong hold, and tape keeps everything in place while the glue dries.
Check the sides and bottom of your bag. Make sure there are no gaps. If you find any, seal them with a small piece of tape. This step is important for assembling your paper bag because it keeps your bag from falling apart when you use it.
Reinforce the Bottom
The bottom of your bag needs to be strong. You do not want your bag to break when you put something inside. Reinforcing the bottom is easy and makes a big difference.
Follow these steps to make your bag sturdy:
- Cut a small rectangle of kraft paper. Make it just a little smaller than the base of your bag.
- Place the rectangle inside the bag at the bottom.
- Use glue or tape to stick the rectangle to the base. Press down so it sticks well.
- If you want even more strength, add a second layer.
Note: You can use cardboard instead of kraft paper for heavy items. Just make sure it fits snugly in the bottom.
After you reinforce the bottom, let everything dry. Now your bag can hold books, snacks, or small gifts without tearing. This step finishes the main part of your bag and gets you ready for handles or decorations.
Add Handles to Paper Bags
Adding handles can turn your simple bag into something much more useful. Handles make it easy to carry your bag, especially if you plan to use it for shopping or gifts. You have many choices when it comes to handle materials. Some work better for heavy loads, while others look stylish for lighter items.
Handle Options
You can pick from several popular handle materials. Each one has its own look and feel. Here are some of the best options:
- Ribbon: Soft and smooth, ribbon handles feel nice in your hand. They look fancy and work well for light items or gift bags.
- Cotton: Cotton handles feel strong and comfortable. You can use them for heavier things. They also look simple and classic.
- Twisted Paper: These handles feel sturdy and keep their shape. Twisted paper works great if you want your bag to hold more weight.
- Folded Paper: Folded paper handles cost less and work best for small bags. They are easy to make and good for light loads.
You can match the handle style to the purpose of your bag. If you want to make paper bags for gifts, ribbon or folded paper might be perfect. For shopping or carrying books, cotton or twisted paper handles give you more strength.
Tip: Try mixing handle types with different bag sizes. You can create a set of bags that all look unique!
Attach Handles
Now you need to attach the handles to your bag. This step helps your bag last longer and carry more. The way you attach handles can make a big difference in how strong your bag feels.
- Twisted handles give your bag extra security. They hold up well when you carry heavy things.
- These handles keep their shape because of their rigid structure.
- The twisting process makes the handles stronger, so your bag can hold more weight.
To attach handles, punch two holes near the top of each side of your bag. Thread your chosen handle material through the holes. Tie a knot on the inside to keep the handle in place. If you use glue, press the ends of the handle flat against the inside of the bag and let it dry. Make sure both handles are the same length so your bag hangs evenly.
If you want to make paper bags that last, always check the handles before you use the bag. Give them a gentle tug to see if they hold tight. You can add a small piece of tape or glue over the knots for extra strength.
Note: Handles not only make your bag easier to carry, but they also add a personal touch. Choose colors and materials that match your style!
Decorate and Personalize
Simple Decoration Ideas
Decorating your paper bag is the fun part. You get to show off your creativity and make each bag special. You can use many easy techniques to turn a plain kraft bag into something eye-catching. Here are some popular ways people like to decorate:
- Stamping: Grab a rubber stamp and ink pad. Press designs onto your bag. You can use shapes, words, or patterns.
- Embossing: Use an embossing tool to create raised designs. This adds texture and makes your bag look fancy.
- Stickers: Pick colorful stickers and place them anywhere you like. You can use stars, hearts, or even letters.
- Ribbons: Tie a ribbon around the handle or glue it along the edge. Ribbons add a pop of color and make your bag look festive.
You can also draw with markers or colored pencils. Try making stripes, polka dots, or doodles. If you want a simple look, use washi tape to make borders or shapes. Decorating your paper bag does not have to be hard. You can mix and match these ideas to create a style that fits your event or mood.
Tip: If you want your handmade paper bag to stand out, combine two or three decoration techniques. For example, stamp a pattern and then add a ribbon for extra flair.
Customization Tips
Personalizing your kraft paper bag makes it even more special. When you add custom touches, you show the person receiving the bag that you care. Personalization can turn a simple gift into a memorable experience.
Here are some ways you can customize your bag:
- Write the recipient’s name or a short message on the front. Use a marker or a printed label.
- Choose designs that match the occasion. For birthdays, use bright colors and fun shapes. For holidays, pick seasonal themes.
- Pick the right size and shape for your gift. You can make small bags for jewelry or large ones for books.
Personalization helps create emotional connections. When someone sees their name or a special message, they feel valued. Unique designs also make your gift stand out. You can select different styles for each event, so your bag always fits the theme.
Note: Decorating your paper bag with custom features makes your gift more memorable. You can use tags, charms, or even photos to add a personal touch.
If you want your bag to look neat, use a ruler to line up decorations. Try layering stickers or stamps for a bold effect. You can also glue on small embellishments like buttons or sequins. The variety of options means you can always find a way to make your bag unique.
Decorating your paper bag and adding personal touches turns a simple kraft bag into a keepsake. You get to decide how creative you want to be. Your friends and family will love receiving a gift in a bag you made just for them.
Make Paper Bags Sturdy
A sturdy paper bag can make all the difference when you want to carry something heavy or valuable. You do not want your bag to tear or fall apart. Let’s look at some simple ways to make your kraft paper bag much stronger.
Double Layering
Double layering is one of the easiest tricks to boost your bag’s strength. You just add a second sheet of kraft paper to your bag. This extra layer helps your bag hold more weight and last longer. If you plan to carry books, groceries, or gifts, double layering is a smart move.
Here’s how you can do it:
- Cut two pieces of kraft paper the same size.
- Glue or tape them together before you start folding your bag.
- Make sure the edges line up so your bag looks neat.
- Fold and shape your bag as usual.
With double layering, your bag can handle much more weight. In fact, double-layered kraft paper bags can hold up to 30 kilograms, depending on the design and materials you use. That’s about the weight of a big suitcase! Even single-layer bags can carry a few kilograms, but double layering gives you peace of mind for heavier loads.
Tip: If you want your bag to look nice and feel strong, use a thicker kraft paper for both layers.
Reinforcing Techniques
You can use a few more tricks to make your bag even tougher. Reinforcing certain parts of your bag helps prevent tears and keeps everything together. Here are some of the best techniques:
| Technique | Description |
|---|---|
| Reinforced Bottoms | Add a second layer of paper or a cardboard insert to the bottom. This stops sagging and tearing. |
| Gusseted Sides | Fold panels on the sides so the bag can expand. This spreads out the weight and reduces pressure. |
| Twisted Paper Handles | Use twisted paper for handles and glue them well. These handles are strong for light to medium loads. |
| Premium Handles | Try ribbon or fabric handles for extra support. These work great for heavier items and look stylish. |
You can mix and match these ideas. For example, use a reinforced bottom with gusseted sides for a bag that stands up and holds more. If you want to carry something heavy, always check the handles and seams before you go.
Note: Choosing the right materials matters. Thicker kraft paper, strong glue, and sturdy handles all help your bag last longer.
When you use these tips, you can trust your homemade kraft paper bag to carry almost anything you need. Try out different methods and see which ones work best for your projects!
Troubleshooting & Tips
Common Mistakes
You might run into a few problems when making kraft paper bags. Don’t worry—everyone makes mistakes at first! If you know what to watch out for, you can avoid most issues. Here’s a quick table showing the most common mistakes and how you can fix them:
| Mistake | Description |
|---|---|
| Choosing weak paper | Thin, flimsy paper tears easily, especially at the handles. Stick with kraft or other sturdy paper. |
| Sloppy folding | Uneven folds make your bag look messy and can cause balance problems. Use a ruler or bone folder to get sharp creases. |
| Poor adhesion | Not enough glue or tape means seams might rip apart. Use enough adhesive and keep it neat. |
| Missing reinforcement | Handles carry a lot of weight. Always reinforce where you attach them to prevent tears. |
Tip: Take your time with each step. Sharp folds and strong glue make your bag look professional and last longer.
Bag Size Variations
You can make kraft paper bags in many sizes. The right size depends on what you want to carry. Small bags work for jewelry or cosmetics. Medium bags fit books or clothing. Large bags hold groceries or big orders. Here’s a table to help you pick the best size for your project:
| Size Category | Typical Dimensions (Width x Height x Depth) | Common Uses | Examples of Industries |
|---|---|---|---|
| Small | 4-6 in x 8-10 in x 2-3 in | Jewelry, cosmetics, gifts | Boutiques, bakeries |
| Medium | 8-10 in x 10-12 in x 4-6 in | Clothing, takeaway food, books | Retail stores, cafes |
| Large | 12-16 in x 16-20 in x 6-8 in | Groceries, clothing, big orders | Grocery stores, department stores |
Note: You can adjust the measurements to fit your needs. Try making a few different sizes to see which works best for you.
Eco-Friendly Uses
Kraft paper bags do more than just carry things. You can reuse them in lots of creative and eco-friendly ways. Here are some ideas you might like:
- Pack your lunch and recycle the bag when you’re done.
- Cut bags open to make patterns for sewing or knitting.
- Cover textbooks or notebooks with kraft paper sheets.
- Line drawers to keep them clean from dust and spills.
- Add bags to your compost pile if they’re biodegradable.
- Protect your craft table from paint, glue, or glitter.
- Shred bags for pet bedding in cages.
- Use bags as seedling pots for gardening.
- Carry leftovers home after parties.
- Place crumpled bags in the fridge to absorb odors.
- Make paper flowers or gift tags for DIY craft projects.
- Decorate plant pots with paper bag covers.
- Package homemade baked goods for friends.
- Wrap gifts with decorated paper bags.
- Organize small items around your home.
- Create bookmarks, envelopes, or puppets for arts and crafts.
Using kraft paper bags in these ways helps you reduce waste and get creative. You can help the planet and have fun at the same time!
If you try new uses for your bags, you’ll find they’re handy for more than just carrying things. Get creative and see how many ways you can reuse your homemade kraft paper bags!
Conclusion
Making your own paper bag at home is simple and fun. You can change the size or add new decorations each time. Lots of people like eco-friendly bags. Check out these numbers:
| Consumer Group | Preference Percentage |
|---|---|
| Young Consumers | 79% |
| European Consumers | 62% |
Kraft paper bags break down on their own and are easy to recycle. They help lower the amount of plastic trash.If you need specialty bags, we offer a wide range of materials, handle options, and finishing styles to match your brand. As a professional kraft paper bag manufacturer, we provide complete OEM/ODM customization, including design development, size options, printing, and bulk production.
FAQ
How strong are homemade kraft paper bags?
You can carry books, snacks, or small gifts in your kraft paper bag. Double layering and reinforced bottoms help your bag hold up to 30 pounds. Always check the seams before you use it.
Can I use colored kraft paper for my bag?
Yes! Colored kraft paper works great. You can pick any color you like. Bright colors make your bag stand out. Try matching the paper to your event or gift.
What glue works best for paper bags?
A glue stick or double-sided tape gives you a clean finish. Water-based glue is eco-friendly. Make sure you press the seams firmly so your bag stays together.
How do I make handles sturdy?
You can use twisted paper, ribbon, or cotton for strong handles. Tie knots inside the bag or glue the ends down. Test the handles by gently pulling before you fill the bag.
Can I recycle kraft paper bags?
Absolutely! Kraft paper bags break down quickly and are easy to recycle. You can also reuse them for crafts, storage, or gift wrapping.
What size should I cut my paper for a small bag?
Cut your kraft paper to about 6 inches by 10 inches for a small bag. This size works well for jewelry, cosmetics, or small gifts.
How do I fix a tear in my paper bag?
Grab some clear tape or glue. Patch the tear from the inside. Press the edges together until the adhesive dries. Your bag will look neat and stay strong.