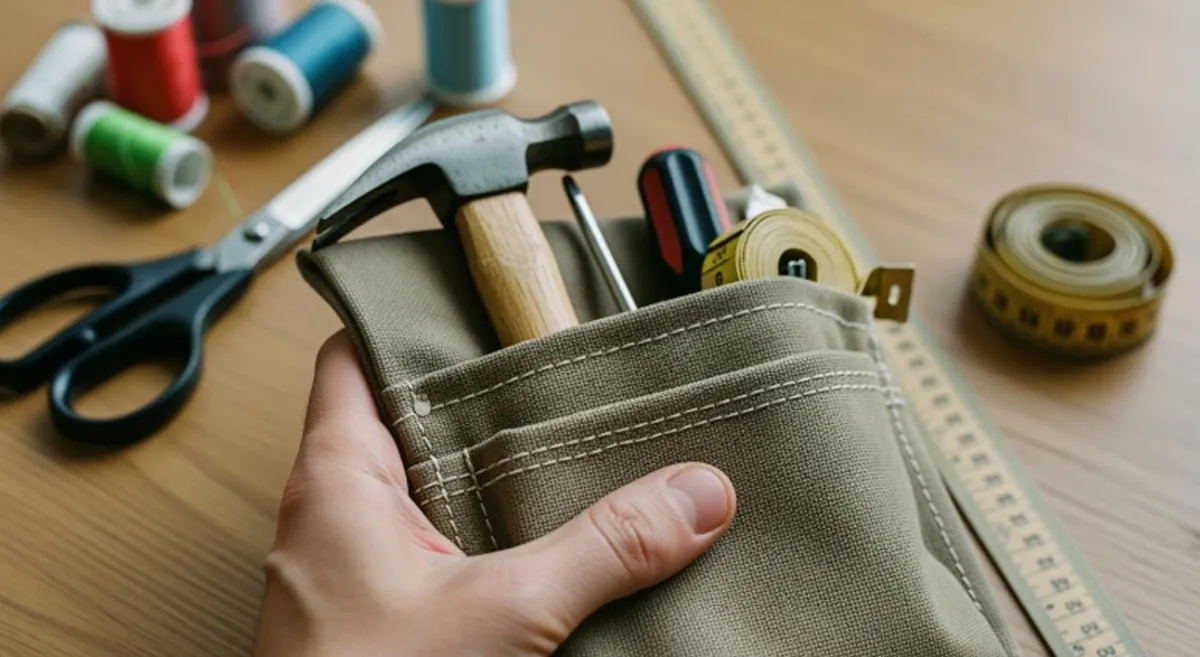
You can learn how to make a canvas tool bag from scratch with just a few basic steps. Start by picking your favorite canvas and gather your supplies. Cut your fabric, sew the pieces together, and add pockets where you want them. You get to decide the size and the features. Beginners love this project because it is easy to customize. Grab your materials and make a tool bag that fits your needs!
Key Takeaways
- Pick heavyweight canvas because it is strong. It does not tear easily and can hold heavy things.
- Think about using waxed canvas for water resistance. It keeps your tools dry and looks nice.
- Get important supplies like strong thread and sharp scissors. These items help you sew better.
- Look for free patterns online to make your tool bag unique. Change the size to fit your tools.
- Use strong stitching for the pockets. Make corners stronger with box stitching so they do not rip.
- Put in zippers and fasteners to keep things safe. These parts help you organize and find tools easily.
- Make your bag special with leather tags or decorations. These details help your bag look different.
- Check your bag often for damage. Fix problems early so your bag stays useful and looks good.
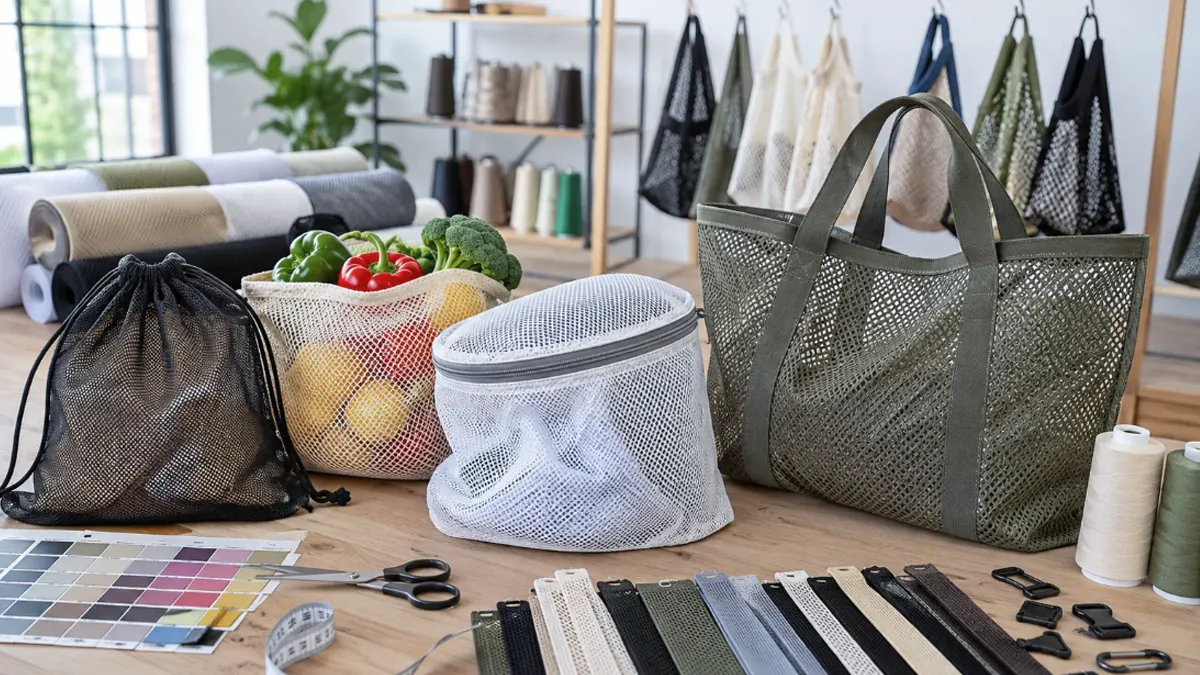
How to Make a Canvas Tool Bag: Materials & Tools
Canvas and Waxed Canvas
Choosing Canvas Weight
You want your tool bag to last, so picking the right canvas matters. Heavyweight duck canvas stands out for its strength and toughness. This fabric resists tears and holds up under heavy loads. If you plan to carry lots of tools or use your bag every day, go for a canvas in the 400–800 gsm range. The No. 8 natural canvas used in many professional tool bags gives extra durability. You get better resistance to wear and tear, which means your bag will last longer.
Tip: Thicker canvas makes your bag sturdier, but it can be harder to sew. If you’re new to sewing, start with a medium-weight canvas.
Benefits of Waxed Canvas
Waxed canvas is another great choice. It’s treated to repel water, so your tools stay dry even if you work outside or in wet places. Waxed canvas also looks cool and ages nicely. You get a rugged, classic style that gets better with time.
Here’s a quick look at popular canvas types for tool bags:
| Canvas Type | Weight Range | Water Resistance | Recommended Use |
|---|---|---|---|
| Heavyweight Duck Canvas | 400–800 gsm | High | Tool bags, industrial carriers |
| Waxed Canvas | 250–600 gsm | High | Outdoor duffels, field gear |
Essential Supplies
Thread, Scissors, Sewing Machine
You need a few basic supplies to get started. Grab strong thread, sharp scissors, and a sturdy sewing machine. Heavy-duty thread works best for tool bags because it won’t snap under pressure. A sewing machine that can handle thick fabric makes the job easier.
Leather Tags, Tether Grommets
Add leather tags for style and easy labeling. Tether grommets help you attach keys or hang your bag. These small extras make your bag more useful and give it a professional look.
Here’s a table to help you compare materials:
| Material | Pros | Cons | Best For |
|---|---|---|---|
| Canvas | Durable, lightweight, affordable | Absorbs water | DIYers, light-duty professionals |
| Ballistic Nylon | Super durable, water-resistant | Heavy, expensive | Heavy tools, tough jobs |
| Leather | Stylish, long-lasting | Needs care, heavy, expensive | High-quality, long-lasting bags |
| Polyester | Lightweight, budget-friendly | Less durable | Cost-effective, lightweight options |
| Cordura | Weather-resistant, long-lasting | Expensive, stiff | Heavy-duty, resilient bags |
Note: You can use other fabrics like jeans, linen, or jute for a unique look. Handles can be made from the same fabric or use straps and ribbons for extra comfort.
Optional Add-ons
Zippers, Fasteners, Decorative Elements
Want to make your bag stand out? Add zippers for secure pockets, fasteners for easy access, or decorative patches and labels. Hinges and magnetic buttons can make your bag easier to open and close. These extras let you customize your tool bag to fit your style and needs.
- Zippers keep tools safe.
- Fasteners make pockets easy to reach.
- Decorative elements add personality.
You get to choose what works best for you. Material choice affects how tough, waterproof, and stylish your bag will be. Pick supplies that match your needs and make your tool bag truly yours.
Make a Basic Tool Bag: Pattern & Cutting
Free Patterns & Custom Sizing
Finding Patterns Online
You want to make a basic tool bag that fits your style and needs. Start by searching for free patterns online. Many websites and DIY forums offer printable templates for tool bags. You can find patterns for classic tool totes, roll-up bags, or even specialty designs. Look for patterns that match your skill level. Some patterns include step-by-step instructions, which help you follow along easily.
Tip: Download a few different patterns before you decide. Compare the shapes and pocket layouts. This helps you pick the best one for your tools.
Adjusting Dimensions
You might want a tool bag that holds bigger tools or has extra pockets. Adjust the pattern dimensions to fit your needs. Measure your favorite tools and decide how much space you want. Use a ruler and fabric marker to sketch new lines on the pattern. If you want a deeper bag, add extra inches to the height. For more pockets, draw extra rectangles on the pattern.
| Bag Feature | How to Adjust | Result |
|---|---|---|
| Height | Add inches | Holds taller tools |
| Width | Widen pattern | Fits more items |
| Pocket Size | Change rectangle | Custom compartments |
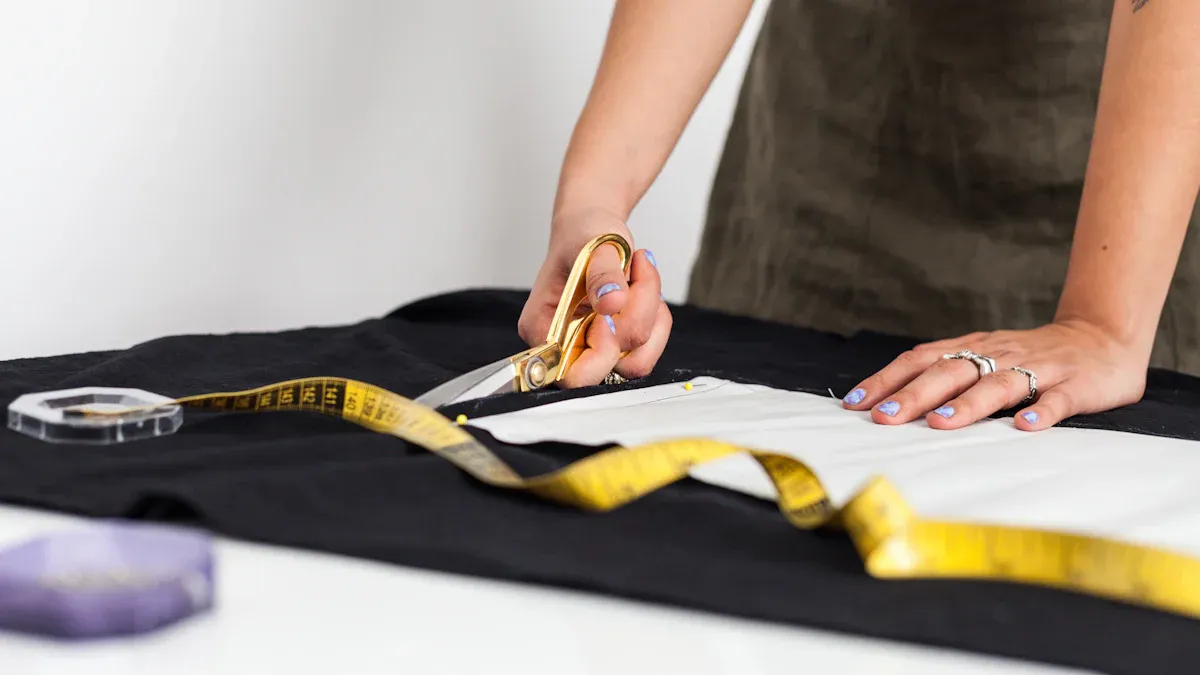
Cutting Techniques
Safety Tips
Before you cut your canvas, set up a safe workspace. Clear a flat surface and use a cutting mat to protect your table. Keep your fingers away from blades. Always use sharp scissors or a rotary cutter. Dull blades can slip and cause accidents. If you work with kids, supervise them closely.
- Wear gloves if you use heavy-duty cutters.
- Keep tools organized to avoid clutter.
- Store blades safely after you finish.
Marking and Cutting Canvas
Professional bag makers use smart techniques to get clean edges. You want your tool bag to look neat, so follow these steps:
- Prepare your workspace with a cutting mat.
- Gather your canvas, scissors, rotary cutter, ruler, and fabric marker.
- Measure and mark the dimensions on the canvas using a ruler.
- Cut along the marked lines. Use fabric scissors for small cuts. For straight lines, guide a rotary cutter along the ruler.
You can use different tools for the best results:
- Utility scissors work for general tasks. Make sure they are sharp for clean cuts.
- Rotary cutters help you cut straight lines. Use them on a cutting mat for accuracy.
- Pinking shears create zigzag edges. This helps prevent fraying.
Align the fabric edges with grid lines on your cutting mat. This keeps your cuts straight. If you need to cut several layers, use a rotary cutter with a sharp blade. Always follow the grain line of the fabric. This keeps your tool bag strong and prevents distortion.
Note: Some makers pull a thread from the canvas to create a visible guide for straight cuts. Laser-guided tools can also help you cut with precision.
You now have the pieces you need to make a basic tool bag. With careful measuring and cutting, your project will look professional and last a long time.
Pockets, Compartments, and Tool Rolls
Designing Pocket Layouts
You want your tool bag to keep everything in order. Start by thinking about what tools you use most. Place those tools in easy-to-reach pockets. When you create the first set of pockets, group hand tools separately from power tools. This makes it simple to grab what you need.
Tool-Specific Pockets
You can design pockets for each tool. Use small pouches inside bigger pockets to keep tiny items from getting lost. Try color-coding your pockets for different tool types. Label dividers and handles so you know where everything goes. Add hooks or a pegboard for hanging tools. Leave space for new tools you might add later.
- Group similar tools together.
- Use magnetic strips for metal tools.
- Add drawer organizers for small parts.
Tip: Thoughtful placement of items in pockets helps you avoid chaos and makes your tools easy to find.
Multi-purpose Compartments
Multi-purpose compartments give you flexibility. You can store tape, nails, or even snacks. Use adjustable dividers to change the size of each compartment. This way, your bag grows with your collection. If you want to keep things neat, add small containers or zippered pouches.
| Compartment Type | Best Use | Extra Features |
|---|---|---|
| Adjustable Divider | Nails, screws, tape | Removable, flexible |
| Zippered Pouch | Small tools, bits | Secure, easy to open |
| Open Pocket | Large tools, gloves | Quick access |
Making a Tool Roll
A canvas tool roll helps you organize tools and keeps them safe. You can roll it up and carry it anywhere. Professionals use tool rolls with lots of pockets and sturdy fabric.
Layout and Cutting
Before you start, measure your tools. Decide how many pockets you need. Standard tool rolls fit two 15-piece wrench sets and have up to 40 pockets. You can use heavy-duty duck canvas or 600D polyester. When you cut your fabric, follow these steps:
- Lay out your canvas on a flat surface.
- Mark the pocket positions with a fabric marker.
- Cut the main body and pocket pieces to match your layout.
Here’s a quick look at common tool roll sizes:
| Feature | Pro Wrench Roll 40 | TR-LC Specifications |
|---|---|---|
| Rolled Size | 5″ D x 21″ L | 9″ H x 14.5″ W x 7″ D |
| Opened Size | 23″ L x 21″ H | 29″ H x 14.5″ W |
| Material | Duckwear Canvas | 600D Polyester |
| Pockets | 40 | Removable pouches |
| Carry Handle | Web handle | Ergonomic handle |
Organizing Tools
A canvas tool roll keeps your tools organized and easy to reach. You can use colored tape to mark different rolls for different tool types. Wrapping your tools in a roll protects them from damage and keeps you safe from sharp edges.
- Designate each roll for a specific set of tools.
- Use quick-release buckles for fast access.
- Carry your roll with a sturdy web handle.
Note: Using a tool roll means you never have to dig through a messy toolbox again. You can find your tools fast and keep them in great shape.
Sew It All Together: Assembly Steps
Ready to sew it all together? This is the fun part where your canvas tool bag starts to look like the real deal. You’ll join all the pieces, attach pockets, add handles, and reinforce the bottom for strength. Let’s break down each step so you can follow along easily.
Attaching Pockets & Compartments
You want your pockets to last, so use strong stitching and smart placement. Start by laying out your pocket pieces on the main panels. Pin them in place before you sew. Double-check the alignment so everything looks neat.
Reinforcement Stitching
Strong seams keep your pockets from tearing. Use box stitching or bar tacking at the corners. These techniques add extra strength where you need it most. Double-stitch the edges for heavy-duty pockets. If you plan to carry sharp tools, add interfacing or a second layer of canvas.
| Reinforcement Techniques | Lining Options | Elastic Choices |
|---|---|---|
| Box stitching | Cotton canvas | Woven elastic |
| Bar tacking | Polyester twill | Knitted elastic |
| Interfacing | Nylon ripstop | Silicone-coated elastic |
Tip: Strong materials and double-stitching help pockets hold heavy items without sagging or tearing.
Alignment Tips
Getting your pockets straight makes your bag look professional. Use a ruler and fabric marker to mark pocket positions. Pin each pocket before you sew. Check that the top edges line up with the main panel. Sew slowly and keep an eye on the seam line. If you notice a pocket drifting, stop and adjust before you finish.
Handles, Straps, and Grommets
Handles and straps make your bag easy to carry. You want them to feel comfortable, especially when the bag is full. Reinforced handles and ergonomic designs help reduce strain on your hands and shoulders.
Handle Placement
Decide where you want your handles. Most tool bags have handles on the top, but you can add side straps for extra support. Use thick canvas or webbing for handles. Sew them on with box stitching or bar tacks for strength. If you want a padded grip, wrap the handle with extra fabric or foam.
- Reinforced handles make carrying easier.
- Ergonomic grips help prevent sore hands.
Adding Tether Grommets
Grommets let you attach keys, hang your bag, or add tethers for extra security. Metal grommets work best for heavy-duty canvas. Here’s how you add them:
- Make the hole: Use a fabric punch or hole cutter to cut a clean hole in the canvas.
- Position the grommet: Insert the eyelet through the hole from the front side.
- Attach the grommet: Place the washer on the back, line it up, and use a grommet tool to press them together. You might need a hammer to crimp the edges.
Note: Add interfacing or a fabric stabilizer around the hole before you install the grommet. This keeps the fabric from fraying and helps the grommet stay secure.
Reinforcing the Bottom
The bottom of your tool bag takes the most abuse. You want it to stay strong and keep its shape, even when loaded with heavy tools.
Extra Layers
Add a hard bottom support to prevent sagging. You can use thin plastic or cardboard covered with canvas. Sew extra patches of heavy-duty canvas or denim to the bottom and corners. Reinforce seams with stitch-over-stitch sewing and heavy-duty thread.
- Insert a hard bottom support for shape.
- Sew on fabric patches for wear spots.
- Reinforce seams with extra stitching.
Waterproofing Tips
Protect your bag from water and dirt by treating the bottom and seams. Waxed canvas lasts up to seven years and keeps water out. DWR treatments offer strong resistance but need reapplication after many washes.
| Waterproofing Method | Water Resistance (mm) | Longevity | Maintenance |
|---|---|---|---|
| Waxed Canvas | 500–1000 | 7+ years | Re-wax every 2–3 years |
| DWR Treatment | 800–1200 | Shorter | Reapply after 20–30 washes |
Tip: Apply waterproofing treatments to repaired areas and high-stress spots. This keeps your bag dry and extends its life.
Step-by-Step Assembly Table
Here’s a quick guide to help you sew your tool bag together:
| Step | Action Description | Key Tips |
|---|---|---|
| Preparation | Organize, pre-wash, and mark fabric pieces | Accurate measurements prevent errors |
| Sew Main Seams | Join panels with double stitching and reinforcements | Reinforce corners with bar tacks |
| Attach Roll-Top | Sew top flap separately, attach secure closures | Ensure a tight, adjustable roll-top |
| Add Pockets | Incorporate internal dividers and exterior pockets | Customize layout for tool organization |
| Final Assembly | Combine all parts, trim excess, and press seams | Inspect for uniformity and strength |
Troubleshooting Tips for Sewing
You might run into sewing problems. Here’s how to fix the most common issues:
- Use the right needle. Strong needles prevent broken needles and skipped stitches.
- Use a walking foot. This keeps thick fabric from shifting or puckering.
- Adjust your stitch length. Longer stitches work better for thick canvas.
- Use the needle down function. This gives you more control.
- Practice on scrap fabric. Test new techniques before you start.
| Symptom | Likely Cause | Quick Fix |
|---|---|---|
| Thread bunching underneath | Bobbin tension too loose | Check bobbin threading path |
| Loops on top of fabric | Upper tension too loose | Increase tension dial setting |
| Thread breaking frequently | Needle too small or dull | Replace with correct needle |
Understanding how to troubleshoot sewing machine problems saves time and money. You can fix issues like skipped stitches and thread bunching quickly, so your project stays on track.
Now you know how to cut, sew, and reinforce every part of your canvas tool bag. Take your time with each step, and your bag will look great and last for years.
Finishing Touches & Customization
Installing Zippers & Edges
Zipper Choices
You want your tool bag to open and close smoothly. Zippers make this easy. When you pick a zipper, think about the closure style first. Some bags use a standard zipper, while others use a recessed one for a cleaner look. Measure the mouth of your bag after sewing. Choose a zipper that is about 1–1.5 cm shorter than the opening. This helps the zipper fit without bunching up.
Tip: Always add a seam allowance of 4–6 mm to each side of your zipper panel. This gives you enough fabric to sew the zipper in place.
Before you sew, lay the zipper face down and baste it securely. Use a zipper foot on your sewing machine. Keep the stitching even and close to the teeth. For longer zippers, bar-tack a new stop and add end tabs. This keeps the zipper from hitting the seams. Secure both ends with tight backstitches or bar-tacks. Topstitch along the zipper for a neat, professional finish.
- Decide on closure style early
- Measure and select zipper length carefully
- Add seam allowance to zipper panels
- Use interfacing under the zipper to prevent tunneling
- Keep edges straight within ±2 mm
- Baste zipper before final stitching
- Use a zipper foot for accuracy
- Secure ends with bar-tacks or backstitches
Edge Finishing
Clean edges make your bag look sharp. You can use bias tape, fold-over binding, or just turn the raw edge under and stitch. For canvas, woven interfacing works best. It keeps the edges from fraying and adds strength. Always check that your edges stay straight. If you want a softer look, use lighter interfacing or non-fusible for leather details.
| Edge Finish | Best For | Look |
|---|---|---|
| Bias Tape | All fabrics | Colorful |
| Fold-over Binding | Heavy canvas | Durable |
| Turned Edge | Simple bags | Clean |
Note: Straight edges and neat stitching make your tool bag look like it came from a pro shop.
Leather Tags & Decorative Details
Attaching Leather Tags
Leather tags add style and help you label your bag. Cut your tag from scrap leather. Punch holes for stitching. Place the tag where you want it, then sew it on with strong thread. You can use a simple running stitch or a decorative saddle stitch. If you want extra flair, emboss your initials or a logo onto the leather before attaching.
- Cut tag to size
- Punch holes for sewing
- Stitch tag securely
- Emboss for a custom look
Personalization Ideas
You can make your tool bag unique with a few creative touches. Add your brand logo, a favorite design, or use high-quality materials for details. Personalization boosts the value of your bag and makes it stand out. A logo helps people recognize your work right away. Unique designs catch the eye and encourage people to use your bag again and again. When you use top-notch materials, your bag feels special and lasts longer.
Want your bag to be memorable? Try adding patches, embroidery, or even a custom color scheme. These small changes make a big impact.
| Personalization Method | What It Does | Why It Matters |
|---|---|---|
| Brand Logo | Boosts recognition | Builds loyalty |
| Unique Design | Adds visual appeal | Encourages reuse |
| High-Quality Details | Improves durability | Increases value |
You get to decide how your tool bag looks and feels. With the right finishing touches, your bag becomes more than just a tool carrier—it becomes a statement piece.
Troubleshooting & Pro Tips
Common Mistakes
You might run into a few bumps when making your canvas tool bag. Beginners often make the same mistakes, but you can avoid them with a little planning.
Fixing Misaligned Seams
Misaligned seams can make your bag look messy. If you notice seams that don’t line up, don’t panic. You can fix this by ripping out the stitches with a seam ripper and trying again. Always pin your pieces before sewing. Double-check the alignment with a ruler or measuring tape. Sew slowly and keep your fabric flat. If you see the seam drifting, stop and adjust. Practice on scrap fabric to get the hang of it.
Tip: Use a fabric marker to draw guide lines. This helps you keep seams straight and neat.
Repairing Weak Spots
Weak spots show up in places that get a lot of wear, like corners and handles. You can reinforce these areas with extra stitching or a patch of canvas. If you spot a tear, sew a zigzag stitch over the area or add a small patch. For handles, use box stitching or bar tacks. These stitches add strength and keep your bag from falling apart.
Here’s a quick table to help you spot and fix weak areas:
| Weak Spot | How to Fix | Best Stitch |
|---|---|---|
| Corners | Add canvas patch | Zigzag or box stitch |
| Handles | Reinforce with webbing | Bar tack |
| Seams | Double stitch | Straight stitch |
Note: Regularly check your bag for signs of wear. Fixing small problems early keeps your bag strong.
You also want to avoid these beginner mistakes:
- Forgetting to organize your tools. Assign each tool to a pocket to prevent damage and loss.
- Skipping regular cleaning. Dirt and grime can wear out your bag and tools. Wipe down your bag and inspect it often.
- Picking the wrong bag for your job site. Choose a bag that fits your work environment to protect your gear.
- Not securing your bag during transport. Fasten your bag so tools don’t spill or get lost.
- Ignoring warranty or repair options. Check if your bag has a warranty. Repairs can save you money and extend the life of your bag.
Tips for a Professional Finish
You want your tool bag to look sharp and last a long time. Small details make a big difference.
Decorative Touches
Add a splash of style with decorative touches. Try sewing on patches, using colorful thread, or adding embroidery. You can use contrast stitching to highlight pockets or handles. Leather accents give your bag a classic look. Metal rivets add both strength and style.
Pro Tip: Use fabric paint or iron-on decals for a custom design. These extras make your bag stand out.
Customization Ideas
Personalize your bag to fit your needs. Add extra pockets for special tools. Use Velcro strips or magnetic closures for quick access. Try different handle styles for comfort. You can even add a name tag or logo to show off your work.
- Sew on extra compartments for nails or screws.
- Attach a key ring or carabiner for small items.
- Use waterproof lining for outdoor jobs.
Your canvas tool bag can be as simple or as fancy as you want. With a little creativity, you’ll have a bag that’s both useful and unique.
Conclusion
You now know how to make a canvas tool bag from scratch. You get to pick your materials, design your pockets, and add your own style. When you make your own bag, you enjoy benefits like strong canvas, tight seams, and reinforced handles. You can use eco-friendly materials, unique designs, and weatherproof features. Custom bags last longer and show off your personality. If you want a custom tool bag for your team or business, you can contact us. We offer sample preparation in 5–7 days and bulk orders in 25–35 days. Try how to make a canvas tool bag today, and see how easy it is to create something durable. You can use how to make a canvas tool bag for your next project, your job site, or even as a gift. When you choose how to make a canvas tool bag, you get a product that fits your needs and stands up to tough jobs.
FAQ
How do I choose the right canvas for my tool bag?
Pick heavyweight canvas if you want a tough bag. Waxed canvas works great for water resistance. Lighter canvas is easier to sew. Think about how much weight you plan to carry.
Can I make a tool bag without a sewing machine?
Yes, you can sew by hand. Use a strong needle and thick thread. Hand stitching takes longer, but you get more control. Try simple stitches like running stitch or backstitch.
What tools do I need to start this project?
You need canvas, scissors, thread, and a sewing machine. Add a ruler, fabric marker, and pins. Optional tools include grommet kits, leather scraps, and zippers.
How do I keep my bag from fraying?
Use pinking shears or finish edges with bias tape. You can also fold raw edges under and stitch them down. Waxed canvas helps prevent fraying, too.
Can I add extra pockets after finishing my bag?
You can sew or glue extra pockets onto your bag later. Use strong thread and reinforce the seams. Make sure the new pockets fit your tools.
How do I clean my canvas tool bag?
Brush off dirt first. Wipe with a damp cloth. For tough stains, use mild soap and water. Avoid machine washing if your bag has leather or waxed canvas.
What’s the best way to waterproof my tool bag?
Waxed canvas gives good water resistance. You can also spray your finished bag with a waterproofing spray. Reapply wax or spray every few months for best results.