You want to learn how to clean a tool bag without hurting it, right? Dirt, mold, and bad smells can show up fast. This makes your bag look old and smell bad. Every material needs its own way to clean. So, you should check what your bag is made of before you start. Here are some common materials and how to clean them:
| Material | Characteristics | Cleaning Requirements |
|---|---|---|
| Canvas | Strong, can get mold | Clean gently to stop mold |
| Polyester | Light, water-resistant | Easy to clean, might stretch |
| Nylon | Tough, strong | Needs little care, wipe off stains |
| Leather | Classic, heavy | Needs special care to stop damage |
If you follow the main steps for cleaning a tool bag, you can clean your bag and keep it looking nice.
Key Takeaways
- Check your tool bag for dirt, stains, and mold before you clean it. This helps you find spots that need extra care.
- Learn what your bag is made of. Leather, canvas, and nylon need different ways to clean.
- Take everything out of your bag before you start cleaning. Shake the bag to get rid of loose dirt. Use mild detergent to clean stains.
- Pick cleaning solutions that are safe. Do not use strong chemicals like bleach. Choose eco-friendly cleaners instead.
- Brush off dirt on the surface gently. Use a soft brush for fabric bags. Use a wire brush for tough dirt.
- Use plain white vinegar to clean mold. Spray vinegar on the moldy spot. Wait one hour, then wipe it clean.
- Use leather conditioner on leather bags often. This keeps the leather soft and stops it from cracking. Pick a good leather conditioner.
- Make a habit of cleaning your tool bag often. Clean it once a month to stop dirt from building up. This helps your bag last longer.
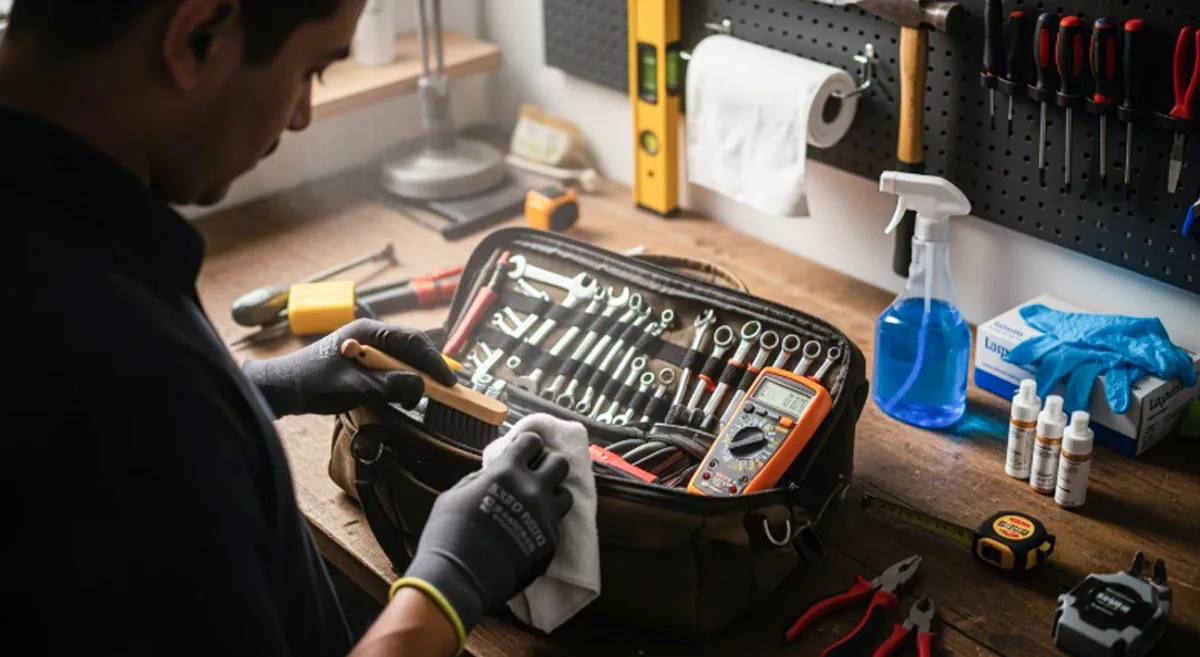
How to Clean a Tool Bag: Initial Steps
Inspect for Dirt and Mold
Start by looking closely at your tool bag. You want to spot any dirt, stains, or mold before you begin to clean tool bags. Mold can grow fast if your bag gets wet or sits in a damp place. Check the corners, seams, and pockets. Sometimes, you might see dark spots or smell something musty. If you find mold, you need to clean it right away. Dirt and dust can hide in small spaces, so use a flashlight if you need to. If you see any damage, like tears or broken zippers, make a note. You can fix these after cleaning.
Tip: Mold can spread quickly. If you see any, plan to clean that area with extra care.
Identify Bag Material
You need to know what your tool bag is made of before you clean it. Different materials need different cleaning methods. Most tool bags use leather or fabric. You can usually tell by touching the surface. Leather feels smooth and heavy. Fabric, like canvas or nylon, feels lighter and softer. If you cannot identify the material of tool bag by touch, check the label inside the bag. Sometimes, the seller can help you figure it out.
- Leather bags need special cleaning products.
- Canvas bags can handle gentle scrubbing.
- Nylon bags are tough and easy to clean.
- Polyester bags resist water and stains.
Knowing the material helps you clean tool bags safely. You will avoid damage and keep your bag looking new.
Empty and Pre-Wash
You should empty the tool bag before you start cleaning. Take out all your tools, screws, and anything else inside. Shake the bag upside down to get rid of loose dirt. For canvas bags, spot-clean stains with a soft brush and mild detergent. If the bag is very dirty, wash it in lukewarm water with mild soap. Scrub the dirty spots gently. Rinse the bag well and let it air dry. Never use bleach or harsh chemicals. These can ruin the material.
If you have a nylon bag, you can machine wash it or clean it by hand. Use a washing bag to protect it. For leather bags, wipe them with a damp cloth and use a leather conditioner. This keeps the material soft and strong.
Note: Always let your bag dry completely before you put your tools back. Wet material can cause mold and bad smells.
Cleaning your tool bag the right way starts with these simple steps. When you clean tool bags often, you stop dirt and mold from building up. You also protect the material and make your bag last longer.
Ways to Clean Tool Bags: Essential Supplies
Get your cleaning tools ready before you start. The right supplies make cleaning easier and keep your tool bag safe. Let’s see what you need and how to use each item.
Gather Cleaning Tools
You should collect some basic tools first. Here is a simple list to help:
- Soft brush for gentle scrubbing
- Wire brush for tough dirt or rust
- Clean, non-fading rags or microfiber cloths
- Mild detergent or white soap
- Vinegar and rubbing alcohol for mold or tough stains
- Small bucket or bowl
- Old toothbrush for zippers and corners
Tip: Use soft brushes and non-fading rags. This stops scratches or stains on your bag. Microfiber cloths pick up dirt and do not leave lint.
Choose Safe Cleaning Solutions
Pick a safe cleaning solution for your tool bag. Stay away from strong chemicals that can hurt the bag or the planet. Here is a quick table to help you pick:
| Cleaning Solution Type | Description |
|---|---|
| Mild, pH-balanced soaps | Good for leather and fabric; no harsh chemicals. |
| Leather conditioners with natural oils | Good for fabric too; do not use silicone-heavy ones. |
| Reusable cleaning tools | Soft microfiber cloths work for both materials. |
If you want to use a safety fabric cleaner, check the label. Make sure it is gentle and has no bleach or ammonia. Eco-friendly cleaners are better for the earth and your bag. Try to use biodegradable detergents and natural cleaners. These keep your bag clean and help nature.
- Use eco-friendly cleaners with no harsh chemicals or toxins.
- Pick biodegradable detergents and natural cleaners that are safe for the earth.
- Do not use bleach or ammonia to keep your tool bag safe.
Prepare Warm Water and Detergent
Now get your cleaning solution ready. The water temperature and detergent depend on your bag’s material. Here is a table to help you:
| Material | Recommended Water Temperature | Detergent Type |
|---|---|---|
| Fabric Tool Bags | Warm (Hand wash) / Cold (Machine wash) | Mild Detergent |
| Leather Tool Bags | N/A | Leather Cleaner / Saddle Soap |
| Canvas Tool Bags | Cold (Machine wash) | Mild Detergent |
Fill a bucket with warm water if you have a fabric bag. Add a little mild detergent and mix until you see bubbles. For leather bags, do not use water. Use a leather cleaner or saddle soap. Always follow the cleaner’s instructions for best results.
When you use the right ways to clean tool bags, your bag stays nice and lasts longer. Safety is important, so test your cleaner on a small spot first before cleaning the whole bag.
Remove Dirt and Mold
Brush Off Surface Debris
You want to start by brushing off any loose dirt or dust from your tool bag. Use a soft brush for fabric or canvas bags. If you see tough dirt or rust, grab a wire brush and gently scrub the area. Make sure you reach into corners and seams, where dirt likes to hide. If you spot any stains, use a dry microfiber cloth to wipe them away. This step helps you see what needs deeper cleaning later.
Tip: Always brush gently. Scrubbing too hard can damage the material or spread stains.
Treat Mold with Vinegar Solution
If you need to remove mold from a tool bag, vinegar works best. You should use undiluted white vinegar with 5% acidity. This strength kills over 80% of mold types, even black mold. Spray the moldy area with vinegar until it is soaked. Let it sit for at least one hour. This gives the vinegar time to break down the mold and lift stains. After an hour, wipe the area with a clean rag. If you still see stains, repeat the process. Vinegar also helps remove bad smells from your bag.
- Use undiluted white vinegar (5% acidity) for mold.
- Spray the mold directly and let it sit for one hour.
- Wipe with a clean rag and repeat if stains remain.
If you prefer, you can use rubbing alcohol instead of vinegar. Both work well for cleaning mold and stains. Always let the bag dry completely after treating mold.
Clean Zippers and Hardware
Zippers and hardware need special care. Dirt and moisture can cause rust or make zippers stick. Start by removing loose dirt with a dry microfiber cloth. Use a small brush or old toothbrush to clean around zipper teeth and hardware. Mix mild dish soap with distilled water. Dip a cloth or Q-tip in the solution and gently clean the zippers and metal parts. If you see tarnish or stains, use a little white vinegar or lemon juice. Do not let these cleaners sit too long, or they might damage the metal.
| Step | What to Do |
|---|---|
| Remove loose dirt | Use a dry microfiber cloth |
| Clean with soap | Use mild dish soap and distilled water |
| Treat stains | Dab with vinegar or lemon juice |
| Buff and dry | Wipe with a clean microfiber cloth |
Prevent Rust on Zippers
You want to keep your zippers rust-free and working smoothly. Clean zipper teeth with soap and water every month. Use a soft-bristled brush to remove dirt. After cleaning, inspect for wear or damage. Place silica gel packs inside your bag to absorb moisture. This helps prevent rust and keeps your hardware in good shape.
Routine cleaning is key. If your bag gets dirty or wet, rinse zippers with fresh water, scrub with a small brush, and dry them completely before storing. This stops corrosion and keeps your tool bag looking new.
If you store your bag, leave the zipper partly open. Avoid extreme temperatures. Use a breathable fabric cover to keep dust away and let the bag breathe. These steps help prevent stains and rust, making your tool bag last longer.
Clean Tool Bag Surfaces
Wash with Mild Detergent
You want your tool bag to look fresh and last longer. Start by soaking your bag in warm water mixed with a mild detergent. Fill a bucket or sink with enough water to cover the bag. Add a small amount of detergent and swirl it around until you see bubbles. Let your bag soak for 20 to 30 minutes. This step helps loosen dirt and stains from the fabric or leather. If your bag is made of canvas or nylon, soaking works well. For leather bags, use a damp cloth with a gentle cleaner instead of soaking.
Tip: Always test your detergent on a small hidden spot first. This helps you avoid fading or damage.
Scrub Heavily Soiled Areas
After soaking, you need to scrub the spots that look extra dirty. Grab a soft brush or a sponge for gentle cleaning. If you see tough stains or debris, use a sponge soaked in hot water with OXY powder. This method helps remove discoloration and stubborn dirt. You can also use an old toothbrush for corners and seams. Replace your sponge if it starts to wear down. A fresh sponge cleans better and does not spread germs.
- Soft brushes work best for fabric and canvas.
- Sponges soaked in OXY powder help with heavy stains.
- Old toothbrushes reach tight spaces.
- Change your sponge when it looks worn out.
Note: Scrub gently. You do not want to damage the material or make the stain worse.
Rinse and Air Dry
Once you finish scrubbing, rinse your tool bag with clean water. Make sure you remove all soap and cleaning solution. Hold the bag under running water or use a clean bucket to rinse. Squeeze out extra water, but do not twist or wring the bag. This can stretch or tear the fabric.
You need to dry your bag the right way to stop mold and mildew. Place your bag in a well-ventilated area. Open all pockets and zippers so air can flow inside. Do not put your bag in direct sunlight or near a heater. High heat can damage the material. Let your bag air dry completely before you put your tools back inside. If your bag gets wet, always remove everything and let it dry in a breezy spot.
- Remove all tools and accessories before drying.
- Choose a spot with good airflow for drying.
- Avoid direct sunlight and heat sources.
- Make sure the bag is totally dry before restocking.
Never use a dryer for your tool bag. The heat can shrink, melt, or ruin the material. Air drying is the safest way to keep your bag clean and mold-free.
Cleaning your tool bag the right way keeps it strong and ready for work. You stop mold from growing and protect your bag from damage. When you clean and dry your bag often, you make it last longer and look better.
Deodorize and Remove Stains
Use Baking Soda for Odors
You want your tool bag to smell fresh, right? Sometimes, even after cleaning, odors stick around. Baking soda helps you get rid of those smells. It does more than just cover up odors. It actually absorbs and neutralizes them. You can use baking soda for carpets and trash cans, so it works great for tool bags too.
Here’s how you can use baking soda:
- Sprinkle a generous amount inside your empty tool bag.
- Close the bag and let it sit overnight.
- Shake out the baking soda the next day.
- Repeat if you still notice any odor.
Tip: Baking soda is safe for most materials. You don’t need to worry about damage or fading.
Spot Clean Stubborn Stains
Sometimes, you clean your bag and still see marks. You need to find the stains that just won’t go away. Spot cleaning helps you tackle these tough spots. First, check what material your bag is made of. Different stains need different methods.
Try these spot cleaning tricks:
- Use a soft laundry stain remover on a microfiber cloth for small fabric stains. Don’t put the remover straight on the bag.
- Grab a Tide-To-Go Pen for stubborn stains. It works fast and is easy to carry.
- For leather, buff light marks with a microfiber cloth. If the stains are stubborn, use a small piece of a Mr. Clean Magic Eraser.
- If your bag has suede, pony hair, or fur, a suede brush can help remove dirt or light stains.
You want to be gentle. Scrubbing too hard can make stains worse or damage the material. Always test your cleaning method on a hidden spot first. If you still see stains after cleaning, repeat the process or try a different method.
Note: Avoid bleach. It can ruin your bag and make stains harder to remove.
Dry Thoroughly
After you finish cleaning, drying your tool bag is super important. Moisture can cause new stains or even mold. Hang your bag upside down in a place with good airflow. Keep it out of direct sunlight because strong sun can weaken the fabric. Make sure your bag is completely dry before you store it or put your tools back inside.
Here’s a quick drying checklist:
- Hang the bag upside down.
- Choose a well-ventilated area.
- Keep away from direct sunlight.
- Check that every part is dry before storing.
Drying your bag the right way helps prevent stains and keeps your tool bag fresh for your next project.
Condition and Protect
Condition Leather Bags
Leather tool bags need extra care if you want them to last. You can keep your leather bag looking great by conditioning it. Conditioning helps the leather stay flexible, stops it from cracking, and makes it last longer. If you skip this step, your bag might get stiff or even split.
- Keeps leather soft and flexible
- Stops cracks from forming
- Makes your bag last for years
Experts say you should use high-quality leather conditioners. These products work best on tool pouches made from full-grain leather. Full-grain leather stands up to tough jobs and gives you more strength than fabric or synthetic bags. You just need to rub a small amount of conditioner into the leather with a clean cloth. Let it soak in for a few minutes, then wipe off any extra. Your bag will look shiny and feel smooth.
Tip: Condition your leather bag every few months, especially if you use it outside or in rough places.
Apply Fabric Protectant
Fabric tool bags also need protection. You can use a fabric protectant to help your bag fight off water, dirt, and stains. Different protectants work better for different types of fabric. Here’s a quick look at some popular options:
| Fabric Type | Waterproof Level | Abrasion | Flexibility | Cost |
|---|---|---|---|---|
| TPU Laminated | High | High | Excellent | High |
| PU Coated | Medium | Medium | Good | Medium |
| PEVA | Low | Low | Fair | Low |
| Silicone/Waxed | Low | Low | Good | Low–Medium |
- TPU laminated protectants work best for heavy-duty bags that need strong waterproofing.
- PU coated protectants fit mid-range tool bags and backpacks.
- PEVA protectants suit cooler bags or medical kits.
- Silicone or waxed protectants help light-use totes and fashion bags.
You can spray or rub the protectant onto the fabric. Make sure you cover all sides, especially seams and corners. Let the bag dry before you use it again. This step helps your bag stay clean and strong, even if you work in wet or dirty places.
Note: Always check the label on your protectant. Some products work better on certain fabrics.
Store Properly
Storing your tool bag the right way keeps it safe from damage and mold. You want to keep your bag dry and clean when you’re not using it. Try these easy tips:
- Use plastic bins instead of cardboard. Plastic keeps out moisture.
- Put silica gel packs inside your bag. These packs soak up any water in the air.
- Store your bag in a vacuum-sealed bag if you want extra protection.
- Leave space between your bags and other items. Air can move around and keep things dry.
- Place your bags on shelves. This lifts them off the ground and helps air flow.
If you follow these steps, your tool bag will stay fresh and ready for your next project. You won’t have to worry about mold or bad smells. Good storage makes your bag last longer and keeps your tools safe.
Tip: Check your storage area every month. Make sure it stays dry and clean.
Prevent Future Issues
Regular Cleaning Schedule
You want your tool bag to last, right? Setting up a regular cleaning schedule helps you keep your bag in top shape. Dirt and grime can build up fast. If you clean your bag often, you stop dirt from wearing down the material. You also keep your tools from getting rusty. Try to clean your bag every month, or more often if you use it daily. Wipe down the outside and inside with a damp cloth. Use mild soap for tough spots. For Cordura, canvas, or nylon, stick with gentle soap and water. For leather, use a special cleaner and conditioner. When you make cleaning a habit, you extend the life of your tool bag and keep your gear ready for work.
Tip: Set a reminder on your phone or calendar. This way, you never forget to clean your bag.
Proper Storage Tips
Storing your tool bag the right way makes a big difference. You want to keep it away from moisture and sunlight. Pick a dry, clean spot for your bag. A shelf or cabinet works best. Keep your bag upright so it holds its shape. Never leave your bag on the floor or in places with extreme temperatures. If you have more than one bag, leave space between them so air can move around. For leather bags, avoid direct sunlight and too much moisture. For fabric bags, make sure they are dry before you put them away.
Here’s a quick checklist for storing your tool bag:
- Store in a dry, clean area
- Keep away from direct sunlight
- Use a shelf or cabinet for upright storage
- Avoid placing on the floor
- Leave space for air flow
Note: Silica gel packs help absorb moisture. Toss one inside your bag before storing.
Quick Response to Moisture
If your tool bag gets wet, you need to act fast. Mold and bad smells can show up quickly. First, empty your bag and turn it inside out. Air dry it in a well-ventilated spot for at least 24 hours. Use a soft brush to remove any mold you see. Mix equal parts water and white vinegar or rubbing alcohol in a spray bottle. Spray the affected areas and wipe with a clean cloth. Rinse with a damp cloth and dry again. If your bag still smells, sprinkle baking soda inside and let it sit overnight. For leather bags, use a conditioner after cleaning. Always store your bag in a cool, dry place with good airflow.
Quick action stops mold and keeps your bag fresh. Don’t wait if you see moisture!
Taking these steps helps you avoid problems before they start. You keep your tool bag clean, dry, and ready for your next project. Regular care and smart storage make your bag last longer and protect your tools.
Conclusion
You keep your tool bag in great shape when you clean it often and store it the right way. Regular care helps you save money, keeps your tools organized, and makes every job easier.
- You prevent damage and loss.
- You find tools fast and work more efficiently.
If your bag needs deep cleaning, you can call a professional.
Quality always comes first. Professional manufacturers solve quality issues and deliver top products.
You want a custom tool bag? We offer OEM and ODM services. You get unique designs, full control, and strong brand identity. Contact us for wholesale or custom orders!
FAQ
How often should you clean your tool bag?
You should clean your tool bag once a month. If you use it every day or work in dirty places, clean it more often. Regular cleaning keeps your bag fresh and strong.
Can you put a tool bag in the washing machine?
You can wash some fabric tool bags in the machine. Always check the care label first. Use a gentle cycle and mild detergent. Never machine wash leather or bags with lots of metal parts.
What should you do if your tool bag smells bad?
Sprinkle baking soda inside your empty bag. Let it sit overnight. Shake out the powder the next day. This trick removes most odors. You can repeat if needed.
How do you remove mold from a tool bag?
Spray undiluted white vinegar on the moldy area. Let it sit for an hour. Wipe with a clean cloth. Dry the bag completely. Vinegar kills mold and removes the smell.
Is it safe to use bleach on a tool bag?
No, you should not use bleach. Bleach can damage the fabric, fade colors, and weaken the material. Stick with mild soap, vinegar, or rubbing alcohol for cleaning.
How do you keep zippers from rusting?
Keep your bag dry. Clean zippers with a toothbrush and soapy water. Place silica gel packs inside your bag to absorb moisture. This helps stop rust before it starts.
Can you use a hair dryer to speed up drying?
You should not use a hair dryer. High heat can shrink or damage your bag. Air drying in a well-ventilated spot works best. Open all pockets and zippers for faster drying.
What is the best way to store a tool bag?
Store your tool bag in a dry, cool place. Use a shelf or plastic bin. Put silica gel packs inside to keep moisture away. Keep your bag off the floor and out of direct sunlight.