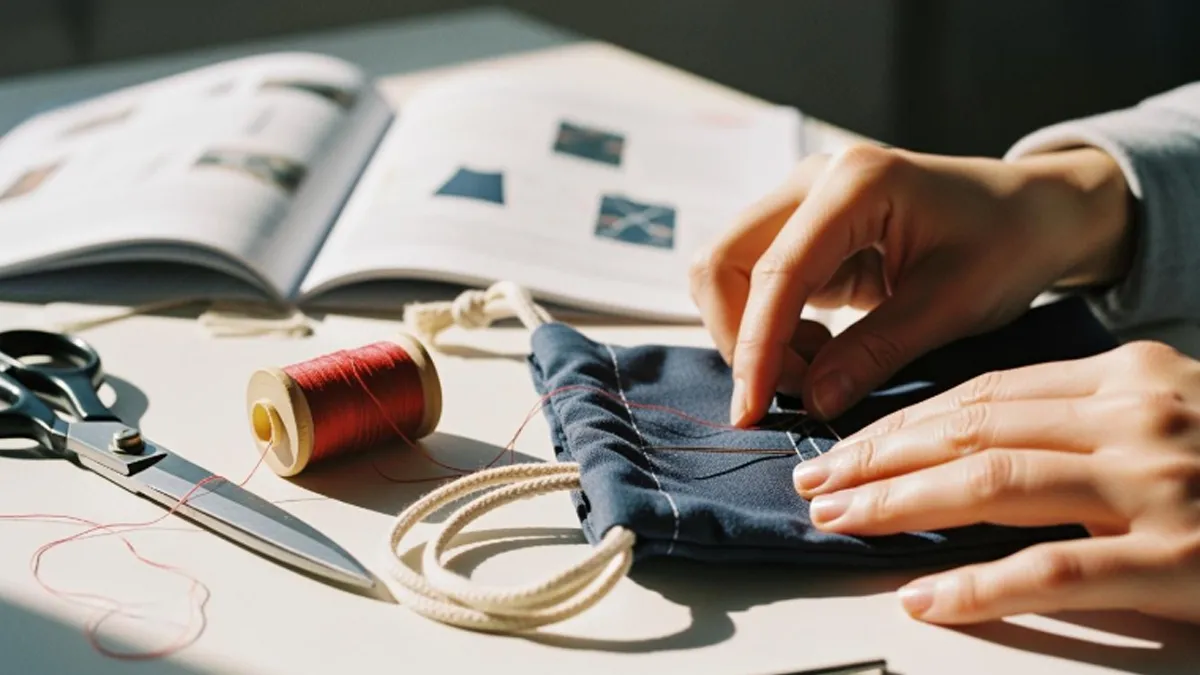
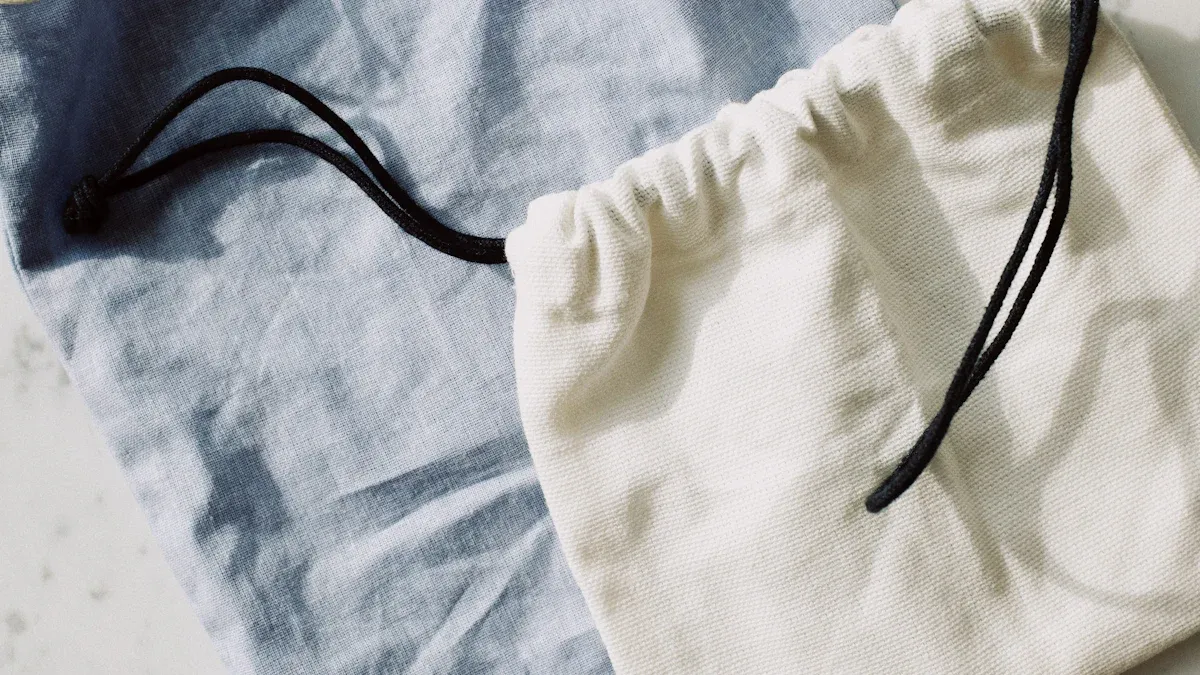
You can sew a diy drawstring bag with just a few simple steps. This project is quick and easy, so you don’t need much experience to get started. Many beginners finish their first diy bag in just a short time. Grab your favorite fabric and basic supplies. You’ll feel proud when you see your finished bag!
Key Takeaways
- Gather essential supplies like fabric, thread, scissors, and a sewing machine to start your drawstring bag project.
- Choose the right fabric for your bag. Cotton is great for beginners due to its ease of use and forgiving nature.
- Measure and cut your fabric carefully to ensure a neat and functional bag. A common size is 18 x 12 inches.
- Create a strong drawstring casing by folding and sewing the top edges of your bag. This helps the drawstring slide smoothly.
- Use a simple straw method to thread your drawstring through the casing quickly and easily.
- Personalize your bag with decorations like fabric paint, embroidery, or charms to make it unique.
- Follow care tips to keep your bag looking fresh, such as washing it gently and air drying.
- Learn from common mistakes and troubleshoot issues like uneven seams or fraying edges to improve your sewing skills.
DIY Drawstring Bag Materials
You need some basic supplies before you sew. This diy drawstring bag is good for beginners. It does not take a long time to make. You might already have most supplies at home.
Essential Supplies
You will need these things to make your bag:
- Fabric (18 x 12 inches is good for one bag)
- Sewing machine or needle and thread
- Scissors or rotary cutter
- Ruler or measuring tape
- Pins or fabric clips
- Safety pin (to help with the drawstring)
- Iron and ironing board
- Two strips of fabric or cord for the drawstring (each 2 inches wide and 30 inches long)
Tip: Cut your drawstring strips along the grain. This helps stop stretching and keeps your bag neat.
Optional Extras
You can add extras to make your bag special or easier to use:
- Decorative ribbon or lace for the drawstring
- Fabric marker or chalk for marking lines
- Fusible interfacing for more strength
- Embroidery thread or patches for decoration
- Small beads or charms for the drawstring ends
Choosing Fabric
The right fabric makes sewing easier and helps your bag last. There are many types to pick from. Some work better than others. Here is a quick look at popular choices:
| Material | Advantages | Common Uses |
|---|---|---|
| Cotton | Eco-friendly, print-friendly, soft, breathable | Sustainable packaging, casual bags |
| Canvas | Durable, structured, holds shape well | Heavy-duty backpacks, work bags |
| Polyester | Lightweight, water-resistant, wrinkle-resistant | Promotional bags, general use |
| Nylon | High strength-to-weight ratio, abrasion-resistant | Outdoor and performance bags |
If you want a strong and easy-to-sew bag, try these:
- Cotton canvas: sturdy and lasts long, good for daily use
- Cordura: very tough, does not wear out fast
- Heavy-duty polyester: strong and easy to clean
- Nylon: light, dries quickly, and resists stains
- Duck fabric: heavy cotton, smooth, and strong for heavy things
Pick a fun print or a solid color. If you are new to sewing, cotton is a good choice. It is easy to use and forgiving if you make mistakes. This diy drawstring bag is great for beginners. Do not worry about picking fancy fabric. Just choose one you like and start sewing!
Drawstring Bag Pattern & Cutting
Measuring Fabric
Let’s get started with your drawstring bag pattern. First, you need to measure your fabric. You want your bag to look neat and fit your needs, so grab your ruler or measuring tape. For a classic size, you can cut out a rectangular piece of fabric that measures 18 inches wide and 12 inches long. This size works well for most uses, like holding small items or snacks.
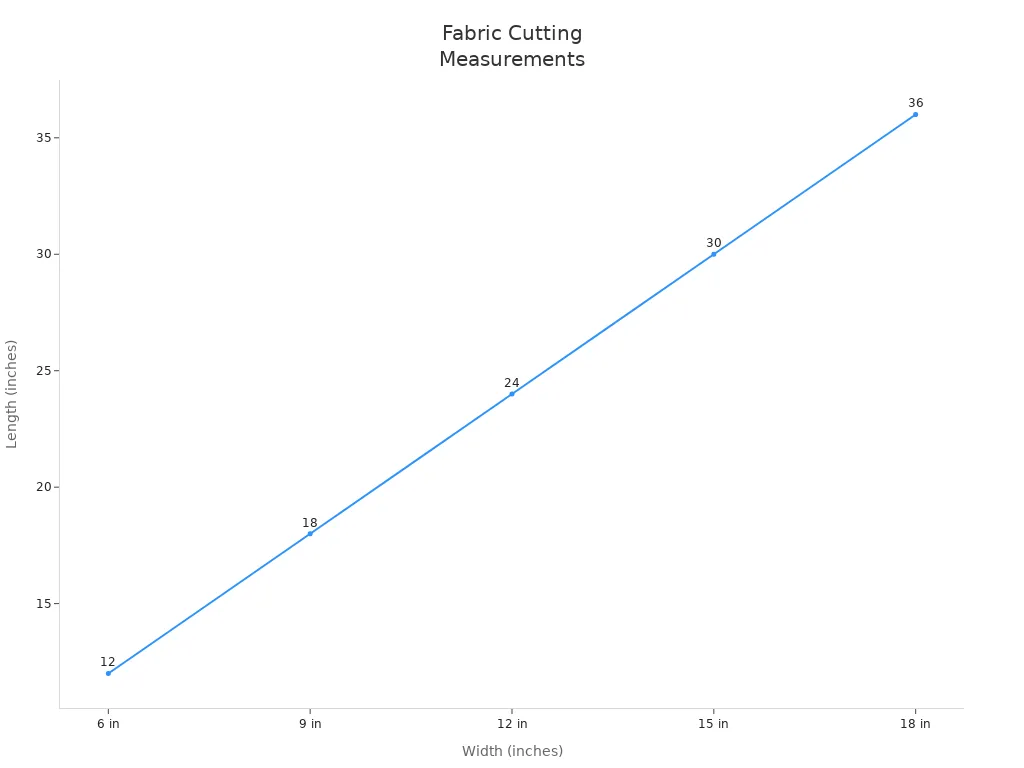
If you want a different size, check out this handy table. It shows popular measurements for drawstring bag pattern options:
| Width (inches) | Length (inches) |
|---|---|
| 6 | 12 |
| 9 | 18 |
| 12 | 24 |
| 15 | 30 |
| 18 | 36 |
You can also see how the width and length change in this chart. It helps you pick the best size for your project:
Cutting the Pattern
Now you’re ready to cut out the pattern pieces. Lay your fabric flat on a clean surface. Use pins or clips to hold it in place. Mark your measurements with chalk or a fabric marker. Take your time when you cut. Rushing can lead to uneven edges and a wonky drawstring bag pattern.
Here’s a quick look at a common mistake and how you can avoid it:
| Mistake | Description | How to Avoid It |
|---|---|---|
| Rushing the Cutting Process | Cutting fabric too quickly, leading to uneven edges and inaccurate shapes. | Use a rotary cutter, cutting mat, and quilting ruler for precision. Take your time, especially with curves and corners. |
If you want a crisp edge, use a rotary cutter and a quilting ruler. You’ll get a straight line every time. Double-check your measurements before you snip. You want your drawstring bag pattern to match up perfectly when you sew.
Preventing Fraying
Fraying can make your bag look messy and wear out faster. You can stop fraying with a few easy tricks. Here are some ways to keep your edges neat:
- Melt the ends of paracord with a candle or lighter to prevent unraveling.
- For cotton or ribbon, wrap tape around the ends to stop fraying.
- For nylon or polyester cords, melting the tips with a lighter is effective.
If you want extra protection, you can zigzag stitch along the raw edges or use pinking shears. These tools help your drawstring bag pattern stay strong and last longer. You can also use a small amount of fabric glue on the edges. It dries clear and keeps threads from coming loose.
Take a moment to check your edges before you move on. A little care now means your bag will look great and hold up over time. You’re almost ready to sew!
Quick DIY Drawstring Bag Steps
You’re ready to jump into the quick diy drawstring bag process. These steps move fast, so you can finish your diy drawstring bag in about 10 minutes if you have everything set up. Let’s break down each part so you feel confident and excited to sew the bag together.
Ironing and Prepping
Start by ironing your fabric. Smooth fabric makes sewing easier and helps your bag look neat. Set your iron to the right temperature for your fabric type. Press out any wrinkles and make sure the edges are flat.
Here are some smart prepping techniques:
- Use a serger or zig-zag stitch to finish the raw edges. This stops fraying and keeps your bag strong.
- Press seams open with your iron. You can use a little fabric adhesive to hold accent seams in place for a crisp look.
Tip: Ironing before you sew helps your stitches stay straight and your bag look professional.
Take a moment to fold in the edges where you’ll create the drawstring casing. Press these folds with your iron so they stay in place. This step makes the next part much easier.
Creating the Drawstring Casing
Now you’ll make the casing for your drawstring. This is the channel at the top of your bag where the drawstring slides through. Fold in the edges at the top of your fabric about one inch. Pin or clip the fold so it doesn’t move.
Here’s how you get a smooth and sturdy casing:
- Choose a sturdy fabric like mid-weight canvas for the casing. This helps your bag last longer.
- If your fabric is thin, add interfacing to give it more structure.
- Finish the raw edges inside the casing with a zig-zag stitch or serger.
- Topstitch along the folded edge to make the casing strong and keep it from rolling up.
You want the casing to be wide enough for your drawstring to move easily. Double-check the width before you sew the 2 channels closed. If you want extra durability, quilt the main pieces or add a second row of stitching.
Note: A well-made casing keeps your drawstring from snagging and makes your bag easier to open and close.
Sewing the Side and Bottom Seams
It’s time to sew the bag together. Place your fabric right sides facing each other. Pin the sides and bottom so they line up. Make sure the casing openings stay clear so you can thread the drawstring later.
Follow these instructions for sewing:
- Sew the 2 side seams from the bottom up to the casing. Stop when you reach the casing fold.
- Sew across the bottom edge to close the bag.
- Backstitch at the start and end of each seam for extra strength.
If you want a neat finish, use a zig-zag stitch or serger on the seam allowances. This keeps the inside of your bag tidy and stops fraying. You can finish quickly if you prep your materials and follow each step. Many people complete a quick diy drawstring bag in less than 10 minutes.
Tip: Double-check your seams before turning the bag right side out. Strong seams help your bag last longer.
You’ve finished the main sewing steps. Next, you’ll turn your bag and add the drawstring. Your diy project is coming together fast!
Turning the Bag
Now comes the fun part—turning your bag right side out! This step brings your project to life. You get to see your fabric choice and neat seams come together. Here’s how you do it:
- Find the opening at the top of your bag. Slide your hand inside and grab the bottom corner.
- Gently pull the fabric through the opening. Work slowly so you don’t stretch the seams.
- Use your fingers to push out the corners. You want crisp, square corners for a polished look. If you have trouble, try using a blunt pencil or the eraser end of a chopstick.
- Smooth out the bag with your hands. Check that all seams look even and strong.
Tip: If you see any loose threads, snip them off now. This keeps your bag looking tidy.
Take a moment to admire your work. The bag should look neat and the casing for the drawstring should sit at the top. If the fabric looks wrinkled, give it a quick press with your iron. This step helps your bag hold its shape and look professional.
You just finished a big step! Turning the bag right side out makes it feel real. You’re almost done—just add the drawstring and your DIY bag will be ready to use.
Inserting the Drawstring
You’re almost done with your diy bag! Now you get to add the drawstring. This step brings your project together and makes your bag easy to open and close. Let’s walk through each part so you can finish strong.
Choosing a Drawstring
Picking the right drawstring makes your bag work well and look great. You have lots of choices. Some people use fabric strips, while others like cord, ribbon, or even shoelaces. If you want a soft feel, cotton cord works nicely. For a strong and smooth finish, try nylon or polyester cord. Ribbon adds a pop of color and style.
Here’s a quick table to help you decide:
| Drawstring Type | Pros | Cons |
|---|---|---|
| Cotton Cord | Soft, easy to knot | Can fray |
| Nylon Cord | Strong, resists wear | Slippery to knot |
| Ribbon | Decorative, colorful | May wear out faster |
| Fabric Strip | Matches your bag | Needs sewing |
| Shoelace | Durable, easy to find | May be thick |
Tip: If you want your drawstring to last, pick a cord that matches your bag’s strength and style.
Threading the Casing
Threading the drawstring through the casing can feel tricky, but you have a super easy method. You don’t need fancy tools. Just grab a straw and a stapler. Here’s how you do it:
- Get your drawstring, a straw, and a stapler.
- Push the drawstring through the straw.
- Staple the end of the drawstring to the straw.
- Slide the straw into the casing at the top of your bag.
- Push the straw all the way through until it comes out the other side.
- Pull the drawstring out and remove the straw.
This straw and stapler trick lets you thread the drawstring in about 30 seconds. It’s much faster than using a safety pin or trying to push the cord through by hand. You’ll save time and avoid frustration.
Note: If you don’t have a straw, you can use a safety pin. Attach it to the end of your drawstring and guide it through the casing.
Securing the Ends
You want your drawstring to stay put and look neat. Tying the ends helps keep them from slipping back into the casing. You also want to stop fraying. Here are some ways to finish the ends:
- Double knot: Tie two knots in a row for a strong hold.
- Slip knot: Make it adjustable so you can pull the drawstring tight.
- Loop and tuck: Wrap one end around the knot for extra safety.
- Figure-eight knot: Spread out the tension so the knot doesn’t slip.
To keep the ends from fraying, dab a little clear nail polish or fabric glue on each tip. This seals the fibers and keeps your drawstring looking fresh.
Tip: If you want a fun touch, add beads or charms to the ends before you tie your knots.
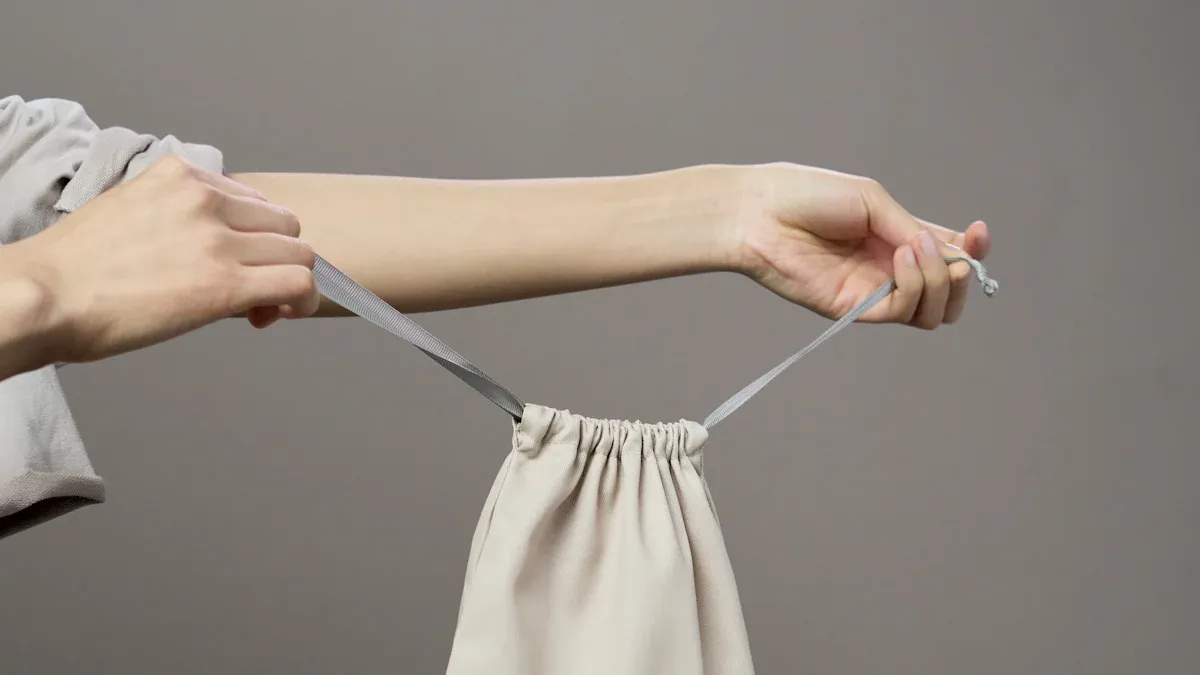
Now your drawstring bag is ready to use! You can open and close it with a quick pull. You finished the sewing and threading steps. Your diy project looks great and works well.
Finishing Touches
Personalization Ideas
You can make your drawstring bag stand out with a few creative touches. Personalizing your bag lets you show off your style or make a special gift for someone. Here are some fun ways to decorate your bag:
- Hand-painting: Grab some fabric paint and brush on your favorite shapes, words, or doodles. You can go bold with bright colors or keep it simple with soft pastels.
- Embroidery: Stitch your initials, a small flower, or even a fun pattern. Embroidery adds a classic and handmade feel.
- Heat transfer vinyl (HTV): Cut out shapes or letters from vinyl and use an iron to press them onto your bag. This method gives a clean, professional look.
- Screen printing: If you want to make several bags with the same design, try screen printing. It works great for logos or group projects.
- Stenciling: Place a stencil on your bag and dab paint over it. You get sharp, precise patterns every time.
- Combine techniques: Mix painting, embroidery, and vinyl for a one-of-a-kind design.
Tip: Try adding beads, patches, or even a small charm to the drawstring ends for extra flair. You can finish the bag with a personal touch that makes it truly yours.
Care Tips
Taking care of your handmade drawstring bag helps it last longer and keeps it looking fresh. Here’s how you can keep your bag in top shape:
- Read the care instructions first. If your fabric has a label, check it before washing.
- Use a color catcher in the wash. This helps stop colors from bleeding onto other items.
- Place your bag in a lingerie bag before washing. It protects the fabric and keeps the drawstring from tangling.
- Choose a perfume and dye-free detergent. Gentle soap is best for handmade items.
- Wash on cold. Cold water helps prevent shrinking and fading.
- Skip the dryer—air dry instead. Turn your bag inside out and lay it flat to dry.
- Hang with care. If you hang your bag, make sure it’s not dripping wet so it doesn’t stretch.
- Use a fan or open window for faster drying. This helps your bag dry without heat.
- Reshape before it dries completely. Smooth out any puckers and flatten the base.
- Store it dry, always. Never put your bag away when it’s damp. This keeps away odors and mold.
Note: If you ever spill something on your bag, spot clean it right away with a damp cloth. Quick action helps prevent stains.
With these tips, you can keep your bag looking new and ready for any adventure. When you finish the bag, you’ll have a unique accessory that lasts a long time.
Troubleshooting
Common Mistakes
Sewing a drawstring bag feels easy, but you might run into a few bumps along the way. Don’t worry! You can fix most problems with simple tricks. Here are some mistakes you might see and how you can avoid them:
- Uneven seams: If your stitches look wobbly, check your fabric before you sew. Make sure you line up the edges and use pins or clips to hold everything in place.
- Corners that look bulky: Thick corners can make your bag look messy. Clip and trim the seam allowance at each corner. This helps the corners turn out sharp and flat.
- Fraying edges: Raw edges can unravel fast. Use a zigzag stitch or pinking shears to finish the edges before you sew the seams.
- Drawstring casing too tight: If your drawstring gets stuck, the casing might be too narrow. Measure the width of your cord and add a little extra space when you fold and sew the casing.
- Lining peeking out: Sometimes the lining slips out at the top. Use understitching to keep the lining tucked inside. This trick works great for small bags and gives your project a pro look.
- Skipped stitches: If your sewing machine skips stitches, check your needle. A dull or bent needle causes problems. Change it out and try again.
Tip: Always press your fabric before you sew. Ironing helps you get crisp seams and makes your bag look neat.
Here’s a quick table to help you spot and fix common mistakes:
| Mistake | How to Fix It |
|---|---|
| Uneven seams | Pin fabric, sew slowly |
| Bulky corners | Clip and trim seam allowance |
| Fraying edges | Zigzag stitch or pinking shears |
| Tight drawstring casing | Make casing wider |
| Lining peeking out | Use understitching |
| Skipped stitches | Change needle, check thread tension |
Fixing Seams
You might notice a seam that looks crooked or weak. You can fix it without starting over. Here’s what you can do:
- Rip out the bad seam: Use a seam ripper to gently pull out the stitches. Go slow so you don’t tear the fabric.
- Line up the edges again: Smooth out the fabric and pin it in place. Make sure the edges match up.
- Sew with a steady hand: Stitch slowly and keep your eye on the seam line. Backstitch at the start and end for extra strength.
- Press the seam: Use your iron to flatten the seam. This helps the stitches set and keeps your bag looking sharp.
If you see loose threads, snip them off with scissors. For seams that look bulky, trim the seam allowance and press again. You can always add a zigzag stitch to reinforce weak spots.
Note: Fixing seams takes a little patience, but you’ll feel proud when your bag looks neat and strong.
You can handle any mistake with these simple steps. Your drawstring bag will look great and last a long time!
Tips for Beginners
Time-Saving Tricks
You want to finish your drawstring bag quickly, right? Many experienced sewists have clever tricks to help you save time and avoid frustration. Here are some of their favorite shortcuts:
| Time-Saving Tool | How It Helps |
|---|---|
| Drawstring threader tool | Makes threading cords through casings fast and easy. |
You can pick up a drawstring threader at most craft stores. This little gadget slides your cord through the casing in seconds. No more struggling with safety pins or getting stuck halfway!
Here are a few more time-saving ideas:
- Use freezer paper to trace your pattern. Freezer paper sticks to fabric, so you can cut shapes quickly and reuse the pattern for future bags.
- Cut all your pieces before you start sewing. Lay everything out so you don’t have to stop and measure again.
- Keep your sewing area tidy. When you know where your scissors and pins are, you move faster.
- Iron your fabric before you sew. Smooth fabric helps you stitch straight lines and keeps your bag looking sharp.
Tip: Try batching your steps. Sew several bags at once by doing all the cutting first, then all the sewing. You’ll finish more bags in less time!
Encouragement
Starting a new sewing project can feel tough, especially if you’re new to it. You might worry about making mistakes or getting stuck. Don’t let that stop you! Every sewist started as a beginner, and you can do this too.
Here are some motivational tips to keep you going:
- Get to know your machine. Spend time practicing stitches and reading tutorials. The more you use your sewing machine, the easier it gets.
- Choose a project that matches your skill level. Simple projects like drawstring bags help you build confidence.
- Build your skills little by little. Try new techniques as you get comfortable. You’ll improve with each project.
- Expect mistakes and take breaks. Everyone messes up sometimes. If you feel frustrated, step away for a bit and come back with fresh eyes.
- Accept that mistakes happen. They’re part of learning. You’ll get better every time you sew.
- Ask for help. Reach out to friends or look for answers online when you get stuck.
- Keep a ‘can do’ attitude. Stay positive and believe in yourself. You’ll be amazed at what you can create!
Note: You’re not alone. Many people feel nervous when they start sewing. Just remember, every bag you make is a step forward. Celebrate your progress and enjoy the process.
You’ve got this! With a few smart tricks and a positive mindset, you’ll sew beautiful drawstring bags in no time.
Drawstring Bag Variations
Different Sizes
You can make drawstring bags in all sorts of sizes. Each size works best for different things. If you want to organize small items, a tiny bag is perfect. Need something for gym clothes or groceries? Try a bigger bag. Here’s a handy table to help you pick the right size for your project:
| Bag Size | Typical Dimensions | Best Use Cases |
|---|---|---|
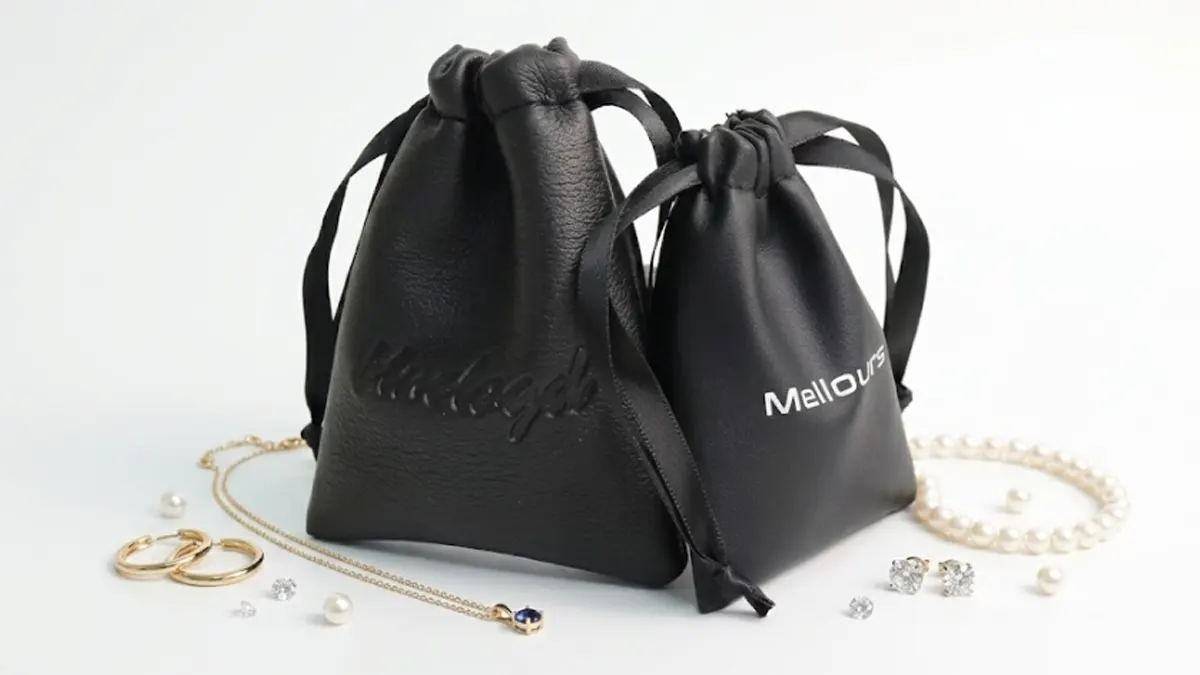
| Small | 6 x 8 – 10 x 12 in | Jewelry, cosmetics, accessories, packaging |
| Medium | 13 x 17 – 14 x 18 in | School, gym, giveaways, promotional events |
| Large | 16 x 20 – 18 x 24 in | Sports gear, groceries, family travel |
| Extra Large | 20 x 27 in + | Laundry, camping, bulk storage |
You can adjust the pattern to fit your needs. Want a bag for snacks? Go with a small size. Need something for laundry? Make it extra large. You get to choose what works best for you.
Using Upcycled Materials
You don’t have to buy new fabric for every bag. You can use old clothes, sheets, or leftover fabric scraps. Upcycled materials help the planet and make your project unique. Here are some reasons why upcycling is a smart choice:
- Upcycled materials reduce the environmental impact of manufacturing new products.
- They help divert waste from landfills by repurposing old textiles.
- The use of repurposed materials promotes sustainability in crafting and consumer habits.
You might find a cool pattern on an old shirt or a soft texture from a worn-out pillowcase. Your bag will have a story, and you’ll help the environment at the same time. Next time you clean out your closet, save those fabrics for your next DIY project!
Tip: Wash and iron upcycled fabric before you sew. This helps your bag look fresh and last longer.
Gift and Storage Ideas
Drawstring bags make great gifts and help you organize your stuff. You can use small bags for treats or party favors. Bigger bags work well for wine bottles or holiday presents. Craft experts suggest these creative uses:
- Use smaller fabric drawstring bags for treats and party favors.
- Create larger fabric gift bags for items like wine bottles, emphasizing durability and reusability.
You can also use drawstring bags to store toys, shoes, or travel essentials. They keep things tidy and easy to find. If you want to make a special gift bag, you can follow a simple tutorial.
Check out the Drawstring Fabric Gift Bag Tutorial for step-by-step guidance on making your own.
Drawstring bags are flexible and fun. You can make them any size, use upcycled materials, and give them as gifts or use them for storage. Your creativity makes each bag special!
Conclusion
You just saw how easy and fun it is to make your own diy drawstring bag. Try new patterns, fabrics, or add your own twist with custom embroidery or eco-friendly materials. Want to share your diy drawstring bag or have questions? Drop a comment below! If you need custom, wholesale, or branded bags, we offer cotton canvas, logo printing, sustainable fabrics, and premium closures. Our OEM/ODM services help you stand out, reduce costs, and scale with expert support—from sampling to mass production.
FAQ
How long does it take to sew a drawstring bag?
You can finish a basic drawstring bag in about 10 minutes. If you add decorations or use thick fabric, you might need a few extra minutes.
What fabric works best for beginners?
Cotton fabric is easy to handle and forgiving if you make mistakes. You can also try canvas or polyester for more durability.
Can I sew a drawstring bag without a sewing machine?
Yes! You can sew your bag by hand using a needle and thread. It takes longer, but you still get a strong and neat result.
How do I stop the drawstring from fraying?
You can tie knots at the ends, use clear nail polish, or melt the tips if you use synthetic cord. These tricks keep your drawstring looking fresh.
Can I wash my drawstring bag in the washing machine?
Most fabric bags are machine washable. Use cold water and gentle detergent. Air dry your bag to keep it in good shape.
What can I use as a drawstring?
You can use ribbon, cord, shoelaces, or fabric strips. Pick something that fits your style and matches your bag’s strength.