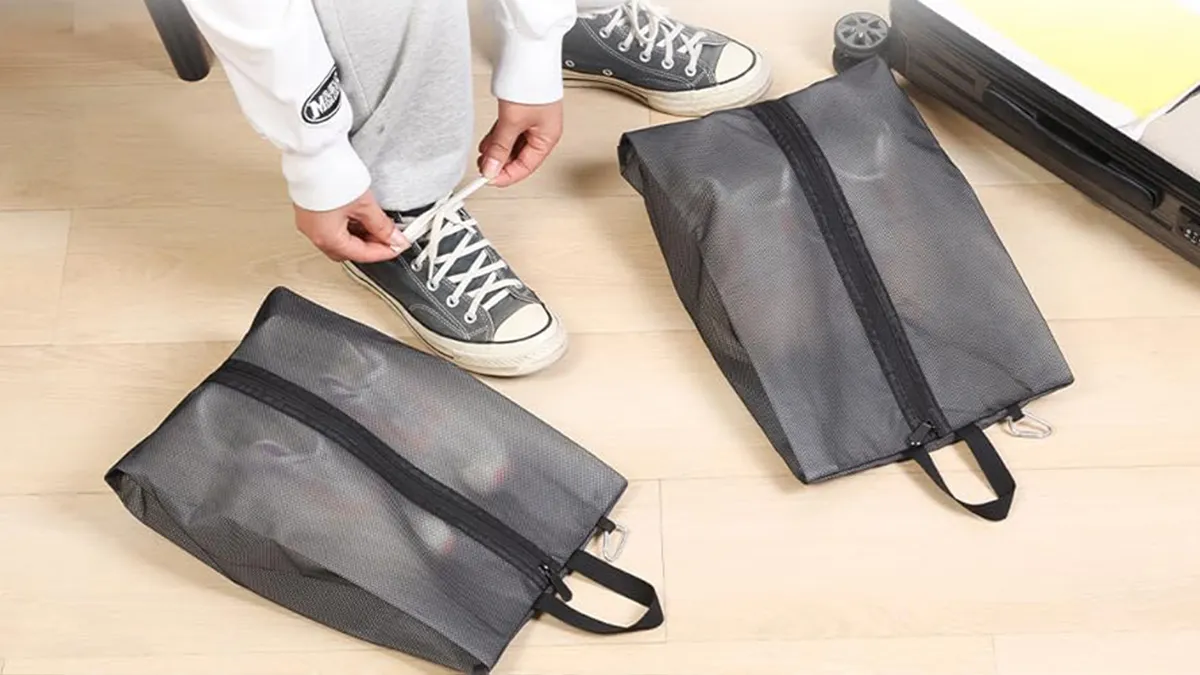
You can sew your own diy travel shoe bags with just some fabric, a drawstring, and a few simple stitches. These handy bags keep your shoes organized and your clothes clean while you travel. Many travelers skip shoe bags—check out the numbers below:
| Source | Percentage Not Using Shoe Bags |
|---|---|
| Instagram Poll | 28% |
| AFAR Staff Poll | 40% |
You do not need to be a sewing expert. With a little diy spirit, you will find this project easy and fun!
Key Takeaways
- DIY travel shoe bags are simple to make. You only need basic sewing skills. Use fabric and a drawstring for this project.
- Making your own shoe bags saves you money. DIY bags cost about $5.50 each. Store-bought bags cost between $7.77 and $30.78.
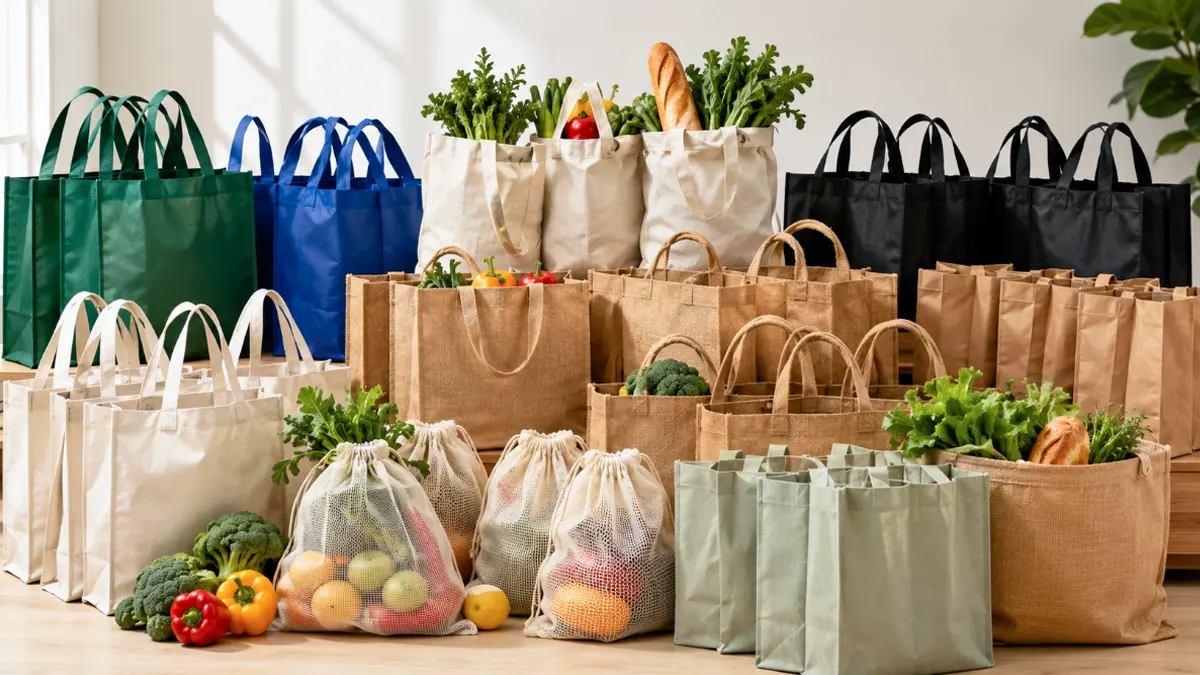
- Shoe bags help keep your shoes neat and tidy. They protect shoes from dirt and damage. They also help keep your luggage clean.
- You can pick different fabrics and sizes for your shoe bags. Choose fun prints to show your style.
- Travel shoe bags can be used in many ways. They can hold cables or keep clean and dirty clothes apart. You can also use them to store toiletries.
- Take care of your shoe bags by washing and air drying them. This will help them stay nice and last longer.
- Try making bags with two compartments or waterproof ones. This makes them even more useful.
- You can sew many bags at once to save time. This way, you can make a matching set for family or friends.
Why DIY Travel Shoe Bags
Benefits
Making your own diy travel shoe bags is both practical and fun. You get to choose your favorite fabrics and patterns, and you save money at the same time. Take a look at how the cost compares:
| Option | Cost Range |
|---|---|
| DIY (materials) | Approx. $5.50 + materials |
| Pre-made | $7.77 – $30.78 |
You can see that a diy shoe bag costs less than most store-bought options. You also get a sense of pride when you finish a sewing project yourself.
Travel shoe bags help you stay organized and keep your suitcase clean. Here’s how they help frequent travelers:
| Benefit Type | Description |
|---|---|
| Protection | Shields shoes from dirt, dust, scuffs, and scratches during transit, preserving their appearance. |
| Organization | Helps maintain order in luggage by separating shoes from other items, making them easy to locate. |
| Hygiene | Prevents contamination of clean items by keeping dirty shoes contained, ensuring cleanliness. |
| Space-saving | Compact design allows for efficient use of luggage space, freeing up room for other necessities. |
| Versatility | Can be used for storing other items like socks or as a laundry bag for dirty clothes. |
Tip: Travel shoe bags act as a protective barrier for shoes. They keep dirt, dust, and damage away from both your shoes and your clothes. If you use 100% chemical-free cotton, you get museum-quality storage protection.
Uses
You might think a travel shoe bag only holds shoes, but it does much more. You can use it to organize cables and electronics, separate clean and dirty clothes, or keep documents dry while you travel.
- Organizing cables and electronics
- Separating clean and dirty clothes
- Keeping documents dry while on the go
For example, on a camping trip, you can start with your hiking boots in the bag. After your hike, switch the bag to hold your dirty boots so your clean clothes stay fresh. Later, rinse out the bag and use it for toiletries. This shows how adaptable a simple drawstring bag can be.
Customization
You have total control over your diy travel shoe bags. You can pick lightweight fabrics for sneakers or larger sizes for boots. You can even make 10-minute shoe bags for quick trips or special bags for fancy shoes. When you sew your own, you can match the finished shoe bag to your style or needs. This makes every diy project unique and personal.
Materials and Tools
Before you start your diy travel shoe bag, you need to gather the right materials and tools. Picking the best supplies makes your project easier and helps your bag last longer. Let’s break down what you’ll need.
Fabric Options
Choosing the right fabric is important. You want something that’s lightweight, durable, and easy to clean. You also want your bag to look great!
Lightweight Fabrics
Lightweight fabrics make your shoe bag easy to pack and carry. Here’s a quick look at some top choices:
| Fabric Type | Features | Suitability for Travel |
|---|---|---|
| Flexible Nylon | Moulds to the shape of shoes, lightweight (25 g per bag), durable | Excellent for carry-on |
| Washable | Can be cleaned easily, no shrinkage observed | Convenient for travel |
| Thin but Durable | Protects shoes from scratches and dirt | Ideal for packing light |
You can also use strong fabric like canvas or twill if you want extra protection for your shoes. Some people love using recycled sari fabric because it’s colorful and patterned. These fabrics look unique and add a personal touch to your bag. Just remember to spot clean them to keep the colors bright.
Fun Prints
Why not pick a fabric that shows off your style? Go for bold patterns, bright colors, or even a fabric with your favorite animals. Fun prints make your travel shoe bag easy to spot in your suitcase. You can match your bag to your luggage or make one for every family member.
Tools Needed
You don’t need fancy equipment to make a shoe bag. Most people already have the basics at home.
Sewing Machine or Hand Sewing
A sewing machine makes the job faster, but you can sew by hand if you prefer. Both methods work well for this project. If you’re new to sewing, don’t worry—straight stitches are all you need.
Optional Tools
Some tools make the process smoother:
- Wondertape (helps hold fabric in place while you sew)
- Fabric scissors
- Pins or clips
- Measuring tape
Tip: Wondertape is optional, but it can help keep your seams straight and neat.
Notions
Notions are the little extras that finish your bag.
Drawstring Choices
You need a drawstring to close your bag. You can use ribbon, cord, or even a shoelace. Pick something strong and smooth so it slides easily. A bright drawstring adds a pop of color and makes your bag easy to open and close.
Extras
Want to add something special? Try these extras:
- Labels or tags for names
- Decorative patches
- Waterproof lining for extra protection
With these materials and tools, you’re ready to start sewing your own travel shoe bag. Gather your supplies and get creative!
DIY Shoe Bag Sizing

Getting the right size for your travel shoe bag makes packing much easier. You want your shoes to fit comfortably inside, with a little extra room for easy access. Let’s break down how to pick the perfect size for your diy project.
Standard Sizes
Most travel shoe bags come in a few common sizes. These work well for many types of shoes, from sneakers to dress shoes. Here’s a quick look at a popular size for adult shoes:
| Dimension Type | Length (inches) | Width (inches) | Depth (inches) |
|---|---|---|---|
| Shoe Bag | 16.5 | 8.3 | 5.5 |
You can use this size for most adult shoes. If you want a bag for boots or larger sneakers, you might want to add a few inches to the length or width. For smaller shoes, like sandals or kids’ shoes, you can make the bag a bit smaller.
Measuring Shoes
You don’t have to guess the size you need. Grab your shoes and measure them before you cut your fabric. Here’s how you can do it:
- Place your shoe on a flat surface and measure the length from the toe to the heel.
- Measure the height at the tallest part of the heel.
- Double the height measurement.
- Add the length and the doubled height together.
- Add about 2 extra inches for the drawstring casing and a little wiggle room.
If you want a quick guide, start with a piece of fabric that is 15 inches wide by 30 inches high. This size works for most women’s shoes. For larger men’s shoes, increase the height by about 4 inches. Always check the fit before you sew the sides.
Tip: A well-fitted shoe bag keeps your shoes snug but not squished. You want enough space so the shoes slide in and out easily.
Adjusting Size
Every shoe is different. You might have hiking boots, ballet flats, or chunky sneakers. Adjust the size of your bag to match the shoes you plan to carry. If you travel with boots, make the bag longer and a bit wider. For sandals or flats, you can use a smaller piece of fabric.
You can also make a set of bags in different sizes. This way, you always have the right bag for any trip. Just remember to measure each pair of shoes before you start cutting your fabric. Custom sizing makes your travel shoe bags more useful and keeps your packing organized.
Preparing Materials
Getting your materials ready is the first step to a smooth sewing project. When you prep your fabric and cut your pieces with care, you set yourself up for a bag that looks great and lasts a long time. Let’s walk through the steps together.
Prepping Fabric
Before you start cutting, you want your fabric to be clean and easy to work with. Here’s a simple way to prep your fabric for sewing travel shoe bags:
- Wash and dry your fabric. This helps prevent shrinking later.
- Iron the fabric flat. Wrinkles can make your cuts uneven.
- Lay your fabric on a clean, flat surface.
- If you’re using a lining, stack the lining fabric on top of the outer fabric.
- Cut along the lines and corners, but avoid cutting through any stitching at the corners.
- Pull the lining fabric through any opening to the other side.
- Press both sides of the fabric and stitch around the box to finish the opening.
- Place the outer fabric on top of the other outer piece. Stitch down the sides and across the bottom, leaving the corners alone for now.
- To box the corners, line up the side seam and bottom seam, then stitch across the straight edge.
- Turn the bag right side out and pull the lining piece out.
- Make the strap using a simple strap tutorial. You don’t need to finish either end yet.
- Stuff the lining into the main bag, press the top edges together, and insert the strap before sewing along the top edge.
Tip: Taking time to prep your fabric helps your diy shoe bag look neat and professional.
Cutting Pieces
Cutting your fabric pieces to the right size makes sewing much easier. You can use a template or measure each piece with a ruler.
Using Templates
Templates help you get the same size every time. For a small shoe bag, cut a square that measures 9.5 by 14 inches. Remove a 2 by 2 inch square from each bottom corner. For a large bag, cut a piece that’s 19.5 by 14 inches and remove a 3.5 by 3.5 inch square from the bottom corners. Cut one piece of outer fabric and one piece of lining fabric for each bag. For the strap, cut a piece that’s 4 by 11 inches.
Marking Tips
Use a fabric marker or chalk to draw your cutting lines. Make sure your lines are straight and easy to see. Double-check your measurements before you cut. If you want, you can pin your template to the fabric so it doesn’t move. Always cut slowly and follow your lines for the best results.
Note: Careful cutting and marking make your sewing project go faster and help your bag turn out just right.
Now your fabric is ready, and your pieces are cut. You’re all set for the next step—sewing your travel shoe bag!
DIY Travel Shoe Bags Instructions
Ready to sew your diy travel shoe bags? Let’s walk through the steps together. You’ll see how simple it is to create a bag that keeps your shoes organized and your suitcase clean. Grab your fabric pieces and let’s get started!
Fold and Sew Sides
First, you need to put the main pieces of your diy shoe bag together. This step gives your bag its basic shape.
- Lay your outer fabric pieces on top of each other, right sides facing in.
- Move the lining out of the way if you have one.
- Pin or clip the sides and bottom edges together, but leave the small squares at the bottom corners unpinned for now.
Seam Allowance
When you sew the sides and bottom, use a seam allowance of about 1/4 inch. This means you sew your stitches 1/4 inch away from the edge of the fabric. A small seam allowance keeps your diy shoe bag neat and helps it lay flat in your suitcase. If you’re new to sewing, go slow and keep your stitches straight. You can use the edge of your presser foot as a guide.
Tip: Backstitch at the beginning and end of each seam. This keeps your stitches from coming undone.
Reinforcing Corners
The corners of your diy travel shoe bags need a little extra strength. Here’s how you do it:
- Line up the side seam and bottom seam at each corner to form a straight edge.
- Pin the seams together so they match up.
- Sew across this straight edge to “box” the corners. This gives your bag a flat bottom and more space for your shoes.
- Repeat on the other corner.
Once you finish the corners, turn your bag right side out. You’ll see the shape come together!
Make Drawstring Casing
Now it’s time to make the channel for your drawstring. This step lets you open and close your bag with a simple pull.
Folding and Pressing
- Fold the top edge of your bag down about 1/2 inch to the inside. Press with an iron to make a crisp fold.
- Fold it down again, this time about 1 inch. Press again. This double fold hides the raw edge and makes a neat casing for your drawstring.
Stitching
- Sew around the folded edge, close to the inner fold. Leave a small gap (about 1 inch) at one side. This is where you’ll thread your drawstring through.
- If you’re making a lined bag, sew the casing after you’ve attached the lining and turned the bag right side out.
- Make sure your stitches are even so the drawstring slides easily.
Note: Stopping your stitches 2 inches from the top when sewing the sides creates a natural opening for the drawstring casing.
Insert Drawstring
You’re almost done! Adding the drawstring is the final step to turn your diy travel shoe bags into handy organizers.
Using Safety Pin
- Cut your drawstring to size. For most bags, you’ll need two pieces, each a little longer than the width of your bag.
- Attach a safety pin to one end of the drawstring.
- Push the safety pin through the casing, working it all the way around until it comes out the other side.
- Repeat with the second drawstring, starting from the opposite side. This way, you can pull both ends to close your bag.
Securing Ends
- Remove the safety pin and tie a knot at each end of the drawstring. This keeps it from slipping back into the casing.
- If you want, add a bead or a small charm for a fun touch.
- Pull both ends to test your drawstring bag. The top should cinch closed easily.
Tip: Your diy shoe bag is now collapsible and easy to store. You can fold it flat when you’re not using it, or tuck it into a corner of your suitcase.
You’ve just finished the main steps for making diy travel shoe bags! These instructions work for all kinds of bags, from 10-minute shoe bags to more detailed projects. With a little practice, you’ll be sewing up a whole set in no time.
Finishing Touches
You’ve sewn your shoe bag and added the drawstring. Now it’s time to make your bag stand out! Finishing touches turn a simple project into something special. You can add labels, tags, or fun embellishments. These extras help you spot your bag in a crowded suitcase and show off your style.
Labels or Tags
Adding a label or tag is a smart move. You can sew a small fabric label inside the bag or attach a tag to the drawstring. Labels help you tell bags apart, especially if you make several for your family.
Here are some easy ideas for labels and tags:
- Write your name on a piece of ribbon and sew it inside the bag.
- Use iron-on labels for a quick and neat finish.
- Attach a leather tag with your initials for a custom look.
- Add a keychain or charm to the drawstring for easy identification.
Tip: Leather tags or fabric labels with names or initials give your bag a bespoke, professional feel. They also make great gifts!
Embellishments
This is where you can get creative! Embellishments add personality and make your shoe bag one-of-a-kind. You don’t need fancy tools—just a few simple touches can make a big difference.
Try these fun ideas:
- Bold Prints: Pick fabrics with floral, stripes, or geometric shapes. These patterns add flair and make your bag easy to spot.
- Contrasting Zippers: If you want a zipper closure, choose a bright or complementary color. It adds a pop of color and a subtle design highlight.
- Visible Stitching: Use thread in a color that stands out against your fabric. Contrast stitching gives your bag a crafty, homemade vibe.
- Decorative Patches: Sew on patches with fun shapes or favorite animals.
- Iron-on Transfers: Add a favorite quote or image to the front of your bag.
- Beads or Buttons: String a few beads onto the drawstring or sew a button near the opening for extra charm.
Here’s a quick table to help you pick your favorite finishing touch:
| Finishing Touch | How It Helps | Style Level |
|---|---|---|
| Leather Tag | Personalizes and adds durability | Classic/Chic |
| Bold Print Fabric | Makes bag easy to spot | Fun/Bold |
| Contrast Stitching | Adds a homemade, crafty look | Creative |
| Decorative Patch | Shows off hobbies or interests | Playful |
| Contrasting Zipper | Adds color and easy access | Modern |
Note: You can mix and match these ideas. Try a bold print with a leather tag, or add a patch and some contrast stitching. Your bag, your rules!
Finishing touches make your DIY travel shoe bag look polished and professional. They also make packing more fun. Don’t be afraid to experiment—your creativity will shine through every detail!
Tips and Troubleshooting
Beginner Tips
Starting your first diy travel shoe bag can feel exciting and a little overwhelming. You can make it easier by following a few simple steps. Here’s a quick guide to help you get started:
- Gather all your materials before you begin. You’ll need about half a yard of fabric, some ribbon, a cord stop, and thread.
- Cut your fabric and any stabilizer you want to use. If you like, embroider your initial on the fabric for a personal touch.
- Assemble your bag by cutting and sewing the fabric pieces together. Take your time and double-check your measurements.
- Make the casing for your ribbon or drawstring. Fold the top edge down and sew it to create a channel.
- Finish by threading the ribbon through the casing. Use a safety pin to help guide it through.
Tip: Lay out all your supplies before you start. This helps you stay organized and makes the process smoother.
Common Issues
Even if you follow every step, you might run into a few bumps along the way. Here are some common problems and how you can fix them:
- Puckering fabric can happen if your stitches are too tight or your tension is off. Try using interfacing, slow down your stitching, and loosen the tension a bit. A longer stitch length can also help.
- Misaligned seams make your bag look uneven. Always pin your seams before you sew. Take a moment to line everything up so your bag looks neat.
- Trouble turning the bag right side out? Hide the turning hole in a zipper pocket or leave a small gap in the lining. This keeps your bag looking tidy.
Note: If you make a mistake, don’t worry! You can always use a seam ripper and try again. Practice makes perfect.
Making Multiples
Want to make several travel shoe bags at once? Batch sewing saves time and helps you build a matching set. Here’s how you can work more efficiently:
- Cut all your fabric pieces for small and large bags at the same time. Stack your fabric and use a rotary cutter for straight lines.
- Choose a lighter-weight lining fabric. It’s easier to handle and makes the bags less bulky.
- Measure and cut slits in both the lining and outer fabric to create a finished opening for the drawstring.
- Stitch the pieces together and box the corners for a neat, roomy finish.
- Turn each bag right side out and insert the lining. You’ll have a stack of bags ready in no time.
Batch sewing lets you make gifts for friends or organize your whole family’s shoes for your next trip.
You can tackle any diy project with a little patience and these helpful tips. Each bag you make will look better than the last!
Care and Storage
Taking care of your DIY travel shoe bags helps them last longer and keeps your shoes fresh for every trip. You don’t need fancy products or special routines. Just a few simple habits will keep your bags looking and smelling great.
Washing
You want your shoe bags to stay clean, especially after a dusty hike or a muddy adventure. Most DIY shoe bags use washable fabrics, so you can toss them in the wash without worry. Cotton is a popular choice because it’s easy to clean and gentle on your shoes.
Here’s how you can keep your shoe bags fresh:
- Use washable fabrics like cotton or nylon for easy cleaning.
- Pre-wash and dry your fabric before you sew. This step helps prevent shrinking later.
- Shake out any dirt or sand before washing.
- Turn the bag inside out to protect any labels or decorations.
- Wash with similar colors using cold or warm water.
- Use a gentle detergent to keep the fabric soft.
- Air dry your bag by hanging it up or laying it flat. Avoid using a hot dryer, which can shrink or damage the fabric.
- Spot clean stains with a mild soap and a soft brush.
Tip: If your bag has a waterproof lining, wipe it down with a damp cloth instead of putting it in the washing machine. This keeps the lining in good shape.
A clean shoe bag keeps your shoes and clothes smelling fresh. You’ll feel good knowing your travel gear is ready for your next adventure.
Storing
Proper storage makes a big difference in how long your shoe bags last. You want to keep them in a place where they stay clean and dry.
Here are some easy storage tips:
- Store your travel shoe bags in a dry and ventilated area to prevent mildew and odors from forming.
- Fold your bags flat when you’re not using them. This saves space in your closet or suitcase.
- Keep your bags away from direct sunlight. Sunlight can fade bright fabrics and weaken the material over time.
- Place a small sachet of baking soda or lavender inside the bag if you want to keep things smelling fresh.
- If you have several bags, use a storage bin or basket to keep them organized and easy to grab.
Note: Good storage habits help your bags keep their shape and stay ready for your next trip.
You don’t need to spend a lot of time on care and storage. Just follow these simple steps, and your DIY travel shoe bags will look great and work well for years. Clean, dry, and organized bags make packing for your next journey a breeze!
Creative Variations
Travel shoe bags do not have to look or work the same every time. You can try new ideas and make your bags even more useful. Here are some creative ways to upgrade your next project.
Double Compartments
Sometimes you want to keep two pairs of shoes separate, or maybe you want to keep clean shoes away from dirty ones. Double compartment shoe bags help you do just that. You get two spaces in one bag, so your shoes stay in great shape.
- You can find bags with two separate compartments. Each section keeps your shoes from touching.
- Some bags use high-quality leather. These look stylish and last a long time.
- Double compartment bags work well for business trips or special events. You can carry dress shoes and sneakers together, but they stay apart.
- These bags mix style and function. You get a smart look and extra protection for your shoes.
If you want to try this at home, sew a divider down the middle of your bag. You can use the same fabric or pick a different color for each side.
Waterproof Options
Rainy days and muddy trails can make your shoes wet and dirty. A waterproof shoe bag keeps the mess inside and protects your other things. You can use special fabric or add a lining to make your bag water-resistant.
Here are some ideas for waterproofing:
- Use nylon or polyester fabric. These materials block water and dry fast.
- Add a waterproof lining inside your bag. You can buy this at most fabric stores.
- Try iron-on vinyl to cover the inside of your bag. This makes it easy to wipe clean.
Tip: If you want a quick fix, use a plastic shower curtain as your fabric. Cut and sew it just like regular fabric.
A waterproof bag works well for gym shoes, beach trips, or camping. You do not have to worry about dirt or water getting on your clothes.
Fun Fabrics
You can show off your style with fun fabrics. Pick bright colors, bold prints, or even fabric with your favorite cartoon characters. Your shoe bag will stand out in your suitcase.
Here are some ways to make your bag unique:
- Use fabric with animals, flowers, or sports themes.
- Mix two or more fabrics for a patchwork look.
- Add iron-on patches or fabric paint for extra flair.
A diy shoe bag lets you get creative. You can make a bag that matches your mood, your trip, or your favorite shoes. Every bag becomes one of a kind!
Custom and Bulk Orders
Do you love making DIY travel shoe bags but need more than just a few? Maybe you want to share them with friends, family, or even your customers. You can order custom or bulk shoe bags that fit your needs. Let’s look at how you can get started.
Wholesale
If you need a large number of travel shoe bags, wholesale is the way to go. You might run a small shop, organize events, or want to give gifts to your team. Wholesale orders help you save money and time.
- You can choose from different sizes, fabrics, and colors.
- You get a better price per bag when you order in bulk.
- You can mix and match styles to fit your group’s needs.
Tip: Wholesale orders work great for schools, sports teams, or travel agencies. You can even add your logo or a special message to each bag.
Here’s a quick table to show what you can customize with a wholesale order:
| Option | Choices Available |
|---|---|
| Fabric | Cotton, nylon, canvas |
| Size | Small, medium, large |
| Color | Many colors and prints |
| Logo/Branding | Yes, on request |
OEM & ODM
Do you want something truly unique? OEM (Original Equipment Manufacturer) and ODM (Original Design Manufacturer) services let you create shoe bags that match your brand or vision.
- With OEM, you bring your own design or idea. We help you turn it into a real product.
- With ODM, you pick from our designs and add your own twist, like colors or logos.
You can work with us to:
- Choose special fabrics or eco-friendly materials.
- Add custom labels, tags, or packaging.
- Create a new size or shape just for your needs.
Note: OEM & ODM orders are perfect for brands, boutiques, or anyone who wants a one-of-a-kind product.
Conclusion
You can see how easy it is to make a diy shoe bag. You get a useful travel helper and a fun project at the same time. Try making your own diy bag and pick any fabric or size you like. You will feel proud when you use your finished shoe bag on your next trip. Need custom, branded, or bulk bags? Reach out to us for a solution that fits you best!
FAQ
How do I choose the best fabric for my shoe bag?
Pick a fabric that feels light but strong. Cotton works well for most shoes. Nylon or canvas gives extra protection. Fun prints make your bag easy to spot.
Can I sew a shoe bag without a sewing machine?
Yes! You can sew by hand using a needle and thread. Straight stitches work best. It might take longer, but you can still make a sturdy bag.
What size should my travel shoe bag be?
Measure your shoes first. Most adult shoes fit in a bag about 16.5 x 8.3 inches. Add a little extra room for boots or bulky sneakers.
How do I keep my shoe bag clean?
Wash your bag with cold water and mild soap. Air dry it to keep the fabric strong. Spot clean stains with a soft brush.
Can I use my shoe bag for things other than shoes?
Absolutely! Use your bag for socks, laundry, cables, or toiletries. It helps keep your suitcase organized.
What’s the easiest way to add a drawstring?
Use a safety pin to thread the drawstring through the casing. Tie knots at the ends so it stays in place. You can use ribbon, cord, or even a shoelace.
How do I make my shoe bag waterproof?
Choose nylon or polyester fabric. Add a waterproof lining or use iron-on vinyl inside the bag. Wipe it clean after each trip.
Can I personalize my shoe bag?
Yes! Sew on a label, add a patch, or use fabric paint. You can pick colors and prints that match your style. Your bag will stand out!