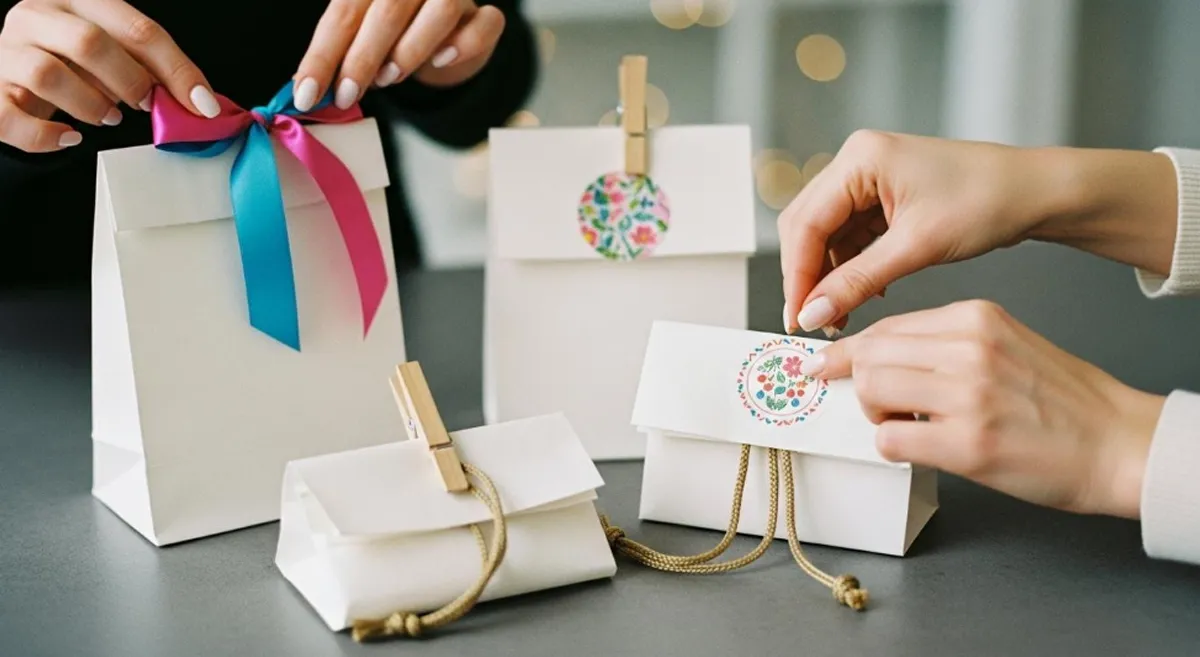
You might wonder how to close a gift bag so your present looks great and stays safe. When you close a gift bag, think about both security and style. Choose sturdy bags and decorations that match your special occasion. Try a ribbon, tissue paper, or even a creative knot—many ways do not need tape at all. Check out the table below to see what matters most:
| Concern Type | Description |
|---|---|
| Material Quality | Pick a strong bag that will not tear. |
| Secure Closure | Make sure your bag stays shut and keeps the gift inside. |
| Visual Appeal | Add bows or ornaments for a beautiful finish. |
INITI offers custom gift bag solutions, so you can always find the perfect way to wrap your gifts.
Key Takeaways
- Pick a strong gift bag so it holds your gift well. Use ribbons or bows to close the bag and make it look nice. Tissue paper can make the bag look fun and keep your gift safe. Double-sided tape gives a neat way to close the bag. Fun ways like scrunching and tying make your gift look playful. You can use clasps or tuck-in flaps for a fancy and safe finish. Add stickers or tags to make your gift bag special. Try different materials and ways to see what works best for your gifts.
How to Close a Gift Bag: Essential Methods
When you want to know how to close a gift bag, you have many classic and easy options. These methods help your gift look neat and stay safe inside the bag. Let’s walk through some of the most popular ways.
Tie Handles
Many gift bags come with handles. You can use these handles to close the bag in a simple and stylish way.
Bow
A bow looks pretty and keeps the bag closed. Here’s how you can do it:
- Hold both handles together at the top of the bag.
- Cross one handle over the other.
- Make a loop with each handle.
- Tie the loops together, just like tying your shoes.
- Pull the loops to make a bow.
Tip: If you want the bow to stay tight, use the double knot technique. This keeps the bow from coming undone, even if the bag gets jostled.
Knot
If you want a quick and secure closure, tie the handles in a knot.
- Grab both handles.
- Cross them and pull one under the other.
- Pull tight to make a simple knot.
A knot works well if you need to close a gift bag without tape. It’s fast and holds the bag shut.
Ribbon Closure
Using ribbon adds a special touch to your gift bag. It also helps keep the bag closed and looks elegant.
Bow
You can use ribbon to tie a bow around the handles or the top of the bag.
- Cut a piece of ribbon long enough to wrap around the handles.
- Place the ribbon under the handles.
- Bring both ends up and tie them in a bow.
- Adjust the loops so they look even.
A ribbon bow is a classic gift wrapping technique. It makes your bag look festive and polished.
Around Handles
Sometimes, you want to use ribbon in a different way. Try wrapping the ribbon around the handles several times and tying a knot or bow.
- This method works well for heavier gifts.
- You can use different colors to match the occasion.
- Using ribbon this way adds extra security and style.
| Method | Description |
|---|---|
| Ribbon | Using a double knot technique ensures the bow remains intact, adding an elegant touch to the bag. |
| Adhesive Tape | Double-sided or invisible tape can create a seamless closure that maintains a polished look. |
| Tissue Paper | Gathering and twisting tissue paper at the top creates a tight seal, ideal for smaller gifts. |
| Stickers | Efficient for delicate items, simply fold and secure with tape or stickers for a neat closure. |
This table shows that ribbon is one of the most widely used ways to close a gift bag. The double knot technique keeps your bow looking great.
Tissue Paper Wrapping
Tissue paper is not just for decoration. It also helps close the bag and protect your gift.
Fluffing
You can use tissue paper to cover the top of the bag and make it look full.
- Place your gift inside the bag.
- Take a few sheets of tissue paper.
- Crumple each sheet gently in the middle.
- Place the crumpled tissue on top of the gift.
- Fluff the tissue so it sticks out of the bag.
Fluffing makes the bag look festive and hides the gift inside.
Layering
Layering tissue paper gives your bag a colorful and soft look. It also adds extra protection.
- Choose two or three colors of tissue paper.
- Lay the sheets on top of each other.
- Place the gift in the center.
- Gather the tissue around the gift and place it in the bag.
- Let the edges of the tissue stick out for a bright, layered effect.
| Technique | Benefit |
|---|---|
| Layering | Creates a vibrant and colorful presentation through multiple colors. |
| Cushioning | Provides extra protection for the gift, maintaining aesthetic appeal. |
| Additional Sheets | Enhances visual appeal and adds layers of protection to the gift inside. |
Layering and fluffing tissue paper not only look good but also keep your gift safe. Try the tissue paper twist for a tight seal—just gather the tissue at the top and twist it closed.
If you want to know how to close a gift bag for any occasion, these essential methods will help you every time. You can use ribbon, tissue, or even just the handles. Each method gives your gift a special touch.
Tape or Sticker Seal
Sometimes, you want a quick and easy way to close your gift bag. Tape and stickers work great for this. You can use them to keep your bag shut and add a fun touch at the same time. Let’s look at two simple ways you can use tape or stickers to seal your gift bag.
Decorative Stickers
Decorative stickers do more than just hold your bag closed. They also make your gift look special. You can find stickers in all shapes, colors, and themes. Some have glitter, some have cute messages, and some even match holidays or birthdays.
How to use decorative stickers:
- Fold the top of your gift bag over once or twice.
- Pick a sticker that matches your occasion or style.
- Place the sticker right over the fold to keep the bag closed.
- Press down firmly so it sticks well.
Tip: Try using more than one sticker for extra security or to create a pattern. You can even write a short message on a plain sticker for a personal touch.
Here’s a quick table to help you choose the right sticker:
| Sticker Type | Best For | Extra Touch |
|---|---|---|
| Glitter | Birthdays, parties | Adds sparkle |
| Themed | Holidays, events | Matches the celebration |
| Plain/Write-on | Any occasion | Personal messages |
| Shaped | Kids’ gifts, fun bags | Cute and playful look |
Decorative stickers work best for light or medium-weight gifts. If your bag is heavy, you might want to use tape as well.
Double-sided Tape
Double-sided tape gives your gift bag a clean, seamless look. You can’t see the tape from the outside, so your bag looks neat and tidy. This method works well if you want a simple closure without extra decorations.
How to use double-sided tape:
- Fold the top edge of your gift bag down once or twice.
- Cut a strip of double-sided tape.
- Stick the tape inside the fold.
- Press the folded part down so it sticks to the bag.
Note: Double-sided tape holds best on smooth paper bags. If your bag has a rough or textured surface, press down extra hard to make sure it sticks.
Why choose double-sided tape?
- It keeps the bag closed without showing any tape.
- It works for almost any occasion.
- It’s fast and easy to use.
You can also combine tape and stickers for extra hold and style. For example, use tape to seal the bag and add a sticker on top for decoration.
Quick Comparison Table:
| Method | Looks Visible? | Best For | Security Level |
|---|---|---|---|
| Decorative Sticker | Yes | Fun, themed gifts | Medium |
| Double-sided Tape | No | Clean, simple look | High |
Try both methods and see which one you like best. You can mix and match to fit your gift and the occasion. Tape and stickers make closing a gift bag easy, fast, and fun!
Creative Ways to Close a Gift Bag
Looking for fresh ways to close a gift bag? You can make your present stand out with creative closures that go beyond the basics. These techniques add personality and keep your gift secure, whether you want a playful look or a polished finish.
Punch Holes & Tie
Punching holes in your gift bag opens up a world of diy wrapping solutions. You can use string or ribbon to create a closure that’s both functional and decorative.
String
Try this method if you want to close a gift bag without tape. Use a hole punch to make two or more holes near the top edge of your bag. Thread a piece of string through the holes and tie a simple knot or bow. This technique works well for kraft paper bags and recycled cardboard pouches. You get a rustic look and a secure closure.
Tip: Use colored string for birthdays or holidays. You can even attach a card tag for a personal touch.
Ribbon
Ribbon brings elegance to your wrapping. Punch holes as you did before, then thread a ribbon through. Tie a bow or use the double knot technique for extra hold. This method looks great with custom printed pouches or fabric bags. You can match the ribbon color to the occasion or your brand.
| Technique | Description |
|---|---|
| Punch Holes & Tie | Lets you use string or ribbon for a secure, stylish closure. |
| Layered Packaging | Reveals the gift gradually, building anticipation for the recipient. |
| Reusable Packaging | Use bags or pouches that can be repurposed, adding value and reducing waste. |
Scrunch & Tie
Scrunch and tie closures give your gift bag a playful, textured look. You can use tissue, cellophane, or fabric to create this effect.
Casual Knot
Gather the top of your bag or pouch and scrunch it together. Use a piece of string or ribbon to tie a casual knot. This method works well with cellophane bags and recycled fabric pouches. It’s quick and keeps your gift safe inside.
- Place your gift in the bag.
- Scrunch the top together.
- Wrap string or ribbon around the gathered part.
- Tie a knot to secure.
Decorative Tie
Want to add flair? Use a decorative tie. After scrunching the top, wrap a colorful ribbon around and tie a bow. You can use seed paper packaging for an eco-friendly twist. Attach a header card or a tag for branding or a message.
Note: Decorative ties work best with tissue or fabric. You can layer tissue for extra volume and color.
- Scrunch the top of the bag.
- Wrap ribbon around the gathered area.
- Tie a bow or use the double knot technique for security.
- Add a tag or ornament for style.
Toggle & Lace
Adjustable Closure
Toggle and lace closures give your gift bag a unique, adjustable finish. You can use a small toggle or button and thread a lace or ribbon through holes at the top. Pull the lace tight and secure with the toggle. This method works well for custom printed pouches and reusable packaging. You get a closure that’s easy to open and close, and it looks upscale.
Tip: Adjustable closures are perfect for gifts you want to reuse or for packaging that needs to stay closed during transport.
If you want your gift wrapping to stand out, try these creative closures. You can mix and match materials like ribbon, tissue, and string. These methods let you personalize your gift and make the unboxing experience memorable.
Flaps & Clasps
You might want a closure that feels a little more secure or looks extra polished. Flaps and clasps give you that option. These methods work well for paper, fabric, and even reusable gift bags. You can use them for birthdays, holidays, or any special event. Let’s look at how you can use tuck-in flaps and different clasp types to close your gift bag.
Tuck-in Flaps
Tuck-in flaps make closing a gift bag quick and easy. You don’t need tape or ribbon. You just use the bag’s own design. Some bags come with built-in flaps, but you can also fold the top of a regular bag to create one.
Here’s how you can use tuck-in flaps:
- Fold the top edge of your gift bag down toward the inside.
- If your bag has a pre-cut flap, tuck it into a slot or pocket inside the bag.
- For bags without a flap, fold the corners inward to make a triangle shape, then tuck the triangle into the bag.
- Press gently to keep the flap in place.
Tip: You can decorate the flap with a sticker, washi tape, or a small ornament. This adds a personal touch and helps keep the flap secure.
Tuck-in flaps work best for lightweight gifts. You get a neat look and a simple closure. If you want extra security, combine a tuck-in flap with a sticker or a small clip.
Clasp Types
Clasps give your gift bag a professional finish. You can choose from many styles, depending on your bag and the occasion. Clasps work well for heavier gifts or when you want the bag to stay closed during travel.
Here are some popular clasp types:
| Clasp Type | How It Works | Best For | Style Level |
|---|---|---|---|
| Button Clasp | You push the button through a loop | Fabric or canvas bags | Classic |
| Snap Clasp | You press two pieces together | Non-woven or paper bags | Modern |
| Magnetic Clasp | Magnets hold the flap shut | Luxury gift bags | Elegant |
| Hook & Loop | Velcro strips stick together | Kids’ gifts, reusable | Fun |
You can attach a clasp by sewing, gluing, or using adhesive strips. Some bags come with clasps already built in. If you want to upgrade a plain bag, buy stick-on snaps or magnetic buttons from a craft store.
Note: Magnetic clasps work best for special occasions. They feel fancy and keep the bag closed tightly.
You can mix and match clasp types with other closure methods. Try adding a ribbon bow on top of a snap clasp for extra flair. You can also use a button clasp with a tuck-in flap for double security.
If you want your gift bag to stand out, flaps and clasps give you lots of options. You get a closure that looks great and keeps your gift safe. Try these methods for your next celebration and see how easy it is to create a polished finish.
Wrapping Techniques for Different Gift Bag Materials
Gift bags come in all sorts of materials. Each one needs a different way to close and finish. Let’s look at some easy and creative ways you can wrap and secure your gifts, no matter what kind of bag you use.
Kraft Paper
Kraft paper bags feel sturdy and look classic. You can dress them up or keep them simple.
Fold & Seal
You can fold the top of a kraft paper bag down a few times. This makes a neat edge. Use a sticker or a piece of double-sided tape to keep it closed. If you want extra security, punch two holes near the fold and tie a string through them. This method works well for small gifts or party favors.
Tip: Try folding the corners in before you seal the top. This gives your bag a crisp, clean look.
Printed Finish
Printed kraft bags let you show off fun designs or your brand. You can add a custom sticker or a tag with your logo. INITI can help you create bags with your business name or special message. This makes your gift stand out and feels more personal.
Cotton & Canvas
Cotton and canvas bags feel soft and reusable. They are great for eco-friendly wrapping.
Drawstring
Many cotton and canvas bags come with a drawstring at the top. Just pull the strings to close the bag. You get a snug fit that keeps your gift safe. This style works well for oddly shaped items or gifts that need a little extra space.
Branded Tie
You can add a branded tie or ribbon to your cotton or canvas bag. Wrap the tie around the top and make a bow. This adds a special touch and helps with your business branding. INITI offers custom ties in your brand colors, so your packaging always matches your style.
| Material | Closure Method | Best For |
|---|---|---|
| Kraft Paper | Fold & Seal | Small, light gifts |
| Cotton/Canvas | Drawstring | Odd shapes, reusable |
| Cotton/Canvas | Branded Tie | Business branding |
Non-Woven Fabric
Non-woven fabric bags feel light and strong. They work well for both gifts and giveaways.
Velcro
Some non-woven bags have a Velcro strip at the top. Just press the two sides together to close the bag. Velcro is quick and easy, and you can open and close the bag many times.
Snap/Button
You might find bags with a snap or button closure. Push the snap together or fasten the button to keep your gift inside. This method feels secure and looks neat. You can even add a small piece of tissue inside for extra padding.
Note: INITI can customize non-woven bags with your logo, special colors, or even unique closures like snaps or Velcro. This helps your business stand out and gives your customers a great unboxing experience.
No matter which material you choose, you can find a wrapping technique that fits your style and keeps your gift safe. Try different closures to see what works best for your occasion.
Close a Gift Bag for Oddly Shaped Gifts
Sometimes, you find the perfect gift, but it just won’t fit neatly in a regular bag. Bulky or oddly shaped presents can make wrapping tricky. Don’t worry! You have plenty of ways to keep your gift safe and looking great.
Bulky Items
Reinforce
Big or heavy gifts need extra support. You can reinforce your gift bag to make sure it holds up.
- Place a sturdy piece of cardboard at the bottom of the bag. This helps the bag keep its shape and stops it from tearing.
- Use extra tissue paper or bubble wrap around the gift. This cushions the item and fills empty spaces.
- Try wrapping the gift in a soft blanket or towel before placing it in the bag. This adds padding and keeps the gift from moving.
Tip: If your gift is very heavy, choose a bag with strong handles or double up the handles with ribbon for extra strength.
Double-bag
Sometimes, one bag just isn’t enough. Double-bagging gives you more support and peace of mind.
- Place your gift inside the first bag.
- Slide that bag into a second, slightly larger bag.
- Add tissue paper or padding between the two bags for extra protection.
This method works well for gifts with sharp edges or extra weight. You don’t have to worry about the bag breaking during transport.
Irregular Shapes
Flexible Wraps
Irregularly shaped gifts can poke out or shift around. Flexible wraps help you keep everything in place.
- Use tissue paper, bubble wrap, or even fabric to wrap around the gift. This fills gaps and stops the gift from moving.
- Add extra padding to delicate spots, like corners or edges, to protect them.
- For a festive touch, wrap strings of holiday lights around large gifts. This not only secures the item but also makes it look fun and bright.
Inserts
Inserts are a smart way to keep your gift steady inside the bag.
- Place foam, cardboard, or crumpled paper around the gift. This cushions the item and keeps it from sliding.
- Use small boxes or containers inside the bag to hold loose parts or accessories.
- Make sure all parts of the gift are protected, especially if they stick out or are fragile.
Note: Flexible wraps and inserts work together to keep your gift safe and looking good, no matter the shape.
Alternative Packaging
Sometimes, a gift bag just isn’t the best choice. You might want to try something different for a better fit or a special look.
Gift Boxes
Gift boxes give you a classic, premium feel. They work well for formal events like Christmas or weddings. Boxes make unboxing feel special and keep your gift safe.
Pouches
Pouches offer a relaxed and elegant style. They’re great for personal gifts, especially for couples or close friends. Pouches can stretch to fit odd shapes and add a soft touch.
- Gift boxes and pouches can change how your gift feels to the receiver.
- Choose a box for a fancy, memorable moment.
- Pick a pouch for a cozy, personal vibe.
| Packaging Type | Best For | Special Touch |
|---|---|---|
| Gift Bag | Everyday, easy gifts | Quick and colorful |
| Gift Box | Formal, premium gifts | Classic unboxing experience |
| Pouch | Personal, flexible | Casual elegance |
No matter what shape your gift takes, you have options. Try these tips to make sure your present arrives safe and looks amazing!
Tips for Mastering Gift Bag Closures
Want to make your gift bags look amazing every time? You can! With a few simple tips, you’ll avoid common mistakes and even try some advanced tricks. Let’s break it down so you can master every closure, from quick fixes to creative designs.
Beginner Steps
Avoid Mistakes
Everyone makes mistakes when wrapping gifts. You might use too little tissue paper, or maybe your bow comes undone. Here are some things to watch out for:
- Don’t overload the bag. Heavy gifts can break handles or tear the bag.
- Make sure your closure matches the bag’s weight. A sticker might not hold a heavy present.
- Avoid using too much tape. It can look messy and make the bag hard to open.
- Check that your decorations don’t block the handles.
Tip: Always test your closure before giving the gift. Give the bag a gentle shake to see if it stays shut.
Quick Fixes
Sometimes, you need a fast solution. Maybe you ran out of tape or ribbon. No problem! Here are some quick fixes:
- Use a twist tie or a piece of string to secure the handles.
- Fold the top of the bag and use a paperclip or binder clip.
- Try a rubber band for a snug hold.
- Want to close a gift bag without tape? Just punch two holes at the top and tie them with ribbon or string. It’s easy and looks great!
Advanced Ideas
Layer Techniques
Ready to take your gift bag closures to the next level? Try layering different materials. You can use tissue paper, cellophane, and even fabric together. This adds color and texture. For example:
- Place tissue paper inside the bag.
- Add a layer of cellophane for shine.
- Top it off with a ribbon or bow.
You can also layer ribbons of different widths or colors. This makes your closure look fancy and unique.
Cohesive Look
Want your gift bag to stand out? Make sure everything matches. Pick colors that go well together. Use the same style of ribbon, sticker, or tag for all your bags if you’re wrapping for a party or event. This creates a cohesive look.
| Element | How to Match |
|---|---|
| Ribbon | Match with bag color |
| Tissue Paper | Use shades from same family |
| Stickers | Pick a theme or pattern |
Try mixing and matching until you find a style you love. Don’t be afraid to experiment. Sometimes, the best ideas come from trying something new!
You have all the tools you need to master gift bag closures. With a little practice, your gifts will always look special.
Customizing Closures for Branding
Want your gift bags to do more than just hold a present? You can turn every closure into a branding opportunity. When you add your logo, use your brand colors, or include a special tag, you help people remember your business. Let’s see how you can make your gift bag closures work for your brand.
Logo & Finish
Your logo is the face of your brand. When you put it on a gift bag closure, you make your business stand out. You can print your logo right on the ribbon, sticker, or even the bag itself. Try screen printing or dye sublimation for bright, lasting colors. These methods keep your branding strong and clear.
Brand Colors
Using your brand colors on closures helps people recognize your business right away. You can:
- Print your brand colors on ribbons, stickers, or tissue paper.
- Choose colored string or ribbon that matches your logo.
- Use custom printing to add your colors to the bag handles or closure flaps.
- Try embossed logos for a high-quality finish.
- Add a tagline or short message to share your brand’s values.
When you use your brand colors, your gift bags become mobile ads. People see your colors and logo, and they remember your business.
Info Tags
Info tags do more than just look nice. They give important details and show off your brand’s personality. You can:
- Attach a tag with your business name, website, or social media.
- Add a thank-you note or a fun message.
- Use custom labels or stickers for extra information.
- Include care instructions or product details.
A thoughtful tag can make your customer feel special and help them connect with your brand.
Customer Experience
A great closure does more than keep the bag shut. It makes the unboxing feel exciting and personal. When customers open a bag with a special closure, they remember the moment.
Unboxing
The unboxing experience matters a lot. When you add a thank-you note or a small insert, you show customers you care. This personal touch makes people feel valued. Happy customers are more likely to come back and buy again.
- A strong first impression keeps customers coming back.
- Attractive packaging builds loyalty and makes your brand easy to remember.
- Easy-to-open bags make the experience better.
- Fun packaging encourages people to share photos online.
- Unique closures set you apart from other brands.
- High-quality packaging makes your product feel more valuable.
Marketing
You can use closures as part of your marketing plan. When people see your logo and colors, they think of your business. Some companies, like Coca-Cola, use the same colors everywhere to help people remember them. Others add small gifts or samples to surprise customers and make them want to buy again.
| Branding Element | How It Helps Your Business |
|---|---|
| Logo | Boosts recognition and trust |
| Brand Colors | Makes your bags stand out |
| Info Tags | Shares your story and contact details |
| Unique Closures | Creates a memorable unboxing experience |
When you customize your closures, you turn every gift bag into a marketing tool. Customers notice the details, and they remember your brand long after the gift is gone.
Conclusion
You have so many options when you want to know how to close a gift bag. Try ribbons with a double knot, use double-sided tape for a seamless look, or add creative tags for extra flair. For bigger gifts, folding or using gift boxes works well. Customizing closures makes your gift stand out and helps you create a memorable moment. Personalized touches also boost your business branding. Want to share your favorite way to close a gift bag? Drop your ideas in the comments!
- Ribbons and bows keep bags secure and stylish
- Branded stickers and tags add a professional touch
- Creative wrapping solutions fit any gift shape
FAQ
How do you close a gift bag without tape?
You can tie the handles together, use a ribbon, or scrunch the top and secure it with string. Punch holes and thread ribbon through for extra style. These methods keep your gift safe and look great—no tape needed!
What’s the best way to keep a heavy gift bag closed?
Try double-bagging for extra strength. Use strong ribbon or a reinforced knot on the handles. Add a cardboard base for support. For extra security, combine a tuck-in flap with a sticker or clasp.
Can you reuse gift bags with custom closures?
Absolutely! Just untie the ribbon or open the clasp gently. Save the bag and closure for another occasion. Reusable closures like drawstrings, snaps, or Velcro make it easy to use the bag again.
How do you make a gift bag look more festive?
Add colorful tissue paper, tie a bright ribbon, or use themed stickers. Try layering different textures. You can even attach a small ornament or tag for a personal touch. Your gift will stand out!
What if my gift is an odd shape?
Flexible wraps like tissue or fabric help. Use inserts or padding to keep the gift steady. For tricky shapes, try a pouch or box instead. These options protect your gift and make wrapping easier.
Are there eco-friendly ways to close a gift bag?
Yes! Use fabric ribbons, reusable bags, or biodegradable string. Choose recycled paper for tags. Avoid plastic tape and single-use decorations. Eco-friendly closures look stylish and help the planet.
Can I add branding to my gift bag closure?
You sure can! Print your logo on ribbons, stickers, or tags. Use your brand colors for a cohesive look. Custom closures make your business memorable and add a professional touch to every gift.