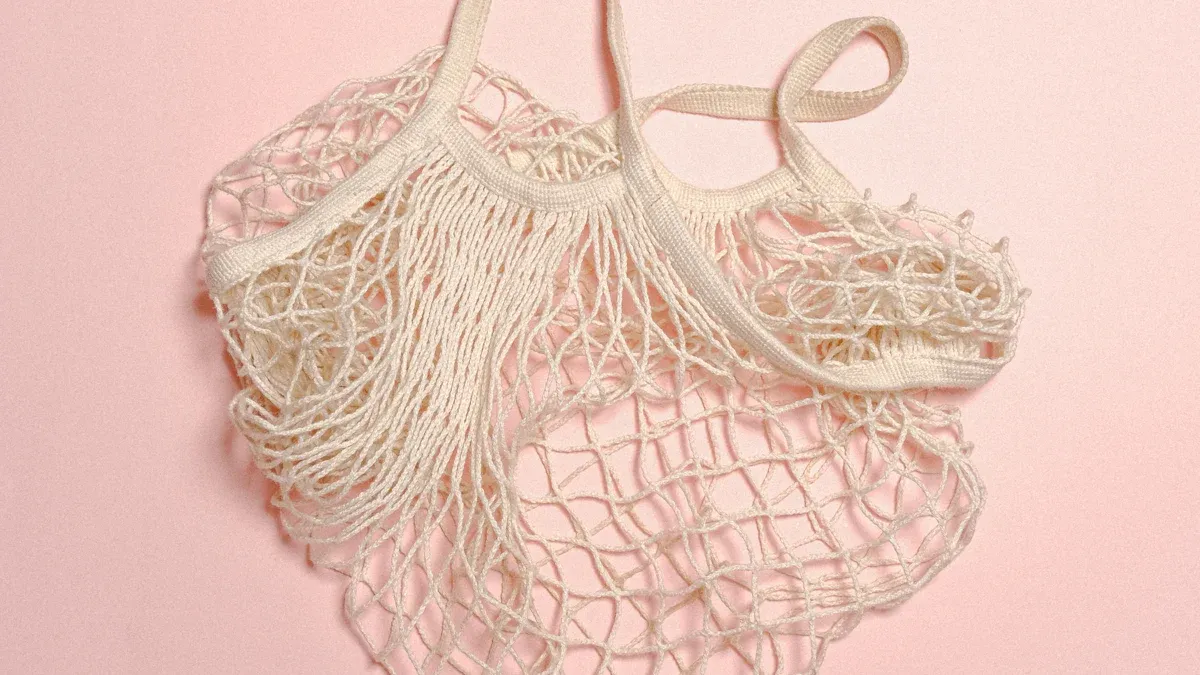
Are you ready to learn how to make a mesh tote bag? You just need simple materials and a little bit of patience. This project is perfect for beginners. You can use your favorite colors and fabrics to create a bag that shows your style.
Key Takeaways
- Get your supplies like mesh fabric, thread, and handles before you start. Use a rotary cutter to cut the mesh fabric neatly. Cut only one layer at a time so it does not move. Add pockets to your tote to make it more useful. Put the pockets where you can reach them easily. Sew strong seams with a straight stitch. Use backstitching to make the seams last longer. Top-stitching on the seams makes your bag stronger. It also helps your bag look nice and neat. Pick handles that feel good and are strong. Sew the handles on with strong stitches. Make your tote bag special with your own designs or colors. You can also add embroidery if you want. Wash your mesh bag gently to keep it clean. Check for loose threads so your bag will last a long time.
Supplies and Tools
Before you start sewing, you need to gather all your supplies. Having everything ready makes the process smoother and more enjoyable. Let’s break down what you’ll need for your mesh tote bag project.
Materials List
You don’t need fancy materials to make a great tote. Here’s what you should have on hand:
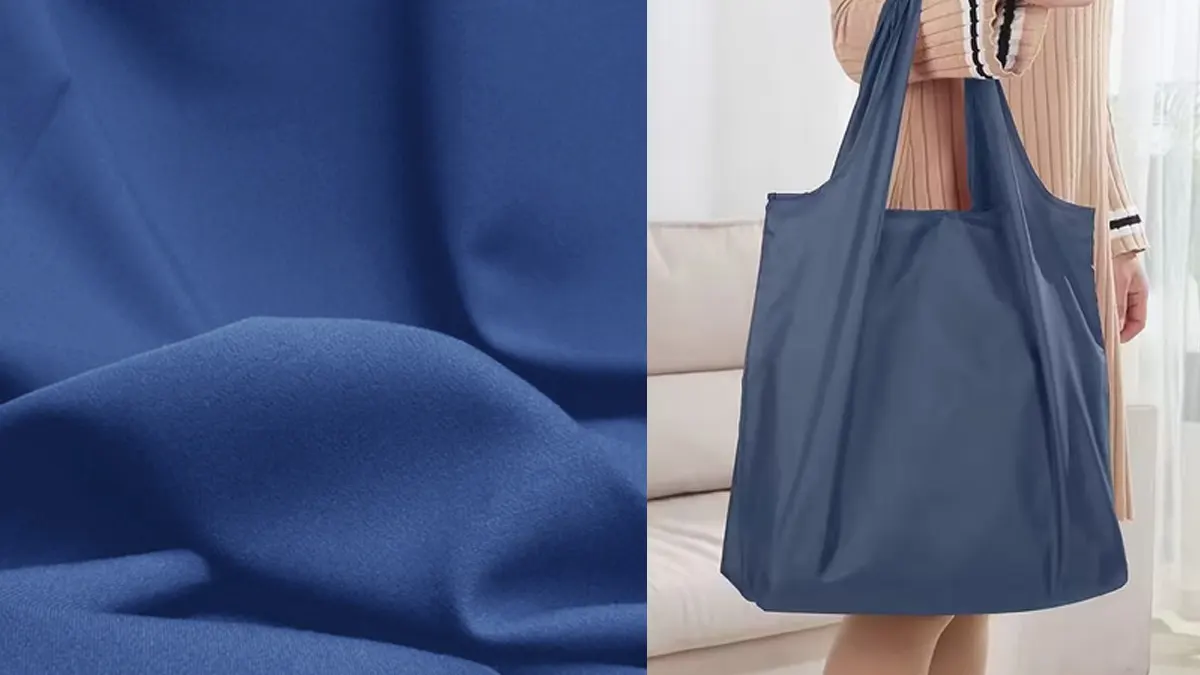
- Mesh fabric (choose a color you love)
- All-purpose thread (match or contrast with your mesh)
- Handles or sturdy webbing for straps
- Scrap fabric (for pockets or lining)
- Fabric for binding edges (optional)
- Interfacing (for extra structure, if you want)
- Zipper (if you want a secure closure)
Tip: When working with mesh fabric, pick a type that feels soft but strong. This helps your bag last longer and look great.
Here’s a quick look at the average cost for a basic mesh tote bag:
| Product Name | Price |
|---|---|
| Mesh Tote Bag | From $3.24 |
If you want to make a larger or zippered version, the price may change:
| Product Name | Price |
|---|---|
| Nylon Mesh Large Tote Bag With Zipper | From $3.24 |
You can also save money by making several bags at once. Check out this price chart for bulk orders:

Tools Needed
You don’t need a lot of fancy equipment, but a few basic tools make sewing easier. Here’s what you should gather:
- Sewing machine (any basic model works)
- Fabric scissors or rotary cutter
- Measuring tape or ruler
- Pins or fabric clips
- Seam ripper (for fixing mistakes)
- Marking pen or chalk
Professional bag makers often use extra tools to get a polished finish. Here are some you might want to try:
- Magnetic snaps – Easy to insert and come in many colors and sizes.
- Cap rivets – Great for reinforcing handles and details.
- D-rings – Attach handles securely.
- Adjustable sliders – Make your straps the perfect length.
- Eyelets – Reinforce holes in your mesh.
- Smooth foot – Helps sew mesh or vinyl without sticking.
- Piping foot – Gives your seams a clean, strong edge.
- Zipper attaching foot – Makes adding zippers simple.
Optional Add-ons
Want to take your tote to the next level? Try these extras:
- Quilting supplies for a professional look
- Decorative patches or embroidery
- Extra pockets inside or outside
- Key clip or small pouch attachment
Note: Adding these features lets you personalize your bag and practice new sewing skills.
With your supplies and tools ready, you’re set to start creating. The right materials and tools make working with mesh fabric much easier and more fun. Now, let’s move on to cutting your fabric pieces!
Cutting Fabric
Measuring Pieces
Before you start cutting, you need to know the right size for your tote bag pieces. Most mesh tote bags use simple rectangles. You can follow these standard sizes to make a classic tote or try a different shape if you want something unique.
| Bag Type | Width (inches) | Height (inches) | Depth (inches) |
|---|---|---|---|
| Mesh Tote Bag (NBPC) | 19 | 12 | 4.5 |
| Mesh Tote Bag with Zipper (BS216) | 19 | 12 | 4.5 |
| Landscape Mesh Tote | 16.125 | 12.5 | 6.375 |
You can use these measurements for your main mesh panels. If you want pockets or lining, measure and cut those pieces a bit smaller so they fit nicely inside the bag.
Tip: Always double-check your measurements before you cut. It saves time and fabric!
Cutting Mesh and Fabric
Now it’s time to cut your fabric. Mesh can be slippery, so take your time. Lay your mesh flat on a table or a self-healing mat. Use a rotary cutter for clean, straight lines. This tool works better than scissors for mesh because it glides smoothly and doesn’t pull the fabric.
Cut each piece one at a time. Cutting single layers helps you avoid shifting and keeps your pieces the right size. If you want to add pockets or a lining, cut those from your scrap fabric now.
Note: Pattern weights work better than pins for mesh. Pins can snag or stretch the fabric, but weights hold everything in place without damage.
Tips for Accuracy
Getting clean, even pieces makes sewing much easier. Here are some tips to help you cut like a pro:
- Use a rotary cutter and a self-healing mat for precise cuts.
- Mark your fabric with a washable pen or chalk before cutting.
- Place pattern weights on your fabric instead of pins to prevent snags.
- Cut only one layer at a time to avoid shifting.
- Secure the edges of your mesh with tape if it starts to fray or move.
Taking a few extra minutes to measure and cut carefully will make your tote bag look neat and professional. You’ll thank yourself when it’s time to sew everything together!
Sewing Pockets and Details
Pocket Placement
Pockets make your mesh tote bag extra handy. You can keep your phone, keys, or sunscreen in them. First, decide where you want your pockets. Most people like to put one on the inside for small items. You can also add a pocket to the outside for things you need to grab fast.
Lay out your main mesh panel on a flat surface. Place your pocket pieces on top. Move them around until you find a spot you like. Use a ruler to check that the pocket sits straight. Mark the corners with a washable pen or chalk. This step helps you keep everything neat.
Tip: If you want more than one pocket, space them out evenly. You can even use different fabrics for each pocket to add some fun color!
Attaching Pockets
Now you get to use your sewing skills. Pin or clip the pocket piece to the mesh where you marked it. Mesh fabric can be slippery, so clips work better than pins. Start by sewing along the sides and bottom of the pocket. Leave the top open so you can use it.
Use a straight stitch for this step. Go slow and keep your lines even. If you want your pocket to hold heavy things, sew a second line close to the first one. This makes the pocket stronger. Backstitch at the start and end to lock the stitches in place.
Here’s a quick checklist for attaching pockets:
- Clip pocket to mesh panel
- Sew sides and bottom with a straight stitch
- Backstitch at both ends
- Check that the pocket feels secure
Note: If you want to try new techniques, add a zipper or a snap to your pocket. This keeps your items safe inside.
Decorative Touches
You can make your tote bag stand out with a few simple details. Try adding a strip of ribbon or a patch to your pocket. Use colorful thread for the stitching. You can even sew on a small label with your name.
Some people like to add embroidery or fabric paint. These extras show off your style. If you want a sporty look, use bright neon colors. For a classic style, pick neutral shades.
- Add ribbon or lace to the pocket edge
- Sew on a fabric patch or label
- Use fun thread colors for stitching
- Try simple embroidery shapes like hearts or stars
Remember: Small details make your bag special. Take your time and enjoy the process!
How to Make a Mesh Tote Bag
Assembling Bag Body
Now you get to see your project come together. Lay out your mesh panels and any pocket pieces you have already sewn. Place the two main mesh panels with the right sides facing each other. If you added pockets or details, make sure they are on the inside for now. Line up the edges so everything matches.
If you want to add a lining, place it on top of the mesh panels. This step gives your tote extra strength and a neat look. You can also add interfacing between the mesh and lining for more structure. Double-check that all layers are smooth and flat before you start sewing.
Tip: Use fabric clips instead of pins to hold mesh layers together. Clips keep the fabric from shifting and do not leave holes.
Sewing Seams
You are ready to start sewing the sides and bottom of your tote. Set up your sewing machine with a needle that works well for mesh fabric. A universal needle usually does the job. Choose a strong all-purpose thread that matches or contrasts with your mesh.
For the seams, use a straight stitch. This stitch holds mesh fabric together without puckering. Sew along both sides and the bottom edge, leaving the top open. Keep your seam allowance even, about 1/2 inch from the edge. Go slow and steady to keep your lines straight.
Here is a quick table to help you remember the recommended stitch pattern for assembling mesh tote bag bodies:
| Step | Instructions |
|---|---|
| 1 | Chain 4, skip 2, repeat [double crochet, chain 1, skip 1] around, slip stitch (62 double crochet, 62 chain-1 spaces) |
| 2-20 | Chain 4, repeat [double crochet in next stitch, chain 1] around, slip stitch |
| 1 | Chain 2, repeat [double crochet in next stitch, chain 1] until 2 stitches left, decrease (21) |
| 2-9 | Chain 2, turn, repeat [double crochet in next stitch, chain 1] until 2 stitches left, decrease (19, 17, 15, 13, 11, 9, 7, 5) |
| 10-23 | Chain 4, turn, repeat [double crochet in next stitch, chain 1] (5 double crochet, 4 chain-1 spaces) |
If you want extra strength, sew a second line of stitching close to the first one. This step helps your bag hold heavier items. Backstitch at the beginning and end of each seam to lock the stitches in place.
Note: If you are learning how to make a mesh tote bag, practicing your sewing on a scrap piece first can help you get comfortable with the fabric.
Reinforcing Bottom
A strong bottom keeps your tote in shape and helps it last longer. There are a few ways to reinforce the bottom of your mesh tote bag. You can use a stiff insert, like acrylic or heavy plastic canvas, to stabilize the base. If your tote is unlined, cover the insert with matching fabric for a clean look. For lined totes, place the insert between the mesh and the lining.
Here are some best practices for reinforcing the bottom:
- Use an insert of stiff material to stabilize the bottom.
- Cover the insert with fabric if your tote is unlined.
- Place the insert between the outer mesh and lining for lined totes.
- Secure the insert at the side seams so it does not shift.
- Add bag feet to keep your tote off the ground and protect the corners.
- Center interfacing on the fabric and attach it with double adhesive tape.
- Try faux leather or similar materials for extra strength.
- Topstitch the reinforced piece to keep it in place.
You can also rotate between different totes to spread out wear and tear. Avoid overloading your bag to prevent stress on the seams and straps. Set your tote down on flat, padded surfaces to keep the corners looking new.
Remember: Reinforcing the bottom is a key step in how to make a mesh tote bag that stands up to daily use.
Top-Stitching for Durability
Top-stitching gives your mesh tote bag a strong finish. You add this stitch along the edges and seams after you sew the main parts together. It helps your bag hold its shape and look neat. You also make the seams tougher, so your tote lasts longer.
You might wonder, “What is top-stitching?” It’s a line of stitching you sew on the outside of your bag. You place it close to the edge or seam. You use a straight stitch or a triple stitch for extra strength. You can pick a thread color that matches your bag or choose a bright color for a fun look.
Here’s why top-stitching matters:
- It keeps the seams flat and smooth.
- It stops the fabric from rolling or bunching up.
- It adds a professional touch to your tote.
- It makes the bag stronger, so you can carry more.
Let’s walk through the steps for top-stitching your mesh tote bag:
- Set Up Your Machine
Pick a straight stitch or a triple stitch. Use a matching or contrasting thread. Put in a new needle if yours looks dull. - Start with the Seams
Lay your bag flat. Press the seams open with your fingers. Place the edge under your sewing machine foot. - Sew Close to the Edge
Stitch about 1/8 inch from the seam. Go slow and keep your line straight. If you want extra strength, sew a second line about 1/4 inch from the seam. - Top-Stitch the Bag Opening
Fold the top edge of your bag over once or twice. Clip it in place. Sew along the folded edge. This step keeps the opening neat and stops fraying. - Check Your Work
Look at your stitches. Make sure they look even and smooth. If you see loose threads, trim them with scissors.
Tip: Use a longer stitch length for top-stitching. It looks better and feels smoother.
Here’s a quick table to help you choose the right stitch for each part:
| Area | Recommended Stitch | Stitch Length | Purpose |
|---|---|---|---|
| Side Seams | Straight/Triple | 3.0–4.0 mm | Strength and structure |
| Bag Opening | Straight | 3.5–4.0 mm | Prevent fraying |
| Handles/Straps | Triple | 4.0 mm | Extra durability |
You can use top-stitching to add style, too. Try a zigzag stitch for a sporty look. Use metallic thread for a little shine. Add a row of decorative stitches along the top edge.
Remember: Top-stitching is your secret to a sturdy, stylish mesh tote bag. Take your time and enjoy the process. Your bag will look and feel amazing!
Adding Handles
Preparing Straps
Handles make your tote bag easy to carry. You want them to feel comfortable and last a long time. You have many choices for strap materials. Some of the most durable options include cotton, nylon, polyester, and even eco-friendly PVC plastic. These materials hold up well, even if you use your bag every day. If you want something unique, you can try wooden handles. They look stylish and feel sturdy in your hand. You can find wooden handles made from bamboo, oak, or maple.
To get started, measure how long you want your straps. Most people like handles that are about 20 to 26 inches long. This length lets you carry the bag on your shoulder or in your hand. Cut two pieces of your chosen material. If you use fabric, fold each piece in half lengthwise with the right sides together. Sew along the long edge, then turn the strap right side out. Press it flat with an iron. If you use webbing or pre-made handles, you can skip the sewing and just cut them to size.
Tip: If you want extra comfort, add a layer of padding inside your fabric straps. This makes them softer on your shoulder.
Attaching Handles
Now you need to attach the handles to your tote bag. Place the ends of each strap on the inside of the bag opening. Space them evenly from the side seams. Most people place the handles about 4 inches from each side. Make sure the straps are not twisted.
Use fabric clips to hold the handles in place. Sew a square or rectangle at each end of the strap to secure it. For extra strength, sew an “X” inside the square. This helps the handles stay put, even when you carry heavy things.
Here’s a quick checklist for attaching handles:
- Place strap ends inside the bag opening
- Space handles evenly from the side seams
- Clip handles in place
- Sew a square or rectangle at each end
- Add an “X” for extra strength
If you want to try something different, you can use D-rings or metal hardware to attach your handles. This gives your bag a professional look and makes the handles even stronger.
Securing for Strength
You want your handles to last. Professional bag makers use special tricks to make sure handles stay strong. They sometimes add stiffeners or reinforcement tapes inside the strap area. These help spread out the weight and stop the fabric from tearing. Some makers use thin metal strips or even build handles around a bungee cord for extra support.
Here’s a table with some ways to reinforce your handles:
| Method/Material | Description |
|---|---|
| Stiffeners | Support handles and reduce the chance of tearing or breaking |
| Reinforcement Tapes | Make handles stronger and help spread out heavy loads |
| Structural Supports | Add extra strength to where the handles attach |
If you want to carry heavy items, try adding one of these reinforcements. Sandwich a thin metal strip or stiffener between layers of fabric at the handle base. You can also sew extra rows of stitching or use rivets for a super-strong hold.
Remember: Strong handles mean you can use your tote bag for groceries, books, or even a day at the beach—without worry!
Finishing Touches
Trimming Threads
You’re almost done! Before you show off your new mesh tote bag, take a close look at all the seams. You’ll probably see some loose threads sticking out. Grab a small pair of sharp scissors and snip these threads as close to the fabric as you can. This step makes your bag look neat and tidy.
Don’t forget to check both the inside and outside of your tote. Sometimes threads hide in the corners or along the seams. If you see any knots or tangled spots, trim those too. You want your bag to look clean and professional.
Tip: Keep a small container nearby for all your trimmed threads. This keeps your workspace neat and makes cleanup easy.
Binding Edges
Now it’s time to finish the edges of your bag. Mesh fabric can fray or stretch, so you want to make sure the edges stay strong. There are a few ways you can bind the edges for a polished look:
- Press the bottom of the top bag piece to the wrong side along the seam allowance. This helps you get a crisp, accurate closure.
- Use a zigzag or overcast stitch along the raw edges. These stitches add stability and keep the mesh from stretching out of shape.
- If your sewing machine only does straight stitches, try bias tape binding. Wrap the tape around the edge and sew it in place for a clean finish.
- Understitch the bag by sewing a straight stitch on the seam allowance through the inner top bag. This keeps the lining or facing from rolling out.
You can pick the method that works best for you and your machine. Take your time with this step. Rushing through binding and topstitching can make the bag look messy. A careful finish makes your tote look store-bought!
Note: If you want a pop of color, use bright bias tape or thread for your binding. This adds a fun detail to your bag.
Final Inspection
Your bag is almost ready for its first trip out! Before you pack it full of goodies, do a quick final inspection. Here’s a simple checklist to help you:
| Step | What to Check For |
|---|---|
| Seams | Are they reinforced and secure? |
| Edges | Is the binding neat and even? |
| Threads | Did you trim all loose threads? |
| Shape | Does the bag hold its shape well? |
| Handles | Are they attached tightly? |
Look for any spots where you might have missed a stitch or where the fabric looks loose. Not reinforcing important seams can lead to stress points failing, so give those areas an extra look. If you skipped pressing, your bag might not look as crisp as you want. A quick press with an iron (on a low setting) can help smooth out wrinkles and give your tote a polished finish.
Remember: Taking a few extra minutes to check your work helps your mesh tote bag last longer and look its best. Now you’re ready to enjoy your handmade creation!
Mesh Beach Bag Ideas
Customization Tips
You can turn your mesh beach bag into something truly special with a few creative touches. Personalization is a big trend right now. People love bags that show off their style or even their name. You might want to add your initials, a favorite quote, or a fun design. Here are some of the most popular ways to customize your mesh bag:
- Silkscreen imprinting gives you bold, colorful designs that last.
- Heat transfer lets you add full-color images or small, detailed artwork.
- Sublimation works well for bright, all-over prints.
- Embroidery adds a high-end look and feels sturdy.
You can also try screen-printing for vibrant patterns or digital printing for complex designs. Many people like to use names or monograms. You could put a large monogram on the front and a smaller name on the back. Some even add custom messages or quotes for a personal touch. These ideas help make your mesh beach bag perfect for gifts, events, or just showing off your personality.
Tip: If you want your bag to stand out, mix two or three methods. Try embroidery for your initials and heat transfer for a colorful image.
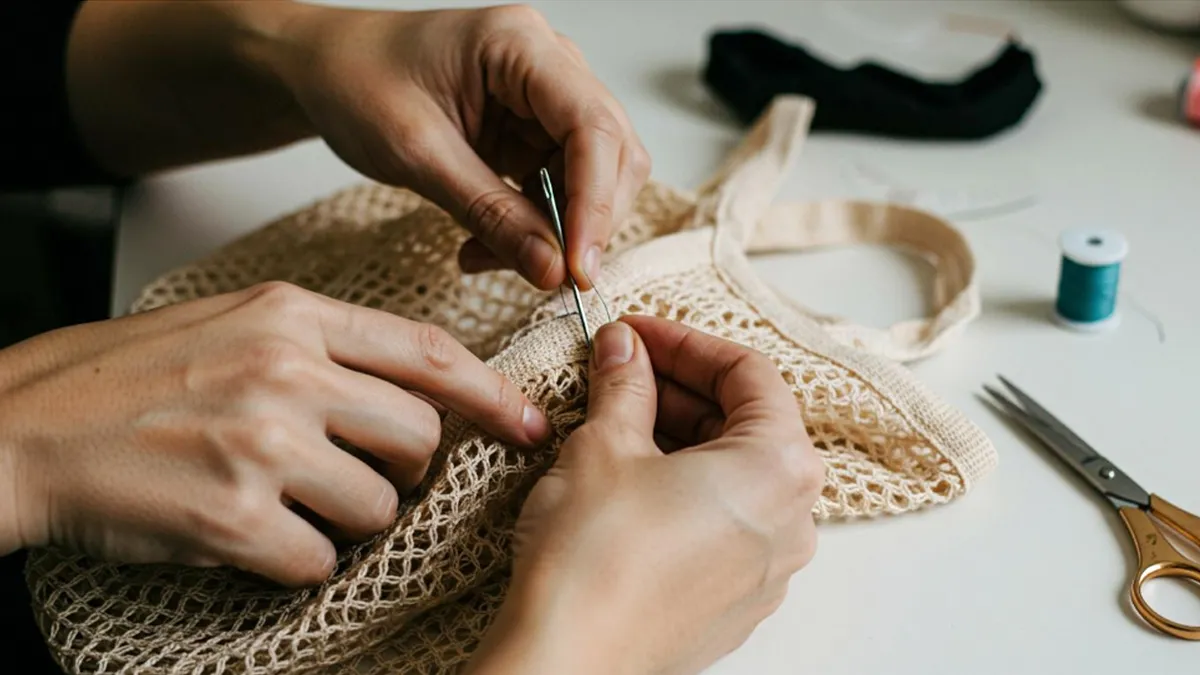
Using Scrap Fabric
Don’t throw away those leftover fabric pieces! You can use scrap fabric to make your mesh bag more interesting and eco-friendly. Here’s a simple way to add scraps to your design:
- Layer squares of nylon net and stitch around three sides. Use backstitches to keep the seams strong.
- Mark a 2-inch grid on the net. Stuff the pockets with fabric scraps. Arrange them in any pattern you like.
- Pin the scraps in place. Stitch along the grid lines to hold everything down.
- Make patchwork bias binding from larger scraps. You can also use trimmed scraps to create unique handles.
- Stitch the net pieces together. Add the handles with your homemade bias binding.
This method lets you use up small pieces of fabric and gives your mesh beach bag a colorful, patchwork look. You help the planet by reducing waste, and you get a bag that no one else has.
Note: Using scraps is a great way to practice new sewing skills and try out different color combinations.
Care and Maintenance
Your mesh beach bag will last longer if you take good care of it. Mesh fabric is strong, but it still needs a little attention. After a day at the beach, shake out any sand or dirt. If your bag gets wet, hang it up to dry. Most mesh bags can be washed by hand with mild soap and cool water. Avoid using bleach, as it can weaken the fabric.
Check the seams and handles from time to time. If you see any loose threads or small holes, fix them right away. This keeps your bag looking neat and helps it last for many summers. Store your mesh beach bag in a cool, dry place when you’re not using it.
Here’s a quick care table for your reference:
| Task | How Often | What to Do |
|---|---|---|
| Shake out sand | After each use | Turn bag inside out, shake |
| Wash | As needed | Hand wash, air dry |
| Check seams/handles | Monthly | Trim threads, repair holes |
| Store | When not used | Keep in cool, dry place |
Remember: A little care goes a long way. Your mesh bag will stay fresh and ready for your next adventure!
Conclusion
You did it! Grab your new mesh tote bag and show it off at the beach or grocery store. Try bold colors, fun fabrics, or even quilting next time. Every project helps you get better and sparks new ideas. Sewing lets you fix, create, and feel proud of your work. Mesh bags help the planet, too—they cut down on plastic waste and can use recycled materials.
As a professional mesh tote bag manufacturer, we bring your ideas to life with full OEM and ODM support. From materials to custom sizes, colors, and branding options, we handle every detail from design to production.
FAQ
How do I stop mesh fabric from fraying?
Use a narrow zigzag or overcast stitch right on the raw edge so the needle bites the mesh and wraps the edge. For a super clean finish, bind the edge with bias tape. Light fray showing already Make a neat trim, then seal with a thin line of clear fabric glue or a fray sealant. Let it dry flat before sewing the next step.
Can I sew a mesh tote bag by hand?
Yes. Choose a sharp hand needle and strong polyester thread. Work with small backstitches or a tight running stitch and keep your seam allowance consistent. Use clips instead of pins so you do not snag the mesh, and consider doubling high stress seams around handles for extra strength.
What size needle should I use for mesh fabric?
A universal 80 12 or 90 14 is a reliable start for most mesh. If the mesh is very fine or stretchy, try a 70 10 microtex or ballpoint to avoid snags. Always test on a scrap with the actual thread and stitch you plan to use, then adjust tension and stitch length until the holes look tidy and the seam lies flat.
How do I clean my mesh tote bag?
Shake out sand or crumbs first so grit does not grind into the fibers. Hand wash in cool water with mild soap, gently swish, then rinse until the water runs clear. Press with a towel to remove excess water and hang to air dry. Skip bleach and high heat, which can weaken mesh and trims.
Can I add a zipper to my mesh tote bag?
Yes. Stabilize the top edge with twill tape or a narrow strip of woven fabric so the zipper does not ripple. Install with a zipper foot and a medium stitch length, stitching slowly to keep the tape straight. Choose a zipper that matches the opening, and consider a plastic coil zipper for smooth, lightweight function.
What can I use for handles?
Cotton webbing feels soft and looks casual, nylon webbing is very strong and weather resistant, and rope gives a nautical vibe. You can also sew fabric handles with interfacing for structure or add wooden or acrylic handles for style. Whatever you pick, test the grip in your hand and reinforce the attachment points with box X stitching or rivets.
Is mesh fabric waterproof?
Most mesh is breathable by design, so water and air pass through easily. For splashy days, choose coated mesh or line the bag with a waterproof or water resistant fabric such as TPU laminated nylon. You can also add a simple drawcord liner to protect contents while keeping the outer bag airy.
How do I make my tote bag stronger?
Reinforce seams with a second row of stitching and extend the seam allowance slightly on stress areas. Add a firm bottom insert made from plastic canvas, foam board, or recycled corrugate wrapped in fabric. Use wide webbing for handles and anchor them with box X or bar tacks, and consider edging high wear areas with binding to reduce abrasion over time.