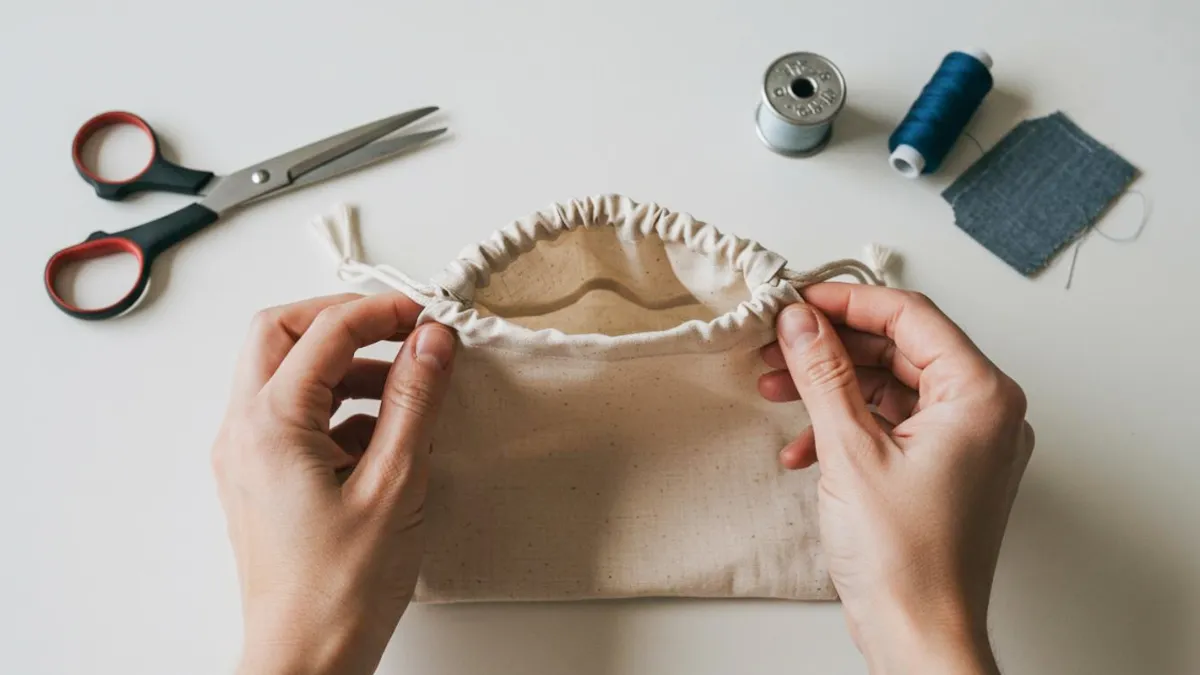
Are you a beginner looking for a fun and simple sewing project? You can learn how to make a drawstring gift bag in no time. This craft welcomes beginners and lets you get creative with your favorite fabrics.
Making a drawstring pouch usually takes just about 20 minutes, even if you have never sewn before. The steps are clear, and you will find the process relaxing and enjoyable.
You can use scrap fabric or pick a special print to match any occasion. These bags make perfect gifts or handy organizers for yourself.
Key Takeaways
- Making a drawstring gift bag is easy and fun. You can finish this sewing project in about 20 minutes. You can use leftover fabric to make eco-friendly bags. This helps the environment and lets you be creative. Gather simple tools like a sewing machine, scissors, and pins. These tools will help you sew better and faster. You can pick a one-piece or two-piece method. Choose the method that fits your bag’s size and style. Change the bag’s size to fit your gift. Measure your gift and add extra space for seams. Make your seams look nice with zigzag stitching or French seams. This gives your bag a neat and finished look. Add decorations like embroidery, buttons, or fabric paint. These touches make your bag special and different. Do not worry if you make mistakes. Practice will help you get better. Each bag you make will improve your sewing skills.
Materials and Tools
Before you sew your drawstring gift bag, gather your supplies. Most of these items are probably at home already. Using good materials makes sewing easier. It also helps your bag last longer.
Fabric Options
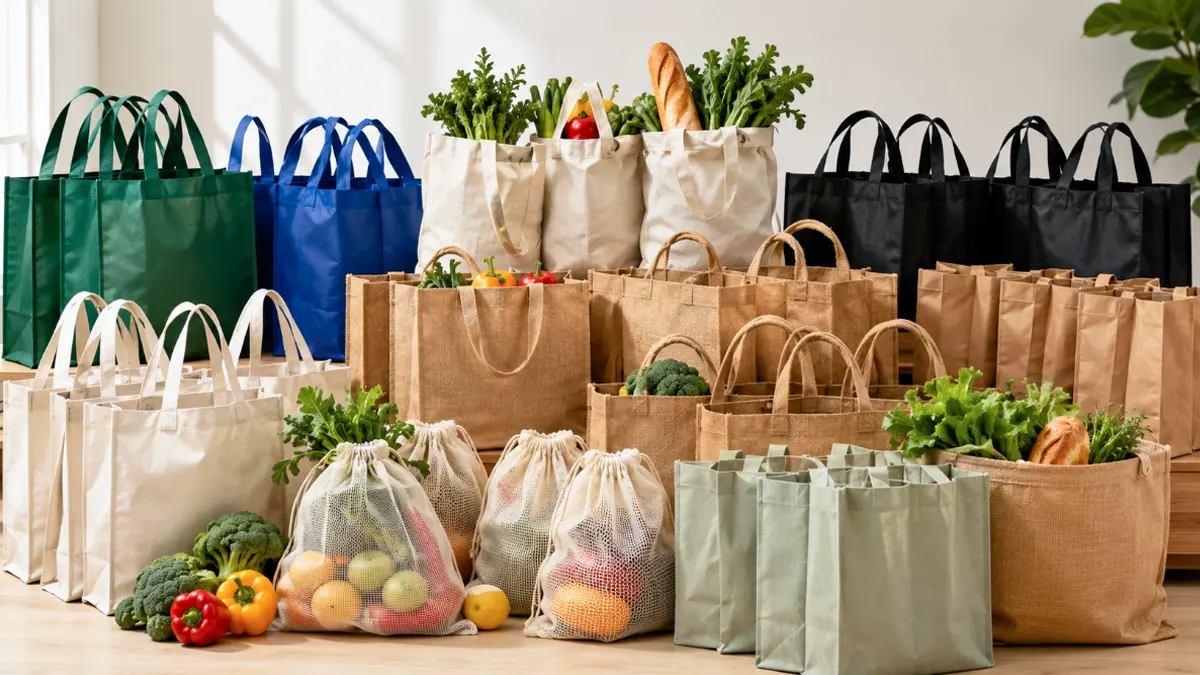
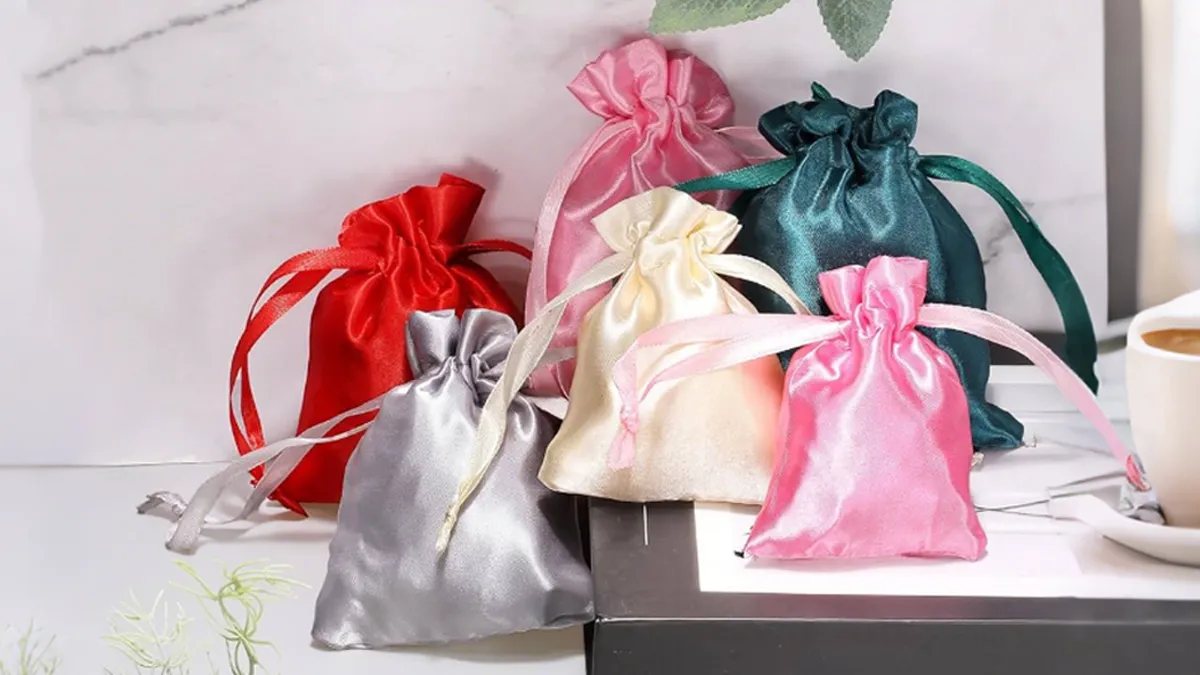
You can pick almost any fabric for your bag. If you want to help the planet, use scrap fabric from old clothes. This cuts down on waste and gives your bag a cool look. Fabric gift bags last for years. They are better than wrapping paper.
Here’s a quick guide to popular fabric choices:
| Fabric Type | Characteristics | Best Use Cases |
|---|---|---|
| Cotton | Soft, flexible, machine-washable, eco-friendly, but absorbs water easily. | Everyday use, lunch, books |
| Polyester | Durable, lightweight, colorfast, but traps odors. | Sports, gym |
| Canvas | Thicker, durable, customizable, but bulkier to carry. | Art projects, DIY |
| Burlap | Eco-friendly, rustic, easy to personalize, but not water-resistant. | Gifting, event packaging |
| Nylon | Lightweight, water-resistant, stain-resistant, but not biodegradable. | Travel, school, daily use |
Tip: Scrap fabric saves money and helps the earth. It keeps trash out of landfills and supports sustainability.
Tools Needed
You do not need fancy tools for a drawstring bag. Here is what you should have:
- Sewing machine (a basic one works, just check for zigzag stitch)
- Sharp scissors for cutting fabric
- Pins or clips to hold pieces together
- Universal sewing needle (use heavy-duty for thick fabric)
- Measuring tape or ruler for sizing
- Fabric marking pen or chalk
- Iron and ironing board for pressing seams
- Small scissors or thread snips for trimming
If you want to try more advanced sewing, use a rotary cutter and cutting mat. Some people use special sewing machine feet for neat edges. These are optional.
Optional Supplies
Want your bag to look special? Try adding these extras:
- Lining fabric for a neat inside
- Ribbon, twill tape, or cording for the drawstring
- Fray blocker to keep edges tidy
- Decorations like buttons, patches, or paint
- Handles or straps for carrying
- Personal touches like names or themed prints
Match your fabric and decorations to the event. Use holiday prints for Christmas or bright colors for birthdays. If you want your bag to last, choose strong fabric and sturdy stitching.
Note: The best thing about making your own drawstring bag is customizing it. Be creative and use what you have!
How to Make a Drawstring Gift Bag
Ready to dive into the main part of this tutorial? You will find that making a drawstring gift bag is easier than you think. This section will walk you through each step, from cutting your fabric to choosing your construction method. You will also learn how to adjust the size for any gift. Let’s get started!
Cutting Fabric
The first step in this tutorial is cutting your fabric. You want your pieces to be the right size so your bag looks neat and fits your gift.
Measuring Tips
If you like to follow clear instructions, grab your measuring tape. Here’s how to measure and cut your fabric for a classic two-piece bag:
- Decide how tall and wide you want your bag. For a medium bag, cut two pieces of fabric, each 15 inches by 11 inches.
- To figure out your own size, use this formula:
- Length = Desired bag height + half the bag’s depth + seam allowances (add ½ inch for the bottom seam and extra for the top hem).
- Width = Desired bag width + the full depth of the bag + seam allowances (add ½ inch for each side).
- Mark your fabric with a fabric pen or chalk. Cut along the lines with sharp scissors.
Tip: Double-check your measurements before you cut. This step helps you avoid mistakes and makes the rest of the tutorial easier.
No-Measure Method
Not a fan of measuring? You can still follow this tutorial! Lay your gift on the fabric. Fold the fabric over the gift, leaving extra space at the sides and top for seams and the drawstring channel. Cut around the shape, making sure you have enough room to sew.
- This method works great if you want a quick project or use up scrap fabric.
- Your bag might turn out a little different each time, but that’s part of the fun.
One-Piece vs. Two-Piece Construction
You can make a drawstring gift bag using one piece of fabric or two. Both methods work well, and this tutorial covers each one.
- One-Piece Method: Fold a single piece of fabric in half. Sew the sides, leaving the top open. This method uses fewer seams and works best for small or medium bags.
- Two-Piece Method: Cut two rectangles of fabric. Place them right sides together. Sew along both sides and the bottom. This method gives you more control over the size and shape.
If you want to add a lining or use two different fabrics, the two-piece method is your best choice. For a fast and simple bag, try the one-piece method.
Adjusting Size
You can change the size of your drawstring gift bag to fit any present. This tutorial gives you the freedom to make tiny pouches or large totes.
Here’s how you can adjust the size:
- Think about what you want to put in the bag. Measure the item’s height, width, and depth.
- Add extra space for seam allowances and the drawstring channel.
- Cut your fabric using the measuring tips above or the no-measure method.
- If your bag has drawstrings, you can make the straps longer or shorter. Pull the drawstrings outward to make the straps longer or inward to make them shorter.
- Make sure both sides of the drawstrings are even. This keeps your bag balanced and easy to close.
- Try out the bag with your gift inside. Adjust the size if you need to.
You can make a bag for jewelry, books, toys, or even shoes. This tutorial lets you create a custom fit every time.
If you follow these instructions, you will know exactly how to make a drawstring gift bag that suits your needs. The next steps in this tutorial will show you how to sew the pieces together and finish your bag with a neat drawstring channel.
Sewing the Bag
Pinning and Stitching
Now that you have your fabric pieces ready, it’s time to sew your bag together. This part is where your project really starts to take shape! Here’s a simple way to pin and stitch your drawstring gift bag:
- Lay your fabric right side down. Fold over one long side by 1/4 inch and press it flat with your iron. Do the same with the other long side.
- Fold over one top edge by 1/4 inch and press. Then fold it again by 1 1/2 inches, press, and pin in place. This creates the casing for your drawstring. Repeat for the other top edge.
- Place your fabric pieces together with the right sides facing each other. Make sure the top edges with the casings line up.
- Pin the sides and bottom of your bag to hold everything steady.
- Sew down one side of the bag with a 1/4 inch seam. Continue across the bottom and up the other side. Stop just below the casing so you don’t sew it shut.
Tip: Take your time with pinning. It helps keep your fabric from slipping while you sew.
Seam Finishes (French Seam, Zigzag)
You want your bag to look neat inside and out. The way you finish your seams makes a big difference. Here are two popular options:
- Zigzag Stitch: This finish works on most fabrics. It’s quick and stops the edges from fraying. You just sew a zigzag line along the raw edge after your main seam. It’s great for thicker fabrics, but it might not look as tidy on delicate materials.
- French Seam: This method gives a super clean look. It hides all the raw edges inside the seam. French seams work best for lightweight or sheer fabrics. They make your bag extra durable and prevent any fraying or unraveling.
If you want a strong, pretty finish for a delicate fabric, go with a French seam. For a fast project with sturdy fabric, a zigzag stitch does the job.
Lined vs. Unlined Bags
You can choose to make your bag lined or unlined. Both options work well, but they give different results.
- Unlined Bags: These are quick and easy. You just sew the outer fabric and finish the seams. They’re perfect for simple gift bags or when you want to use up scrap fabric.
- Lined Bags: These take a little more time, but they look polished inside and out. A lining hides all the seams and makes the bag stronger. You can use a fun print for the lining to add a surprise pop of color.
If you want a bag that feels extra special, try adding a lining. If you need something fast, stick with an unlined version. Either way, your handmade bag will look great and hold up well!
Drawstring Channel
Creating a neat drawstring channel is the secret to a bag that opens and closes smoothly. You want your channel to look tidy and work well, so let’s break down each step.
Folding and Pressing
Start by preparing the top edge of your bag. You want crisp folds so your channel stays even. Here’s a simple way to get it right:
- Cut two strips of fabric, each 2 inches wide and 30 inches long. Make sure you cut along the grain of the fabric. This helps prevent stretching.
- Join the short ends together to make one long strip.
- Fold the strip in half lengthwise. Press the fold with your iron.
- Fold the raw edges in toward the center crease. Press again to keep everything flat.
- Edgestitch along the open edge to finish the strip.
If you’re working with the main bag panel, lay it wrong side up. Fold the top edge down by the amount you want for your channel (usually about 1 inch). Press the fold. Fold it down again by the width of your channel (about 1.5 inches). Press once more. These steps help you create a crisp, straight channel for your drawstring.
Tip: Use a hemming guide or ruler to keep your folds even. Pressing each fold makes sewing easier and helps your bag look professional.
Sewing the Channel
Now you’re ready to sew the channel. You want the channel wide enough for your drawstring or elastic to move freely. Here are some best practices:
- Make the casing slightly wider than your drawstring or elastic. This prevents bunching and lets the cord slide easily.
- Pre-stretch elastic before cutting if you use it. This keeps your channel from getting slack later.
- Fuse interfacing over seam intersections. This creates a smooth path for threading and stops snags.
- Mark alignment points on both the channel and the drawstring. This keeps everything flat and prevents twisting.
Stitch close to the lower fold of your channel. Keep the side seams open so your drawstring can run smoothly through the channel. If you want extra stability, consider adding elastic to the casing.
Note: Always check that your channel is wide enough before sewing. You can test with your drawstring or elastic to make sure it fits.
Easy Drawstring Fabric Gift Bag Tips
Want to make your easy drawstring fabric gift bag even simpler? Try these tips from experienced sewists:
- Make two small snips on both sides of your main panel, about 9 centimeters down from the top edge and 1 centimeter deep. This helps keep your channel even.
- Fold the fabric above the snip over by 1 centimeter onto the wrong side. Press and stitch close to the raw edge.
- Turn under the top raw edge by 1 centimeter, then by another 4 centimeters. Press to hold the folds.
- Use a hemming guide to line up the folds. Stitch along the bottom folded edge to form the channel.
- Fold the bag panel with right sides together. Pin the edges and sew along the bottom and up the side, stopping at the snip.
- Neaten the seams and turn the bag right side out.
- Thread the cord through the channel using a safety pin. Secure the ends so your drawstring stays put.
Pro Tip: If you want a super smooth drawstring channel, always press your folds and check your measurements before sewing. This makes threading the cord much easier and gives your bag a polished look.
Threading the Drawstring
Threading the drawstring is the moment your bag comes to life. You get to choose the perfect material, pull it through the channel, and finish the ends so your bag looks neat and works well. Let’s walk through each step together.
Choosing Drawstring Material
You have lots of options for drawstring materials. The most popular choices for handmade gift bags are:
- Ribbon
- Cord
Each material gives your bag a different look and feel. Some are soft and colorful, while others are sturdy and practical. Here’s a quick guide to help you decide:
| Material | Pros | Cons |
|---|---|---|
| Grosgrain Ribbon | Fray-resistant, holds knots well | Less shiny than satin |
| Cotton Ribbon | Biodegradable, soft texture | Wrinkles easily |
| Poly-Cotton Blend | Washable, wrinkle-resistant | Slightly higher cost |
| Cording | Sturdy, can be dyed | N/A |
| Twill Tape/Ribbon | Available in many colors | Requires finishing to prevent fraying |
If you want a classic look, try grosgrain or cotton ribbon. For a strong and durable bag, cording works best. Twill tape gives you lots of color choices but needs a little extra care at the ends.
Tip: Match your drawstring to your fabric for a coordinated look, or pick a bold color to make your bag pop!
Threading Methods
Threading the drawstring through the channel can feel tricky, but you have some easy methods to try. You don’t need fancy tools—just a few household items.
- Using a Straw: Slide your drawstring into a straw and staple them together. Push the straw through the channel, then pull the drawstring out. This method is super fast and can save you time, especially if you need to rethread.
- Using a Safety Pin: Attach a safety pin to one end of your drawstring. Push the pin through the channel, scrunching the fabric as you go. This classic method works well for most fabrics.
- Using a Bodkin: A bodkin is a special tool that grabs the drawstring and guides it through the channel. It works like a safety pin but is a bit sturdier.
The straw method stands out for speed. You can rethread your bag in under a minute, while other methods might take a bit longer.
Pro Tip: If you lose your drawstring inside the channel, the straw trick can save the day!
Securing Ends
Once you’ve threaded your drawstring, you want to keep the ends from fraying or slipping back into the channel. You have a few ways to do this:
Cord ends help stop unraveling and fraying. They come in metal, plastic, or wood. These little pieces make your bag look finished and keep the drawstring strong. You can also tie a simple knot at each end if you want a quick fix. Cord ends not only protect your bag but also make it easier to open and close.
If you use ribbon or twill tape, fold the ends under and stitch them down or use a dab of fray blocker. For cording, you can melt the ends slightly with a lighter (with adult supervision) or add a cord end for a polished look.
Note: Securing your drawstring keeps your bag looking neat and makes it last longer. Don’t skip this step!
Finishing Touches
Trimming Threads
You’re almost done! Before you show off your new bag, take a moment to trim any loose threads. This step makes your project look neat and finished. Grab your small scissors or thread snips. Check all the seams, corners, and the drawstring channel. Snip off any threads that stick out. If you see a knot, pull it gently and trim close to the fabric. This step is easy, but it makes a big difference in how your bag looks.
Tip: Hold your bag up to the light. Sometimes you’ll spot threads you missed. A quick trim keeps your bag looking sharp and ready for gifting.
Adding Decorations
Now comes the fun part—decorating your drawstring gift bag! You can make your bag stand out with a few easy touches. Decorations turn a simple bag into something special. Here are some of the most popular ways people personalize their bags:
- Screen printing works great for bold, simple designs or logos. You can add a name or a fun shape with this method.
- Embroidery gives your bag an elegant look. It also lasts a long time, so your design stays beautiful.
- Heat transfer lets you add detailed, colorful images. This method is perfect if you want a multi-colored design.
- Sublimation covers the whole bag with a full-color print. You can create a one-of-a-kind look that’s sure to impress.
You can also add buttons, patches, or fabric paint for an easy upgrade. Try using ribbon or beads on the drawstring for extra flair. If you want to make your bag match a holiday or event, pick themed colors or prints. Decorating is easy and lets you show off your style.
Don’t be afraid to experiment. Every bag you make gets easier and more creative!
Troubleshooting
Sometimes things don’t go as planned, but you can fix most problems with a few easy tricks. Here are some common issues and how you can solve them:
- Uneven stitching can happen if your fabric slips. Pin your fabric well before sewing and keep it taut. If you use a sewing machine, practice on scrap fabric first. This makes it easy to get straight lines.
- If the bottom of your pouch feels weak, reinforce the corners. Sew a small triangle or square at each corner. This easy step adds strength and helps your bag last longer.
Different fabrics can bring their own challenges:
- Transparent organza feels stiff and can crack. Try ultrasonic welding or add small reinforcement patches. Micro-perforation stitching or low-temperature bonding also help keep the fabric strong.
- Linen has coarse, stiff fibers that wear out fast. Use double lock stitching or wax treatment. Backstitching and the right needle make sewing linen easy and durable.
If you run into trouble, take a breath. Every project gets easier with practice. You’ll find your own easy solutions as you go.
Ready to make more? If you want to order custom drawstring bags in any style or material, we’re here to help. We’re professional manufacturers who make it easy to get the perfect bag for any occasion—just reach out for wholesale or custom options!
How to Make a Fabric Gift Bag Variations
Using Scrap Fabric
You can turn leftover fabric into something special. Scrap pieces work great for making a fabric drawstring gift bag. You get to help the planet and save money at the same time. You might wonder what you can do with scraps. Here are some creative ideas:
- Holiday wrapping for Christmas, Hanukkah, or any festive event.
- Party favors filled with candy, small toys, or keepsakes.
- Classic drawstring bags using ribbon or cord for closure.
- Simple boxed bags by gathering fabric with a ribbon.
- Hybrid bags that mix different techniques for a unique look.
Scrap fabric lets you play with colors and patterns. You can match the bag to the season or the person receiving it. Thicker scraps make sturdy bags for heavier gifts. Thin scraps work well for delicate items. You can even mix textures for a fun surprise.
Tip: If you want your bag to last, choose durable scraps like canvas or polyester. These materials hold up well and keep your gifts safe.
No-Measure Bag
You don’t need to measure every inch to make a cute gift bag. The no-measure method makes things quick and easy. You just estimate the size based on your gift. Here’s how to make a no-measure drawstring bag:
- Fold one piece of fabric in half or cut two pieces the same size.
- Hold your gift against the fabric and guess the width and height you need.
- Fold the top edge over twice and topstitch to hide the raw edge.
- Cut a strip of fabric for the drawstring casing, matching the width of your bag.
- Fold in the raw edges of the casing and topstitch.
- Fold the casing in half, wrong sides together, and sew at the raw edge with a 1/4 inch seam.
- Iron the casing flat and attach it to the back of your bag.
- Use your fingers to estimate the space between the casing and the top of the bag.
- Topstitch at the top and bottom edges of the casing.
- Sew along the long side and bottom edge to close the bag.
- Feed your ribbon drawstring through the casing and you’re done!
You can finish the bag in less than half an hour. If you want a lined version, just make a lining the same size as the outside, leave a turning gap, and sew the layers together. Turn the bag right side out and close the gap.
Pro Tip: The no-measure method works best when you want a fast project or need to use up odd-shaped scraps.
Lined Bag Option
A lined bag feels smooth inside and looks polished. You get extra strength and a neat finish. Lined bags are eco-friendly because you can reuse them many times. You save money by using scraps or inexpensive fabric. You can pick colors and patterns to match any occasion.
Here are some benefits and challenges of making a lined bag:
- Eco-friendly: You reduce waste compared to disposable wrapping paper.
- Budget-friendly: You use scraps or low-cost fabric.
- Customizable: You choose the fabric and add personal touches.
When you pick fabric, think about durability and appearance. Here’s a quick table to help you decide:
| Purpose / Functional Need | Key Considerations | Recommended Materials Examples |
|---|---|---|
| Product Packaging/Gift Bags | Appearance, texture, brand style | Satin, Velvet, Organic Cotton, Jute |
| Durability & Lifespan | Reusable vs. single-use | Polyester, canvas, nylon, non-woven |
| Material Texture | Brand image and feel | Rough canvas, smooth satin |
Thicker materials like canvas or nylon make strong bags that hold more weight. If you want a luxury look, try smooth satin or velvet. For outdoor gifts, rough canvas works well.
Note: You can make a lined bag by sewing the outer and lining layers together, turning the bag right side out, and topstitching the top edge. This method gives you a professional finish.
If you want to learn how to make a fabric gift bag that stands out, try these variations. You can use scraps, skip measuring, or add a lining for extra style. Each method helps you create a bag that fits your needs and shows off your creativity.
Are you looking for custom or wholesale drawstring bags? We are professional manufacturers who can help you get the perfect bag in any style or material. Reach out if you want to order in bulk or design your own!
Conclusion
You can make your own drawstring gift bag with just a little practice. Try different fabrics, sizes, and decorations to create something unique. If you run into trouble, you’re not alone. Here are some common challenges:
- Figuring out the right fabric dimensions
- Patterns not printing fully
- Cords that feel hard to pull at first
Don’t worry about mistakes. Every bag gets better as you learn.If you need custom or wholesale drawstring bags, reach out to us—We are a professional drawstring gift bag manufacturer offering custom and wholesale drawstring gift bags: choose sizes, shapes, and features (lining, boxed corners, single or double drawcord, ribbon, pockets, labels) and materials like cotton, canvas, linen, satin, velvet, organza, felt, neoprene, or recycled fabrics with Pantone-matched printing. OEM and ODM, sampling and flexible MOQs, fast quotes and lead times—send your specs and we will get started.
FAQ
How do I wash my fabric drawstring bag?
You can toss most fabric drawstring bags in the washing machine with cold water. Let the bag air dry to keep it looking new. If your bag has decorations, hand wash it gently.
Can I make a drawstring bag without a sewing machine?
Yes! You can sew a drawstring bag by hand using a needle and thread. It takes a little longer, but it’s still an easy sewing project for beginners.
What size should I cut my fabric for a gift bag?
Pick a size that fits your gift. For small items, try 8 x 10 inches. For bigger gifts, go up to 15 x 20 inches. Always add extra for seams and the drawstring channel.
What is the best fabric for a drawstring gift bag?
Cotton works well for most bags. Canvas and polyester are great for heavier gifts. If you want a fancy look, try satin or velvet. Use scrap fabric for a fun, eco-friendly option.
How do I stop the drawstring from fraying?
Tie a knot at each end of the drawstring. You can also use fray blocker or melt the ends if you use synthetic cord. Cord ends work well for a polished finish.
Can I decorate my bag after sewing?
Absolutely! Add buttons, patches, or fabric paint to make your bag unique. Embroidery and iron-on designs also look great. Let your creativity shine.
Is this a good project for kids?
Yes, this is a safe and easy sewing project for kids with adult supervision. Kids can help pick fabric, thread the drawstring, and decorate the bag.