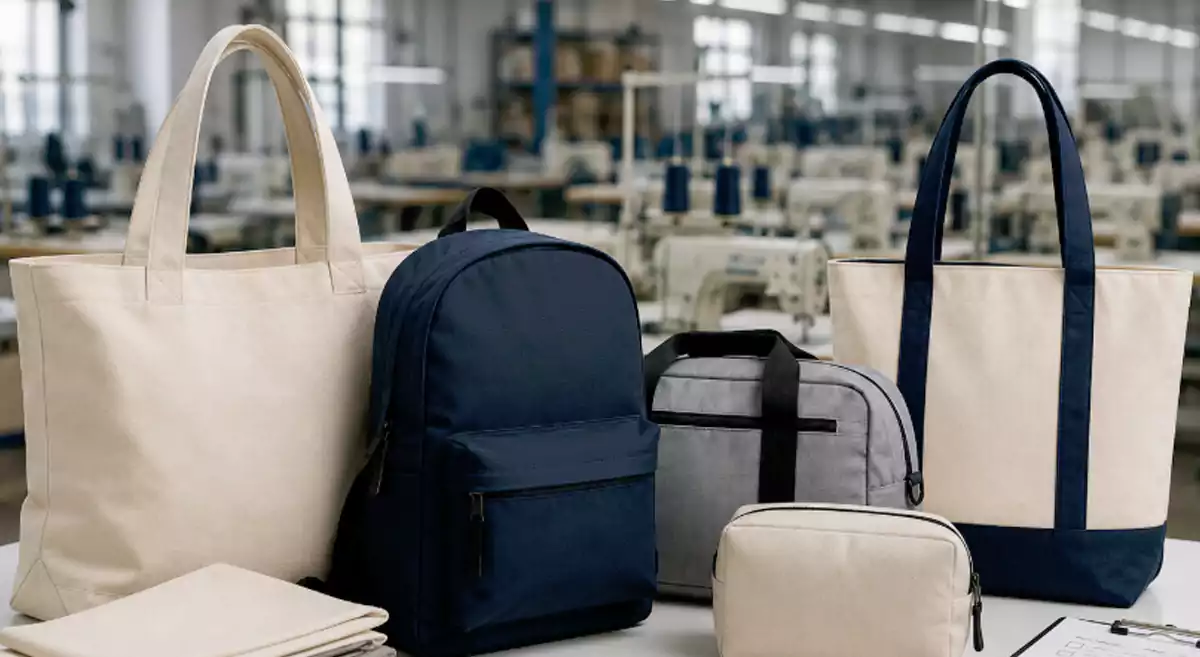
Ready to learn how to sew a roll up tool bag from the beginning? You can get ideas from INITI, a top company that makes custom tool bags with eco-friendly materials. Many new tool bags use recycled fabrics because people want products that help the planet. You do not need to be an expert—just follow easy steps and make it your own. Try to personalize your bag and pick earth-friendly materials. Your project can help support worldwide efforts to protect the environment.
Ready to learn how to sew a roll up tool bag from the beginning? You can get ideas from INITI, a top company that makes custom tool bags with eco-friendly materials. Many new tool bags use recycled fabrics because people want products that help the planet. You do not need to be an expert—just follow easy steps and make it your own. Try to personalize your bag and pick earth-friendly materials. Your project can help support worldwide efforts to protect the environment.
Key Takeaways
- Pick tough fabrics like Cordura or ballistic nylon. These last a long time. Recycled polyester is good for the planet too.
- Get all your tools ready before you start. Use sharp scissors and a measuring tape. A strong sewing machine works best.
- Plan how you want your bag to look. Measure your tools first. Mark your fabric so you do not make mistakes. This helps your bag fit well.
- Make seams stronger with double stitching and backstitching. This keeps your bag from breaking. Your bag will last longer.
- Add things like adjustable straps and tight closures. These help you carry your bag easily. They also keep your tools safe.
- Make your bag special with fancy stitching or labels. This gives your bag a cool look. Your tool roll will be easy to spot.
- Clean your tool bag often and take care of it. This stops mildew from growing. Your tools will stay nice and safe.
- Look at pro designs for ideas. Check out INITI’s tool bags. You can learn about good features and materials.
Materials & Tools
When you start your roll up tool bag project, you want to pick the right materials and tools. Good choices make your bag last longer and look professional. INITI always uses high-quality, sustainable materials for their tool bags. You can follow their example and choose fabrics and extras that fit your needs and style.
Fabric Options
Durable Choices
If you want your tool bag to handle tough jobs, you need strong fabric. Professional manufacturers recommend these top three:
- Cordura: This fabric is tough, resists scratches, and keeps water out. Many pros use Cordura for heavy-duty tool bags.
- Ballistic Nylon: You get great strength and water resistance. Ballistic nylon stands up to tears and rough use.
- Leather: Leather looks stylish and lasts a long time. It’s perfect if you want a premium feel.
You can see these materials in INITI’s tool bags. They use Cordura and ballistic nylon for extra durability.
Eco-Friendly Picks
Want to help the planet? Try eco-friendly fabrics. INITI uses recycled polyester (RPET), canvas, and jute. These materials come from recycled bottles or natural fibers. They reduce waste and support sustainability. You can also look for organic cotton or hemp. These fabrics are gentle on the environment and still strong enough for tools.
Sewing Supplies
Cutting Tools
You need sharp tools to cut your fabric cleanly. Grab a pair of fabric scissors. They make straight cuts and help you avoid frayed edges. A rotary cutter works well for long, smooth lines. Always use a cutting mat to protect your table.
Measuring Tools
Accurate measurements keep your bag neat. Use a measuring tape and a ruler for straight lines. Mark your fabric with chalk or a fabric marker. This helps you see where to cut and sew. A roller or press flattens seams and sets creases.
Essential Sewing Supplies
Here’s a quick list of what you need:
- Heavy-duty sewing machine for thick fabrics
- Polyester or nylon thread for strong seams
- Extra fabric or patches to reinforce stress points
- Zippers or Velcro for pockets
- Roll-top buckles or clips for secure closure
Extras
Straps & Closures
Straps and closures make your tool bag easy to carry and keep your tools safe. Professional tool rolls use padded shoulder straps, sturdy handles, and adjustable closures. Take a look at this table for popular options:
| Tool Roll Design Features | Straps and Closures |
|---|---|
| Multi-compartment tray | Padded shoulder strap |
| 25 pockets, large space | Adjustable shoulder strap |
| 37 pockets, parts tray | Padded handles and shoulder strap |
| Open top, tape clip | Sturdy bar handle with foam grip |
| Backpack, 22 pockets | Padded, breathable harness |
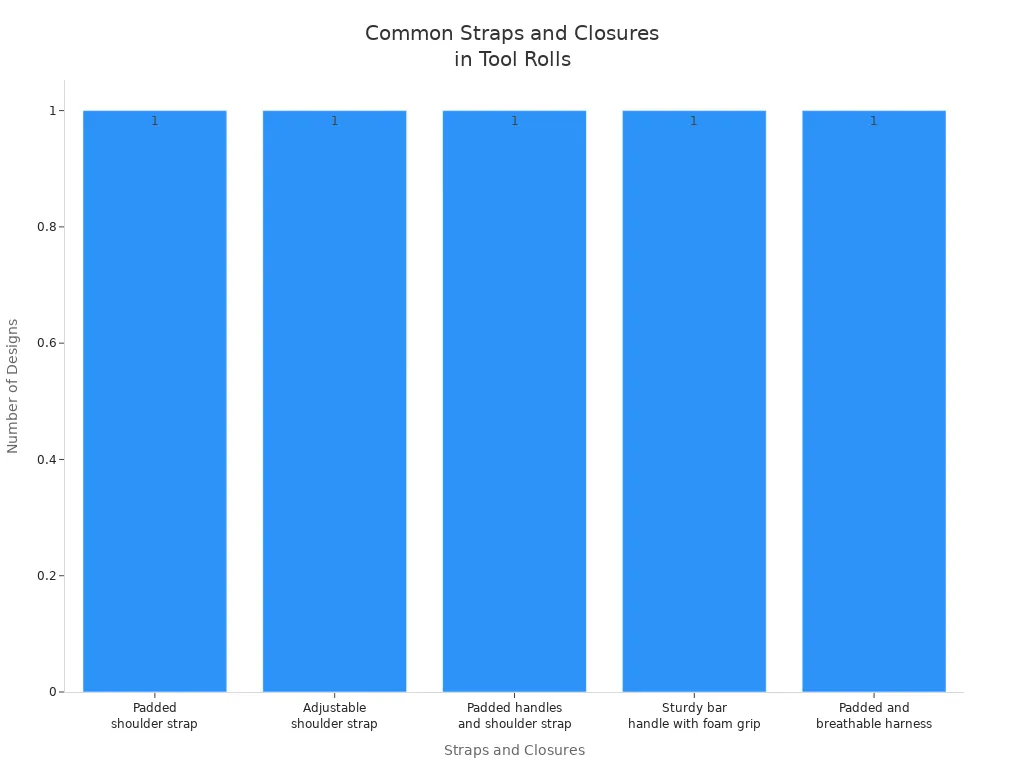
You can mix and match these features to fit your style. INITI offers custom straps and closures for their tool bags, so you can get ideas for your own project.
Decorative Details
Add some personality to your bag. Try colorful stitching, patches, or labels. You can sew on your name or a fun design. INITI lets customers add custom branding, so you can do the same with your DIY bag.
Tip: Choose materials and extras that match your needs. Strong fabrics and sturdy straps help your bag last longer. Eco-friendly picks support the environment.
How to Sew a Roll Up Tool Bag
Ready to dive into the main steps? Let’s walk through how to sew a roll up tool bag from start to finish. You’ll learn how to measure, cut, hem, and reinforce your bag so it lasts for years. These steps will help you build your sewing skills and create a tool bag that looks and feels professional—just like the ones made by INITI.
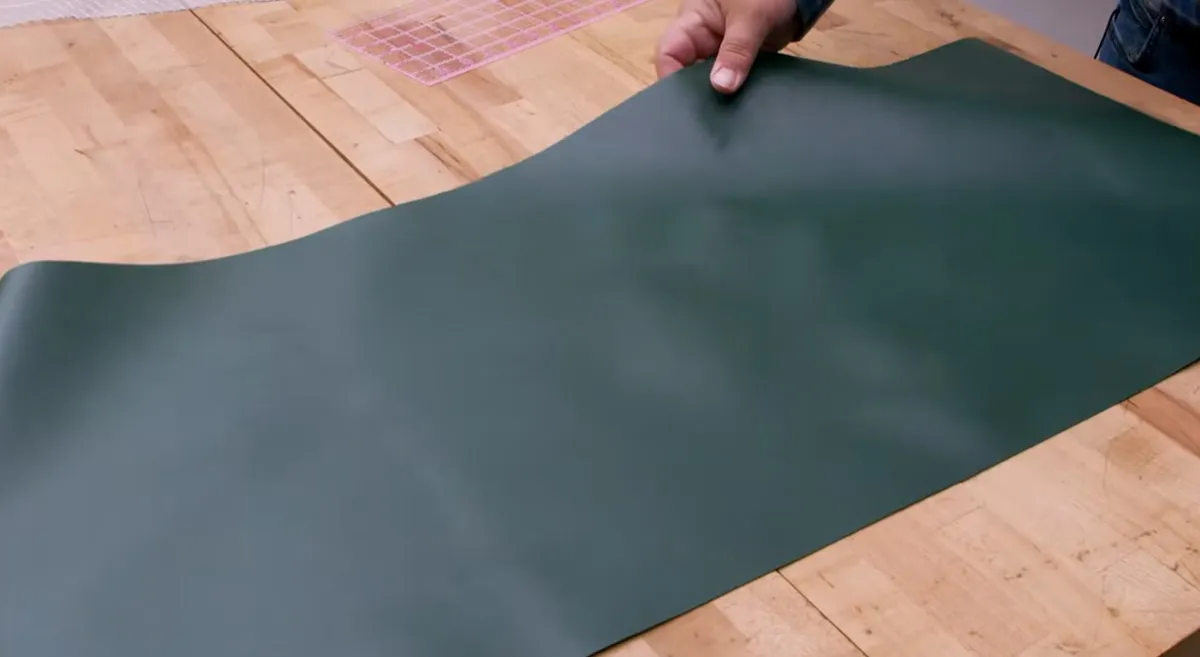
Measure & Cut
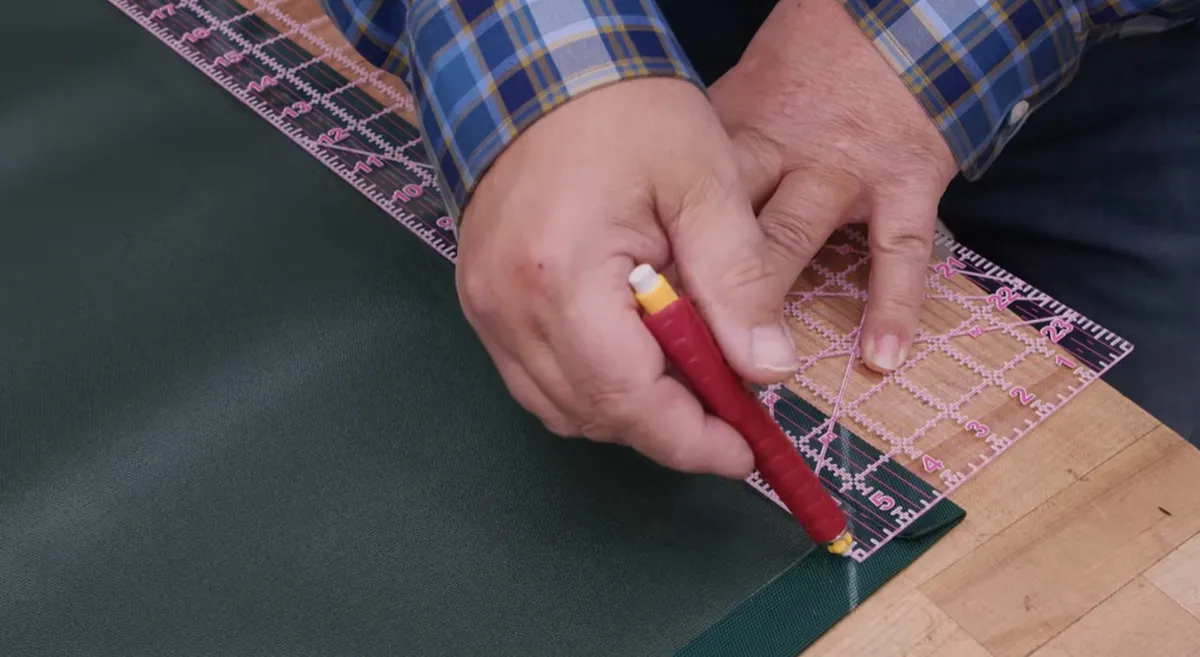
Before you start cutting, you need to plan your layout. This helps you save fabric and avoid mistakes. If you want to know how to sew a roll up tool bag that fits your tools, check out these common sizes:
| Tool Bag Model | Dimensions (L x W x H) |
|---|---|
| Tsmsv Tool Roll Up Bag | 5″L x 3.5″W x 13.2″H |
| WORKPRO Roll Up Tool Bag | 22″L x 14″W x 8″H |
| Legacy Tool Roll | 7″L x 2.4″W x 12″H |
| Ryker Bag Tool Organizers | 12.6″L x 3″W x 20.3″H |
| Arsenal 5874 Roll Up Tool Bag | 27″L x 16″H |
You can pick a size that matches your needs. Lay your fabric flat and use a measuring tape and ruler to mark out the main rectangle. Add extra space for seam allowances—usually about 1/2 inch on each side.
Layout Tips
Want to cut fabric like a pro? Try these tips:
- Arrange your pattern pieces close together to use less fabric.
- Place pieces parallel to the fabric’s edge (the selvage) for less waste.
- Use a rotary cutter for long, straight lines.
- If you have digital patterns, print and lay them out to check your fit.
Tip: Take your time when cutting. Rushing can lead to uneven edges and wasted fabric.
Marking for Slots
Now, decide where your tool slots will go. Lay your tools on the fabric and space them out. Use chalk or a fabric marker to draw lines for each slot. Make sure you leave enough room for each tool to slide in and out easily. Mark the top and bottom edges of each slot so you know where to sew later.
Hem & Edge
A clean edge makes your bag look sharp and helps it last longer. You’ll use your sewing skills to hem the edges and reinforce the seams.
Clean Finish
Start by folding the raw edges of your fabric over twice (about 1/4 inch each time) to make a double hem. Pin or clip the folds in place. Sew along the edge with a straight stitch. This double hem gives your bag a neat look and keeps the fabric from fraying.
- Always prepare your fabric before hemming. Iron the folds so they stay crisp.
- Use a heavy-duty needle (size 90/14 or 100/16) for thick fabrics.
- Test your stitch length on a scrap piece to make sure it looks good.
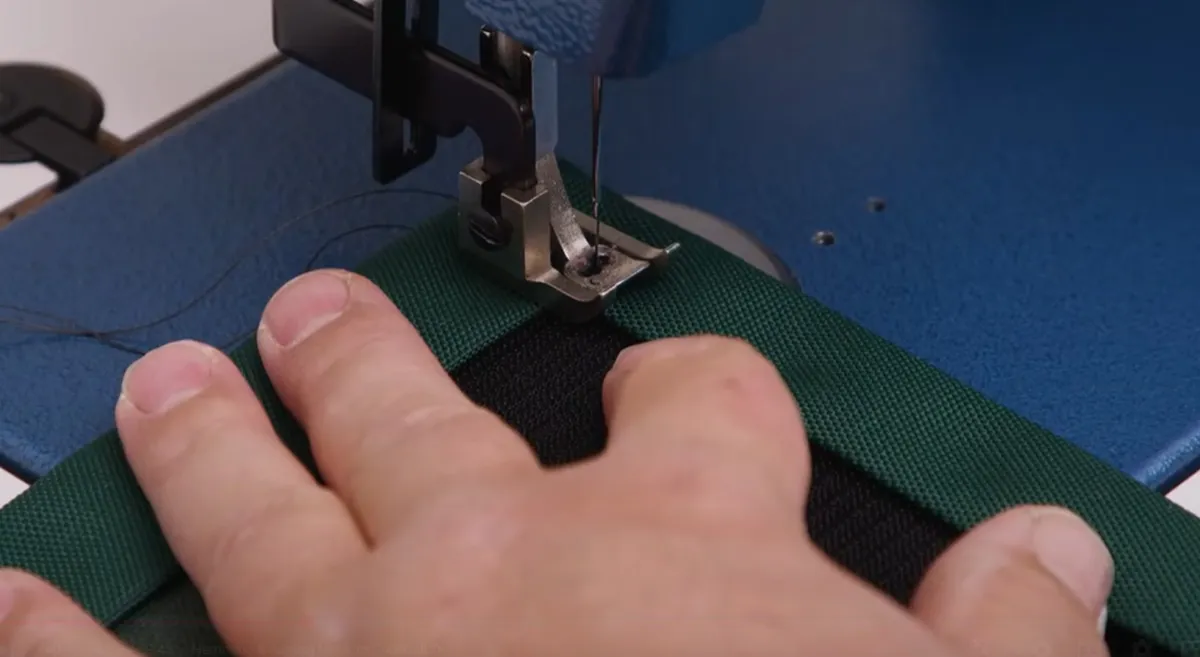
Reinforcement
Strong seams are key for a tool bag. INITI’s tool bags use reinforced seams for extra strength. You can do the same by using these sewing techniques:
- Sew double rows of stitches (about 12 stitches per inch) along the main seams.
- Add X-shaped stitches at the corners and stress points.
- Use strong polyester or nylon thread.
Note: Reinforced seams help your bag handle heavy tools and daily use. This is one of the top sewing skills you can learn for making durable bags.
If you want to know how to sew a roll up tool bag that stands up to tough jobs, always reinforce the areas where straps and handles attach. This prevents tearing and keeps your bag safe.
Common Mistakes to Avoid
Here’s a quick table to help you dodge some common errors:
| Common Mistake | How to Avoid It |
|---|---|
| Using the Wrong Needle Size | Use a 90/14 or 100/16 needle for thick fabrics. |
| Skipping Interfacing and Stabilizer | Add interfacing so your bag holds its shape. |
| Ignoring Seam Allowances | Follow your pattern’s seam allowance for accuracy. |
| Not Changing Your Needle Regularly | Change your needle every 6-8 hours of sewing. |
| Rushing the Cutting Process | Cut slowly and carefully for even edges. |
| Skipping Basting or Clipping | Use clips to hold layers together before sewing. |
| Not Testing Stitch Length | Test on scraps to get the right look and strength. |
| Neglecting Finishing Details | Press seams and topstitch for a polished finish. |
By following these steps, you’ll master how to sew a roll up tool bag that’s both sturdy and stylish. Take inspiration from INITI’s focus on quality and reinforced construction. With practice, your sewing skills will improve, and you’ll be ready for even more advanced projects.
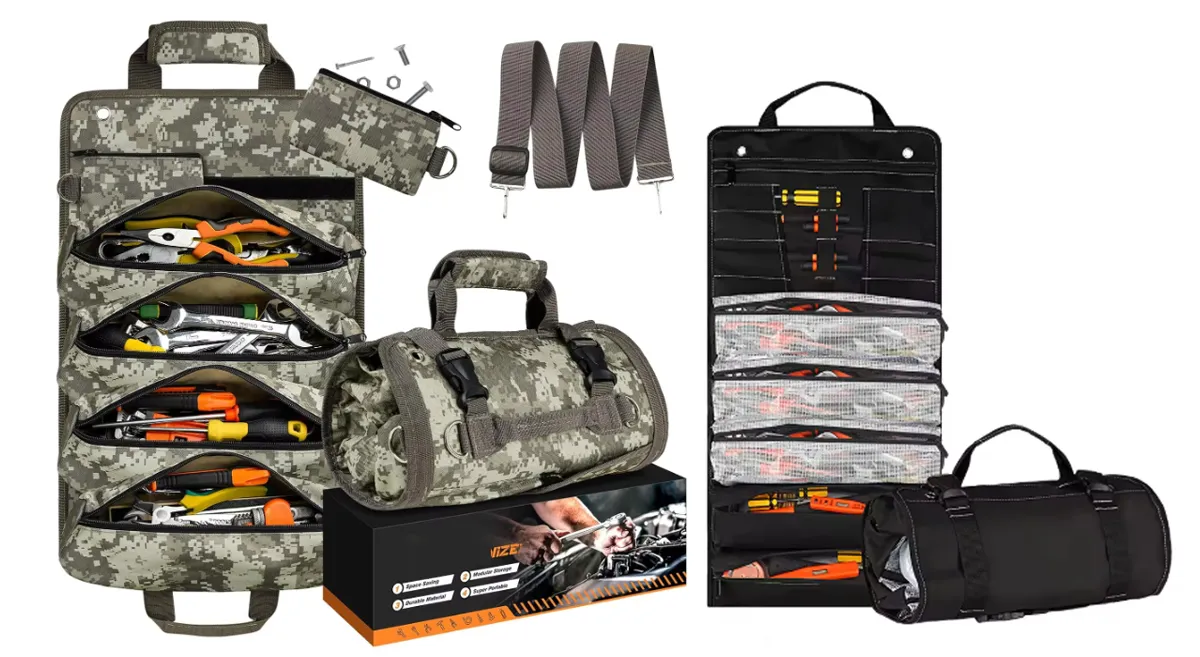
How to Make a Tool Roll
You want your tool roll to fit your tools perfectly. Planning the layout is the first step. If you know how to make a tool roll, you can organize everything so it’s easy to grab what you need.
Plan Tool Layout
Before you start sewing, lay out your tools on the fabric. This helps you see how much space each tool needs. You can arrange wrenches, screwdrivers, pliers, or anything else you use. INITI’s tool bags have customizable compartments, so you can get inspired to make custom slots for your own roll.
Slot Spacing
Slot spacing makes a big difference in how your tool roll works. If you space the slots well, you can fit both large and small tools without wasting space. Here’s what you should think about:
- The Pangolin tool roll has 17 slots for wrenches. It uses bigger slots on the left for large tools and smaller slots on the right for small ones.
- A second section at the bottom holds tiny tools. This keeps everything organized and easy to find.
- If you use different sizes, group similar tools together. You can adjust the width of each slot to match the tool.
Tip: Lay out your tools before marking the fabric. This helps you avoid mistakes and makes your tool roll more useful.
Custom Sizing
You can make your tool roll fit your tools exactly. Measure each tool and add a little extra space so you can slide it in and out easily. If you want to know how to make a tool roll for odd-shaped tools, trace around them and mark the fabric. You can use a ruler or measuring tape to keep everything straight.
| Tool Type | Slot Width | Slot Height |
|---|---|---|
| Large Wrench | 2.5″ | 6″ |
| Small Wrench | 1.5″ | 6″ |
| Screwdriver | 1.25″ | 5″ |
| Pliers | 2″ | 7″ |
| Utility Knife | 1.5″ | 4″ |
You can change these sizes to fit your own tools. Custom sizing makes your tool roll unique and keeps your gear safe.
Sew Pockets
Once you finish planning, you can start sewing the pockets. This step gives your tool roll its shape and strength.
Stitching Lines
You need strong stitching to hold your tools. Sewing experts use several techniques to make pockets last:
- Create hems with mitered corners for a neat look.
- Sew window material into the fabric if you want to see your tools.
- Add zippers for secure pockets.
- Sew boxing to plates for extra structure.
- Use webbing or hook-and-loop tape for flexible slots.
Start by marking the lines where each pocket will go. Sew along these lines with a straight stitch. You can use a heavy-duty thread for extra strength.
Note: Double-check your stitching before moving on. Strong seams help your tool roll last longer.
Backstitching
Backstitching is a simple way to make your pockets stronger. You sew forward and then backward at the start and end of each seam. This keeps the seam from coming apart and helps your tool roll handle heavy use.
- Backstitching reinforces the pocket opening.
- It stops the seam from unraveling.
- The technique supports the weight and movement of your hand when you grab a tool.
If you want your tool roll to last, always use backstitching on the pockets. You’ll notice the difference every time you use it.
Pro Tip: Try backstitching on a scrap piece first. You’ll see how much stronger your seams become.
Now you know how to make a tool roll that fits your tools and lasts for years. You can make custom slots, sew strong pockets, and use smart techniques to build a tool roll that works for you.
Make a Tool Roll Bag with INITI Inspiration
You want your tool roll bag to stand out and last for years. INITI’s tool bags give you plenty of ideas for upgrades and personal touches. Let’s walk through the final steps to make a tool roll bag that matches your style and needs.
Add Straps & Closures
Straps and closures keep your tools safe and make your bag easy to carry. You can pick features that work best for you.
Strap Types
You have lots of choices for straps. Cotton webbing straps feel soft and strong. They work well for everyday use. Padded shoulder straps add comfort if you carry heavy tools. Adjustable straps let you change the length to fit your body. INITI offers custom straps, so you can get inspired to try different styles.
Here are some strap types you might use:
- Cotton webbing straps for a classic look
- Padded handles for extra comfort
- Adjustable shoulder straps for hands-free carrying
- Reinforced handles for heavy loads
Tip: Try sewing webbing straps with box stitches for extra strength. You can use mitered corners for a neat finish.
Closure Options
Closures keep your bag shut and your tools secure. Plastic side-release buckles snap open and closed quickly. Velcro strips give you fast access. Metal snaps add a sturdy touch. INITI tool bags use adjustable closures, so you can mix and match these options.
| Closure Type | Features |
|---|---|
| Plastic Buckles | Quick release, lightweight |
| Velcro Strips | Easy to open, adjustable |
| Metal Snaps | Durable, secure |
| Roll-top Buckles | Extra protection, waterproof |
You can sew closures onto the flap or the sides of your bag. Pick the ones that fit your style and needs.
Final Assembly
Now you’re ready to put everything together. This step brings your bag to life.
Attach Pockets
Lay out your pockets on the main fabric. Pin them in place. Sew along the edges using strong thread. Backstitch at the start and end for extra hold. You can add zippers or hook-and-loop tape to some pockets for more security. INITI’s tool bags use reinforced seams, so try double stitching for stress points.
Note: If you want waterproof pockets, use waterproof lining fabrics and seal the seams with heat-activated tape or liquid seam sealant.
Inspect & Finish
Check your bag for loose threads and uneven seams. Trim any extra fabric. Press the seams with an iron for a crisp look. Test the straps and closures to make sure they hold up. You can add edge binding or welt seams for extra durability. INITI recommends regular cleaning and reapplying DWR sprays to keep your bag waterproof.
Here’s a quick checklist for your final inspection:
- Are all pockets secure?
- Do straps and closures work well?
- Are seams reinforced and neat?
- Is the bag waterproof where needed?
- Does the bag fit your tools?
You can personalize your bag with color choices, custom labels, or decorative stitching. INITI offers green, blue, and black options, but you can choose any color you like. Try adding your name or a fun patch to make your bag unique.
You now know how to make a tool roll bag that’s strong, stylish, and ready for any job. Use INITI’s professional features as inspiration and make your bag your own.
DIY Tool Roll Customization
Personal Touches
Decorative Stitching
You can make your tool roll stand out with decorative stitching. Try using a contrasting thread color or a fun stitch pattern. Many crafters love adding embroidery or unique stitches along the edges and pockets. This not only looks great but also adds strength to your seams. Some people even personalize their bags with their initials or a favorite symbol. Decorative stitching can turn a simple tool roll into a one-of-a-kind piece.
Tip: Embroidered tool bags often sell for higher prices because they look special and feel personal. You can create the same effect at home!
Labels & Branding
Adding a label or your own branding gives your diy tool roll a professional touch. You might sew on a fabric patch with your name or a logo. Some makers use woven labels or even leather tags for a classic look. INITI offers custom branding options like embroidery and screen printing on their tool bags. You can take inspiration from them and design a label that matches your style. A personalized label makes your tool roll easy to spot and adds value if you ever want to gift or sell it.
| Customization Option | Description |
|---|---|
| Adjustable Pocket Sizes | Change pocket sizes to fit your tools perfectly. |
| Fabric Choices | Pick from tough Cordura® or your favorite fabric for a unique look. |
| Removable Pouches | Add pouches you can take out for easy packing and cleaning. |
Care & Maintenance
Cleaning Tips
Keeping your tool roll clean helps it last longer. Always check the care label for the best cleaning method. Most of the time, you can shake out dirt and spot clean with a damp cloth and mild soap. For tough stains, hand-wash with gentle detergent. If your bag is machine-washable, use a mesh bag and a gentle cycle. Let your tool roll air dry to keep its shape. Never store it while damp—this prevents mildew and bad smells. You can use baking soda or vinegar to get rid of odors naturally. Don’t forget to wipe down zippers and add a little lubricant to keep them working smoothly.
Note: Regular cleaning keeps your bag looking fresh and protects your tools from rust and grime.
Longevity
You want your tool roll to last for years. Store it indoors or under cover when you’re not using it. Clean out the pockets and surfaces often to stop rust or mildew from forming. Check for any worn spots or loose threads and fix them right away. At the end of each season, give your bag a deep clean and treat the fabric with a protective spray if needed. Always make sure your tools are clean and dry before putting them away. These habits help your tool roll stay strong and eco-friendly, just like INITI’s sustainable products.
Sustainable care means you get more use out of your bag and help the planet at the same time. Rotate between different bags if you have more than one, so each gets a break.
You just learned how to sew your own roll up tool bag. You picked strong, eco-friendly materials, planned your layout, and added custom touches. When you want even more ideas, check out INITI’s tool bags. Here’s what users love:
| Feature | Why It Matters |
|---|---|
| Durable Materials | Bags last longer and handle heavy tools. |
| Custom Interiors | You can organize tools your way. |
| Reinforced Stitching | Keeps seams strong for daily use. |
Try making your own bag. You’ll feel proud every time you use it! Quality work always stands out.
FAQ
How do I choose the best fabric for my tool roll?
You want strong fabric that lasts. Try Cordura, canvas, or recycled polyester. If you care about the planet, pick eco-friendly options like RPET or organic cotton. Think about what tools you carry and how tough your bag needs to be.
Can I sew a roll up tool bag without a heavy-duty sewing machine?
Yes, you can! Use a regular sewing machine with a strong needle and heavy-duty thread. Go slow over thick spots. If your machine struggles, hand-stitch those areas for extra strength.
What’s the easiest way to customize my tool roll?
Add colorful stitching, patches, or labels. You can sew your name or a fun design on the outside. Try different pocket sizes for your favorite tools. Personal touches make your bag unique!
How do I keep my tool roll clean?
Shake out dirt often. Wipe stains with a damp cloth and mild soap. Let your bag air dry. If it smells, sprinkle baking soda inside. Always store your tool roll dry to prevent mildew.
Can I make my tool roll waterproof?
You can! Use waterproof fabric like PVC-coated polyester. Seal seams with tape or liquid seam sealant. Add a roll-top closure for extra protection. Waterproofing keeps your tools safe in wet weather.
What should I do if my seams start to come apart?
Don’t worry! Grab a needle and strong thread. Sew over the loose seam with a backstitch. Reinforce stress points with extra stitches. Regular checks help you catch problems early.
Is it possible to add more pockets after finishing my bag?
Yes, you can add pockets anytime. Cut new fabric pieces, hem the edges, and sew them onto your bag. Use strong thread and reinforce the corners. Extra pockets help you organize more tools.